


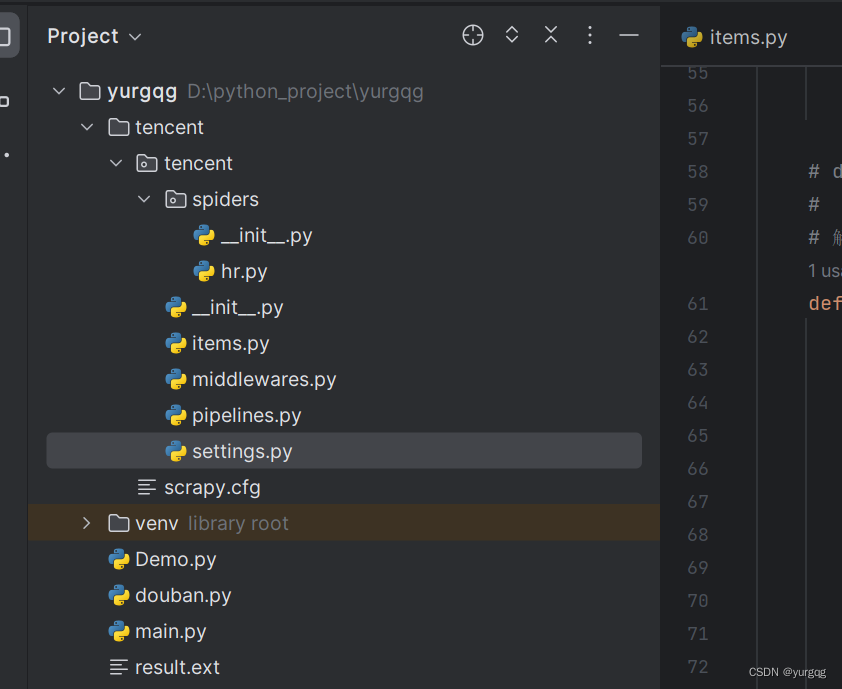
一、项目结构
- 创建项目
scrapy startproject tencent
- 开始spider
cd .\tencent\
--
scrapy genspider hr careers.tencent.com
3.hr.py文件源码
import scrapy
from urllib import parse
import time
import json
from tencent.items import TencentItem


class HrSpider(scrapy.Spider):
    name = "hr"
    allowed_domains = ["careers.tencent.com"]

    # start_urls = ["http://careers.tencent.com/"]
    hr_url = "https://careers.tencent.com/tencentcareer/api/post/Query"
    data = {
        'timestamp': '',
        'countryId': '',
        'cityId': 2,  # 城市位置
        'bgIds': '',
        'productId': '',
        'parentCategoryId': '',
        'attrId': '',
        'keyWord': 'python',  # 搜索关键字
        'pageIndex': 1,  # 页号
        'pageSize': 10,  # 页大小
        'lanugage': 'zh-cn',
        'area': 'cn'
    }

    # 初始化请求方法
    def start_requests(self):
        self.data['timestamp'] = int(time.time() * 1000)
        url = self.hr_url + "?" + parse.urlencode(self.data)
        yield scrapy.Request(url, callback=self.parse1)

    def parse1(self, response):
        # print(response.url)
        json_data = json.loads(response.body)
        #判断是否爬取到信息
        if isinstance(json_data['Data']['Posts'],list):
            for dd in json_data['Data']['Posts']:
                # print("dd:",dd)
                # 定义详情Url地址
                desc_url = "https://careers.tencent.com/tencentcareer/api/post/ByPostId"
                params = {
                    'timestamp': int(time.time() * 1000),
                    'postId': dd['PostId'],
                    'language': 'zh-cn'
                }
                durl = desc_url + "?" + parse.urlencode(params)
                yield scrapy.Request(durl, callback=self.parse2)

            # 加载下一页的请求
            self.data['pageIndex'] += 1
            self.data['timestamp'] = int(time.time() * 1000)
            url = self.hr_url + "?" + parse.urlencode(self.data)
            yield scrapy.Request(url,callback=self.parse1)

    # def parse(self, response):
    #     pass
    # 解析工作详情信息
    def parse2(self, response):
        # print("详情:" + response.url)
        json_data = json.loads(response.body)
        item = TencentItem()
        item['PostId'] = json_data['Data']['PostId']
        item['RecruitPostName'] = json_data['Data']['RecruitPostName']
        item['LocationName'] = json_data['Data']['LocationName']
        item['BGName'] = json_data['Data']['BGName']
        item['CategoryName'] = json_data['Data']['CategoryName']
        item['Responsibility'] = json_data['Data']['Responsibility']
        item['Requirement'] = json_data['Data']['Requirement']
        yield item
4.items.py源码
# Define here the models for your scraped items
#
# See documentation in:
# https://docs.scrapy.org/en/latest/topics/items.html

import scrapy


class TencentItem(scrapy.Item):
    # define the fields for your item here like:
    # name = scrapy.Field()
    PostId = scrapy.Field()#岗位Id
    RecruitPostName = scrapy.Field()#岗位工作
    LocationName = scrapy.Field()#工作地
    BGName = scrapy.Field()#部门名称
    CategoryName = scrapy.Field()#工作类型
    Responsibility = scrapy.Field()#工作职责
    Requirement = scrapy.Field()#工作要求
5.pipelines.py源码
# Define your item pipelines here
#
# Don't forget to add your pipeline to the ITEM_PIPELINES setting
# See: https://docs.scrapy.org/en/latest/topics/item-pipeline.html


# useful for handling different item types with a single interface
from itemadapter import ItemAdapter
import pymysql


class TencentPipeline:
    def process_item(self, item, spider):
        return item


# 执行MySQL数据写入操作
class MySQLPipeline(object):
    def __init__(self, host, user, password, database, port):
        self.host = host
        self.user = user
        self.password = password
        self.database = database
        self.port = port

    @classmethod
    def from_crawler(cls, crawler):
        return cls(
            host=crawler.settings.get('MYSQL_HOST'),
            user=crawler.settings.get('MYSQL_USER'),
            password=crawler.settings.get('MYSQL_PASS'),
            database=crawler.settings.get('MYSQL_DATABASE'),
            port=crawler.settings.get('MYSQL_PORT'),
        )

    def open_spider(self, spider):
        '''负责连接数据库'''
        self.db = pymysql.connect(
            host=self.host,
            user=self.user,
            password=self.password,
            db=self.database,
            port=self.port,
            charset='utf8',
        )
        self.cursor = self.db.cursor()

    def close_spider(self, spider):
            self.db.close()

    def process_item(self, item, spider):
        '''执行数据的添加操作'''
        sql = "insert into hr(pid,pname,city,bgname,cname,responsibility,requirement) values(%s,%s,%s,%s,%s,%s,%s)"
        self.cursor.execute(sql, (
            item['PostId'], item['RecruitPostName'], item['LocationName'], item['BGName'], item['CategoryName'],
            item['Responsibility'], item['Requirement']))
        self.db.commit()  # 提交事务
        return item
6.settings.py源码
# Scrapy settings for tencent project
#
# For simplicity, this file contains only settings considered important or
# commonly used. You can find more settings consulting the documentation:
#
#     https://docs.scrapy.org/en/latest/topics/settings.html
#     https://docs.scrapy.org/en/latest/topics/downloader-middleware.html
#     https://docs.scrapy.org/en/latest/topics/spider-middleware.html

BOT_NAME = "tencent"

SPIDER_MODULES = ["tencent.spiders"]
NEWSPIDER_MODULE = "tencent.spiders"

# Crawl responsibly by identifying yourself (and your website) on the user-agent
# USER_AGENT = "tencent (+http://www.yourdomain.com)"

# Obey robots.txt rules
ROBOTSTXT_OBEY = True

# Configure maximum concurrent requests performed by Scrapy (default: 16)
# CONCURRENT_REQUESTS = 32

# Configure a delay for requests for the same website (default: 0)
# See https://docs.scrapy.org/en/latest/topics/settings.html#download-delay
# See also autothrottle settings and docs
# DOWNLOAD_DELAY = 3
# The download delay setting will honor only one of:
# CONCURRENT_REQUESTS_PER_DOMAIN = 16
# CONCURRENT_REQUESTS_PER_IP = 16

# Disable cookies (enabled by default)
# COOKIES_ENABLED = False

# Disable Telnet Console (enabled by default)
# TELNETCONSOLE_ENABLED = False

# Override the default request headers:
# DEFAULT_REQUEST_HEADERS = {
#    "Accept": "text/html,application/xhtml+xml,application/xml;q=0.9,*/*;q=0.8",
#    "Accept-Language": "en",
# }

# Enable or disable spider middlewares
# See https://docs.scrapy.org/en/latest/topics/spider-middleware.html
# SPIDER_MIDDLEWARES = {
#    "tencent.middlewares.TencentSpiderMiddleware": 543,
# }

# Enable or disable downloader middlewares
# See https://docs.scrapy.org/en/latest/topics/downloader-middleware.html
# DOWNLOADER_MIDDLEWARES = {
#    "tencent.middlewares.TencentDownloaderMiddleware": 543,
# }

# Enable or disable extensions
# See https://docs.scrapy.org/en/latest/topics/extensions.html
# EXTENSIONS = {
#    "scrapy.extensions.telnet.TelnetConsole": None,
# }

# Configure item pipelines
# See https://docs.scrapy.org/en/latest/topics/item-pipeline.html
ITEM_PIPELINES = {
    # "tencent.pipelines.TencentPipeline": 300,
    "tencent.pipelines.MySQLPipeline": 300,
}

# Enable and configure the AutoThrottle extension (disabled by default)
# See https://docs.scrapy.org/en/latest/topics/autothrottle.html
# AUTOTHROTTLE_ENABLED = True
# The initial download delay
# AUTOTHROTTLE_START_DELAY = 5
# The maximum download delay to be set in case of high latencies
# AUTOTHROTTLE_MAX_DELAY = 60
# The average number of requests Scrapy should be sending in parallel to
# each remote server
# AUTOTHROTTLE_TARGET_CONCURRENCY = 1.0
# Enable showing throttling stats for every response received:
# AUTOTHROTTLE_DEBUG = False

# Enable and configure HTTP caching (disabled by default)
# See https://docs.scrapy.org/en/latest/topics/downloader-middleware.html#httpcache-middleware-settings
# HTTPCACHE_ENABLED = True
# HTTPCACHE_EXPIRATION_SECS = 0
# HTTPCACHE_DIR = "httpcache"
# HTTPCACHE_IGNORE_HTTP_CODES = []
# HTTPCACHE_STORAGE = "scrapy.extensions.httpcache.FilesystemCacheStorage"

# Set settings whose default value is deprecated to a future-proof value
REQUEST_FINGERPRINTER_IMPLEMENTATION = "2.7"
TWISTED_REACTOR = "twisted.internet.asyncioreactor.AsyncioSelectorReactor"
FEED_EXPORT_ENCODING = "utf-8"

MYSQL_HOST = 'localhost'
MYSQL_DATABASE = 'yurgqg'
MYSQL_USER = 'root'
MYSQL_PASS = 'root'
MYSQL_PORT = 3306
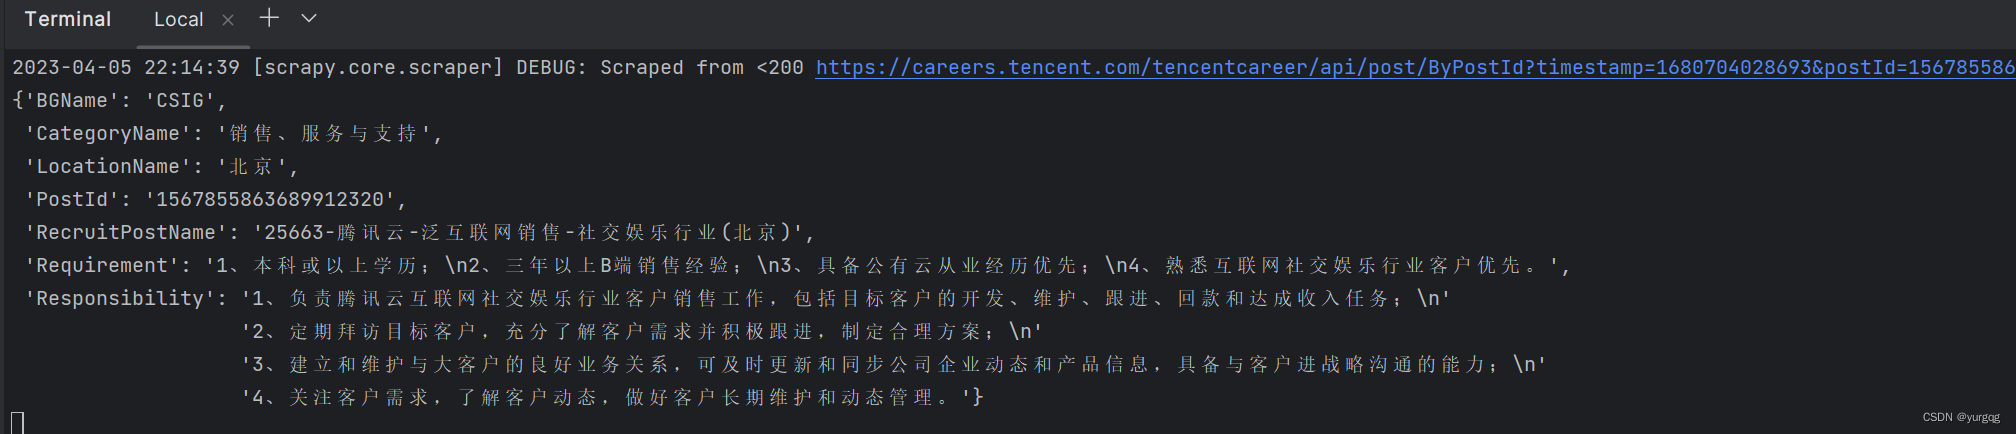
7.执行命令

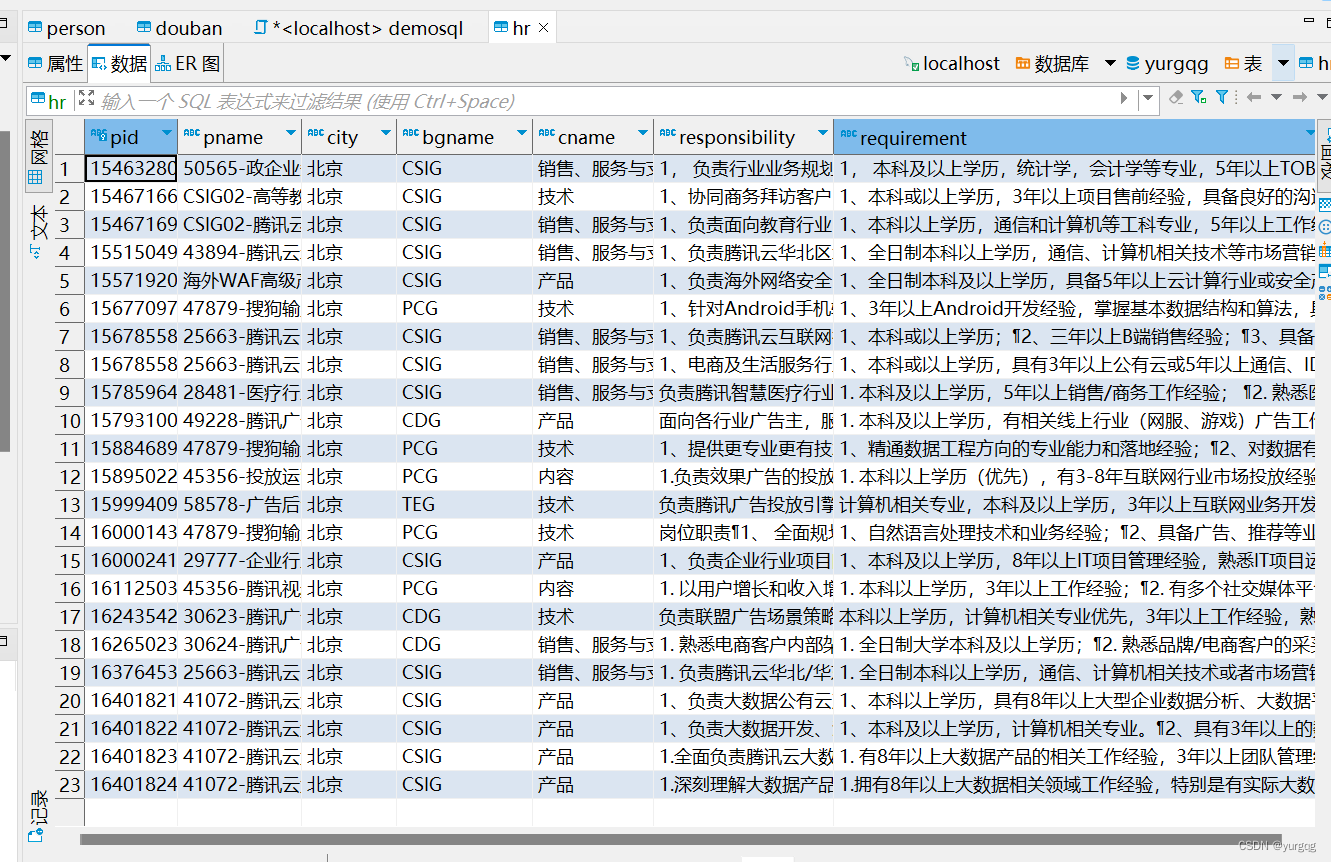
8.数据库效果图
9.数据库创建语句
CREATE TABLE yurgqg.`hr` (
`pid` varchar(50) NOT NULL,
`pname` varchar(255) DEFAULT null,
`city` varchar(32) DEFAULT NULL,
`bgname` varchar(32) DEFAULT NULL,
`cname` varchar(32) DEFAULT null,
`responsibility` text DEFAULT NULL,
`requirement` text DEFAULT null,
PRIMARY KEY (`pid`)
)ENGINE=InnoDB DEFAULT CHARSET=utf8;


 3180
3180


 被折叠的 条评论
为什么被折叠?
被折叠的 条评论
为什么被折叠?
 到【灌水乐园】发言


