


这个是我看了官方文档30分钟学LaTex后写的总结。
LATEX的最大特点在于它的内容文件与它的格式是分开的。其格式保存在模板中。我们可以直接使用编辑器
目录
- Adding a title, author and date(添加题目、作者和日期)
- Adding comments(添加注释)
- Bold, italics and underlining(加粗、斜体、下划线)
- Adding images(添加图片)
- Creating lists in LATEX (在LaTex中使用列表)
- Adding math to LATEX (添加公式)
- Basic Formatting(基本格式)
- Paragraphs and newlines(段落和换行)
- Chapters and Sections(章和节)
- Creating tables(创建表)
- Adding a Table of Contents
- 在Overleaf里面用BibTex便捷的添加/引用参考文献
\documentclass{article} : 表示引入类article,article是最常用的LaTex类,也有其它的类如book或 report. 也可以是引入其它模板如ieeeaccess。
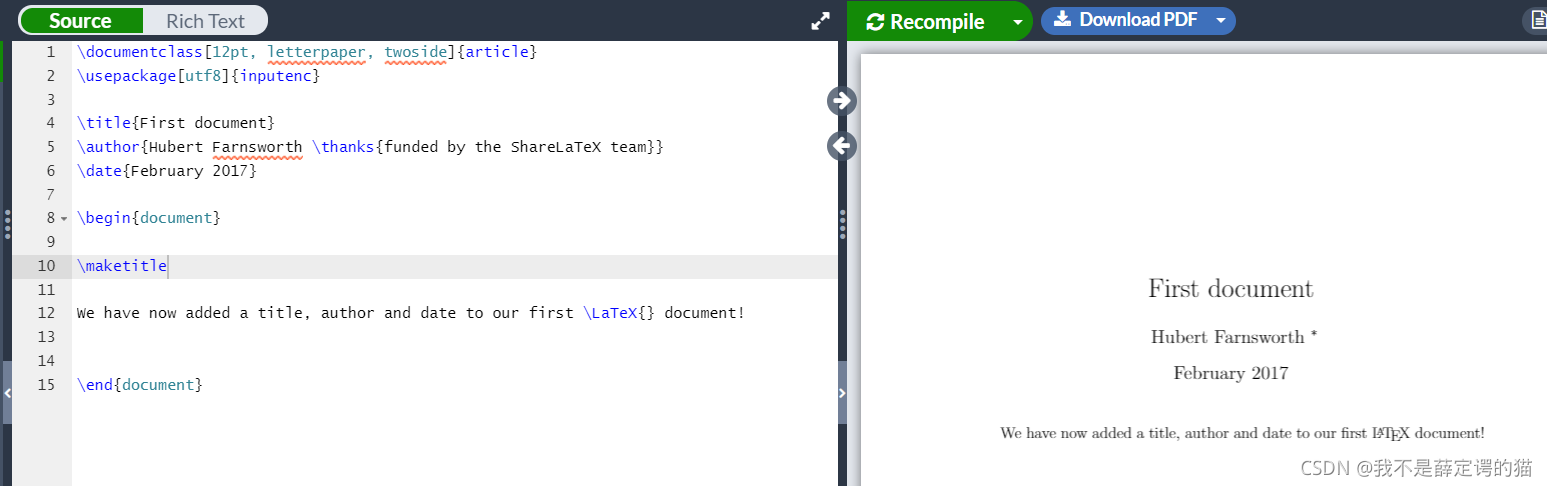
Adding a title, author and date(添加题目、作者和日期)
\title{First document} : 写文章题目
\author{Hubert Farnsworth} : 写文章作者
\date{February 2014} : 写创作日期
上面这些命令放于文章的主体之前
\begin{document}
\end{document}
通过 在文章主体中使用 \maketitle命令将 题目、作者日期输入到固定地方。如下:
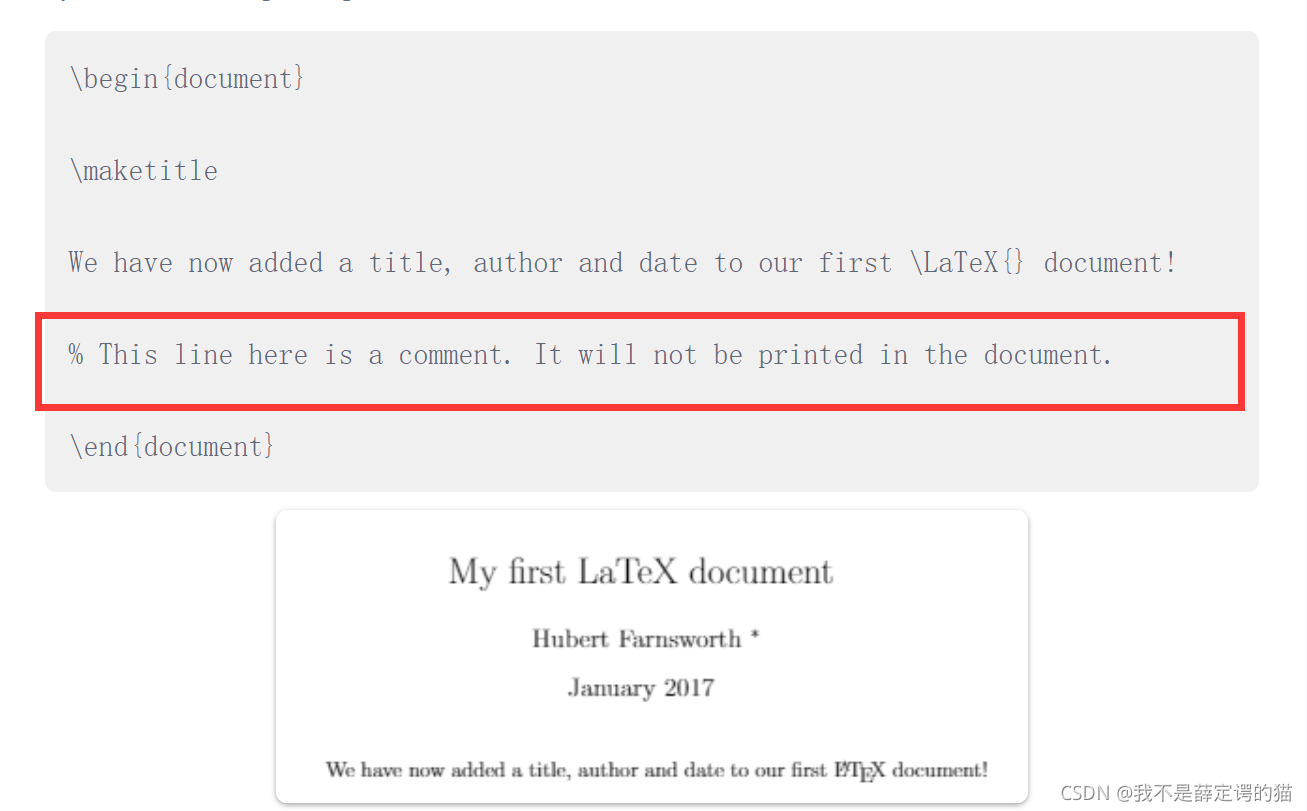
Adding comments(添加注释)
我们可以在文档中通过使用% 来加入注释,注释在编译后不会显示出来:
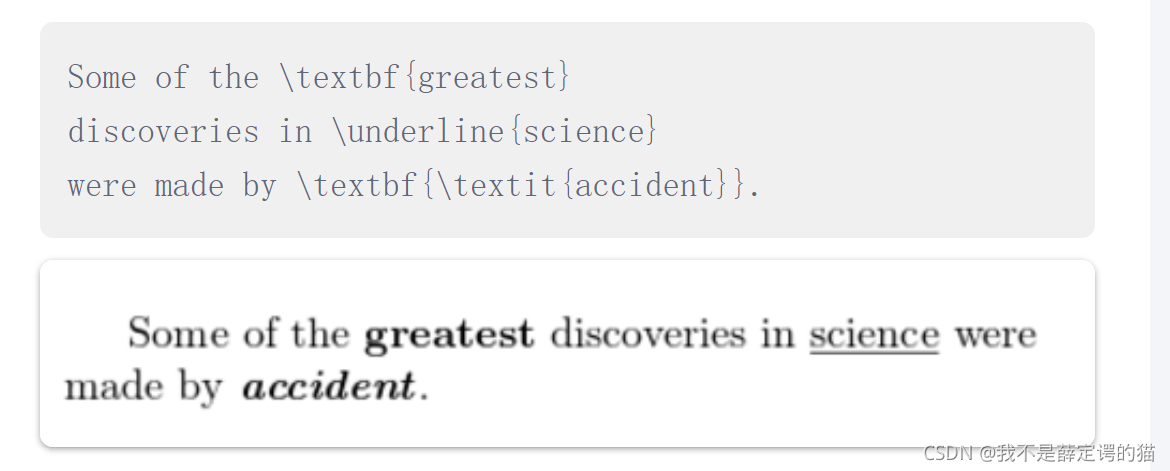
Bold, italics and underlining(加粗、斜体、下划线)
Bold加粗:\textbf{。。。。}
italics斜体:\textit{…}
underline下划线:\underline{。。。。}
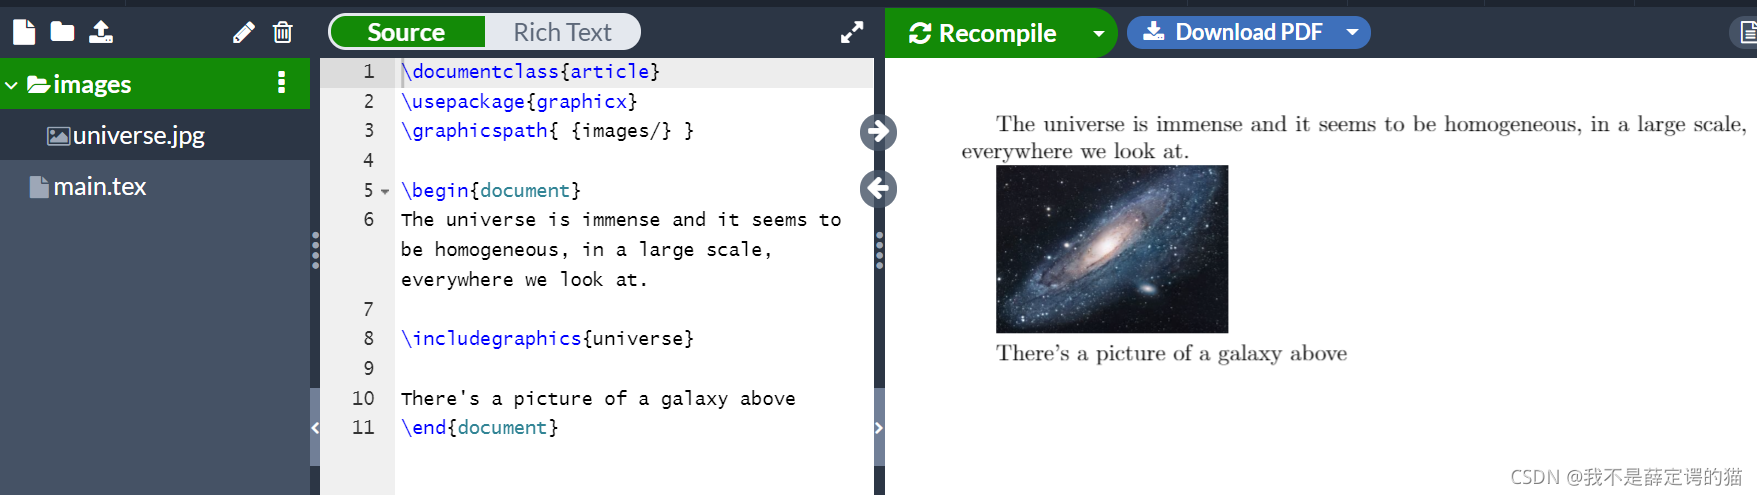
Adding images(添加图片)
若使用Overleaf的话,需要先上传该图片,xia
LaTex不能自动管理图片,所以我们需要在里面引入一个包\usepackage{graphicx} ,之后便可在使用\includegraphics{…}和 \graphicspath{…} 命令插入图片。其中graphicspath{ {images/} }用于告诉LeTax放图片的路径。然后通过 \includegraphics{图片名}可真正插入图片,图片名可带、也可不带扩展名。
Captions, labels and references(给文中图片标题、标记、引用)
- \centering 表示图片位于中间
- \includegraphics[width=0.25\textwidth]{mesh} 插入图片
- \label{fig:mesh1} 标记图片,后面可通过该标记引用该图片
- \ref{fig:mesh1} 引用图片
\begin{figure}[h]
\centering %表示图片位于中间
\includegraphics[width=0.25\textwidth]{mesh} %插入图片
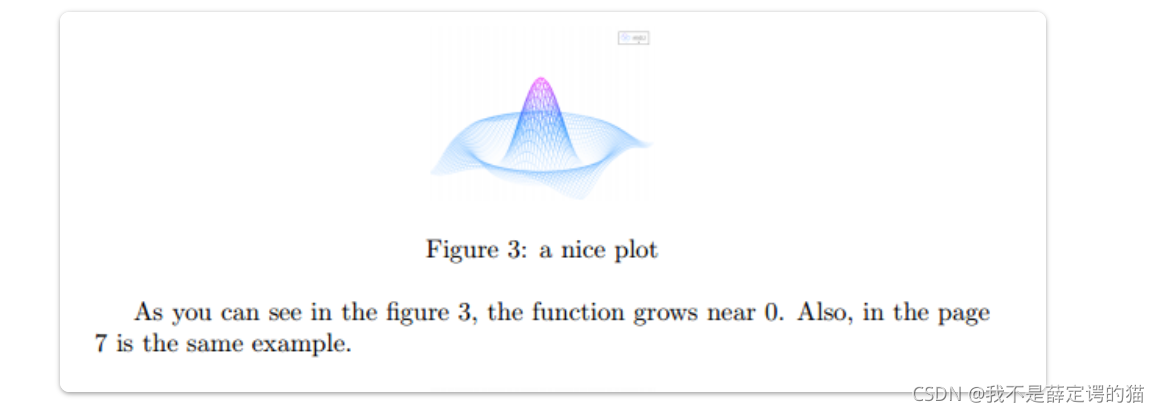
\caption{a nice plot} % 给图片标题
\label{fig:mesh1} % 标记图片,后面可通过该标记引用该图片
\end{figure}
As you can see in the figure \ref{fig:mesh1}, the
function grows near 0. Also, in the page \pageref{fig:mesh1}
is the same example.
Creating lists in LATEX (在LaTex中使用列表)
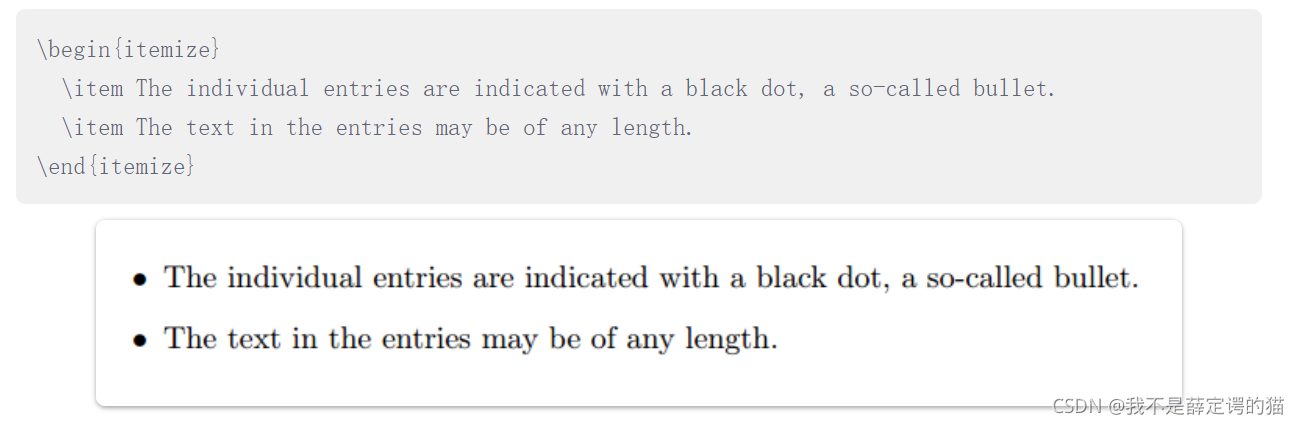
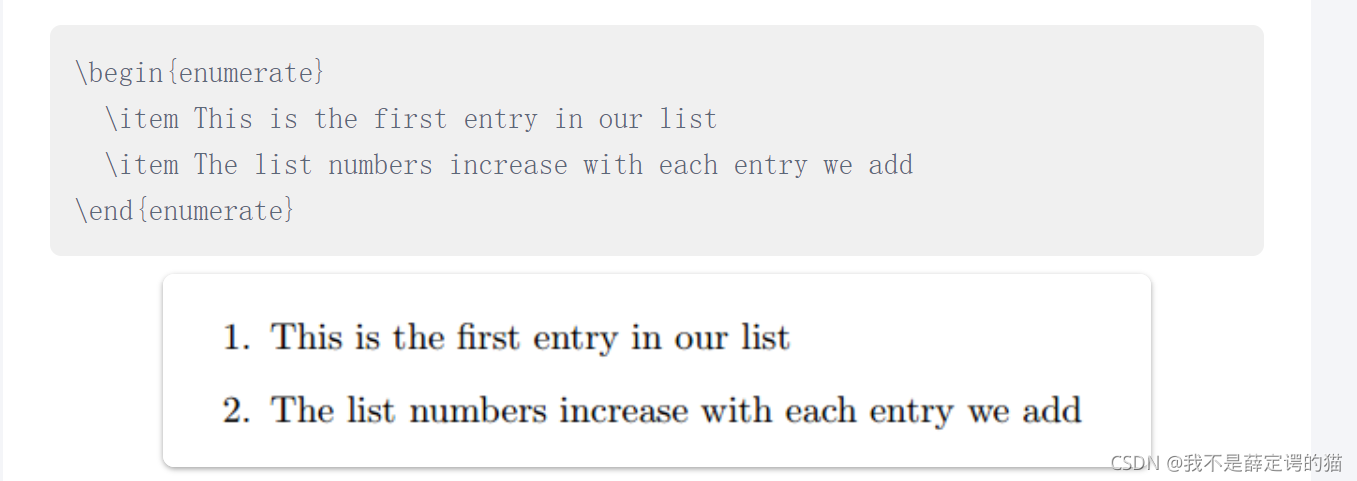
通过命令 \item 可使用列表,而通过在不同环境中使用 \item 来实现不同的列表,可以使用有序列表或无序列表。(Environments are sections of our document that you want to present in a different way to the rest of the document. They start with a \begin{…} command and end with an \end{…} command.)
Unordered lists(无序列表,无标号)
Ordered lists(有序列表,有标号)
Adding math to LATEX (添加公式)
LATEX allows two writing modes for mathematical expressions: the inline mode and the display mode. The first one is used to write formulas that are part of a text. The second one is used to write expressions that are not part of a text or paragraph, and are therefore put on separate lines.
也就是说有两种个格式,一个融于文本内的inline mode ,一是独占一行的display mode。
- inline mode
To put your equations in inline mode use one of these delimiters: ( … ), $ … $ or \begin{math} … \end{math}.

- display mode
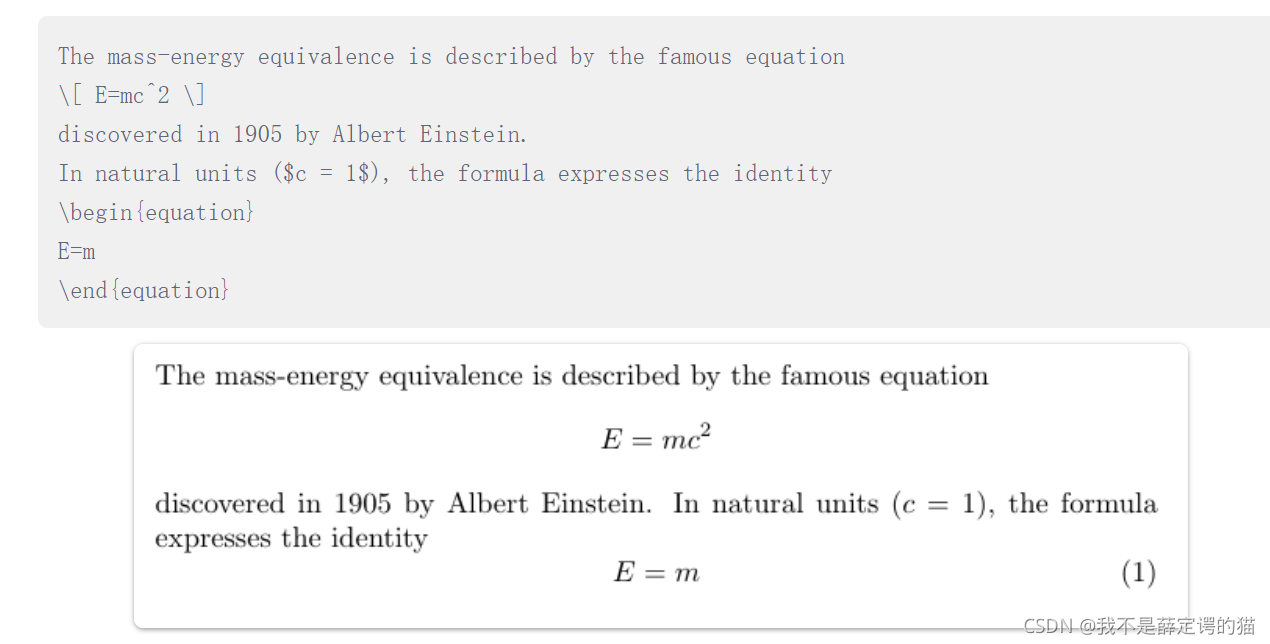
对于display mode有两种,一种是标公式序号的,一种是不标公式序号的。
To print your equations in display mode use one of these delimiters: [ … ], \begin{displaymath} … \end{displaymath} or \begin{equation} … \end{equation}. $$ … $$ is discouraged as it can give inconsistent spacing, and may not work well with some math packages.
重要提示: equation* environment is provided by an external package, consult the amsmath article. 即使用\usepackage{amsmath}
公式还有很多东西不能一一列举,具体见文中开头给的30分钟学LaTex的链接。
Basic Formatting(基本格式)
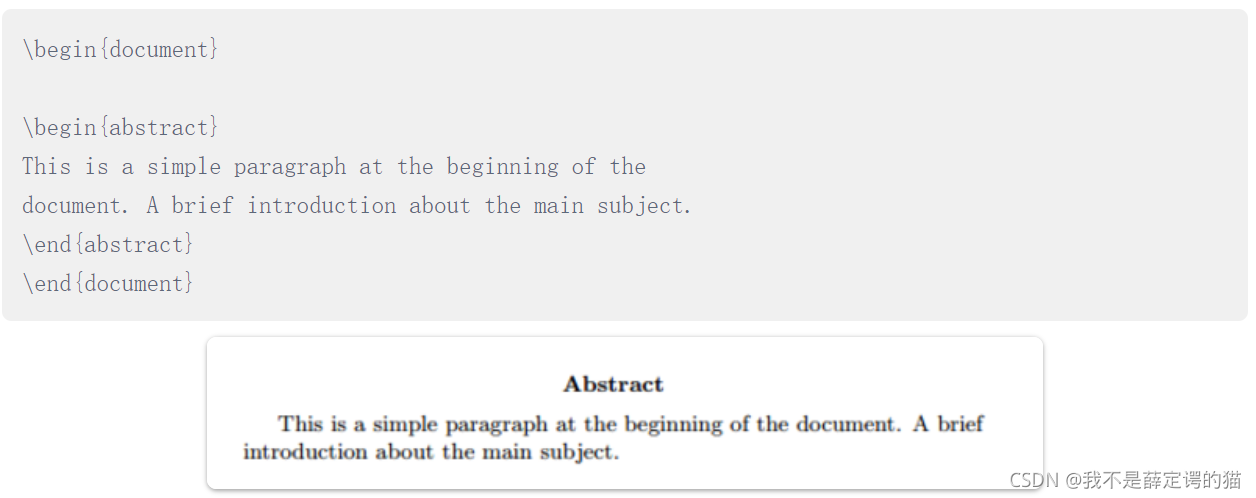
Abstracts
摘要环境: \begin{abstract}…\end{abstract}
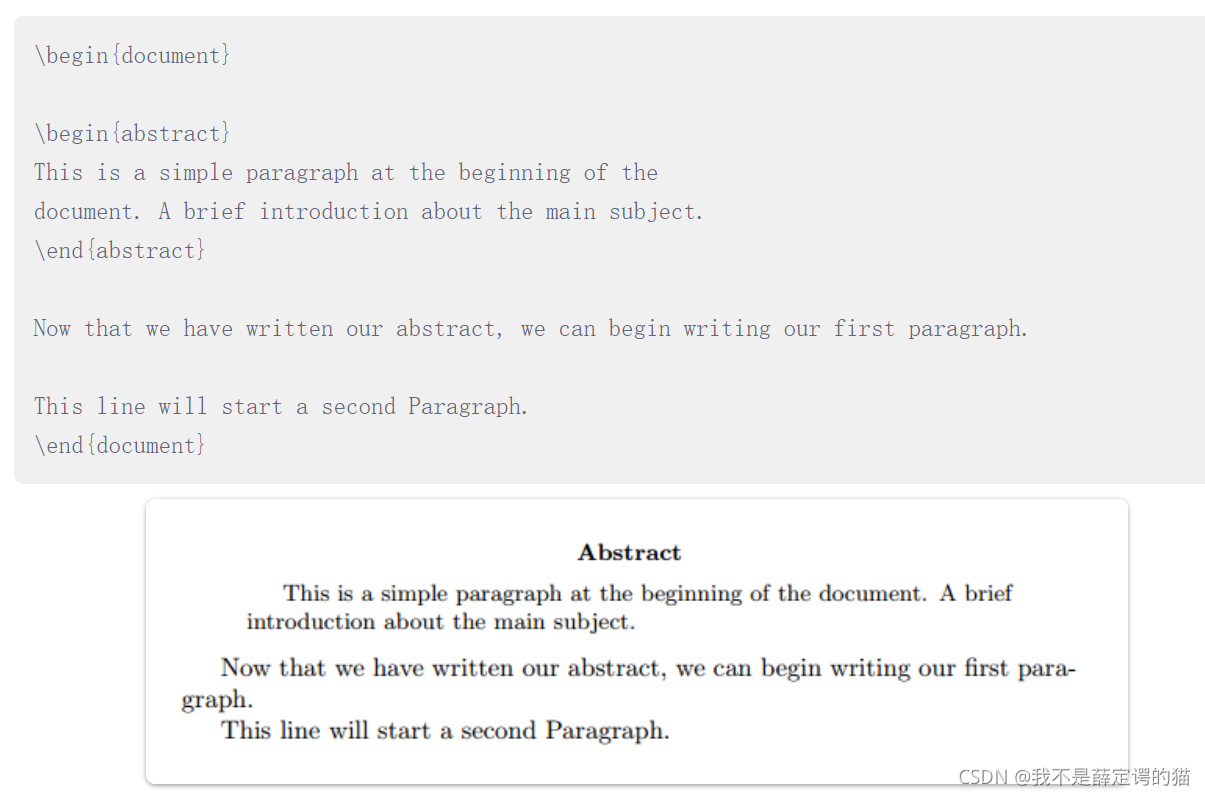
Paragraphs and newlines(段落和换行)
想要换一个新的段落需要按两次回车键,即在编辑器中需要空一行。或使用“\par”
如果只是想换新的一行,而不是新的段落, 使用“\”或者“\newline”。
另外想使用左对齐,右对齐、居中什么的,可以使用center, flushleft and flushright。

具体可参考:段落和新行
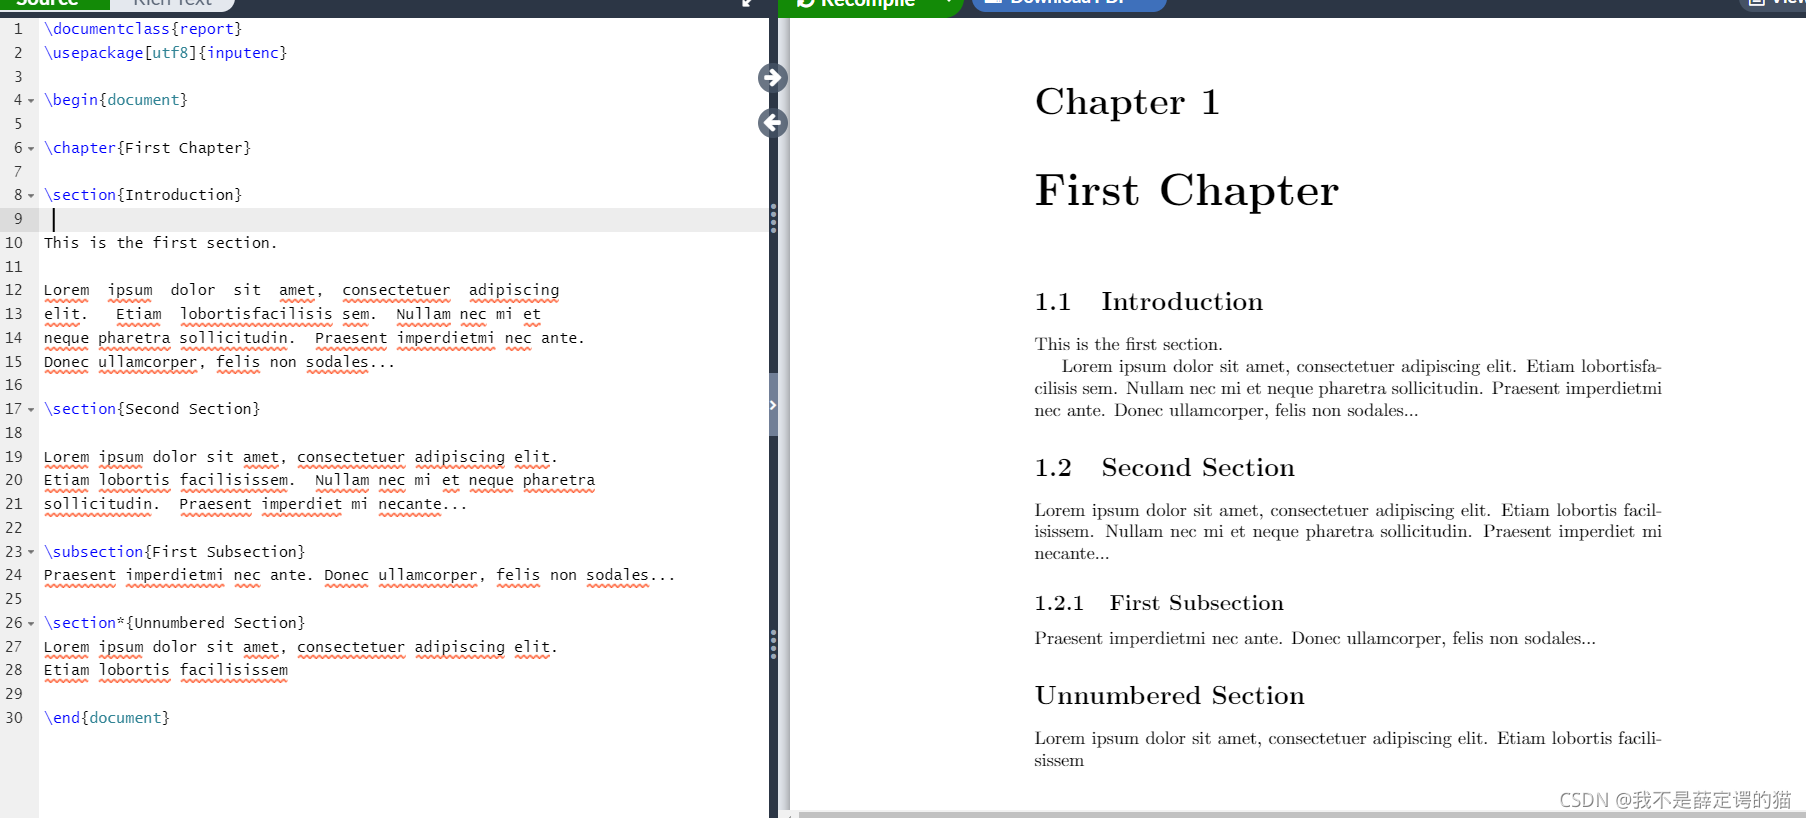
Chapters and Sections(章和节)
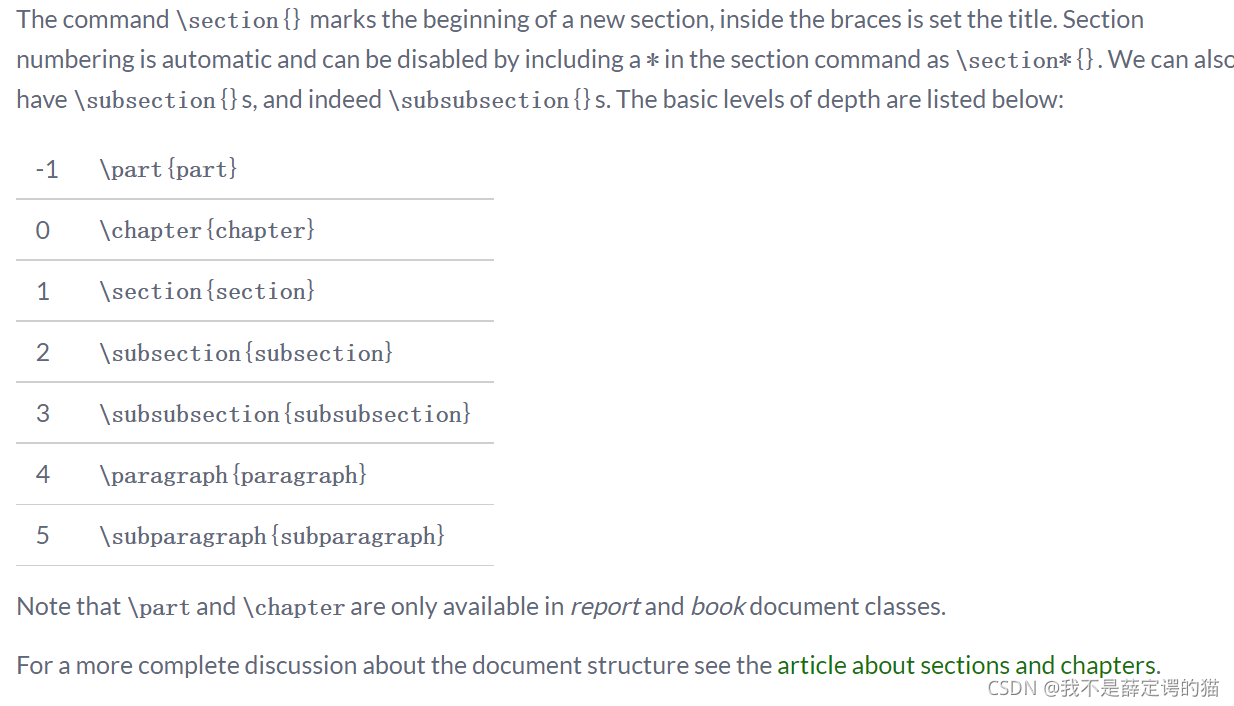
\chapter{…}表示章,\section{…}表示节 , \subsection{…}表示子节。
更详细见:章和节
Creating tables(创建表)
Creating a simple table in LATEX
建一个简单无边框的表可以用如下代码:
\begin{center}
\begin{tabular}{ c c c }
 cell1 & cell2 & cell3 \\
 cell4 & cell5 & cell6 \\
 cell7 & cell8 & cell9
\end{tabular}
\end{center}
- \begin{center} 表示center环境,即整个表位于中间。
- "tabular"环境是LaTex中默认的建表环境,在\begin{tabular}…\end{tabular}中写建表的内容。
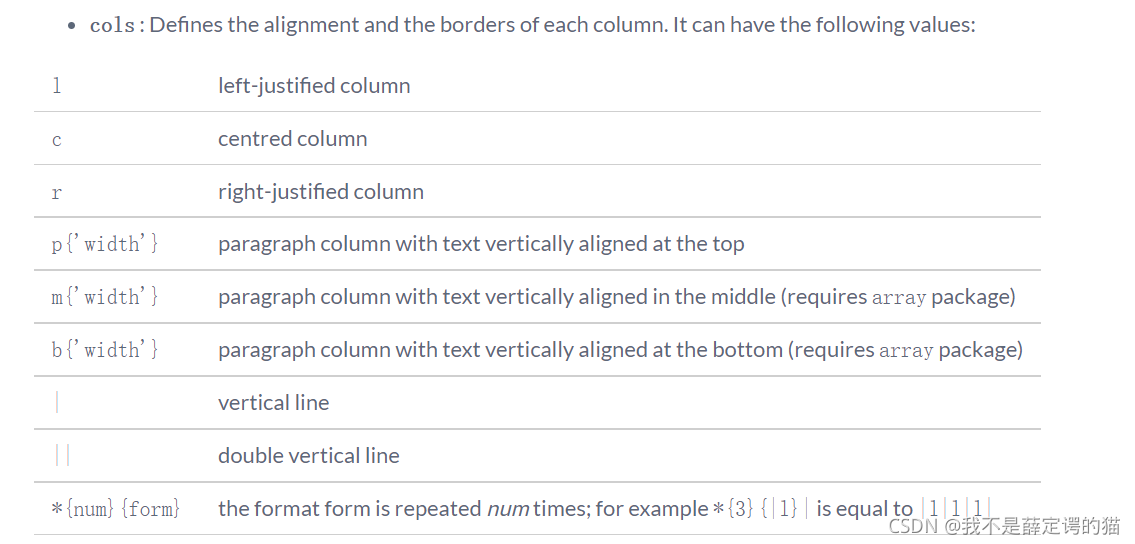
- "{ c c c }"" 表示表有3列,并且文字居中,如果把c换成r或者l则表示文字居右或居左。
- alignment symbol “&” 用于分隔表中每一列的内容。
- **“\” 表示换行,开始写下一行。
- 可使用\renewcommand{\arraystretch}{1.5}设置表格行间距是默认的行间距的1.5倍

若想要设置每一列的固定宽度,可使用
\begin{tabular}{ | c | c | c | } %文字居中,自适应宽度
\begin{tabular}{ | m{5em} | m{1cm}| m{1cm} | } %固定宽度,单位可以是pt,cm,mm,em等。m表示上下居中
\begin{tabular}{ | m{5em}<{\centering} | m{1cm<{\centering}}| m{1cm}<{\centering} | } %固定宽度的同时文字居中
Adding borders(加边界)
\begin{center}
\begin{tabular}{ |c|c|c| }
 \hline
 cell1 & cell2 & cell3 \\
 cell4 & cell5 & cell6 \\
 cell7 & cell8 & cell9 \\
 \hline
\end{tabular}
\end{center}

- { |c|c|c| } 中的“|”表示给表画竖线。
- \hline: 表示给表画横线,上面例子中给表的上部与下部画了水平线。
Captions, labels and references(表格命名标记和引用)
这里的操作和图片你的操作一样,区别在于将图片环境换为表格环境,即图片使用\begin{figure}…\end{figure},而表格使用\begin{table} …\end{table}
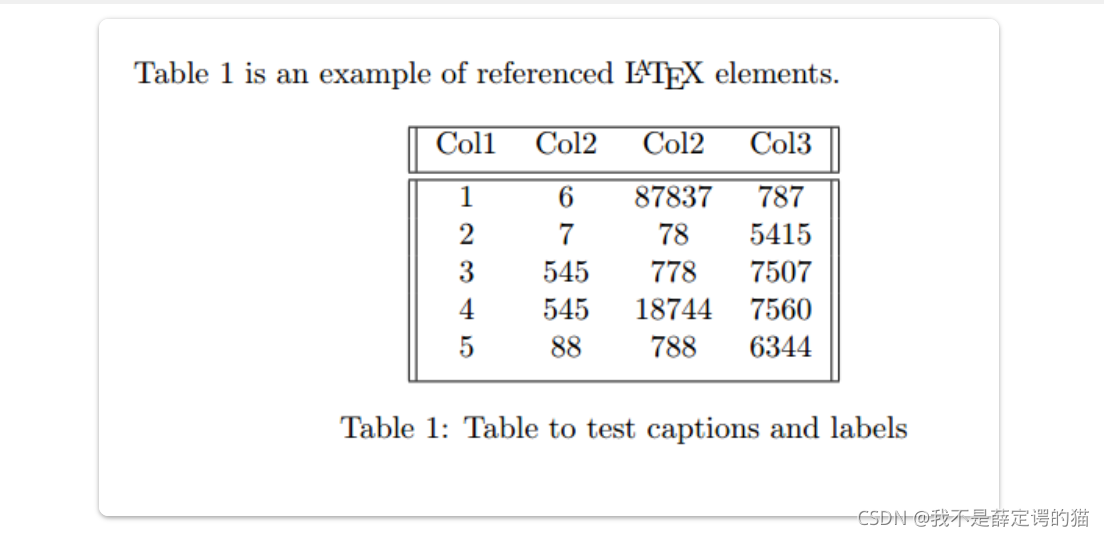
Table \ref{table:data} is an example of referenced \LaTeX{} elements.

\begin{table}[h!]
\centering
\begin{tabular}{||c c c c||}
 \hline
 Col1 & Col2 & Col2 & Col3 \\ [0.5ex]
 \hline\hline
 1 & 6 & 87837 & 787 \\
 2 & 7 & 78 & 5415 \\
 3 & 545 & 778 & 7507 \\
 4 & 545 & 18744 & 7560 \\
 5 & 88 & 788 & 6344 \\ [1ex]
 \hline
\end{tabular}
\caption{Table to test captions and labels}
\label{table:data}
\end{table}
Adding a Table of Contents
To create the table of contents is straightforward, the command \tableofcontents does all the work for you:
\documentclass{article}
\usepackage[utf8]{inputenc}

\title{Sections and Chapters}
\author{Gubert Farnsworth}
\date{ }

\begin{document}

\maketitle

\tableofcontents

\section{Introduction}

This is the first section.

Lorem  ipsum  dolor  sit  amet,  consectetuer  adipiscing
elit.   Etiam  lobortisfacilisis sem.  Nullam nec mi et
neque pharetra sollicitudin.  Praesent imperdietmi nec ante.
Donec ullamcorper, felis non sodales...

\section*{Unnumbered Section}
\addcontentsline{toc}{section}{Unnumbered Section}

Lorem ipsum dolor sit amet, consectetuer adipiscing elit.
Etiam lobortis facilisissem.  Nullam nec mi et neque pharetra
sollicitudin.  Praesent imperdiet mi necante...

\section{Second Section}

Lorem ipsum dolor sit amet, consectetuer adipiscing elit.
Etiam lobortis facilisissem.  Nullam nec mi et neque pharetra
sollicitudin.  Praesent imperdiet mi necante...

\end{document}
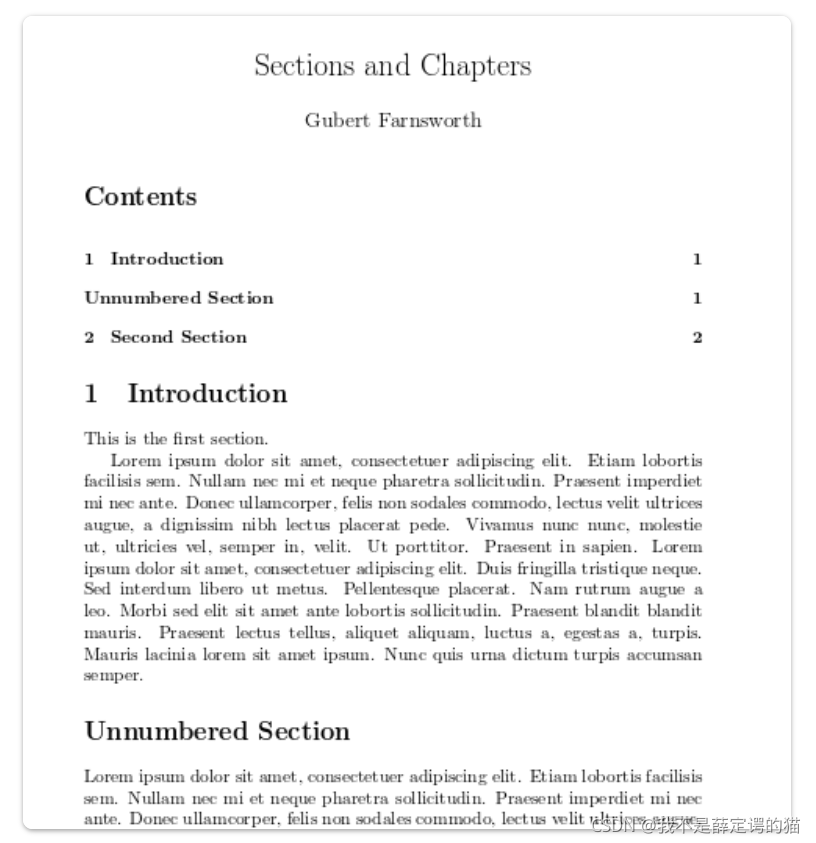
Sections, subsections and chapters are automatically included in the table of contents. To manually add entries, for example when you want an unnumbered section, use the command \addcontentsline as shown in the example.
在Overleaf里面用BibTex便捷的添加/引用参考文献
- 首先在Overleaf里面新建一个.bib文件,最好是和你的论文/文档在一个目录下。可以将将其命名为refs.bib。
- 然后在该文件中放入所有参考文献的信息,无需按顺序摆放。参考文献的格式使用BibTex格式。可在Google学术或百度学术里面直接生成相应的Bib Tex格式。如下:
- 在你的论文文档.tex的\end{document}之前加上 \bibliographystyle{stylename}
\bibliography{bibfile}
“bibfile”是参考文献文件.bib文件的名字,所以在我这里是refs。
stylename是表示选用哪种格式排版,具体见Bibtex bibliography styles。
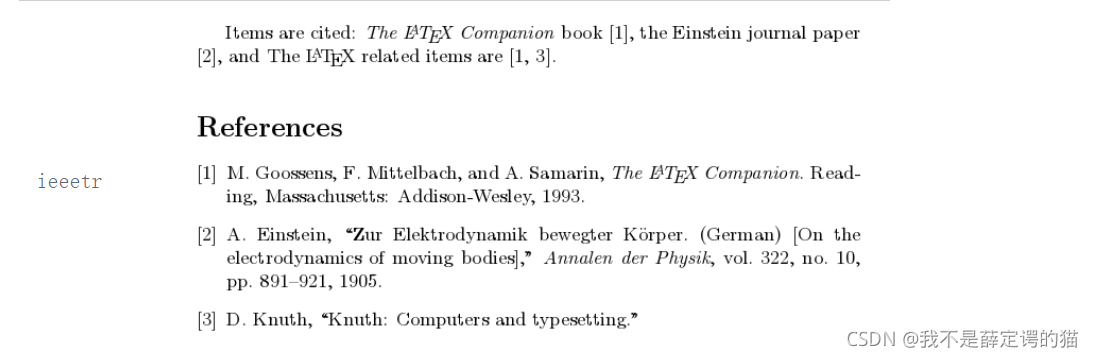
例如想用IEEE的文献排版格式,可将stylename设为ieeetr. - 在需要引用文献的地方使用\cite{…},其中“…”表示BibTex格式文献中{}内的第一个字段。
演示:
refs.bib文件:
@article{einstein,
  author =       "Albert Einstein",
  title =        "{Zur Elektrodynamik bewegter K{\"o}rper}. ({German})
                 [{On} the electrodynamics of moving bodies]",
  journal =      "Annalen der Physik",
  volume =       "322",
  number =       "10",
  pages =        "891--921",
  year =         "1905",
  DOI =          "http://dx.doi.org/10.1002/andp.19053221004"
}

@book{latexcompanion,
    author    = "Michel Goossens and Frank Mittelbach and Alexander Samarin",
    title     = "The \LaTeX\ Companion",
    year      = "1993",
    publisher = "Addison-Wesley",
    address   = "Reading, Massachusetts"
}

@misc{knuthwebsite,
    author    = "Donald Knuth",
    title     = "Knuth: Computers and Typesetting",
    url       = "http://www-cs-faculty.stanford.edu/\~{}uno/abcde.html"
}
.tex文件
\documentclass[a4paper,10pt]{article}
\usepackage[english]{babel}
%Includes "References" in the table of contents
\usepackage[nottoc]{tocbibind}

%Title, date an author of the document
\title{Bibliography management: BibTeX}
\author{Overleaf}

%Begining of the document
\begin{document}

\maketitle

\tableofcontents

\medskip

\section{First Section}
This document is an example of BibTeX using in bibliography management. Three items are cited: \textit{The \LaTeX\ Companion} book \cite{latexcompanion}, the Einstein journal paper \cite{einstein}, and the Donald Knuth's website \cite{knuthwebsite}. The \LaTeX\ related items are \cite{latexcompanion,knuthwebsite}.

\medskip

%Sets the bibliography style to UNSRT and imports the
%bibliography file "refs.bib".
\bibliographystyle{ieeetr}
\bibliography{refs}
\end{document}
结果:

要注意的是,有时参考文献标题中存在公式符号,而在google 学术中复制下来的BibTex格式中的公式可能是有问题,会造成编译报错,要注意检查。
如:
复制下来的:
@article{chen20182,
  title={$ A\^{} 2$-Nets: Double Attention Networks},
  author={Chen, Yunpeng and Kalantidis, Yannis and Li, Jianshu and Yan, Shuicheng and Feng, Jiashi},
  journal={arXiv preprint arXiv:1810.11579},
  year={2018}
}
正确写法
@article{chen2018A,
  title={$A^{2}$-Nets: Double Attention Networks},
  author={Chen, Yunpeng and Kalantidis, Yannis and Li, Jianshu and Yan, Shuicheng and Feng, Jiashi},
  journal={arXiv preprint arXiv:1810.11579},
  year={2018}
}

另外,在编译后,A在文中变为了a,然后在它外面加了一个括号就好了
@article{chen2018A,
  title={{$A^{2}$}-Nets: Double Attention Networks},
  author={Chen, Yunpeng and Kalantidis, Yannis and Li, Jianshu and Yan, Shuicheng and Feng, Jiashi},
  journal={arXiv preprint arXiv:1810.11579},
  year={2018}
}


 3369
3369


 被折叠的 条评论
为什么被折叠?
被折叠的 条评论
为什么被折叠?
 到【灌水乐园】发言


