1.搭建工程
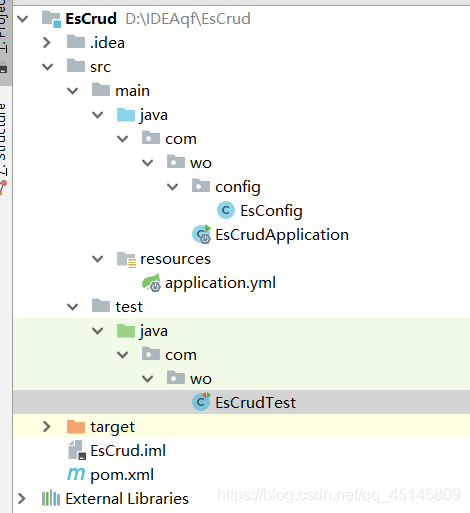
1.1项目结构
1.2 application.yml
server:
  port: 8081
spring:
  application:
    name: es-crud
springcloud-es:
  elasticsearch:
    hostlist: ${eshostlist:127.0.0.1:9200} #多个结点中间用逗号分隔
1.3 EsConfig
@Configuration
public class EsConfig {
@Value("${springcloud-es.elasticsearch.hostlist}")
private String hostlist;
@Bean
public RestHighLevelClient restHighLevelClient(){
String[] split = hostlist.split(",");
HttpHost[] httpHostArray = new HttpHost[split.length];
for(int i=0;i<split.length;i++){
String item = split[i];
httpHostArray[i] = new HttpHost(item.split(":")[0], Integer.parseInt(item.split(":")[1]), "http");
}
return new RestHighLevelClient(RestClient.builder(httpHostArray));
}
}
1.4 启动类
@SpringBootApplication
public class EsCrudApplication {
    public static void main(String[] args) {
        SpringApplication.run(EsCrudApplication.class);
    }
}
2.创建索引库以及映射
@Autowired
RestHighLevelClient highLevelClient;
@Test
public void creatIndex() throws IOException {
CreateIndexRequest createIndexRequest = new CreateIndexRequest("wang-002",
Settings.builder().put("number_of_shards", 1)
.put("number_of_replicas", 0).build());
createIndexRequest.mapping("doc","{\n" +
" \"properties\":{\n" +
" \"name\":{\n" +
" \"type\":\"text\"\n" +
" },\n" +
" \"address\":{\n" +
" \"type\":\"text\"\n" +
" },\n" +
" \"age\":{\n" +
" \"type\":\"integer\"\n" +
" },\n" +
" \"pic\":{\n" +
" \"type\":\"text\",\n" +
" \"index\":false\n" +
" },\n" +
" \"phone\":{\n" +
" \"type\":\"keyword\"\n" +
" }\n" +
" }\n" +
"}", XContentType.JSON);
IndicesClient indices = highLevelClient.indices();
CreateIndexResponse createIndexResponse = indices.create(createIndexRequest);
boolean shardsAcknowledged = createIndexResponse.isShardsAcknowledged();
System.out.println("索引库是否创建成功:"+shardsAcknowledged);
}
3.删除索引
@Test
public void delIndex() throws IOException {
DeleteIndexRequest deleteIndexRequest = new DeleteIndexRequest("wang-002");
IndicesClient indices = highLevelClient.indices();
DeleteIndexResponse delete = indices.delete(deleteIndexRequest );
boolean acknowledged = delete.isAcknowledged();
System.out.println("当前索引库是否删除成功:"+acknowledged);
}
4.文档添加
@Test
public void insertDoc() throws IOException {
Map map=new HashMap<>();
map.put("name","尼古拉斯赵四");
map.put("age",18);
map.put("address","南窑国际");
map.put("pic","http://asf");
map.put("phone",12345);
IndexRequest indexRequest = new IndexRequest("wang-002","doc","1");
indexRequest.source(map);
IndexResponse index = highLevelClient.index(indexRequest);
DocWriteResponse.Result result = index.getResult();
System.out.println("添加结果:"+result);
}
5.通过ID查询索引库
@Test
public void testGet() throws IOException {
GetRequest getRequest = new GetRequest("wang-002");
getRequest.id("1");
getRequest.type("doc");
GetResponse documentFields = highLevelClient.get(getRequest);
boolean exists = documentFields.isExists();
if(exists){
Map<String, Object> sourceAsMap = documentFields.getSourceAsMap();
System.out.println(sourceAsMap);
}
}
6.通过ID来进行修改数据
@Test
public void update() throws IOException {
UpdateRequest updateRequest = new UpdateRequest();
updateRequest.id("1");
updateRequest.type("doc");
updateRequest.index("wang-002");
Map map=new HashMap<>();
map.put("name","赵四");
updateRequest.doc(map);
UpdateResponse update = highLevelClient.update(updateRequest);
DocWriteResponse.Result result = update.getResult();
System.out.println("修改数据的结果:"+result);
}
7.删除索引的文档
@Test
public void testDel() throws IOException {
DeleteRequest deleteRequest = new DeleteRequest("wang-002");
deleteRequest.id("1");
deleteRequest.type("doc");
DeleteResponse delete = highLevelClient.delete(deleteRequest);
DocWriteResponse.Result result = delete.getResult();
System.out.println("删除是否成功:"+result);
}


 965
965

 被折叠的 条评论
为什么被折叠?
被折叠的 条评论
为什么被折叠?
 到【灌水乐园】发言


