


Yeoman是什么
- Yeoman是创建现代化web应用的脚手架工具(最老牌、最通用、最强大)
- 对比vue-cli他更像是一个脚手架的运行平台,我们可以通过Yeoman搭配不同的Generator去创建任何类型的项目
- 我们也可以通过创建自己的Generator,从而来定制属于我们自己的前端脚手架
缺点:在很多专注于框架开发人的眼中Yeoman过于通用,而不够专注
安装Yeoman
npm安装: npm i -g yo
yarn安装: yarn global add yo
安装对应的generator(根据自己需求而定)
我们这里想生成一个node-module的项目
npm安装: npm i generator-node -g
yarn安装: yarn global add generator-node
通过yo运行generator
生成文件夹: mkdir -module
运行generator: yo node
sub Generator
有时候并不需要去创建完整的项目,可能是在以有的项目之上去创建特定类型文件(例如:babel、ESlint)
可以通过生成器去自动生成配置,可通过yeoman提供的sub Generator特性来实现(并不是所有的Generator都提供sub Generator,需要到官方文档查看有没有子级的生成器)
我们这里使用的Generator-node里提供的一个子级cli生成器来生成一个cli所需要的项目文件
yo node:cli // 创建cli项目文件
yarn link // 将本地模板作为全局的命令模块去使用了
my-module --help // 通过模块的名字来运行加进来的模块
Yeoman 使用步骤总结
- 明确你的需求
- 找到合适的Generator
- 全局安装找到的Generator
- 通过yo 运行对应的Generator
- 通过命令行交互填写选项
- 生成所需要的项目结构
自定义Generator(搭建属于自己的脚手架)
公共的部分放到脚手架去生成,比如vuejs,vuex,router配置
Generator基本的目录
yomen的generator的必须是 generator-<name>的格式

mkdir generator-sample
cd generator-sample
npm init
npm i yeoman-generator // 此基类提供了一些工具函数
// index.js作为Generator的核心输入
// 需要导出一个继承自Yeoman Generator 的类型
// Yeoman Generator 在工作的时候会自动调用我们在此类型中定义的一些生命周期方法
// 我们可以在这个文件中通过父类提供的一些工具方法实现一些功能,比如文件写入
const Generator = require('yeoman-generator')
module.exports = class extends Generator {
  writing(){
    // Yeoman 自动在生成文件阶段调用此方法
    // 我们这里尝试往项目目录中写入文件
    this.fs.write(
      this.destinationPath('temp.txt') // 生成文件的路径
      Math.random().toString() // 文件内容
    )
  }
}
npm link
yo sample
根据模板创建文件
在app文件夹下面生成一个templates 目录,在目录下放入要生成的模板
例: 在templates 下面创建一个foo.txt 模板文件
在index.js 中读写文件的操作,也可以改成通过模板方式写入文件到目标目录
相对于手动创建每个文件,模板的方式大大提高了效率
// index.js
// 通过copyTpl 写入文件,该方法接收三个参数(模板文件的路径,输出文件的路径,模板数据的上下文)
const Generator = require('yeoman-generator')
module.exports = class extends Generator {
  writing(){
    // 模板文件路径
    const tmpl = this.templatePath('foo.txt')
    // 输出文件路径
    const output = this.destinationPath('foo.txt')
    // 模板数据上下文
    const context = { title: 'Hello world~', success: false }

    this.fs.copyTpl(tmpl, output, context)
  }
}
npm link
yo sample
可在templates文件下的任意文件使用模板标记(可能发生变化的地方,例如
项目名称可复用)
内部可以使用EJS模板标记输出数据
例如:<%= name %>
其他的EJS语法也支持
<% if (success) { %>
<% }%>
注: 如果想原封不动的输出模板标记,只需要在模板标记的<%后面多加个%,例如 <%% BASE_URL %>
接收用户的输入
// index.js
const Generator = require('yeoman-generator')
module.exports = class extends Generator {
  prompting(){
     return this.prompt([
        type: 'input',
        name: 'name',
        message: 'Your project name',
        default: this.appname // appname 为项目生成目录名称
    ]).then(answers => {
        // 用户输入的结果
        // answers => { name: 'user input value'}
        this.answers = answers
    })
  }
 writing(){
    // 模板文件路径
    const tmpl = this.templatePath('foo.txt')
    // 输出文件路径
    const output = this.destinationPath('foo.txt')
    // 模板数据上下文
    const context = this.answers  // context 编程用户的回答内容
    this.fs.copyTpl(tmpl, output, context)
  }
}
Vue Generator 案例
writing(){
    // 文件的相对路径
    const templates = [
       'src/main.js'
       '.gitignore'
    ]
    templates.forEach(item => {
      this.fs.copyTpl(
        this.templatePath(item),
        this.destinationPath(item),
        this.answers
      )
    })
  }
发布Generator
- 实际就是发布npm 模块 首先把本地开发的generator 托管到公开的仓库
- 在项目根目录下,通过yarn 或者 npm publish进行发布
- 如果报出淘宝镜像不允许发布的错误只需要更改一下要发布的镜像yarn publish --registry= https://registry.yarnpkg.com
以上是Yeoman的全部介绍,下面再去记录下plop的一些简要内容
Plop 小而美的脚手架工具
plop使用文档
是一款主要用于创建项目中特定类型文件的小工具,一般用于集成到项目中自动化的去创建同类型的文件(重复创建相同类型的文件,例如小程序里的wxhtml,wxss,js,json一键生成)
Plop具体使用
安装plop: yarn add plop --dev
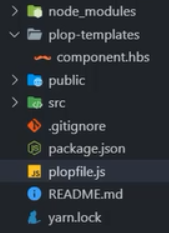
在项目根目录创建ploplfile.js文件
// plop 入口文件,需要导出一个函数
// 此函数接收一个plop对象,用于创建生成器任务
module.exports = plop => {
  plop.setGenerator('component',{
      description : ' create a component',
      prompts: [
        {
          type: 'input',
          name: 'name',
          message: 'component name',
          default: 'MyComponent'
        }
      ],
      actions: [
        {
            type: 'add',
            path: 'src/components/{{ name }}/{{ name }}.js',
            templateFile: 'plop-templates/component.hbs'
        },
       {
            type: 'add',
            path: 'src/components/{{ name }}/{{ name }}.css',
            templateFile: 'plop-templates/component.css.hbs'
        }
      ]
  })
}
在项目根目录创建plop-templates文件夹,在下面创建component.hbs
//component.hbs
import React form 'react'

export default () => {
  <div className="{{name}}">
      <h1>{{name}}Component</h1>
  </div>

}
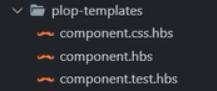
可以在plop-templates文件夹下创建不同的文件,生成模板,例如再去创建一个 component.css.hbs
然后回到ploplfile.js中添加多个action
回到命令行 用过yarn 启动 prop
启动 prop
yarn plop component || npx plop component
避开提示器
// 希望在运行生成器时就为它提供答案,而不是等它提出问题后才给出答案
yarn plop component "答案"
脚手架的工作原理
在启动后,自动询问一些问题,然后根据回答的结果去生成一些模板文件,再去生成一个项目结构(node cli应用)
mkdir sample-scaffolding
cd sample-scaffolding
yarn init
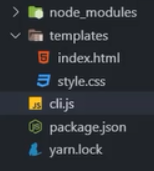
在package.json里面加上bin: cli.js //入口文件
添加cli.js 文件,然后在里面编写内容
#!/usr/bin/env node

// Node CLI应用文件入口文件必须要这样的文件头
// 如果Linux 或者MacOS 系统下还需要把文件的读写权限为755
// 具体就是通过 chmod 755 cli.js 实现修改

// 实现脚手架的工作过程
// 1. 通过命令行交互询问用户问题
// 2. 根据用户回答的结果生成文件

// node中发起命令行交互 我们使用inquirer模块
// yarn add inquirer

const fs = require('fs')
const path = require('path')
const inquirer = require('inquirer')
const ejs = require('ejs')

inquirer.prompt([
  {
    type: 'input',
    name: 'name',
    message: 'Project name ?'
  }
]).then(anwsers =>{
  console.log(anwsers)
  // 有了问答之后考虑动态的去生成项目文件,一般根据模板生成

  // 模板目录
  const tmplDir = path.join(__dirname, 'templates')
  // 目标目录
  const destDir = process.cwd()

  // fs读取模板目录下的文件,把文件全部输出到目标目录

  fs.readdir(tmplDir,(err, files)=>{
    if (err) throw err
    files.forEach(file => {
      console.log(file)
      // 通过模板引擎渲染文件,yarn add ejs

      ejs.renderfile(path.join(tmplDir,file),anwsers,(err,result)=>{
        if(err) throw err
        console.log(result)
        // 将模板写入目标路径
        fs.writeFileSync(path.join(destDir,file),result)
      })
    });
  })
})
通过yarn link 的方式把这个模块link到全局
可通过sample-scaffolding 命令去生成

文章参考链接:https://www.jianshu.com/p/313b1b92197f


 949
949


 被折叠的 条评论
为什么被折叠?
被折叠的 条评论
为什么被折叠?
 到【灌水乐园】发言


