


Axios 实现前后端交互
提示:本篇基于【小项目】SSM 实现单表 CRUD
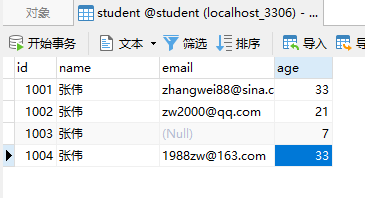
一、数据库
准备数据
二、前端
文件名:Axios.html
<!DOCTYPE html>
<html lang="en">
<head>
    <meta charset="UTF-8">
    <title>Axios</title>
  <script src="../js/axios.js"></script>
</head>

<body>

<button onclick="restFul()">测试 RESTful</button>

<button onclick="object()">测试对象传参</button>

<button onclick="postObj()">测试 POST 对象传参</button>

<button onclick="putObj()">测试 PUT 对象传参</button>

</body>
</html>

<script>
    function restFul(){
        let name = '张伟'
        let age = 33
        let url = `http://localhost:8080/student/${name}/${age}`  //此处为反引号,即 Tab 上面的那个按键
        axios.get(url).then(promise => {
            console.log(promise.data)
        })
    }

    function object(){
        let student = {
            id : 1001,
            name : '张伟',
            age : 33
        }

        let url = "http://localhost:8080/student/getStu"
        axios.get(url,{params : student}).then(promise => {
            console.log(promise.data)
        })
    }

    function postObj(){
        let student = {
            id : 1005,
            name : "王五",
            email : 'wangwu@qq.com',
            age : 35
        }

        let url = "http://localhost:8080/student/saveStu"
        axios.post(url,student)
            .then(promise => {
                console.log(promise.data)
            })
    }

    function putObj(){
        let id = 1005
        let student = {
            id : 1005,
            name : "赵四",
            email : 'zs2021@qq.com',
            age : 42
        }

        let url = `http://localhost:8080/student/updateStuById/${id}`
        axios.put(url,student)
            .then(promise => {
                console.log(promise.data)
            })
    }

</script>
三、后端
1.StudentServiceImpl.java
	//更新
    public void updateStu(Student student, Integer whereId){
        UpdateWrapper<Student> updateWrapper = new UpdateWrapper<>();
        updateWrapper
                .eq("id", whereId);
        studentMapper.update(student, updateWrapper);   //第一个参数为 SET 内容,第二个参数为 WHERE 内容
    }

    //新增
    public void saveStu(Student student){
        studentMapper.insert(student);
    }

    //接收对象参数
    public List<Student> getStu(Student student){
        QueryWrapper queryWrapper = new QueryWrapper(student);
        return studentMapper.selectList(queryWrapper);
    }

    //按照名字年龄查询 RESTful 结构
    public List<Student> getStuByNA(Student student){
        QueryWrapper<Student> queryWrapper = new QueryWrapper<>();
        queryWrapper
                .eq("name",student.getName())
                .eq("age", student.getAge());
        return studentMapper.selectList(queryWrapper);
    }
2.StudentController.java
	//修改, RESTful 的名称不要与属性重名,否则会覆盖
    @PutMapping("updateStuById/{whereId}")
    public String updateStu(@RequestBody Student student, @PathVariable Integer whereId){
        studentService.updateStu(student, whereId);
        return "修改成功";
    }

    //新增
    @PostMapping("saveStu")
    public String saveStu(@RequestBody Student student){

        studentService.saveStu(student);
        return "新增成功";
    }

    //接收对象参数
    @GetMapping("getStu")
    public List<Student> getStu(Student student){
        return studentService.getStu(student);
    }

    //按照名字年龄查询 RESTful 结构
    @GetMapping("{name}/{age}")
    public List<Student> getStuByNA(Student student){
        return studentService.getStuByNA(student);
    }
四、测试


 87
87


 被折叠的 条评论
为什么被折叠?
被折叠的 条评论
为什么被折叠?
 到【灌水乐园】发言


