


本人是个新手,写下博客用于自我复习、自我总结。
如有错误之处,请各位大佬指出。
学习资料来源于:尚硅谷
(首先需要说明的是,文章内容是接上一篇文章⑥的,因此项目结构方面不再说明)
Flyio实现前后台交互
首先还是在pages下建一个文件夹,这次做一个和电影相关的内容。文件夹下还是那些固定格式的内容:
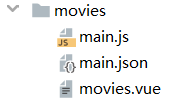
main.js
import Vue from 'vue'
import Movies from './movies.vue'

const movies = new Vue(Movies)
movies.$mount()
main.json
{
  "navigationBarTitleText": "电影列表"
}
不要忘记去app.json中添加路径。
除此以外这里再使用一个功能:底部 tab 栏的表现。这个是写在app.json全局配置下的。即 底部导航条。tabBar的使用
如何使用及相关参数在官方文档中都有,参考即可。
(图片未提供)
{
  "pages": [
    "pages/movies/main",
    "pages/list/main",
    "pages/detail/main",
    "pages/index/main"
  ],
  "window": {
    "navigationBarBackgroundColor": "#489B81"
  },
  "tabBar": {
    "position": "bottom",
    "list": [
      {
        "pagePath": "pages/list/main",
        "text": "文与字",
        "iconPath": "/static/images/tab/yuedu.png",
        "selectedIconPath": "/static/images/tab/yuedu_hl.png"
      },
      {
        "pagePath": "pages/movies/main",
        "text": "电影频道",
        "iconPath": "/static/images/tab/dianying.png",
        "selectedIconPath": "/static/images/tab/dianying_hl.png"
      },
      {
        "pagePath": "pages/index/main",
        "text": "index",
        "iconPath": "/static/images/tab/dianying.png",
        "selectedIconPath": "/static/images/tab/dianying_hl.png"
      }
    ]
  }
}
效果如下:

但是在这里需要注意一个问题,因为之前在index页面中,点击开启小程序之旅用的是wx.navigateTo,它不能用于tabBar,因此现在给它改成wx.switchTab即可。
需要说明的是:
1.小程序中不支持使用axios,会报错: XMLHttpRequest is not a constructor
2.原因: 小程序的环境和浏览器的环境不一样
3.解决方法: 使用其他库: flyio
使用步骤
- 下载: npm install flyio
- 引入: import Fly from ‘flyio/dist/npm/wx’ 注意flyio支持很多环境下使用
- 生成实例: let fly = new Fly
- 配置: Vue.prototype.$fly = fly
- 使用: 组件中 this.$fly.get()
因此首先在src下的main.js中:
import Vue from 'vue'
import store from './store/store'
import Fly from 'flyio/dist/npm/wx'
import App from './app.vue'

// 设置vue的提示功能关闭
Vue.config.productionTip = false;

// 声明当前组件的类型为应用
App.mpType = 'app'

// 将store对象放置Vue的原型上,为的是每个实例都可以使用
Vue.prototype.$store = store

let fly = new Fly
Vue.prototype.$fly = fly

// 生成应用的实例
const app = new Vue(App)

// 挂载整个应用
app.$mount()
对于movies.vue中的内容需要说明的是:
1、代码中提供的MOVIE_URL 是http,微信小程序为了安全,希望使用的都是https,它会报错,但并不是不能使用。我们把这个安全性错误关掉,报错就会变成警告。

2、通过获取这个地址,可以发现,和电影相关的内容全部存放在data下的subjects里。因此在后续,我们会把这个内容存放在页面的数组下。
let moviesArr = response.data.subjects

movies.vue:
<template>
  <div>
    <div v-for="(item, index) in moviesArr" class="moviesContainer">
      <img class="movies_img" :src="item.images.large" alt="">
      <div class="movies_info">
        <p class="movies_name">{{item.original_title}}</p>
        <p class="movies_year">年份: {{item.year}}</p>
        <p class="movies_dir">导演: {{item.directors[0].name}}</p>
      </div>
      <p class="movies_rating">{{item.rating.average}}</p>
    </div>
  </div>
</template>

<script>
  const MOVIE_URL = 'http://t.yushu.im/v2/movie/top250';
  export default {
    data(){
      return {
        moviesArr: []
      }
    },
    beforeMount(){
      this.$fly.get(MOVIE_URL)
        .then( (response) => {
          console.log(response);
          let moviesArr = response.data.subjects
          this.moviesArr = moviesArr
        })
        .catch( (error) => {
          console.log(error);
        });
    }
  }
</script>

<style>
 .moviesContainer {
   display: flex;
   padding:10rpx;
   border-bottom: 1rpx solid #eee;
 }

  .movies_img {
    width: 128rpx;
    height: 128rpx;
    margin-right: 20rpx;
  }
  .movies_info {
    width: 70%;
  }

  .movies_name {
    font-size: 32rpx;
    color: #333;
    white-space: nowrap;
    overflow: hidden;
    text-overflow: ellipsis;
  }
  .movies_year {
   font-size: 28rpx;
   color: #999;
    margin: 5rpx 0;
  }
  .movies_dir{
   font-size: 30rpx;
   color: #666;
  }

 .movies_rating{
   font-size: 36rpx;
   font-weight: bold;
   color: red;
 }
</style>
效果如下:
(部分图片已经失效)

使用vuex完成电影详情页
这部分和之前很像,就是点击每一个电影模块,就可以进入到相应电影的详情页。
详情页部分我们在pages下新建一个文件夹movieDetail。
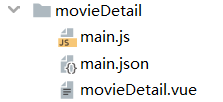
main.js
import Vue from 'vue'
import MoviesDetail from './movieDetail.vue'

const moviesDetail = new Vue(MoviesDetail)
moviesDetail.$mount()
main.json
{
  "navigationBarTitleText": "电影详情"
}
app.json
{
  "pages": [
    "pages/movies/main",
    "pages/movieDetail/main",
    "pages/list/main",
    "pages/detail/main",
    "pages/index/main"
  ],
  "window": {
    "navigationBarBackgroundColor": "#489B81"
  },
  "tabBar": {
    "position": "bottom",
    "list": [
      {
        "pagePath": "pages/list/main",
        "text": "文与字",
        "iconPath": "/static/images/tab/yuedu.png",
        "selectedIconPath": "/static/images/tab/yuedu_hl.png"
      },
      {
        "pagePath": "pages/movies/main",
        "text": "电影频道",
        "iconPath": "/static/images/tab/dianying.png",
        "selectedIconPath": "/static/images/tab/dianying_hl.png"
      },
      {
        "pagePath": "pages/index/main",
        "text": "index",
        "iconPath": "/static/images/tab/dianying.png",
        "selectedIconPath": "/static/images/tab/dianying_hl.png"
      }
    ]
  }
}
为了方便把我们用flyio获取到的电影数据传送到详情页中去,我们使用vuex来存储。
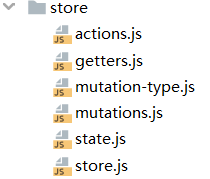
store.js没有变动忽略。getters.js中没有内容忽略。
state.js
export default {
  listTmp: [],
  moviesArr: []
}
mutation-type.js
export const RECEIVE_LIST = 'RECEIVE_LIST'
export const MOVIES_ARR = 'MOVIES_ARR'
actions.js
import {RECEIVE_LIST, MOVIES_ARR} from './mutation-type'
import listData from '../datas/list-data'
export default {
  getList({commit}){
    // 触发对应的mutation
    commit(RECEIVE_LIST, listData)
  },
  getMoviesArr({commit}, data){
    commit(MOVIES_ARR, data)
  }
}
mutations.js
import {RECEIVE_LIST, MOVIES_ARR} from './mutation-type'

export default {
  [RECEIVE_LIST](state, {list_data}){
    state.listTmp = list_data
  },
  [MOVIES_ARR](state, data){
    state.moviesArr = data
  }
}
movies.vue:
<template>
  <div>
    <div @tap="toMoviesDetail(index)" v-for="(item, index) in moviesArr" class="moviesContainer">
      <img class="movies_img" :src="item.images.large" alt="">
      <div class="movies_info">
        <p class="movies_name">{{item.original_title}}</p>
        <p class="movies_year">年份: {{item.year}}</p>
        <p class="movies_dir">导演: {{item.directors[0].name}}</p>
      </div>
      <p class="movies_rating">{{item.rating.average}}</p>
    </div>
  </div>
</template>

<script>
  const MOVIE_URL = 'http://t.yushu.im/v2/movie/top250';
  export default {
    data(){
      return {
        moviesArr: []
      }
    },
    beforeMount(){
      // fly
      this.$fly.get(MOVIE_URL)
        .then( (response) => {
          let moviesArr = response.data.subjects
          this.$store.dispatch('getMoviesArr', moviesArr)
          this.moviesArr = moviesArr
        })
        .catch( (error) => {
          console.log(error);
        });
    },
    methods: {
      toMoviesDetail(index){
        wx.navigateTo({
          url: '/pages/movieDetail/main?index=' + index
        })
      }
    }
  }
</script>

<style>
/*忽略样式*/
</style>
这个跳转页面功能,之前提到过。我们传进来一个index参数,在movieDetail.vue中不要忘记,是这么调用的:this.$mp.query.index
vuex的调用也不再赘述。
因此movieDetail.vue的内容如下:
<template>
  <div class="movieDetailContainer" >
    <img :src="movieDetail.images.large" alt="">
    <p class="movie_name">{{movieDetail.original_title}}</p>
    <div class="detail_content">
      <span>评分:{{movieDetail.rating.average}}</span>
      <span>导演:{{movieDetail.directors[0].name}}</span>
      <span>主演:{{movieDetail.casts[0].name}} {{movieDetail.casts[1].name}} {{movieDetail.casts[2].name}}</span>
    </div>
    <button>我要观影</button>
  </div>
</template>

<script>
  import {mapState} from 'vuex'
  export default {
    data(){
      return {
        movieDetail: {}
      }
    },
    computed: {
      ...mapState(['moviesArr'])
    },
    beforeMount(){
      this.movieDetail = this.moviesArr[this.$mp.query.index]
    }
  }
</script>

<style>
  .movieDetailContainer {
    display: flex;
    flex-direction: column;
  }

  .movieDetailContainer img {
    width:70%;
    height:700rpx;
    margin:50rpx auto;
  }

  .movie_name {
    font-size: 40rpx;
    text-align: center;
    font-weight: bold;
  }

  .detail_content {
    display: flex;
    flex-direction: column;
    margin-left:20%;
    margin-top: 30rpx;
    line-height: 50rpx;
    font-size: 26rpx;
  }

  button{
    width:70%;
    height:80rpx;
    background: green;
    line-height: 80rpx;
    color: #fff;
    font-size: 28rpx;
    margin-top: 20rpx;
  }
</style>
效果如下:

最后总结
mpvue的基本使用到此就说完了。最后再说几个点。
我们在使用的时候movieDetail.images.large,这个调用如果太长,
比如movieDetail.images.large.xxx.xxx.xxx.xxx,虽然它可能是真的存在的,但是也可能会报错。这时因为在加载的时候,它可能没有及时的拿到数据,因此前面的某步就变成了undefined,undefined的下一项必然会报错。因此为了防止这种情况的发生,可以做一个预处理:(v-if部分)
<template>
  <div class="movieDetailContainer" v-if="movieDetail.images">
    <img :src="movieDetail.images.large" alt="">
    <p class="movie_name">{{movieDetail.original_title}}</p>
    <div class="detail_content">
      <span>评分:{{movieDetail.rating.average}}</span>
      <span>导演:{{movieDetail.directors[0].name}}</span>
      <span>主演:{{movieDetail.casts[0].name}} {{movieDetail.casts[1].name}} {{movieDetail.casts[2].name}}</span>
    </div>
    <button>我要观影</button>
  </div>
</template>
这样一来,只有movieDetail.images为true,之后的内容才会渲染,就避免了错误情况出现。
除此以外,之前我们使用到了页面跳转,在这部分不推荐使用vue-router,它和小程序的兼容性不好,问题较多。
最后,mpvue 和 原生小程序 的比较:
(虽然我没用过原生小程序,但是看一看总归是有所了解的)
- 原生小程序运行更稳定些, 兼容性好,mpvue可能在某些方面存在兼容性问题,比如:vue-router
- mpvue支持vue组件化开发. 效率更高,功能更强大,比如有双向数据绑定, vuex
- mpvue可基于webpack组件化, 工程化开发
- 原生不支持npm安装包,不支持css预处理
- mpvue支持 computed 计算属性和 watcher 监听器;模板语法中只支持简单的 js 表达式。
- 如果之前学习过vue,那么上手mpvue框架的成本较低


 254
254


 被折叠的 条评论
为什么被折叠?
被折叠的 条评论
为什么被折叠?
 到【灌水乐园】发言


