


一.Spring Framework结构图
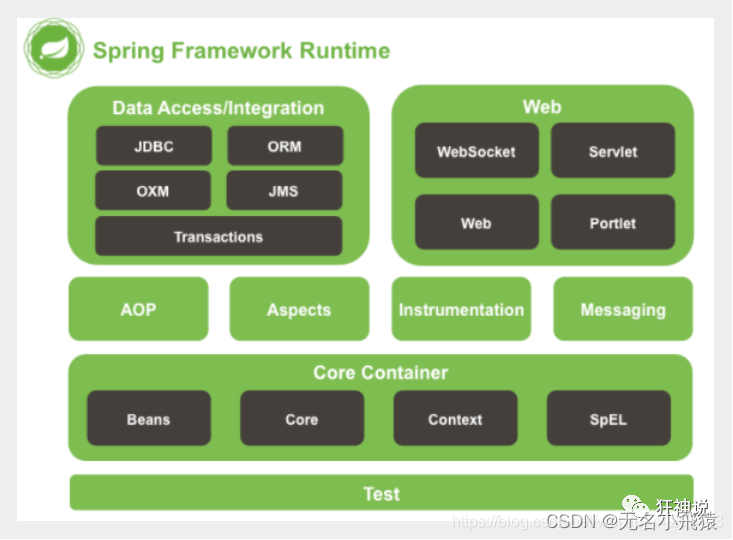
二.Core Container
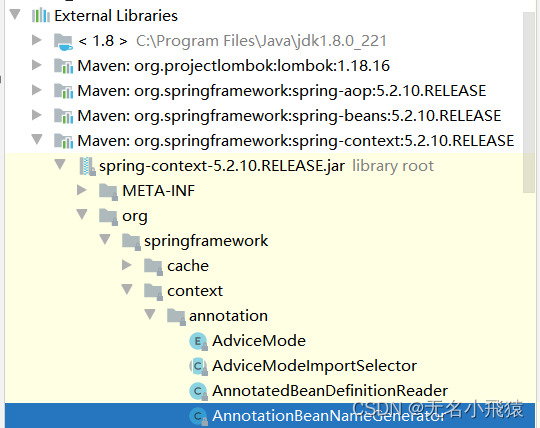
1.模块:spring-core,spring-beans,spring-context,spring-expression(Spring Expression Language).
2. spring-context和spring-beans
简介
spring-context和spring-beans提供整个Spring框架的最基础设施:IoC(控制反转)和DI(依赖注入)
Ioc和DI
- IoC(控制反转):
是面向对象编程的一种设计原则,可以用来减低计算机代码之间的耦合度。
系统中通过引入实现了IoC模式和IoC容器,即可由IoC容器来管理对象的生命周期,依赖关系等,从而使得应用程序的配置和依赖性规范与实际应用程序代码分离。
使用上,以前手动new对象,并设置对象中属性的方式,控制权掌握在应用程序自身。现在全部转移到容器,由容器统一进行管理对象。因为控制权发生的扭转所以叫控制反转。- IoC容器:实现了IoC思想的容器就是IoC容器,比如Spring Framework。
- DI(依赖注入):是实现IoC的方法之一。所谓依赖注入,就是由IoC容器在容器运行期间,动态地将某种依赖关系注入到对象之中。
简而言之,依赖注入(DI)和控制反转(IoC)是从不同角度的描述的同一件事情,就是指引入IoC容器,利用依赖注入的方式,实现对象之间的解耦。
(1)耦合示例代码
class Car{
	private Framework framework;
	Car(int size){
		this.framework=new Framework(size);
	}
	public void run(){...}
}

class Framework{
	private Bottom bottom;
	Framework(int size){
		this.bottom=new Bottom(size);
	}
}

class Bottom{
	private Tire tire;
	Bottom(int size){
		this.tire=new Tire(size);
	}
}

class Tire{
	private int size;
	Tire(int size){
		this.size=size;
	}
}

class Test{
	public static void main(String []args){
	//依赖耦合:Car依赖于Framework,Framework依赖于Bottom,Bottom依赖于Tire
		int size=40;
		Car mycar=new Car(40);
		mycar.run();
	}
}
(2)解耦示例代码
class Car{
	private Framework framework;
	Car(Framework framework){
		this.framework=framework;
	}
	public void run(){...}
}
class Framework{
	private Bottom bottom;
	Framework(Bottom bottom){
		this.bottom=bottom;
	}
}

class Bottom{
	private Tire tire;
	Bottom(Tire tire){
		this.tire=tire;
	}
}

class Tire{
	private int size;
	Tire(int size){
		this.size=size;
	}
}

class Test{
	public static void main(String []args){
	//注入解耦:Tire注入Bottom,Bottom注入Framework,framework注入Car
		int size=20;
		Tire tire=new Tire(size);
		Bottom bottom=new Bottom(tire);
		Framework framework=new Framework(bottom);
		Car mycar=new Car(framework);
		mycar.run();
	}
}
总结:IoC控制反转属于设计思想,DI依赖注入是实现IoC思想的实现技术。
三.Spring Framework容器使用流程
1.Spring容器图解


2.注册/初始化bean(存对象)
(1)方式1:类注解@Controller,@Service,@Component,@Repository
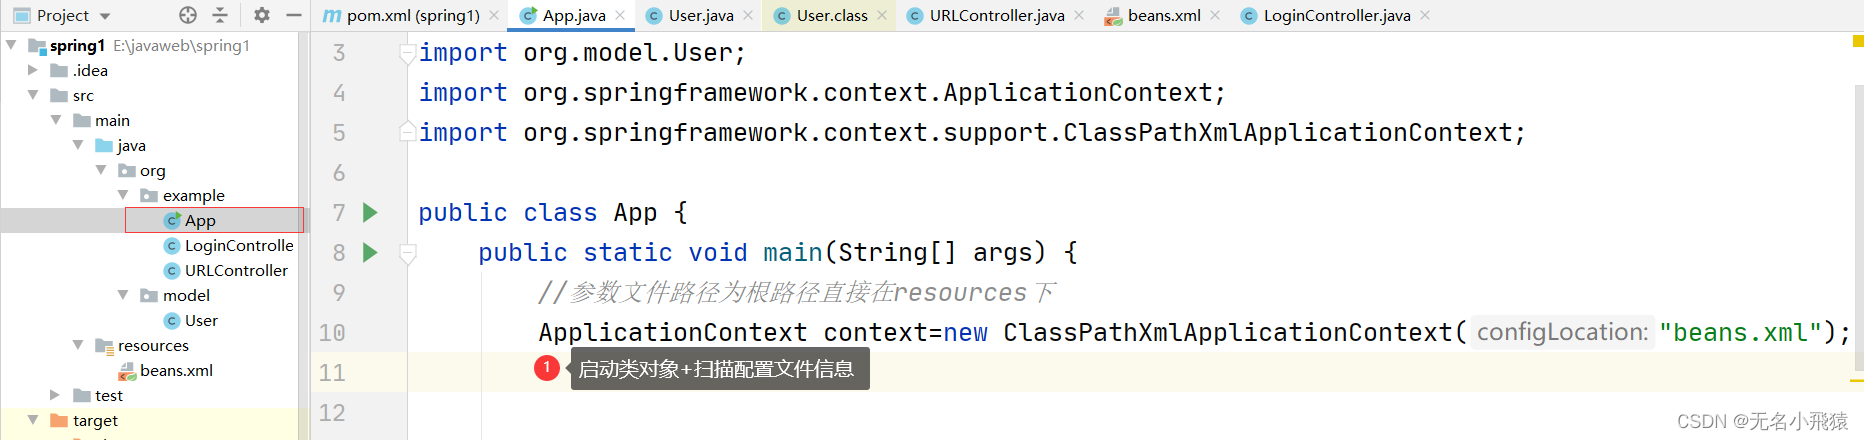
- 创建启动类
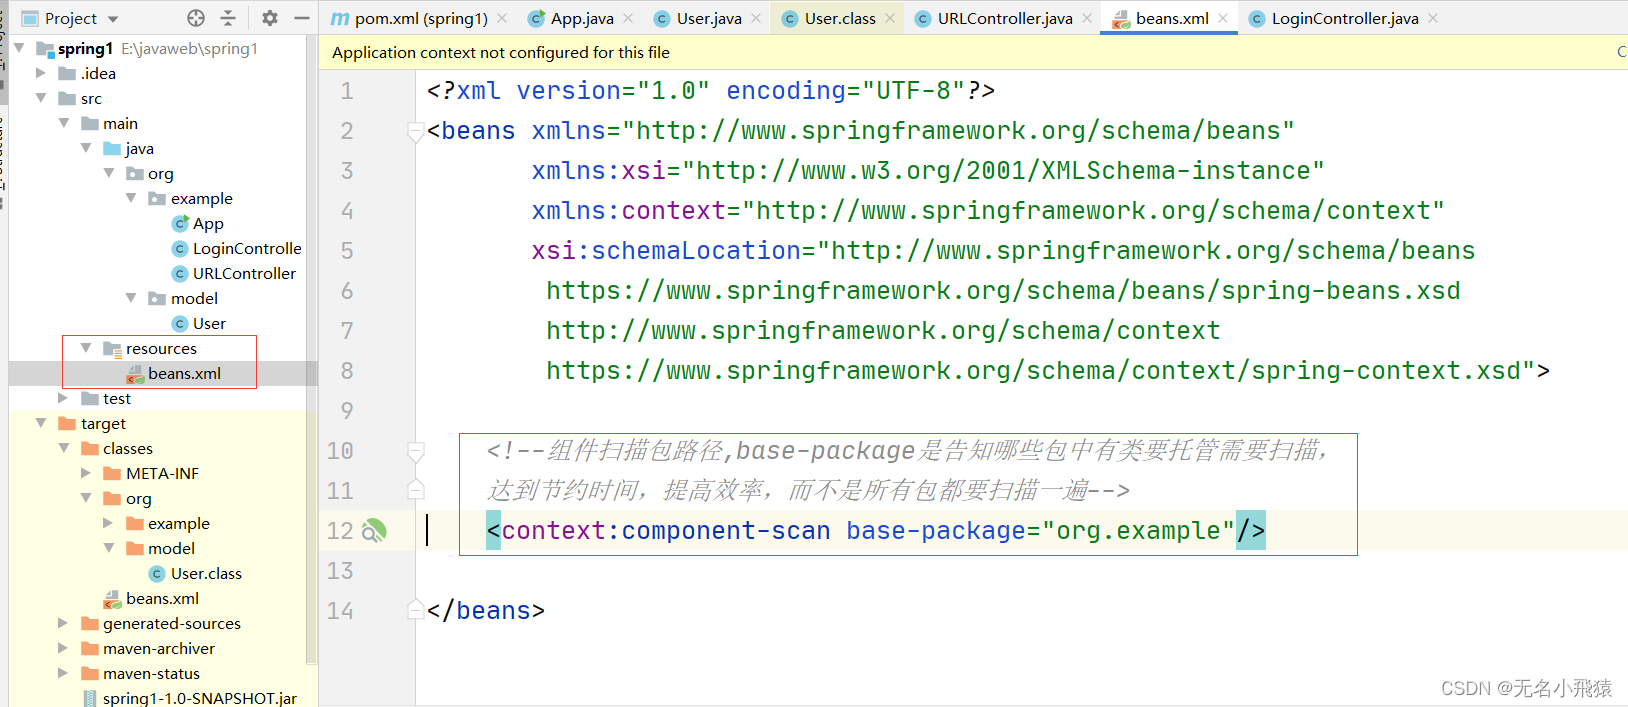
- 配置xml
- 创建注入类
- 获取bean对象
-
创建启动类:ApplicationContext对象并传入扫描xml文件路径;只写文件名则默认在根路径resources目录下。

-
配置xml:设置组件扫描路径,base-package是告知哪些包中有类要托管需要扫描,达到节约时间,提高效率,而不是所有包都要扫描一遍

-
创建注入类:类加上注解(@Controller,@Service,@Component,@Repository)才表示将类托管(注入)给spring容器

-
获取bean对象:运行测试获取bean对象并关闭资源


扩展:获取bean对象方式
- getBean(“类的命名名称”):类的命名名称规则时一是类名首字母大写时需转换为小写;二是类名的首字母开始连续字母均大写时连续大写字母全部保持大写,三是其余情况均保持不变。
public class App {
	public static void main(String[] args) {
		//参数文件路径为根路径直接在resources下
		ApplicationContext context=new ClassPathXmlApplicationContext("beans.xml");
		LoginController loginController= (LoginController) context.getBean("loginController");
		System.out.println(loginController);
		//关闭资源
		((ClassPathXmlApplicationContext)context).close();
- getBean(类名.class)
public class App {
	public static void main(String[] args) {
		//参数文件路径为根路径直接在resources下
		ApplicationContext context=new ClassPathXmlApplicationContext("beans.xml");
		LoginController loginController= (LoginController) context.getBean(LoginController.class);
		System.out.println(loginController);
		//关闭资源
		((ClassPathXmlApplicationContext)context).close();


(2)方式2:方法注解@Bean
当前类被Spring扫描到时,可在方法上使用@Bean注解,通过方法返回类型,也可以定义,注册Bean对象,默认使用方法名作为Bean的名称。
注意没有使用任何Spring的注解,类不会被扫描到。
- 创建启动类
- xml配置
- 创建类和方法,并使用@Bean
- 获取Bean对象
-
创建启动类
-
xml配置:配置扫描包
-
使用@Bean:将方法返回的对象托管至spring容器

-
获取Bean对象:从spring容器获取Bean对象

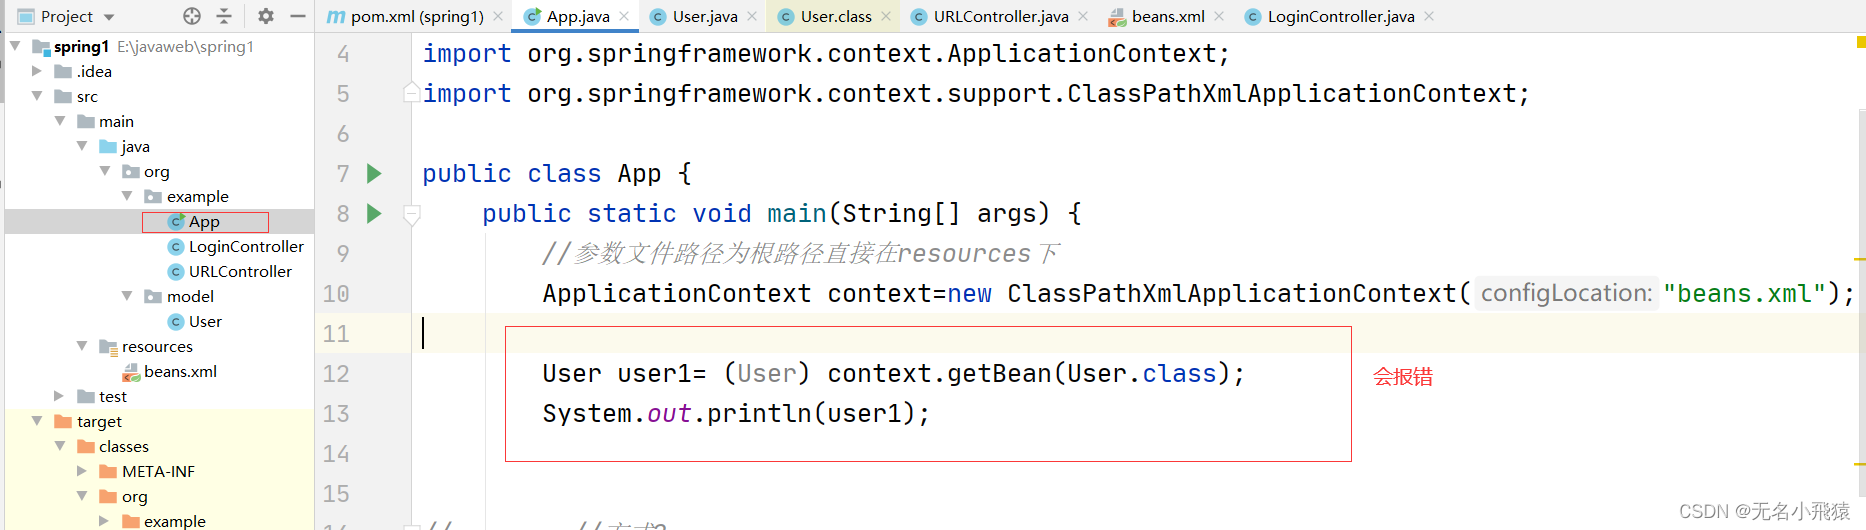
补充:多个相同类型的对象如User时不能使用类名.class获取因为无法区分

(3)方式3:类注解@Configuration
当类被Spring扫描到时,使用@Configuration.可以注册一个配置类到容器中。配置类一般用来自定义配置某些资源。之后会在SpringMVC中用到。


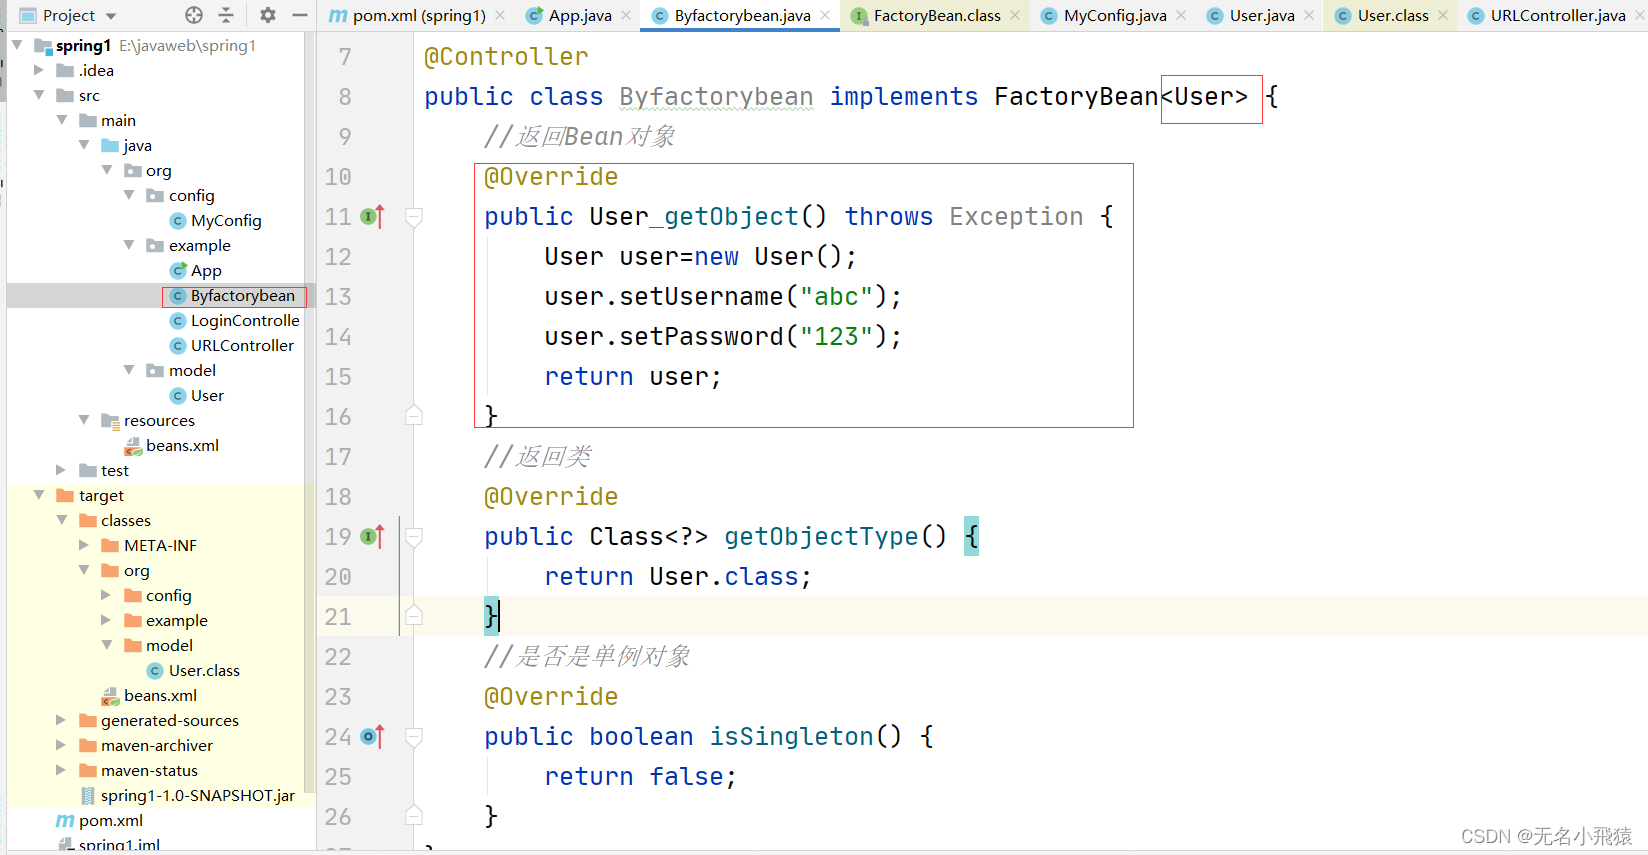
(4)方法4:FactoryBean接口(扩展了解)
- 类实现FactoryBean接口
- 实现getObject方法
- 获取对象
package org.springframework.beans.factory;

import org.springframework.lang.Nullable;

public interface FactoryBean<T> {
    String OBJECT_TYPE_ATTRIBUTE = "factoryBeanObjectType";

    @Nullable
    T getObject() throws Exception;

    @Nullable
    Class<?> getObjectType();

    default boolean isSingleton() {
        return true;
    }
}
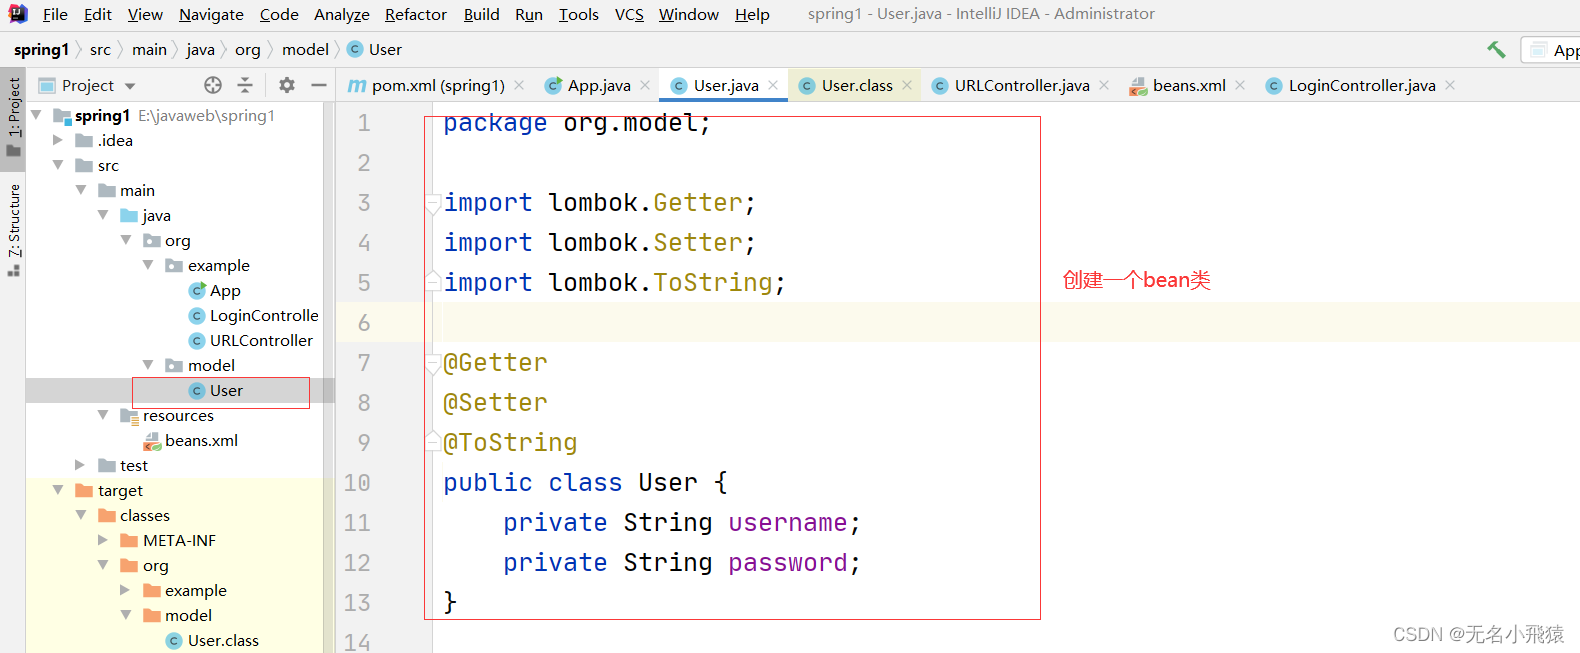
import lombok.Getter;
import lombok.Setter;
import lombok.ToString;

@Getter
@Setter
@ToString
public class User {
    private String username;
    private String password;
}
import org.model.User;
import org.springframework.beans.factory.FactoryBean;
import org.springframework.stereotype.Controller;

@Controller
public class Byfactorybean implements FactoryBean<User> {
    //返回Bean对象
    @Override
    public User getObject() throws Exception {
        User user=new User();
        user.setUsername("abc");
        user.setPassword("123");
        return user;
    }
    //返回类
    @Override
    public Class<?> getObjectType() {
        return User.class;
    }
    //是否是单例对象
    @Override
    public boolean isSingleton() {
        return false;
    }
}
import org.model.User;
import org.springframework.context.ApplicationContext;
import org.springframework.context.support.ClassPathXmlApplicationContext;

public class App {
    public static void main(String[] args) {
        //参数文件路径为根路径直接在resources下
        ApplicationContext context=new ClassPathXmlApplicationContext("beans.xml");
        User user= (User) context.getBean("byfactorybean");
        System.out.println(user);
        //关闭资源
        ((ClassPathXmlApplicationContext)context).close();
 	}
 }
-
类实现FactoryBean接口,实现getObject方法
-
获取对象

3.依赖注入/依赖装配(取对象)
从Sping容器中取出某个对象,然后将该对象放到某个类中。
(1)方式1:属性注解@Autowired
@Autowired声明并初始化对象
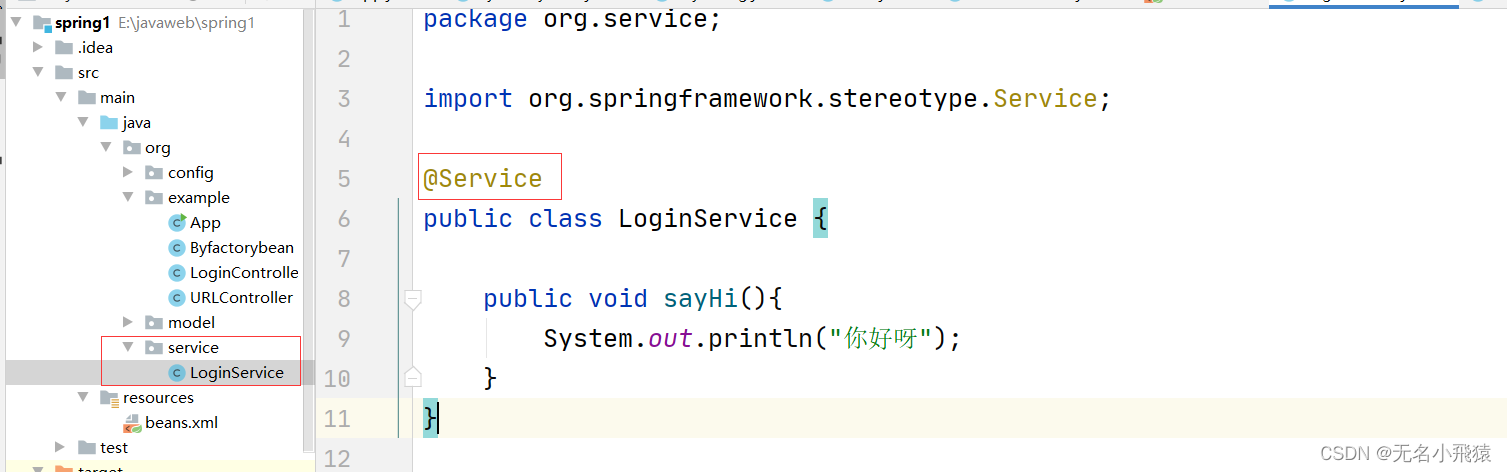
import org.springframework.stereotype.Service;

@Service
public class LoginService {

    public void sayHi(){
        System.out.println("你好呀");
    }
}
//类加上注解(@Controller,@Service,@Component,@Repository)才表示将类托管给spring容器
@Controller
public class LoginController {
    //@Autowired属性注解:初始化对象
    @Autowired
    private LoginService loginService;
    public void say(){
        loginService.sayHi();
    }
}
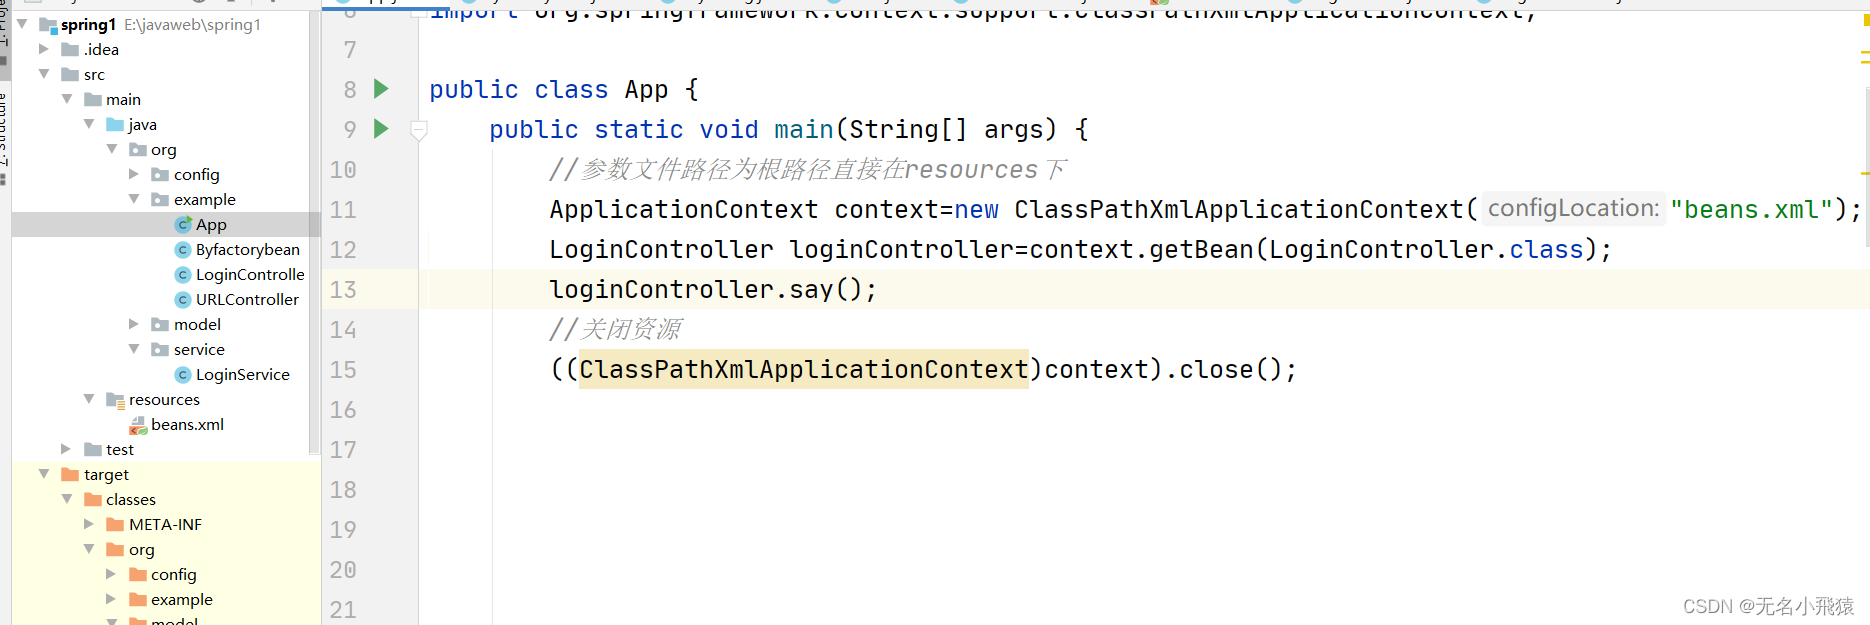
public class App {
    public static void main(String[] args) {
        //参数文件路径为根路径直接在resources下
        ApplicationContext context=new ClassPathXmlApplicationContext("beans.xml");
        LoginController loginController=context.getBean(LoginController.class);
        loginController.say();
        //关闭资源
        ((ClassPathXmlApplicationContext)context).close();
    }
}
-
定义类托管至Spring
-
属性注解获取初始化的对象

-
测试
(2)方式2:Set注入
@Controller
public class LoginController {
    //方式1:@Autowired属性注解:初始化对象
//    @Autowired
//    private LoginService loginService;

    //方式2:Set注入
    private LoginService loginService;
    @Autowired
    public void setLoginService(LoginService loginService) {
        this.loginService = loginService;
    }
    public void say(){
        loginService.sayHi();
    }
}
-
定义类托管至Spring
-
Set注入

-
测试
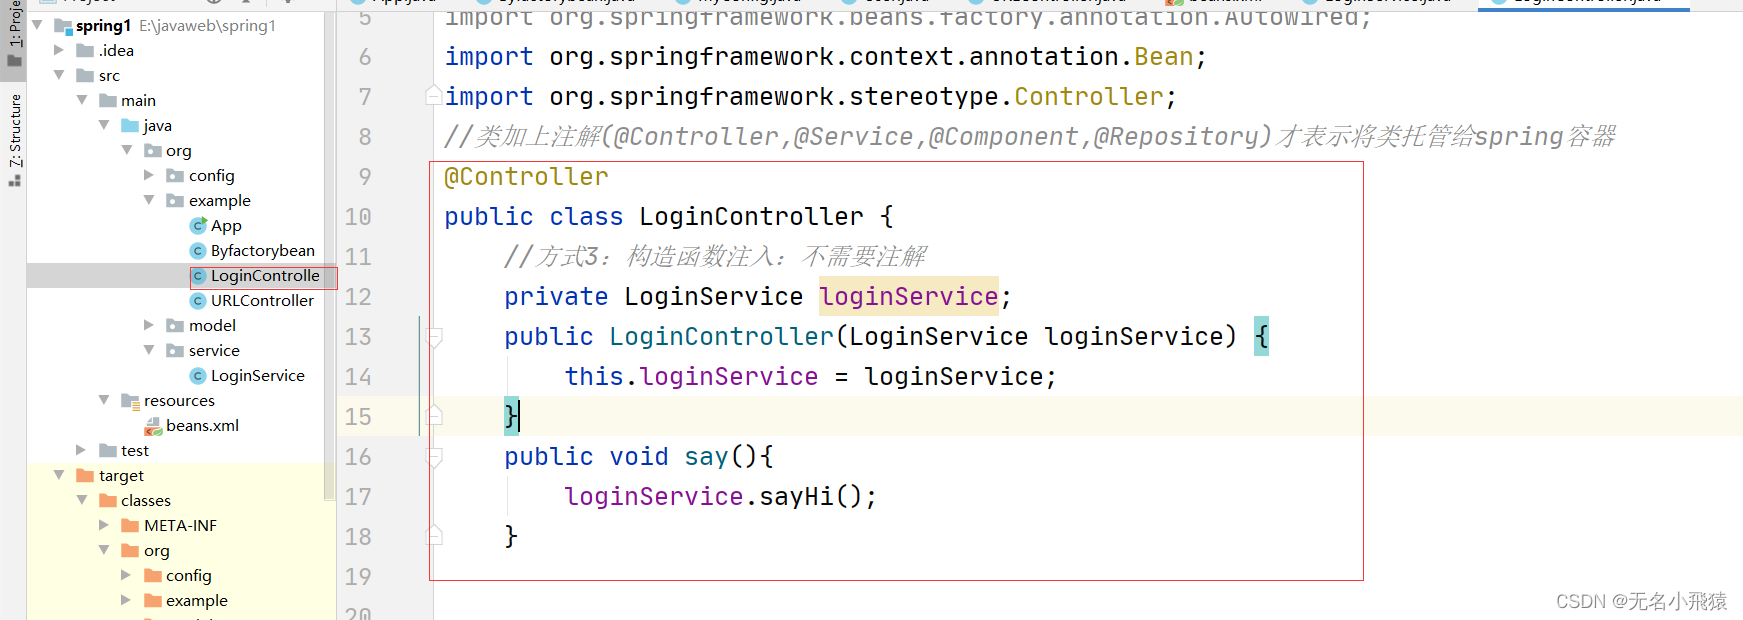
(3)方式3:构造函数注入
不需要注解
@Controller
public class LoginController {
    //方式3:构造函数注入:不需要注解
    private LoginService loginService;
    public LoginController(LoginService loginService) {
        this.loginService = loginService;
    }

    public void say(){
        loginService.sayHi();
    }
}
-
定义类托管至Spring
-
构造函数注入
-
测试
(4)注入补充扩展:@Qualifier
适用于获取多个对象时无法区分时进行标识
- 未标识@Qualifier
//类加上注解(@Controller,@Service,@Component,@Repository)才表示将类托管给spring容器
@Controller
public class LoginController {
//方式1:@Autowired属性注解:初始化对象
@Autowired
private User user;
public void say(){
System.out.println(user);
}
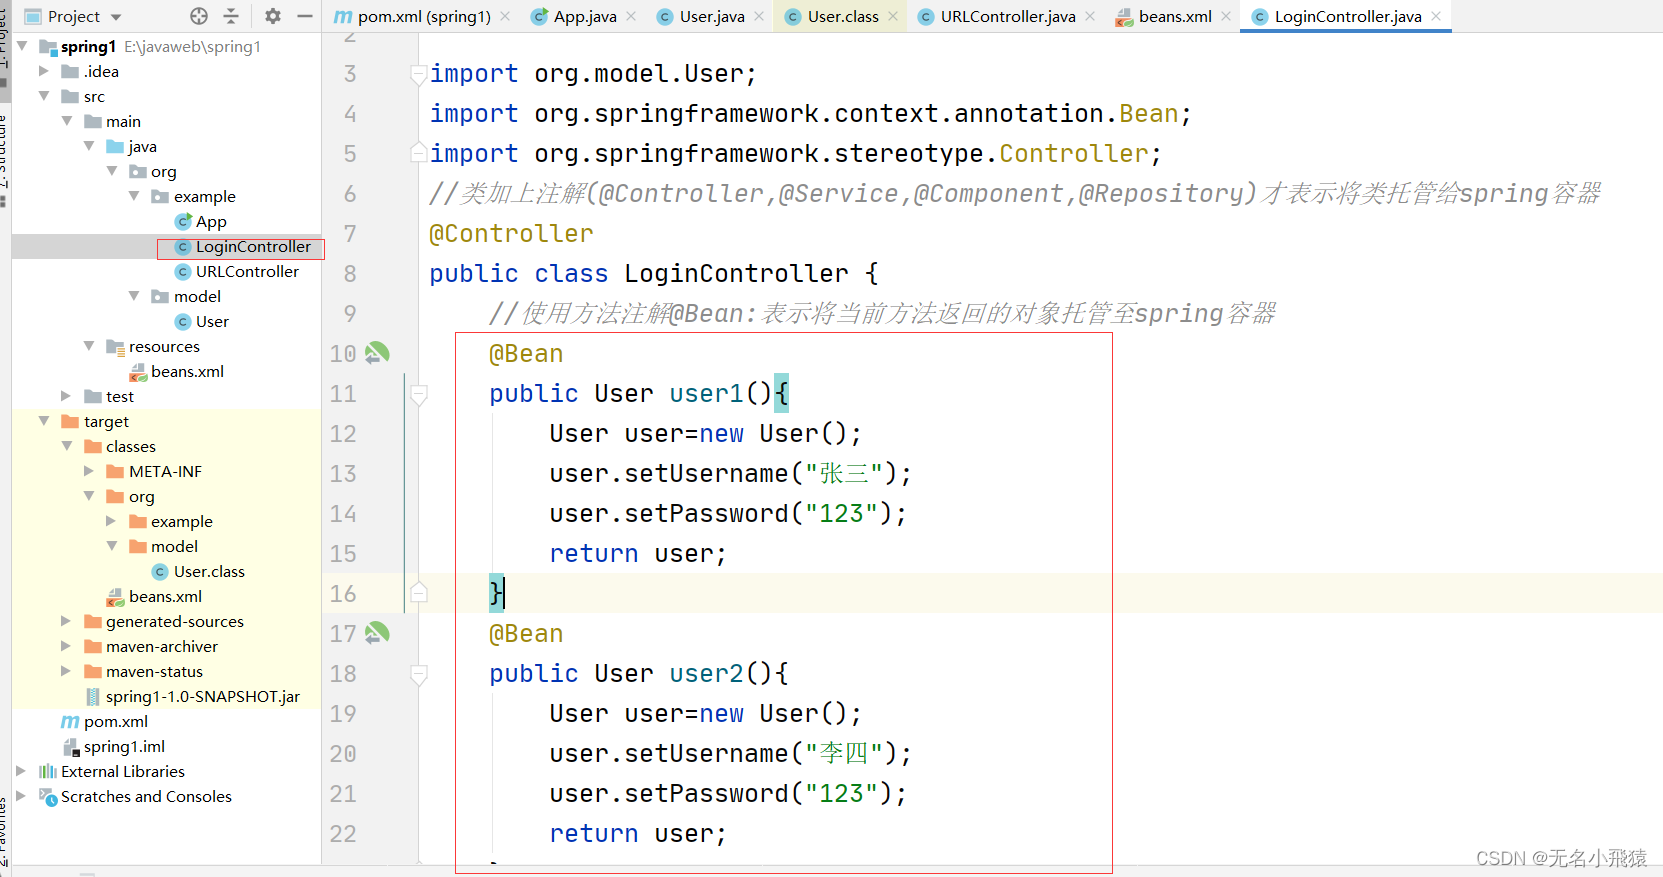
//使用方法注解@Bean:表示将当前方法返回的对象托管至spring容器
@Bean
public User user1(){
User user=new User();
user.setUsername("张三");
user.setPassword("123");
return user;
}
@Bean
public User user2(){
User user=new User();
user.setUsername("李四");
user.setPassword("123");
return user;
}
}
public class App {
    public static void main(String[] args) {
        //参数文件路径为根路径直接在resources下
        ApplicationContext context=new ClassPathXmlApplicationContext("beans.xml");
        LoginController loginController=context.getBean(LoginController.class);
        loginController.say();
        //关闭资源
        ((ClassPathXmlApplicationContext)context).close();
    }
}


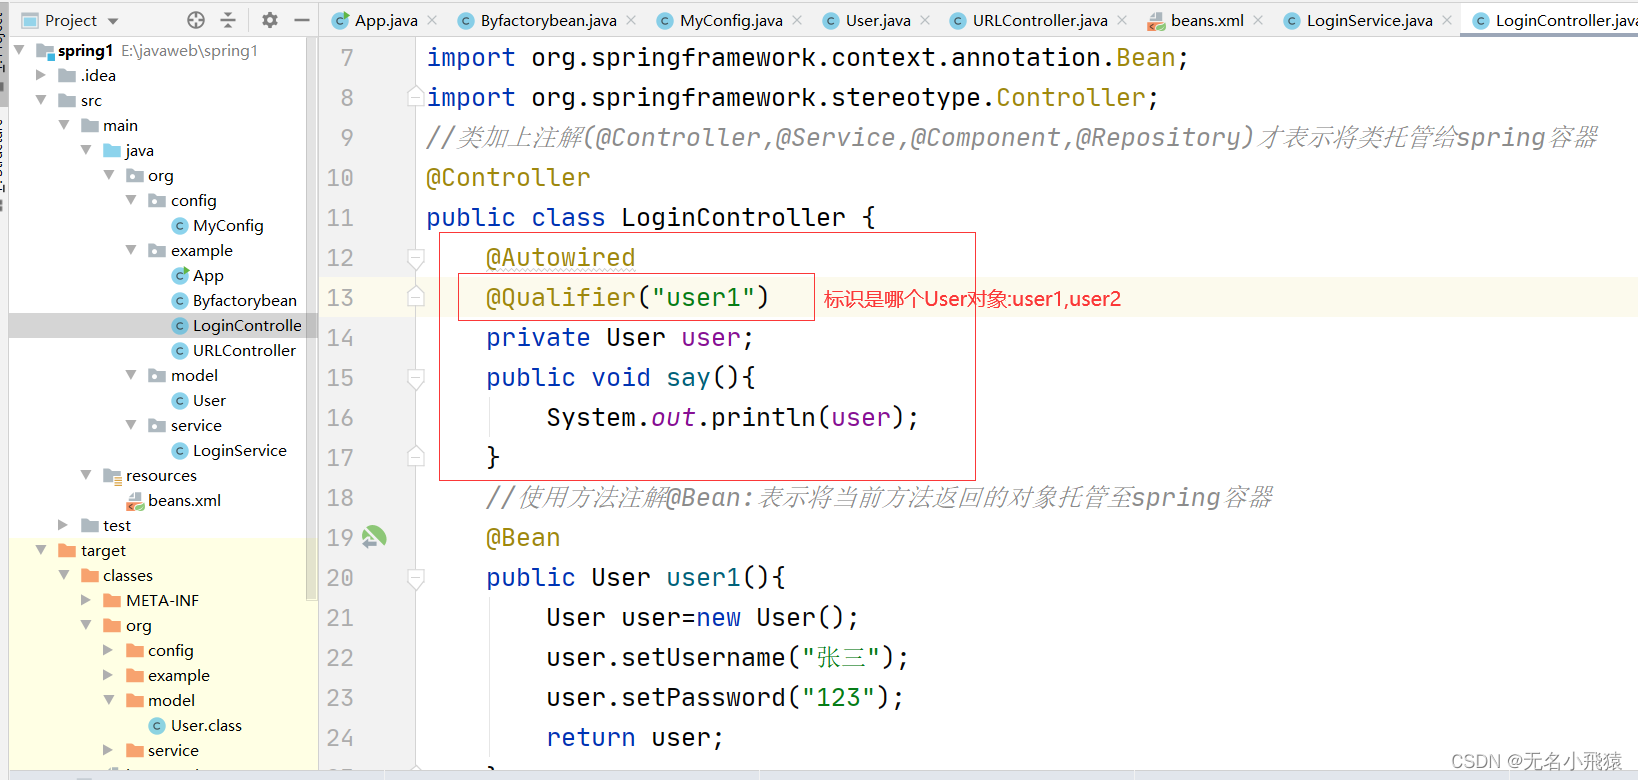
- 标识@Qualifier
//类加上注解(@Controller,@Service,@Component,@Repository)才表示将类托管给spring容器
@Controller
public class LoginController {
    @Autowired
    @Qualifier("user1")
    private User user;
    public void say(){
        System.out.println(user);
    }
    //使用方法注解@Bean:表示将当前方法返回的对象托管至spring容器
    @Bean
    public User user1(){
        User user=new User();
        user.setUsername("张三");
        user.setPassword("123");
        return user;
    }
    @Bean
    public User user2(){
        User user=new User();
        user.setUsername("李四");
        user.setPassword("123");
        return user;
    }
}

4.bean的作用域
Spring容器在初始化一个bean的实例时,同时会指定该实例的作用域。Spring有6个作用域,后四个在Spring MVC中使用。
(1)singleton
- 描述:该作用域下Bean在IoC容器中只存在一个实例
- 场景:无状态的Bean使用该作用域,无状态表示Bean对象的属性不需要更新。
- 注意:Spring默认使用该作用域。
(2)prototype
- 描述:每次对该作用域下的Bean的请求都会创建新的实例。
- 场景:通常有状态的Bean使用该作用域。
(3)request
- 描述:每次http请求都会创建新的Bean实例。
- 场景:一次http的请求和响应共享Bean。
- 注意:限定在Spring MVC中使用。
(4)session
- 描述:在一个http session中,定义一个Bean实例。
- 场景:用户会话共享Bean。
- 注意:限定在Spring MVC中使用
(5)application
- 描述:在一个http servlet context中定义一个Bean对象。
- 场景:Web应用的上下文信息。
- 注意:限定在Spring MVC中使用。
(6)websocket
- 描述:在一个HTTP WebSocket的生命周期中,定义一个Bean实例。
- 场景:WebSocket的每次会话中都会保存一个map结构的头信息,将用来包裹客户端信息头。第一次初始化后,直到WebSocket结束都是同一个Bean。
- 注意:限定在Spring WebSocket中使用。
- 测试使用
在类上加上@Scope(“作用域”)例如@Scope(“prototype”)
5. Bean的生命周期

- 实例化Bean:通过反射调用构造方法实例化对象
- 依赖注入:装配Bean的属性
- Bean对象初始化:调用一系列接口
- 销毁Bean对象,容器关闭。


 779
779


 被折叠的 条评论
为什么被折叠?
被折叠的 条评论
为什么被折叠?
 到【灌水乐园】发言


