


解决cygwin64安装sshd服务进行免密操作失败的问题
在尝试安装hadoop离线版的时候,在安装cygwin64,并对其sshd服务进行免密化的时候出现了问题,老是提示需要输入密码。
就在这里记录一下解决操作。
文章写得有点小白,而且很详细,佬看了可能有点上火,还请各位大佬见谅。
问题发生环境:已经安装了cygwin,安装了ssh相关的服务,即openssh组件等,并且进行了cygwin环境变量的配置,下面就对免密的具体操作进行介绍
PS:如果你是已经安装了ssh的相关服务,并且在配置免密的过程中出现免密失败的问题,我建议你参考下面这篇文章,去把sshd服务卸了重新配。
(执行到第三个命令即可。如果你已经全部执行才看到这句话,抱歉,我的锅,再次重新卸了配吧。)
https://blog.csdn.net/swazer_z/article/details/22154203
如果你在重新配的过程中,执行cygrunsrv -R sshd指令出现1060错误码的时候,请手动进入服务,找到CYGWIN服务,启动它即可.
$ cygrunsrv -R sshd
cygrunsrv: Error starting a service: OpenSCManager:  Win32 error 1060:	#1060错误码
如果在安装过程中,出现了这个错误,请用管理员身份重新启动cygwin64进行操作。
cygrunsrv: Error removing a service: OpenSCManager: Win32 error 5:
#ssh的免密操作
执行指令顺序:(注意,要是实在不会弄,就看我下面一步步来,如果没把把握解决就别直接粘贴指令完事)
ssh-host-config
ssh-keygen
cd ~/.ssh
cat id_rsa.pub >> authorized_keys
ssh localhost  #如果你在这里启动,发现遇到了
# WARNING: REMOTE HOST IDENTIFICATION HAS CHANGED!
#那么就看我下面的解决方式,你遇到这个情况的原因就是你之前装了ssh的服务,识别ip出错了。
第一步:
"""此处如果你是之前配过,那么前面几个叫你overwrite,你填yes就是了。"""
"""然后最关键的一点就是Should privilege separation be used? (yes/no) 选择:no,具体的原因我会把大佬的文章放下面。"""
$ ssh-host-config

*** Info: Generating missing SSH host keys
*** Query: Overwrite existing /etc/ssh_config file? (yes/no) yes
*** Info: Creating default /etc/ssh_config file
*** Query: Overwrite existing /etc/sshd_config file? (yes/no) yes
*** Info: Creating default /etc/sshd_config file

*** Info: StrictModes is set to 'yes' by default.
*** Info: This is the recommended setting, but it requires that the POSIX
*** Info: permissions of the user's home directory, the user's .ssh
*** Info: directory, and the user's ssh key files are tight so that
*** Info: only the user has write permissions.
*** Info: On the other hand, StrictModes don't work well with default
*** Info: Windows permissions of a home directory mounted with the
*** Info: 'noacl' option, and they don't work at all if the home
*** Info: directory is on a FAT or FAT32 partition.
*** Query: Should StrictModes be used? (yes/no) yes

*** Info: Privilege separation is set to 'sandbox' by default since
*** Info: OpenSSH 6.1.  This is unsupported by Cygwin and has to be set
*** Info: to 'yes' or 'no'.
*** Info: However, using privilege separation requires a non-privileged account
*** Info: called 'sshd'.
*** Info: For more info on privilege separation read /usr/share/doc/openssh/READ                                                                                                                ME.privsep.
*** Query: Should privilege separation be used? (yes/no) no
*** Info: Updating /etc/sshd_config file

*** Info: Sshd service is already installed.

*** Info: Host configuration finished. Have fun!
如果这个地方,你执行ssh-host-config出现了下面这个错误的话,你就进到服务里面,找到CYGWIN,把这个服务给关了,在重新执行这个指令就行。

第二步,我是之前装过的,所以说overwrite我就直接选y了
$ ssh-keygen
Generating public/private rsa key pair.
Enter file in which to save the key (/home/Neroism/.ssh/id_rsa):
/home/Neroism/.ssh/id_rsa already exists.
Overwrite (y/n)? y
Enter passphrase (empty for no passphrase):
Enter same passphrase again:
Your identification has been saved in /home/Neroism/.ssh/id_rsa
Your public key has been saved in /home/Neroism/.ssh/id_rsa.pub
The key fingerprint is:
SHA256:DtLaosz1JHxmprtmABoAopLaY4zCDbVocpVp6gS6Cmc Neroism@DESKTOP-9SRJK1N
The key's randomart image is:
+---[RSA 3072]----+
|+  ..o           |
|=.o.=            |
|B=.+             |
|X==  .           |
|=B=.. o S        |
|=.Eo + o         |
|oo .* B .        |
|.o oo@           |
|  +o+o.          |
+----[SHA256]-----+
第三步,进ssh目录
$ cd ~/.ssh #没什么讲的,就是进到ssh目录里面
$ ls -l		#这里我看了下目录里面文件的情况,不一定都是这样
#但是id_rsa和id_rsa.pub文件是一定有的,authorized_keys我们后面会生成
#kown_hosts可以不管,一般情况下你没尝试配过都是没有的。
total 7
-rw-r--r-- 1 Neroism None  577 Nov  9 20:00 authorized_keys
-rw------- 1 Neroism None 2610 Nov 10 18:53 id_rsa
-rw-r--r-- 1 Neroism None  577 Nov 10 18:53 id_rsa.pub
-rw-r--r-- 1 Neroism None   91 Nov  9 20:01 known_hosts
第四步,将id_rsa.pub内的内容写到authorized_keys里面,没有这个文件会生成。
$ cat id_rsa.pub >> authorized_keys
第五步,最关键的一步,这个地方可能会出现两种情况,你执行ssh localhost,一种是你成功启动了,问你要不要启动,填yes即可,下面也会对这个情况进行介绍;另外一种情况就是,启动不成果,报出下面情况。
$ ssh localhost
@@@@@@@@@@@@@@@@@@@@@@@@@@@@@@@@@@@@@@@@@@@@@@@@@@@@@@@@@@@
@    WARNING: REMOTE HOST IDENTIFICATION HAS CHANGED!     @
@@@@@@@@@@@@@@@@@@@@@@@@@@@@@@@@@@@@@@@@@@@@@@@@@@@@@@@@@@@
IT IS POSSIBLE THAT SOMEONE IS DOING SOMETHING NASTY!
Someone could be eavesdropping on you right now (man-in-the-middle attack)!
It is also possible that a host key has just been changed.
The fingerprint for the ED25519 key sent by the remote host is
SHA256:OqSKpJS0opF4pEEKWJaj19UQPKar/ZJczE7IfDcgJV0.
Please contact your system administrator.
Add correct host key in /home/Neroism/.ssh/known_hosts to get rid of this message.
Offending ED25519 key in /home/Neroism/.ssh/known_hosts:1
Host key for localhost has changed and you have requested strict checking.
Host key verification failed.
这个时候怎么解决呢,就执行vi ~/.ssh/known_hosts,把这个文件打开,然后将文件内,包含ip的所有部分删掉,这里我用的是离线安装方式,所以说删掉的就是localhost部分。
下面这图是一个大佬的图,可以看到他是一个ip接了很多你不知道的乱码,这个码就是你的密钥,你需要把整个一块全部删掉。
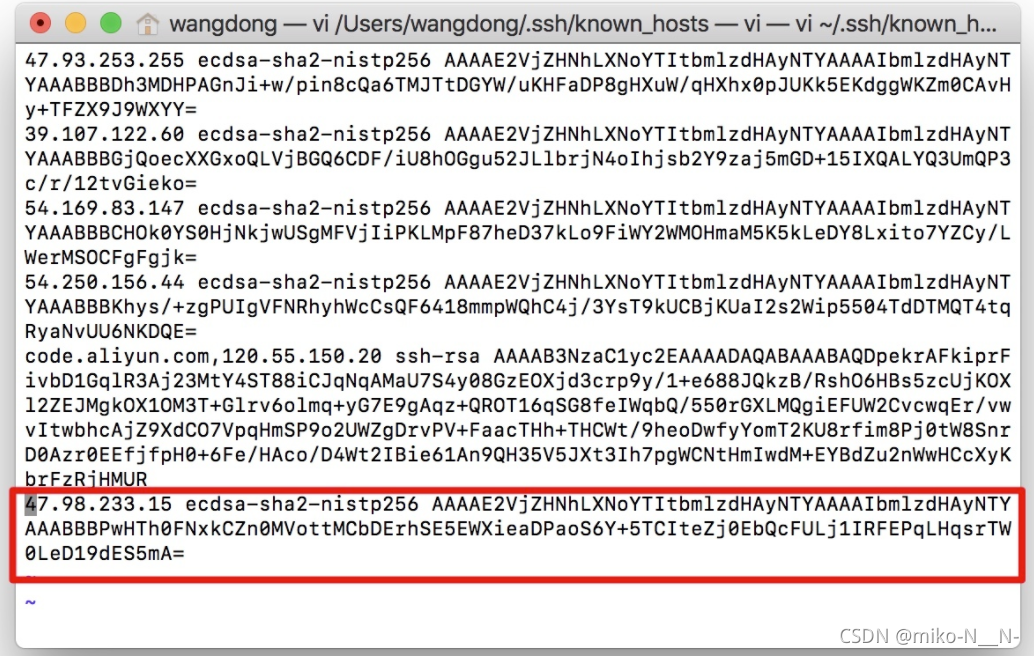
这个图是我的,已经配置好了,只是给你们看一下,大概内容是这个样子的。在删掉后,别急着退出,打出”:“然后输入wq,保存就行。

然后你再启动ssh localhost,就可以了(上面没出现我说的这个问题的,直接跳这里来。)
$ ssh localhost		#如果没出现上面情况,跳到这个地方
The authenticity of host 'localhost (::1)' can't be established.
ED25519 key fingerprint is SHA256:OqSKpJS0opF4pEEKWJaj19UQPKar/ZJczE7IfDcgJV0.
This key is not known by any other names
Are you sure you want to continue connecting (yes/no/[fingerprint])? yes
Warning: Permanently added 'localhost' (ED25519) to the list of known hosts.

$ ssh localhost
Last login: Wed Nov 10 18:56:22 2021 from ::1
下面是我参考的几位大佬的文章:
从头配置:
https://blog.csdn.net/diogy/article/details/50865908
问题指令cygrunsrv -R sshd:
https://blog.csdn.net/swazer_z/article/details/22154203
问题WARNING: REMOTE HOST IDENTIFICATION HAS CHANGED!:
https://blog.csdn.net/xlgen157387/article/details/52669709
https://blog.csdn.net/wd2014610/article/details/79945424
欢迎大家不啬赐教~~


 4198
4198


 被折叠的 条评论
为什么被折叠?
被折叠的 条评论
为什么被折叠?
 到【灌水乐园】发言


