


快速开始
    <parent>
<!--        所有的springboot项目都必须继承自spring-boot-starter-parent-->
        <groupId>org.springframework.boot</groupId>
        <artifactId>spring-boot-starter-parent</artifactId>
        <version>3.1.4</version>
        <relativePath/>
    </parent>

<!--        web开发场景的启动器-->
        <dependency>
            <groupId>org.springframework.boot</groupId>
            <artifactId>spring-boot-starter-web</artifactId>
        </dependency>
添加打包插件
<!--            springboot的应用打包插件-->
<plugin>
    <groupId>org.springframework.boot</groupId>
    <artifactId>spring-boot-maven-plugin</artifactId>
</plugin>
打包后获得下面的文件

打开该文件所在的文件夹,并通过命令行运行即可

直接在 springboot3demo-0.0.1-SNAPSHOT.jar 相同目录下新建application.properties文件既可以设置相应的配置

直接在文件中修改端口

应用分析
依赖管理机制

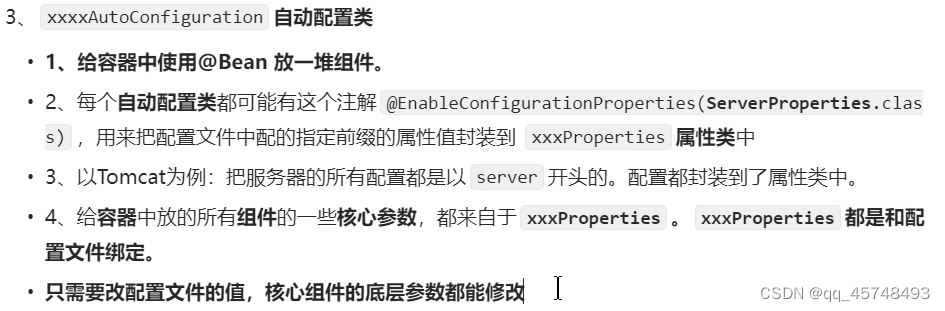
自动配置机制


总结:导入场景启动器、触发spring-boot-autoconfigure这个包的自动配置生效
常用注解
组件注解
@SpringBootApplication(scanBasePackages = "com.example")//自定义扫描包路径
@Bean("userhaha")导入第三方的组件,或者自己定义的类,默认名字是方法名,也可以手动定义,且都是单实例
@Scope("prototype") //通过该注解可以设置为多实例
@Configuration //configuration也是容器中常用的注解
@Import(FastsqlException.class) //导入第三方组件,这个方法获取的是类名是全类名com.alibaba.druid.FastsqlException
@Import(FastsqlException.class) //导入第三方组件,这个方法获取的是类名是全类名com.alibaba.druid.FastsqlException
@SpringBootApplication(scanBasePackages = "com.example")//自定义扫描包路径
public class Springboot3demoApplication {

    public static void main(String[] args) {

        ConfigurableApplicationContext ioc = SpringApplication.run(Springboot3demoApplication.class, args);

        String[] beanNamesForType = ioc.getBeanNamesForType(FastsqlException.class);
        for (String s : beanNamesForType) {
            System.out.println(s);//结果输出:user01
        }
        Object userhaha = ioc.getBean("userhaha");
        Object userhaha1 = ioc.getBean("userhaha");
        System.out.println(userhaha1 == userhaha);
    }
}
@Configuration //configuration也是容器中常用的注解
public class TestConfig {
/**
*除了通过@Component向容器中放我们需要的组件,我们也可以使用@Bean,
* 默认是方法名,
* 且都是单实例,
* 我们可以在Bean中手动设置名字
*/
@Bean("userhaha")
@Scope("prototype") //通过该注解可以设置为多实例
public User user01(){
return new User();
}
/**
* 导入第三方组件,同样可以使用@Bean
*/
// @Bean
public FastsqlException fastsqlException(){
return new FastsqlException();
}
}条件注解
@ConditionalOnClass:如果类路径中存在这个类,则触发指定行为
@ConditionalOnMissingClass:如果类路径中不存在这个类,则触发指定行为
@ConditionOnBean:如果容器中存在这个组件,则触发指定行为
@ConditionOnMissionBean:如果容器中不存在这个Bean,则触发指定行为
@ConditionalOnClass(value = FastsqlException.class)//如果放在类级别,注解判断生效,整个配置才会生效
@Configuration
public class AppConfig {

    @ConditionalOnClass(value = FastsqlException.class)//如果放在方法上,只会单独对这个方法生效
    @Bean("haveFast")
    public User user(){
        return new User();
    }

    @ConditionalOnMissingClass(value = "com.alibaba.druid.FastsqlException")
    @Bean("noFast")
    public User user1(){
        return new User();
    }

    @ConditionalOnBean(User.class)
    @Bean("haveUser")
    public Cat cat(){
        return new Cat();
    }

    @ConditionalOnMissingBean(User.class)
    @Bean("noUser")
    public Cat cat1(){
        return new Cat();
    }
}
属性绑定
@ConfigurationProperties:声明组件的属性和配置文件哪些前缀开始进行绑定必须配合@Bean使用,或者使用@Component将其装入ioc容器内
@EnableConfigurationProperties:快速注册注解,相当于代替@Bean或者@Component,导入第三方的主键进行属性绑定;springboot默认只扫描自己主程序所在的包,如果导入第三方包,即使组件上有@ConfigurationProperties和@Component也没有用
方法一:使用@Bean导入组件:

@Data
@AllArgsConstructor
@NoArgsConstructor
@ConfigurationProperties(prefix = "pig") //匹配前缀
public class Cat {
    private String name;
    private Integer age;

    @Override
    public String toString() {
        return "Cat{" +
                "name='" + name + '\'' +
                ", age=" + age +
                '}';
    }
}
//将其放入容器内,会被覆盖属性
@Bean
public Cat cat1(){
Cat cat = new Cat();
cat.setName("佩奇1");
cat.setAge(25);
return cat;
}方法二:使用@EnableConfigurationProperties
@ConfigurationProperties(prefix = "dog")//配置绑定属性的前缀
@Data
@AllArgsConstructor
@NoArgsConstructor
public class Dog {
    private String name;
    private Integer age;
}
@Import(FastsqlException.class) //导入第三方组件,这个方法获取的是类名是全类名com.alibaba.druid.FastsqlException
@SpringBootApplication(scanBasePackages = "com.example")//自定义扫描包路径
@EnableConfigurationProperties(Dog.class)
public class Springboot3demoApplication {}深入理解自动配置原理


 怎么学好SpringBoot

配置文件中复杂对象的表示
使用application.properties进行属性绑定
@Component
@Data
@ConfigurationProperties(prefix = "person")
public class Person {
    private String name;
    private Integer age;
    private Data birtyDay;
    private Boolean like;
    private Child child;//嵌套对象
    private List<Dog> dogs;//嵌套数组
    private Map<String , Cat> cats;//嵌套map
}
person.name=张三
person.age=18
person.birthDay=2010/10/28
person.like=true
#嵌套对象
person.child.name=李四
person.child.age=22
person.child.birthDay=2018/10/20
person.child.text[0]=abc
person.child.text[1]=def
#嵌套列表
person.dogs[0].name=小黑
person.dogs[0].age=2
person.dogs[1].name=小白
person.dogs[1].age=3
#嵌套map
person.cats.c1.name=小蓝
person.cats.c1.age=13
person.cats.c2.name=小灰
person.cats.c2.age=23使用yml文件进行绑定
person:
  name: 张三
  age: 14
  birthDay: 2010/10/10
  like: true
  child:
    name: 李四
    age: 20
    birtyDay: 2018/20/10
#    使用-表示列表
    text:
      - abc
      - def
  dogs:
    - name: 小黑
      age: 3
    - name: 小白
      age: 2
  cats:
#    使用该方式表示map
    c1:
      name: 小蓝
      age: 3
使用yml的细节

日志
SpringBoot的默认日志配置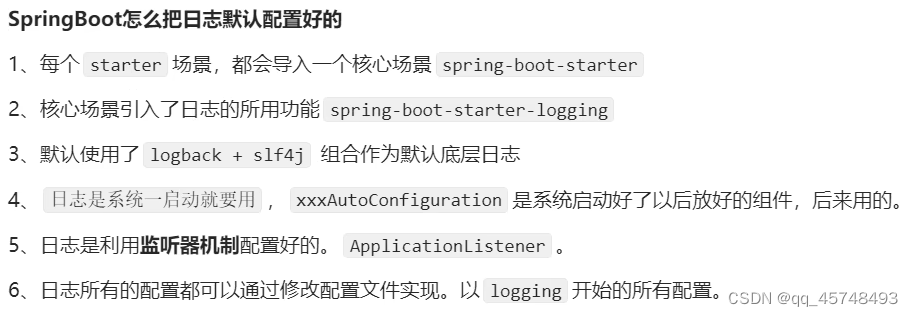
快速入门
配置控制台日志输出格式
#配置控制台日志显示格式
logging.pattern.console=%d{yyyy/MM/dd-HH:mm:ss} [%thread] %-5level %logger- %msg%n
手动向控制台输出信息:@Slf4j+log.info("要输出的信息")
@Slf4j
@RestController
public class demoController {

    @GetMapping("/hello")
    public String testDemo(){
        log.info("控制台输出");
        return "hello, SpringBoot 3!";
    }
}
日志级别

SpringBoot的默认日志级别为:INFO
修改系统输出级别和指定包的输出级别
#修改系统输出的日志级别
logging.level.root=debug
#精确调整某个包下的日志级别
logging.level.com.example.springboot3demo.controller=debug
常用的几个输出级别
@Slf4j
@RestController
public class demoController {

    @GetMapping("/hello")
    public String testDemo(){
        log.trace("trace...");
        log.debug("debug...");
        log.info("默认的输出级别");
        log.warn("warn...");
        log.error("error");
        return "hello, SpringBoot 3!";
    }
}
日志分组
向上面给每一个包设置日志级别相当麻烦,我们可是设置一个日志组
#日志分组
logging.group.abc=com.example.springboot3demo.controller,com.example.springboot3demo.pojo
logging.level.abc=debug
文件输出
#指定日志文件的路径,日志文件的默认名是spring.log
logging.file.path=D:\\
#指定日志文件的名
#1.只写名字,就能生成当前项目同位置的demo.log
#2.写名字+路径:生成指定位置的指定文件
logging.file.name=D:\\demo.log归档和切割
归档:将每天的日志放在一起
切割:日志文件超过一定大小,将其切割

logging.logback.rollingpolicy.max-file-size:效果是当日志文件超过大小后生成新的文件
${LOG_FILE}就是我们前面设置的文件名称%d{yyyy-MM-dd}表示日期%i表示今天的第几个文件
gz表示linux中的压缩文件
自定日志系统

SpringBoot中默认使用的是logback,因此我们只需要在文件系统中新建log4j2-spring.xml文件,系统就可以利用里面的配置,而不一定在application.properties中设置
假如我们要使用log4j2的场景那我们应该要怎么处理呢?
切换日志场景:
<dependency>
    <groupId>org.springframework.boot</groupId>
    <artifactId>spring-boot-starter</artifactId>
    <exclusions>
        <exclusion>
            <groupId>org.springframework.boot</groupId>
            <artifactId>spring-boot-starter-logging</artifactId>
        </exclusion>
    </exclusions>
</dependency>

<dependency>
    <groupId>org.springframework.boot</groupId>
    <artifactId>spring-boot-starter-log4j2</artifactId>
</dependency>
在resources中直接定义log4j2-spring.xml文件系统就可以扫描到配置
WEB开发

默认效果

使用RestController:如果是Bean的话会转为json数据,如果是String类型数据则直接返回
WebMvcAutoConfiguration原理
生效条件
效果

WebMvcConfigurer接口

静态资源源码
由上面就可以知道,WebMvcConfigurer中的方法addResourceHandlers就是关于静态资源的源码
public void addResourceHandlers(ResourceHandlerRegistry registry) {
            if (!this.resourceProperties.isAddMappings()) {
                logger.debug("Default resource handling disabled");
            } else {
                this.addResourceHandler(registry, this.mvcProperties.getWebjarsPathPattern(), "classpath:/META-INF/resources/webjars/");
                this.addResourceHandler(registry, this.mvcProperties.getStaticPathPattern(), (registration) -> {
                    registration.addResourceLocations(this.resourceProperties.getStaticLocations());
                    if (this.servletContext != null) {
                        ServletContextResource resource = new ServletContextResource(this.servletContext, "/");
                        registration.addResourceLocations(new Resource[]{resource});
                    }

                });
            }
}规则二:访问/**路径就去静态资源默认的四个位置找资源(这里的classpath相当于resources)
a.classpath:/META-INF/resources/
b.classpath:/resources/
c.classpath:/static/
d.classpath:/public/

规则三:静态资源都有缓存规则的设置
a.所有的缓存的设置,直接通过配置文件:spring.web
b.cachePeriod:缓存周期,多久不用找服务器要新的,默认没有
c.cacheControl:HTTP缓存控制
d.useLastModified:是否使用最后一次修改,配合HTTP Cache规则
配置式设置静态资源

代码式设置静态资源
//@EnableWebMvc //禁用默认模式,我们一般不用这个实现手自一体
@Configuration
public class MyConfig implements WebMvcConfigurer {

    //代码式配置静态资源规则
    @Override
    public void addResourceHandlers(ResourceHandlerRegistry registry) {
        //保留以前的静态资源规则
        WebMvcConfigurer.super.addResourceHandlers(registry);

        //自己设置静态资源规则
        registry.addResourceHandler("/static/**")//当我们从网页访问static的时候
                .addResourceLocations("classpath:/a/", "classpath:/b/")//我们从下面两个路径下找资源
                .setCacheControl(CacheControl.maxAge(1180, TimeUnit.SECONDS));//最大缓存时间
    }
}
代码方式的第二种方式:(容器中只要有一个WebMvcConfigure组件,其配置就会生效)
@Configuration
public class MyConfig {

    @Bean
    public WebMvcConfigurer webMvcConfigurer(){
        return new WebMvcConfigurer() {
            @Override
            public void addResourceHandlers(ResourceHandlerRegistry registry) {
                WebMvcConfigurer.super.addResourceHandlers(registry);

                //        //自己设置静态资源规则
                registry.addResourceHandler("/static/**")//当我们从网页访问static的时候
                        .addResourceLocations("classpath:/a/", "classpath:/b/")//我们从下面两个路径下找资源
                        .setCacheControl(CacheControl.maxAge(1180, TimeUnit.SECONDS));//最大缓存时间
            }
        };
    }
}
欢迎页规则
只要在上述的四个位置有index.html,我们系统一启动就会展示这个index.html
Favicon规则
我们在静态资源路径上设置favicon.ico自然就会在网页上面显示这个图标

HTTP缓存机制测试

路径匹配

新版PathPatternParser
- PathPatternParser在jmn 基测试下,有 6~8 倍吞吐量提升,降低 30%~40%空间分配率
- PathPatternParser 兼容 AntPathMatcher语法,并支持更多类型的路径模式
- PathPatternParser"**"多段匹配的支持仅允许在模式末尾使用
- 不能匹配**在中间的情况,需要手动设置spring.mvc.pathmatch.matching-strategy=ant_path_matcher
//使用新版路径匹配规则PathPatternParser
@GetMapping("/a*/b?/{p1:[a-f]+}/**")
public void  hello(HttpServletRequest request, @PathVariable("p1") String path){
    log.info("路径变量:{}", path);
    String uri = request.getRequestURI();
    log.info("路径:{}", uri);
}
内容协商

内容协商:对于同一个接口,我们要求不同的请求返回不同类型的数据,如:json,xml等
默认支持把对象写为json。因为默认web场景导入了jackson处理json的包:jackson-core
当我们需要将对象以xml形式返回怎么处理呢?
添加依赖:
<!-- 返回xml文件 -->
<dependency>
    <groupId>com.fasterxml.jackson.dataformat</groupId>
    <artifactId>jackson-dataformat-xml</artifactId>
    <version>2.15.2</version>
</dependency>
给对象添加注解@JacksonXmlRootElement
@Component
@Data
@ConfigurationProperties(prefix = "person")
@JacksonXmlRootElement //可以写出为xml
public class Person {
    private String name;
    private Integer age;
    private Data birtyDay;
    private Boolean like;
    private Child child;//嵌套对象
    private List<Dog> dogs;//嵌套数组
    private Map<String , Cat> cats;//嵌套map
}
创建接口
/**
 * RestController默认返回的是json数据
 * @return
 */
@GetMapping("/person")
 public Person person(){
    return person;
}
使用POSTMAN默认的方式返回返回json和xml


通过请求参数的内容协商
添加配置
#开启基于请求参数的内容协商功能,默认参数为:format
spring.mvc.contentnegotiation.favor-parameter=true
#可以手动修改参数名为type
spring.mvc.contentnegotiation.parameter-name=type
自定义内容协商YAML
添加依赖
<!-- 放回支持yaml格式 -->
<dependency>
    <groupId>com.fasterxml.jackson.dataformat</groupId>
    <artifactId>jackson-dataformat-yaml</artifactId>
    <version>2.15.2</version>
</dependency>
测试将对象转为yaml
@SpringBootTest
class Springboot3demoApplicationTests {

    @Autowired
    Person person;

    @Test
    void contextLoads() {
    }

    //测试将对象返回为yaml
    @Test
    public void testYaml() throws JsonProcessingException {
        //去掉上面的---
        YAMLFactory factory = new YAMLFactory().disable(YAMLGenerator.Feature.WRITE_DOC_START_MARKER);
        ObjectMapper mapper = new ObjectMapper(factory);

        String s = mapper.writeValueAsString(person);
        System.out.println(s);
        /**
         * 效果如下:
         * name: "张三"
         * age: 14
         * birtyDay: null
         * like: true
         * child:
         *   name: "李四"
         *   age: 20
         *   birthDay: null
         *   text:
         *   - "abc"
         *   - "def"
         * dogs:
         * - name: "小黑"
         *   age: 3
         * - name: "小白"
         *   age: 2
         * cats:
         *   c1:
         *     name: "小蓝"
         *     age: 3
         */
    }
}
新建自己的HttpMessageConvert将对象转为xml
public class MyYamlHttpMessageConverter extends AbstractHttpMessageConverter<Object> {

    private ObjectMapper objectMapper = null;//把对象转为yaml

    public MyYamlHttpMessageConverter(){
        //和配置文件中的text/yaml进行配对
        super(new MediaType("application", "yaml", Charset.forName("UTF-8")));
        //去掉上面的---
        YAMLFactory factory = new YAMLFactory().disable(YAMLGenerator.Feature.WRITE_DOC_START_MARKER);
        this.objectMapper = new ObjectMapper(factory);
    }
    @Override
    protected boolean supports(Class<?> clazz) {
        //只要是对象类型,不是基本数据类型
        return true;
    }

    @Override //RequestBody
    protected Object readInternal(Class<?> clazz, HttpInputMessage inputMessage) throws IOException, HttpMessageNotReadableException {
        return null;
    }

    @Override//ResponseBody怎么把对象写出去
    protected void writeInternal(Object methodReturnValue, HttpOutputMessage outputMessage) throws IOException, HttpMessageNotWritableException {
        //try-with写法自动关流
        try(OutputStream os = outputMessage.getBody()){
            this.objectMapper.writeValue(os, methodReturnValue);
        }
    }
}
在配置类中将自己的convert组装到MVCconfigure中去
//@EnableWebMvc //禁用默认模式,我们一般不用这个实现手自一体
@Configuration
public class MyConfig {

    @Bean
    public WebMvcConfigurer webMvcConfigurer(){
        return new WebMvcConfigurer() {
            @Override
            public void addResourceHandlers(ResourceHandlerRegistry registry) {
                WebMvcConfigurer.super.addResourceHandlers(registry);

                //        //自己设置静态资源规则
                registry.addResourceHandler("/static/**")//当我们从网页访问static的时候
                        .addResourceLocations("classpath:/a/", "classpath:/b/")//我们从下面两个路径下找资源
                        .setCacheControl(CacheControl.maxAge(1180, TimeUnit.SECONDS));//最大缓存时间
            }

            @Override //配置一个能将对象转为yaml的messageConverter
            public void configureMessageConverters(List<HttpMessageConverter<?>> converters) {
                converters.add(new MyYamlHttpMessageConverter());
            }
        };
    }
}
修改配置文件,新增加一种内容类型
#增加一种新的内容类型
spring.mvc.contentnegotiation.media-types.yaml=application/yaml
测试效果如下:

Thymeleaf
快速入门
添加依赖
<!-- 默认效果thymeleaf -->
<dependency>
    <groupId>org.springframework.boot</groupId>
    <artifactId>spring-boot-starter-thymeleaf</artifactId>
    <version>3.1.3</version>
</dependency>
添加controller
//@RestController表示的是前后端分离技术
@Controller //这里表示的是前后端不分离的技术
public class ThymeleafTest {
    @GetMapping("/well")
    public String hello(@RequestParam(value = "name") String name,
                        Model model){
        //模板的逻辑视图名
        //物理视图 = 前缀 + 逻辑视图名 + 后缀
        //真实地址 = classpath:/templates/welcome.html

        //将页面需要共享的数据保存在model
        model.addAttribute("msg", name);
        return "welcome";
    }
}
默认效果:1.所有的模板页面在classpath:/templates/下面找 2.找后缀为.html的页面

<!DOCTYPE html>
<html lang="en" xmlns:th="http://www.thmeleaf.org">
<head>
    <meta charset="UTF-8">
    <title>Title</title>
</head>
<body>
<h1>哈哈:<span th:text="${msg}"></span></h1>
</body>
</html>
核心语法
th:utext:替换标签的内容,不会转义html标签,显示为正真html该有的样式
th:任意html属性 动态替换任意属性的值
th:attr:任意属性指定
th:其他标签if
th:src="@{${imgUrl}}" 自动补全图片路径为/demo/static/1.png
字符串拼接 || <h1>哈哈:<span th:utext="|前缀:${text} :后缀|"></span></h1>
@Controller //这里表示的是前后端不分离的技术
public class ThymeleafTest {
    @GetMapping("/well")
    public String hello(@RequestParam(value = "name") String name,
                        Model model){
        //模板的逻辑视图名
        //物理视图 = 前缀 + 逻辑视图名 + 后缀
        //真实地址 = classpath:/templates/welcome.html

        //将页面需要共享的数据保存在model
        model.addAttribute("msg", name);

        //th:utext:替换标签的内容,不会转义html标签,显示为正真html该有的样式
        String text = "<span style='color:red'>"+name+"</span>";
        model.addAttribute("text",text);

        //th:任意html属性 动态替换任意属性的值
        String imgUrl = "/static/1.png";
        model.addAttribute("imgUrl", imgUrl);
        //th:attr:任意属性指定
        model.addAttribute("style","width: 400px");

        //th:其他标签if
        model.addAttribute("show", true);

        //th:src="@{${imgUrl}}" 自动补全图片路径为/demo/static/1.png

        //字符串拼接 || <h1>哈哈:<span th:utext="|前缀:${text} :后缀|"></span></h1>

        return "welcome";
    }
}
<!DOCTYPE html>
<html lang="en" xmlns:th="http://www.thmeleaf.org">
<head>
<meta charset="UTF-8">
<title>Title</title>
</head>
<body>
<h1>哈哈:<span th:text="${msg}"></span></h1>
<h1>哈哈:<span th:utext="${text}"></span></h1>
<br/>
<img th:src="@{${imgUrl}}" style="width:300px;"/>
<br/>
<img th:attr="src=@{${imgUrl}}, style=${style}"/>
<br/>
<img th:src="@{${imgUrl}}" style="width:300px;" th:if="${show}"/>
<br/>
<h1>哈哈:<span th:utext="|前缀:${text} :后缀|"></span></h1>
</body>
</html>遍历

为我们的项目添加bootstrp的样式

我们找一个table的样式

我们新增加页面list.html
<table class="table">
  <thead>
  <tr>
    <th scope="col">id</th>
    <th scope="col">name</th>
    <th scope="col">age</th>
    <th scope="col">email</th>
  </tr>
  </thead>
  <tbody>
  <tr th:each="user, stats: ${users}">
    <th scope="row" th:text="${user.id}">1</th>
    <td th:text="${user.name}">Mark</td>
    <td th:text=[[user.age]]>Otto</td>
    <td th:text=[[user.email]]>@mdo</td>
    <td>
      index: [[${stats.index}]] <br/>
      count: [[${stats.count}]] <br/>
      size(总数量): [[${stats.size}]] <br/>
      current(当前对象):[[${stats.current}]]<br/>
      even(true)/odd(false): [[${stats.even}]]<br/>
      first: [[${stats.first}]]<br/>
      last: [[${stats.last}]]<br/>
    </td>
  </tr>
  </tbody>
</table>

<script src="https://cdn.jsdelivr.net/npm/bootstrap@5.3.2/dist/js/bootstrap.bundle.min.js" integrity="sha384-C6RzsynM9kWDrMNeT87bh95OGNyZPhcTNXj1NW7RuBCsyN/o0jlpcV8Qyq46cDfL" crossorigin="anonymous"></script>
</body>
</html>
效果如下:

判断
<td th:if="${#strings.isEmpty(user.email)}" th:text="联系不上">@mdo</td>
<td th:if="${not #strings.isEmpty(user.email)}" th:text="${user.email}">@mdo</td>
<td th:text= "| ${user.age} - ${user.age >= 18 ? '成年' : '未成年'}|">Otto</td><td th:switch="${user.role}">
<button th:case="'admin'" type="button" class="btn btn-primary">管理员</button>
<button th:case="'pm'" type="button" class="btn btn-secondary">项目经理</button>
<button th:case="'hr'" type="button" class="btn btn-success">人事</button>
</td>这里的button我们可以直接从bootstrap中找
<td th:switch="${user.role}">
  <button th:case="'admin'" type="button" class="btn btn-primary">管理员</button>
  <button th:case="'pm'" type="button" class="btn btn-secondary">项目经理</button>
  <button th:case="'hr'" type="button" class="btn btn-success">人事</button>
</td>属性优先级

<!-- 将会只展示大于22岁的-->
<tr th:each="user, stats: ${users}" th:if="${user.age > 22}">
<th scope="row" th:text="${user.id}">1</th>
<td th:text="${user.name}">Mark</td>
<td th:text= "| ${user.age} - ${user.age >= 18 ? '成年' : '未成年'}|">Otto</td>
<td th:if="${#strings.isEmpty(user.email)}" th:text="联系不上">@mdo</td>
<td th:if="${not #strings.isEmpty(user.email)}" th:text="${user.email}">@mdo</td>
<td th:switch="${user.role}">
  <button th:case="'admin'" type="button" class="btn btn-primary">管理员</button>
  <button th:case="'pm'" type="button" class="btn btn-secondary">项目经理</button>
  <button th:case="'hr'" type="button" class="btn btn-success">人事</button>
</td>
<td>
index: [[${stats.index}]] <br/>
count: [[${stats.count}]] <br/>
size(总数量): [[${stats.size}]] <br/>
current(当前对象):[[${stats.current}]]<br/>
even(true)/odd(false): [[${stats.even}]]<br/>
first: [[${stats.first}]]<br/>
last: [[${stats.last}]]<br/>
</td>
</tr>开启属性绑定
<tr th:each="user, stats: ${users}" th:if="${user.age > 22}" th:object="${user}">
  <th scope="row" th:text="*{id}">1</th>
我们引用user.id的时候可以直接通过*{id}引用
模板引用

假如我们在每一页都有这样一个头需要我们展示,我们要怎么处理呢?
我们在bootstrap中找到header这样的头元素,按F12复制该元素代码

我们使用一个common.html页面里面专门放置我们公共的片段
th:fragment="myheader"设置片段名
<!DOCTYPE html>
<html lang="en" xmlns:th="http://www.thmeleaf.org">
<head>
    <meta charset="UTF-8">
    <title>公共内容</title>
</head>
<body>

<header th:fragment="myheader" class="d-flex flex-wrap align-items-center justify-content-center justify-content-md-between py-3 mb-4 border-bottom">
  <div class="col-md-3 mb-2 mb-md-0">
    <a href="/" class="d-inline-flex link-body-emphasis text-decoration-none">
      <svg class="bi" width="40" height="32" role="img" aria-label="Bootstrap"><use xlink:href="#bootstrap"></use></svg>
    </a>
  </div>

  <ul class="nav col-12 col-md-auto mb-2 justify-content-center mb-md-0">
    <li><a href="#" class="nav-link px-2 link-secondary">Home</a></li>
    <li><a href="#" class="nav-link px-2">Features</a></li>
    <li><a href="#" class="nav-link px-2">Pricing</a></li>
    <li><a href="#" class="nav-link px-2">FAQs</a></li>
    <li><a href="#" class="nav-link px-2">About</a></li>
  </ul>

  <div class="col-md-3 text-end">
    <button type="button" class="btn btn-outline-primary me-2">Login</button>
    <button type="button" class="btn btn-primary">Sign-up</button>
  </div>
</header>
</body>
</html>
在我们需要的页面引用该片段
th:replace="~{common :: myheader} 判断哪个页面的哪个片段
<!DOCTYPE html>
<html lang="en" xmlns:th="http://www.thmeleaf.org">
<head>
    <meta charset="UTF-8">
    <title>list</title>
  <link href="https://cdn.jsdelivr.net/npm/bootstrap@5.3.2/dist/css/bootstrap.min.css" rel="stylesheet" integrity="sha384-T3c6CoIi6uLrA9TneNEoa7RxnatzjcDSCmG1MXxSR1GAsXEV/Dwwykc2MPK8M2HN" crossorigin="anonymous">
</head>
<body>
<!--判断是哪个页面的哪个片段-->
<div th:replace="~{common :: myheader}"></div>
<div class="container">
  <a th:href="@{/list}">列表展示</a>
</div>
<script src="https://cdn.jsdelivr.net/npm/bootstrap@5.3.2/dist/js/bootstrap.bundle.min.js" integrity="sha384-C6RzsynM9kWDrMNeT87bh95OGNyZPhcTNXj1NW7RuBCsyN/o0jlpcV8Qyq46cDfL" crossorigin="anonymous"></script>
</body>
</html>
其他
#开发期间关闭,上线以后开启
spring.thymeleaf.cache=false

错误处理
springMVC中错误处理方式
@ExceptionHandler(Exception.class) 在controller中统一处理类的错误
@Slf4j
@RestController
public class demoController {

    @Autowired
    Person person;

    @GetMapping("/hello")
    public String testDemo(){
        log.trace("trace...");
        log.debug("debug...");
        log.info("默认的输出级别");
        log.warn("warn...");
        log.error("error");
        int i = 10 / 0;
        return "hello, SpringBoot 3!";
    }

    //使用新版路径匹配规则PathPatternParser
    @GetMapping("/a*/b?/{p1:[a-f]+}/**")
    public void  hello(HttpServletRequest request, @PathVariable("p1") String path){
        log.info("路径变量:{}", path);
        String uri = request.getRequestURI();
        log.info("路径:{}", uri);
    }

    //内容协商

    /**
     * RestController默认返回的是json数据
     * @return
     */
    @GetMapping("/person")
     public Person person(){
        return person;
    }

    /**
     * 1.@ExceptionHandler 统一处理指定的错误
     * 2.只能处理这个类的错误
     */
    @ResponseBody
    @ExceptionHandler(Exception.class)
    public String handleException(Exception e){
        return "Ohh~~~, 原因:" + e.getMessage();
    }
}
@ControllerAdvice //这个类是集中处理所有@Controller发生的错误
@ControllerAdvice //这个类是集中处理所有@Controller发生的错误
public class GlobalExceptionHandler {
    /**
     * 1.@ExceptionHandler 统一处理指定的错误
     * 2.只能处理这个类的错误
     */
    @ResponseBody
    @ExceptionHandler(Exception.class)
    public String handleException(Exception e){
        return "Ohh~~~统一处理错误, 原因:" + e.getMessage();
    }
}
SpringBoot中错误处理方式

总结:当springMVC中不能处理错误时,springboot会从templates/error或者静态资源找精确码或者4XX 5XX的错误处理页,都没有找到的时候就去找error错误处理页
错误实战


基础特征
banner的设置
#banner的有关设置 设置banner.txt文件的位置
spring.banner.location=classpath:banner.txt
#打开还是关闭baner
spring.main.banner-mode=console可以在BootSchool中设置自己的banner.txt,如下我们在resources/banner.txt设置文件
             ██                   ██                 ██                          ██
            ░██    █████         ░░   █████         ░██                         ░██
  ██████   ██████ ██░░░██ ██   ██ ██ ██░░░██ ██   ██░██       ██████   ██████  ██████
 ░░░░░░██ ░░░██░ ░██  ░██░██  ░██░██░██  ░██░██  ░██░██████  ██░░░░██ ██░░░░██░░░██░
  ███████   ░██  ░░██████░██  ░██░██░░██████░██  ░██░██░░░██░██   ░██░██   ░██  ░██
 ██░░░░██   ░██   ░░░░░██░██  ░██░██ ░░░░░██░██  ░██░██  ░██░██   ░██░██   ░██  ░██
░░████████  ░░██   █████ ░░██████░██  █████ ░░██████░██████ ░░██████ ░░██████   ░░██
 ░░░░░░░░    ░░   ░░░░░   ░░░░░░ ░░  ░░░░░   ░░░░░░ ░░░░░    ░░░░░░   ░░░░░░     ░░
Profiles环境隔离用法
1.标识环境
1)区分几个环境:dev(开发环境)test(测试环境)prod(生产环境)default(默认环境)
2)指定组件在哪个环境下生效
通过:@Profile({"test"})标注
组件没有标注的时候在任何时候都会生效
3)默认只有激活指定的环境,组件才会生效
2.激活环境
配置文件激活:spring.profiles.active=dev
命令行激活:java -jar xxx.jar --spring.profiles.active=dev
包含指定环境,不管激活哪个环境,这个都要有。总是生效的环境:
spring.profiles.include=dev, test
生效的环境:激活的环境/默认环境 + 包含的环境
总结:基础的环境---》包含的环境 动态切换的环境---》激活的环境
任何@Component, @Configuration 或 @ConfigurationProperties 可以使用 @Profile 标记,来指定何时被加载。[容器中的组件都可以被 @Prlfile 标记]
@Profile("dev")//设置当前环境为dev
@Component//只有当前被@Component的组件被控制
public class TestBean {
}
我们使用命令行激活环境

3.配置文件怎么使用profile
断工文件怎么使用Profile功能
1) 、application.properties:主配置文件。任何情况下都生效
2)、其他Profile环境下命名规范:application-{profile标识}.properties: 比如: application-dev.properties
3)激活指定环境即可:配置文件激活、命令行激活
4)效果:
项目的所有生效配置项 = 激活环境配置文件的所有项 + 配置文件和激活文件不冲突的所有项如果发生了配置冲突,以激活的环境配置文件为准。 application-{profile标识}.properties 优先级 application,properties
我们在application.proerties环境中激活环境dev

dev配置文件中设置端口9999

启动项目最终显示端口为9999
外部化配置
规则一:命令行 》 配置文件 》 代码
规则二:application-{环境}.properties 》 application.properties
规则三:包外》包内
规则四:config子目录下 》 config目录下 》根目录
规则五:配置文件优先级 》 导入优先级


单元测试
注解

断言

核心原理
生命周期监听

Listener先要从 META-INF/spring.factories 读到
1. 引导: 利用 BootstrapContext 引导整个项目启动
starting: 应用开始,SpringApplication的run方法一调用,只要有了 BootstrapContext 就执行
environmentPrepared: 环境准备好 (把启动参数等绑定到环境变量中) ,但是ioc还没有创建,[调一次]
2. 启动:
contextPrepared: ioc容器创建并准备好,但是sources (主配置类)没加载。并关闭引导上下文,组件都没创建[调用一次]
contextLoaded: ioc容器加载。主配置类加载进去了。但是ioc容器还没刷新 (我们的bean没创建)。
=======截止以前,ioc容器里面还没造bean呢=======
started: ioc容器刷新了 (所有bean造好了),但是 runner 没调用
ready: ioc容器刷新了 (所有bean造好了) ,所有runner调用完了
3. 运行
以前步骤都正确执行,代表容器running.
创建我们自己的Listener
@Slf4j
public class MyAppListener implements SpringApplicationRunListener {

    public void starting(ConfigurableBootstrapContext bootstrapContext) {
        log.info("=============starting=============项目正在启动===========");
    }


    public void environmentPrepared(ConfigurableBootstrapContext bootstrapContext,
                                     ConfigurableEnvironment environment) {
        log.info("=============environmentPrepared=============环境准备完成===========");
    }


    public void contextPrepared(ConfigurableApplicationContext context) {
        log.info("=======contextPrepared=============ioc准备完成===========");
    }


    public void contextLoaded(ConfigurableApplicationContext context) {
        log.info("=======contextLoaded=============ioc加载完成===========");
    }


    public void started(ConfigurableApplicationContext context, Duration timeTaken) {
        log.info("=======started=============启动完成===========");
    }


    public void ready(ConfigurableApplicationContext context, Duration timeTaken) {
        log.info("=======ready=============准备就绪===========");
    }


    public void failed(ConfigurableApplicationContext context, Throwable exception) {
        log.info("=======failed=============应用启动失败===========");
    }
}
添加配置

org.springframework.boot.SpringApplicationRunListener=com.example.springboot3demo.listener.MyAppListener9大事件与探针
事件的完整流程

事件和监听器的完整顺序

各种回调监听器
最佳实战

创建我们自己的事件监听器
@Slf4j
public class MyEvent implements ApplicationListener<ApplicationEvent> {
    @Override
    public void onApplicationEvent(ApplicationEvent event) {
        log.info("=======事件=========到达============" + event);
    }
}
在resources/META-INF/spring.factories中添加配置
org.springframework.context.ApplicationListener=com.example.springboot3demo.listener.MyEvent创建我们自己的Runner
//添加Runner
@Bean
public ApplicationRunner applicationRunner(){
    return new ApplicationRunner() {
        @Override
        public void run(ApplicationArguments args) throws Exception {
            log.info("==========applicationRunner=========运行了=============");
        }
    };
}

@Bean
public CommandLineRunner commandLineRunner(){
    return new CommandLineRunner() {
        @Override
        public void run(String... args) throws Exception {
            log.info("==========commandLineRunner=========运行了=============");
        }
    };
}
事件驱动开发
创建事件
//创建事件,将信息封装在我们事件的source中去
public class LoginEvent extends ApplicationEvent {

    public LoginEvent(Person source) {
        super(source);
    }
}
事件的发布者
//事件发布者
@Service
public class EventPublisher implements ApplicationEventPublisherAware {
    private ApplicationEventPublisher applicationEventPublisher;
    @Override
    public void setApplicationEventPublisher(ApplicationEventPublisher applicationEventPublisher) {
        //通过该实现该接口,把真正实现事件发布的底层组件注入
        this.applicationEventPublisher = applicationEventPublisher;
    }
    public void sendEvent(ApplicationEvent event){
        applicationEventPublisher.publishEvent(event);
    }
}
事件接收的两种方式:①@EventListener ②implements ApplicationEventPublisherAware
@Slf4j
@Service
public class ConsumeService {

    //通过该注解监听事件
    @EventListener
    public void onEvent(LoginEvent event){
        Object source = event.getSource();
        Person person = (Person) source;
        consume(person);
    }

    public void consume(Person person){
        log.info("================ConsumeService接收到事件=====================");
        log.info(person.getName() + "=================正在消费==================");
    }
}
//通过继承接口的方式接收事件
@Service
@Slf4j
public class StudyService implements ApplicationListener<LoginEvent> {
public void study(Person p){
log.info("==============StudyService正在接收信息=============");
log.info("===========" + p.getName() + "正在学习==========");
}
@Override
public void onApplicationEvent(LoginEvent event) {
Object source = event.getSource();
Person p = (Person)source;
study(p);
}
}测试
@GetMapping("/login")
public String login(@RequestParam("username") String username,
                  @RequestParam("age") Integer age){
    Person p = new Person();
    p.setName(username);
    p.setAge(age);
    LoginEvent loginEvent = new LoginEvent(p);
    //事件发布
    eventPublisher.sendEvent(loginEvent);
    return "TestLoginEvent";
}
@SpringBootApplication源码分析
@SpringBootApplication注解包含以下几个注解:

第二部门
等待更新。。。


 643
643

 被折叠的 条评论
为什么被折叠?
被折叠的 条评论
为什么被折叠?
 到【灌水乐园】发言


