


基于ant-design-vue@4 UI组件库实现
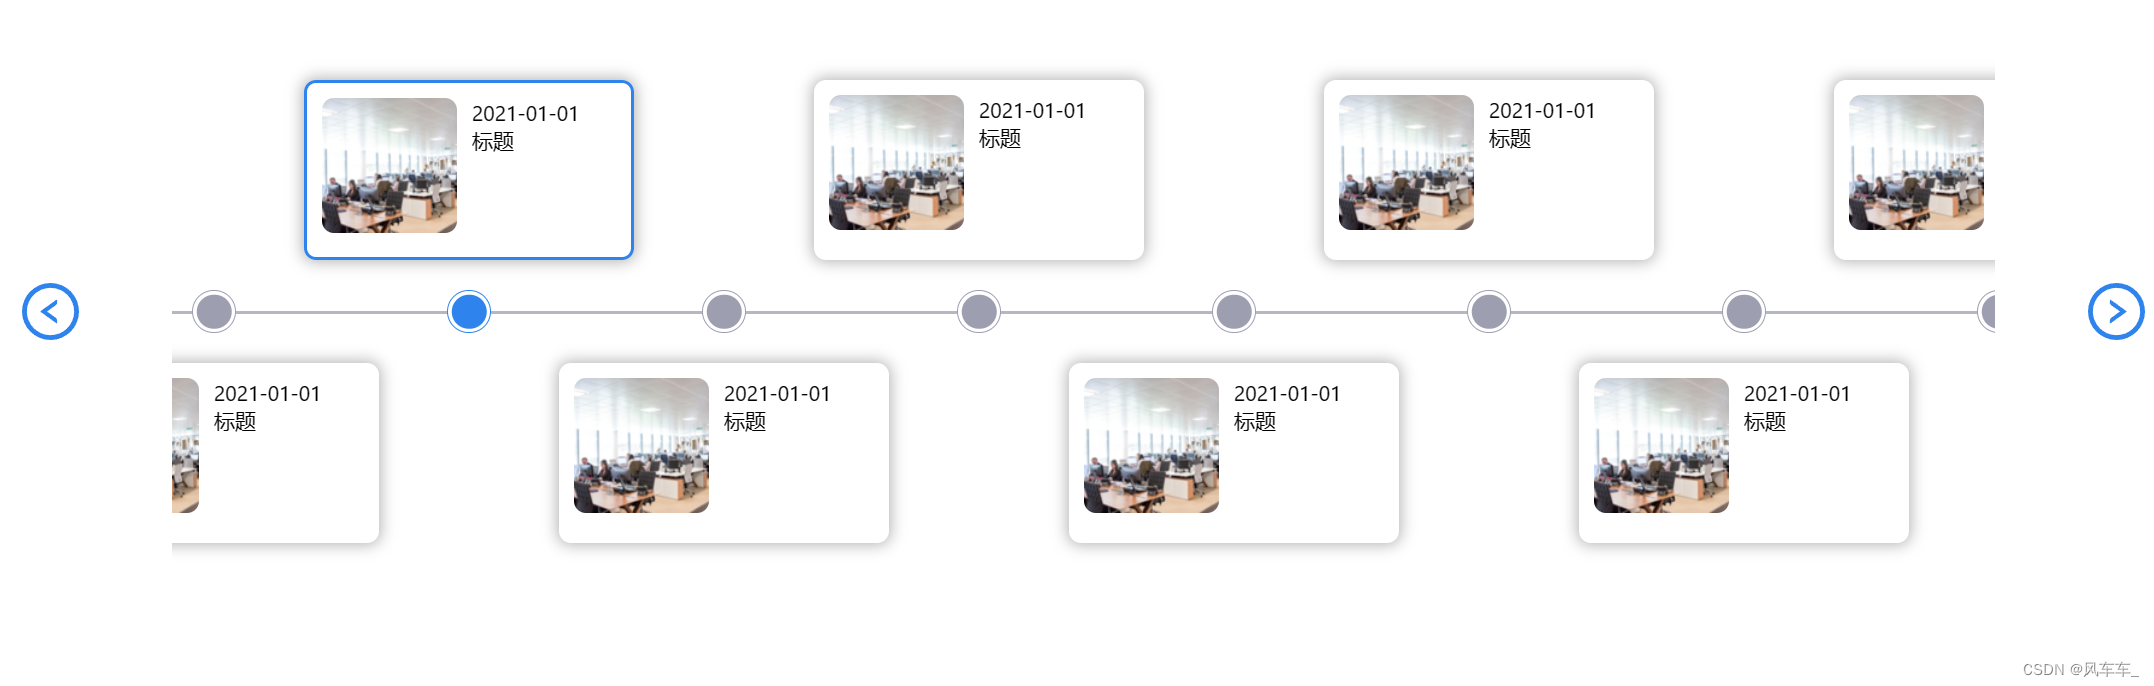
先上图
前提===>保证项目安装有ant-design-vue组件库
项目使用的antdv的按需加载,所以没有导入组件语句
gitee联系作者:https://gitee.com/zlflying
<template>
  <div class="main">
    <LeftCircleOutlined @click="prev" class="sw_icon"
                        :style="{ color: isFirst? '#eee' : 'var(--main-color)'}"/>
    <div class="timeline" ref="timeline">
      <div class="timeline-item" v-for="(item, index) in props.items" :key="index" @click="current = index"
           :style="{marginLeft: index!==0? `-${60}px`: '20px'}">
        <div class="card-top" v-if="index%2 === 0" :class="index===current ? 'card-active' : ''">
          <img :src="item.imgUrl" alt="" style="width: 90px;height:90px;border-radius: 8px;">
          <div class="content">
            <div>{{ item.date }}</div>
            <div>{{ item.title }}</div>
          </div>
        </div>
        <!--        占位-->
        <div v-else style="height: 120px">
        </div>
        <div class="cirque" :class="index===current ? 'active' : ''">
          <div class="dot"></div>
        </div>
        <div class="card-bottom" v-if="index%2 !== 0" :class="index===current ? 'card-active' : ''">
          <img :src="item.imgUrl" alt="" style="width: 90px;height:90px;border-radius: 8px;">
          <div class="content">
            <div>{{ item.date }}</div>
            <div>{{ item.title }}</div>
          </div>
        </div>
        <!--        占位-->
        <div v-else style="height: 120px">
        </div>
      </div>
    </div>
    <RightCircleOutlined @click="next" class="sw_icon"
                         :style="{ color: isLast? '#eee' : 'var(--main-color)'}"/>
  </div>
</template>

<script setup>
import {computed, ref} from "vue";
import {LeftCircleOutlined, RightCircleOutlined} from "@ant-design/icons-vue";

const props = defineProps({
  items: {
    type: Array,
    required: true,
    default: () => [],
  },
});

/** 当前显示的卡片索引 */
const current = ref(0);

/** 滚动容器 */
const timeline = ref(null);

/** 下一个 **/
const next = () => {
  if (current.value < props.items.length - 1) {
    timeline.value.children[current.value + 1].scrollIntoView({
      behavior: 'smooth',
      block: 'center',
      inline: 'center',
    });
    current.value++;
  }
};

/** 上一个 **/
const prev = () => {
  if (current.value > 0) {
    timeline.value.children[current.value - 1].scrollIntoView({
      behavior: 'smooth',
      block: 'center',
      inline: 'center',
    });
    current.value--;
  }
};

/** 是否是第一个卡片 */
const isFirst = computed(() => {
  return current.value === 0;
});

/** 是否是最后一个卡片 */
const isLast = computed(() => {
  return current.value === props.items.length - 1;
});


</script>

<style scoped>
.main {
  width: 100%;
  display: flex;
  align-items: center;
  justify-content: space-between;
  transition: sroll linear 2s;
}

.main .timeline {
  width: calc(100% - 200px);
  display: flex;
  overflow-x: hidden;
  padding: 16px;
  transition: sroll linear 2s;
  position: relative;
}

.main .timeline::before {
  content: ''; /* 伪元素需要内容属性,即使它是空的 */
  position: absolute;
  top: 50%; /* 将线定位在容器的垂直中心 */
  left: 0;
  right: 0;
  height: 2px; /* 线的高度 */
  width: 1000000000000px;
  background-color: rgba(157, 158, 178, 0.75); /* 线的颜色 */
}

.cirque {
  width: 29px;
  height: 29px;
  border-radius: 50px;
  border: 1px solid #9D9EB2;
  background: #FFFFFF;
  margin: 20px;
  z-index: 3;
}

.cirque .dot {
  width: 23px;
  height: 23px;
  transform: translate(0.5px, 0.5px);
  border-radius: 50px;
  background: #9D9EB2;
  margin: 2px;
}

.cirque.active {
  transition: all ease-in 0.3s;
  border-color: var(--main-color);
}

.cirque.active .dot {
  background: var(--main-color);
}

.timeline .timeline-item {
  cursor: pointer;
  display: flex;
  flex-direction: column;
  align-items: center;
  margin: 0 10px;
}


.card-top, .card-bottom {
  position: relative;
  width: 220px;
  height: 120px;
  box-shadow: 0 0 10px 1px rgba(0, 0, 0, 0.3);
  border-radius: 8px;
  padding: 10px;
  display: flex;
  z-index: 3;
}

.card-top:hover, .card-bottom:hover {
  color: var(--main-color);
  transition: all ease-in 0.2s;
}

.content {
  margin-left: 10px;
  display: flex;
  flex-direction: column;
}

.card-top.card-active,
.card-bottom.card-active {
  border: 2px solid var(--main-color);
  transition: all ease-in 0.2s;
}

.sw_icon {
  font-size: 38px;
  user-select: none;
}

</style>
使用
<template>
<TimeLine :items="itemList"></TimeLine>
</template>
<script setup>
import TimeLine from "@/components/TimeLine.vue";
/** 条目列表 */
const itemList = ref([
    {
        imgUrl: '/test.png',
        title: '标题',
        date: '2021-01-01',
    },
    {
        imgUrl: '/test.png',
        title: '标题',
        date: '2021-01-01',
    },
    {
        imgUrl: '/test.png',
        title: '标题',
        date: '2021-01-01',
    },
    {
        imgUrl: '/test.png',
        title: '标题',
        date: '2021-01-01',
    },
    {
        imgUrl: '/test.png',
        title: '标题',
        date: '2021-01-01',
    },
    {
        imgUrl: '/test.png',
        title: '标题',
        date: '2021-01-01',
    },
    {
        imgUrl: '/test.png',
        title: '标题',
        date: '2021-01-01',
    },
    {
        imgUrl: '/test.png',
        title: '标题',
        date: '2021-01-01',
    },
    {
        imgUrl: '/test.png',
        title: '标题',
        date: '2021-01-01',
    },
    {
        imgUrl: '/test.png',
        title: '标题',
        date: '2021-01-01',
    },
    {
        imgUrl: '/test.png',
        title: '标题',
        date: '2021-01-01',
    },
    {
        imgUrl: '/test.png',
        title: '标题',
        date: '2021-01-01',
    },
    {
        imgUrl: '/test.png',
        title: '标题',
        date: '2021-01-01',
    },
    {
        imgUrl: '/test.png',
        title: '标题',
        date: '2021-01-01',
    },
    {
        imgUrl: '/test.png',
        title: '标题',
        date: '2021-01-01',
    },
    {
        imgUrl: '/test.png',
        title: '标题',
        date: '2021-01-01',
    }
]);
</script>


 4927
4927


 被折叠的 条评论
为什么被折叠?
被折叠的 条评论
为什么被折叠?
 到【灌水乐园】发言


