


springboot集成websocket实现消息推送
在我们的日常JavaWeb开发中,经常是由客户端发送请求到服务端来获取数据,那么有没有什么方式可以由服务端主动推送数据到客户端呢?下面我们将介绍如何使用websocket来进行服务端消息推送。
使用websocket的方式有两种:1、sockjs 2、使用H5标准。此处只介绍H5的方式
1、springboot整合websocket
1.1、依赖引入
<dependency>
    <groupId>org.springframework.boot</groupId>
	<artifactId>spring-boot-starter-websocket</artifactId>
</dependency>

<!-- 引入该依赖方便使用@Slf4j注解进行日志打印 -->
<dependency>
    <groupId>org.projectlombok</groupId>
    <artifactId>lombok</artifactId>
    <optional>true</optional>
</dependency>
1.2、编写配置类
ServerEndpointExporter会自动的注册使用了@ServerEndpoint注解的类,将其解析为一个websocket端点
@Configuration
public class WebSocketConfig {

    @Bean
    public ServerEndpointExporter serverEndpointExporter(){
        return new ServerEndpointExporter();
    }
}
1.3、创建WebSocket接口,提供访问端点
访问地址为:ws://localhost:port/websocket/{uuid}, uuid为路由参数,实际使用中必须保证唯一,此处直接将其用做用户名。
@Component
@Slf4j
@ServerEndpoint(value = "/websocket/{uuid}")
public class MyWebSocket {
// 对连接用户进行统一管理
private static Map<String, Session> sessionPool = new ConcurrentHashMap<>();
private String uuid;
@OnOpen
public void onOpen(@PathParam("uuid") String uuid, Session session){
log.info("创建链接 uuid: {}", uuid);
this.uuid = uuid;
sessionPool.put(uuid, session);
// 主动向其他客户端推送上线通知
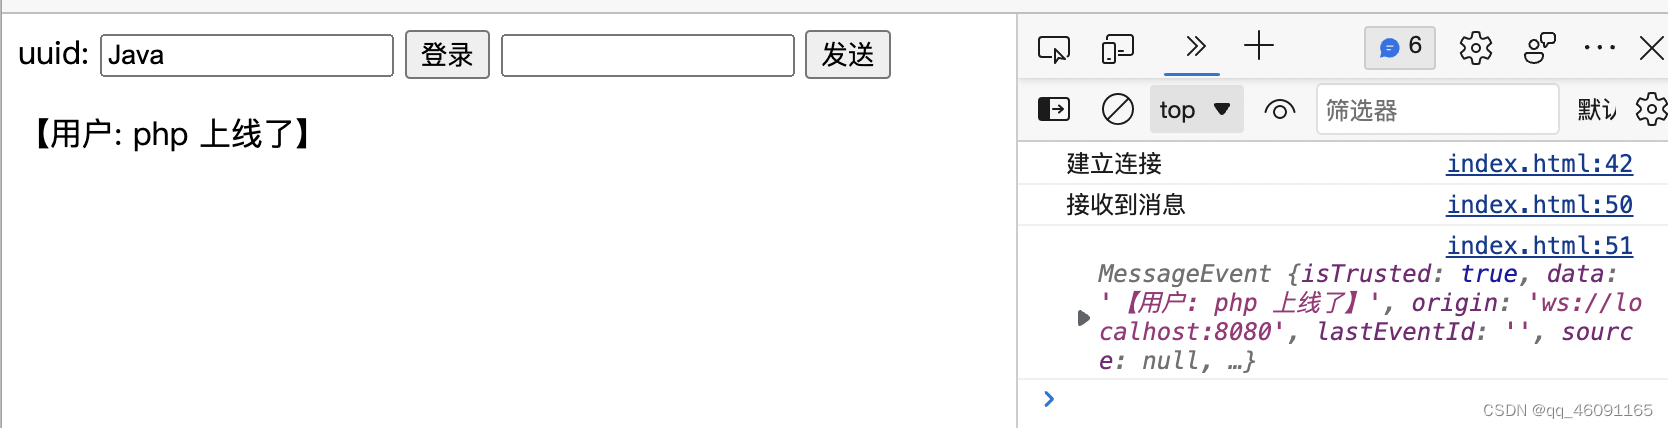
String text = "【用户: " + uuid + " 上线了】";
sendAll(uuid, text);
}
@OnMessage
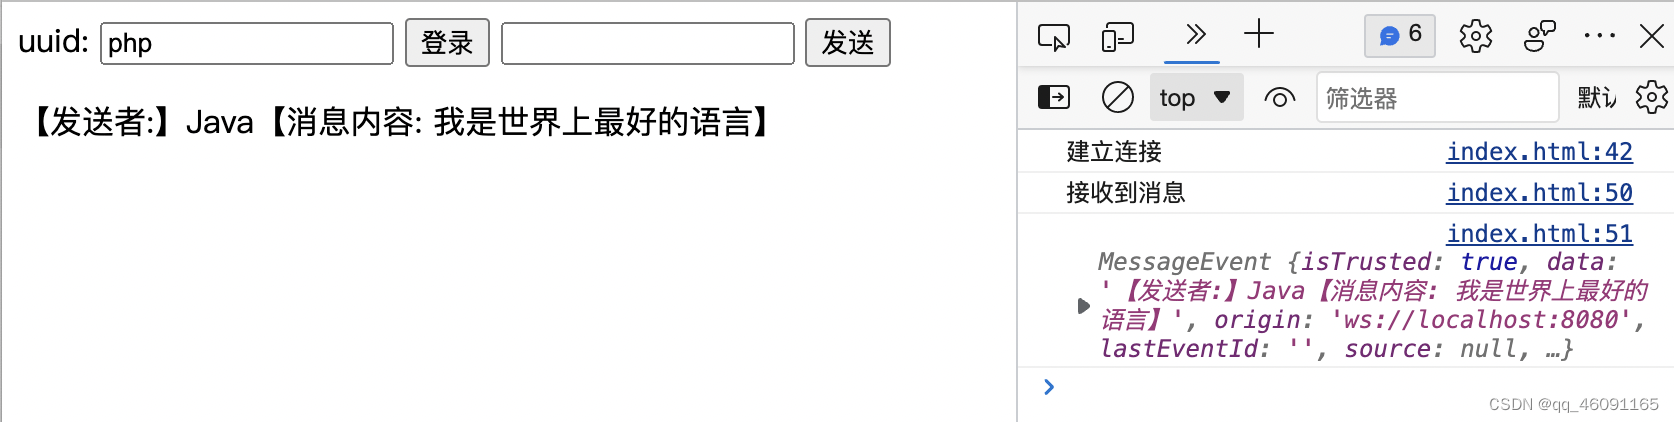
public void onMessage(String message, @PathParam("uuid") String uuid){
log.info("接收到的消息: {}", message);
sendAll(uuid, "【发送者:】" + uuid + "【消息内容: " + message + "】");
}
@OnClose
public void onClose(){
log.info("关闭连接 uuid: {}", uuid);
// 断开连接,移除session
sessionPool.remove(uuid);
String text = "【用户: " + uuid + " 下线了】";
sendAll(uuid, text);
}
@OnError
public void onError(Throwable e){}
public static void sendAll(String uuid, String text){
sessionPool.forEach(((s, session) -> {
if (!s.equals(uuid)){
session.getAsyncRemote().sendText(text);
}
}));
}
}
2、前端代码
<!DOCTYPE html>
<html lang="en">
<head>
<meta charset="UTF-8">
<title>Title</title>
</head>
<body>
uuid: <input id="uuid"> <button onclick="login()">登录</button>
<input id="send"/> <button onclick="sendMsg()">发送</button>
<div id="main">
</div>
</body>
</html>
<script>
function login(){
uuid = document.getElementById("uuid").value;
webSocket = new WebSocket("ws://localhost:8080/websocket/" + uuid);
webSocket.onopen = function (e){
onOpen(e)
}
webSocket.onclose = function (e){
onClose(e)
}
webSocket.onmessage = function (e){
onMessage(e)
}
webSocket.onerror = function (e){
onError(e)
}
}
// 连接成功建立的回调方法
function onOpen(e){
console.log("建立连接")
}
// 连接关闭的回调方法
function onClose(e){
console.log("关闭连接")
}
// 接收到服务端消息的回调方法
function onMessage(e){
console.log("接收到消息")
console.log(e)
var main = document.getElementById("main");
main.innerHTML += `<p>${e.data}</p>`
}
// 连接发生错误的回调方法
function onError(e){
console.log("error")
}
// 发送消息
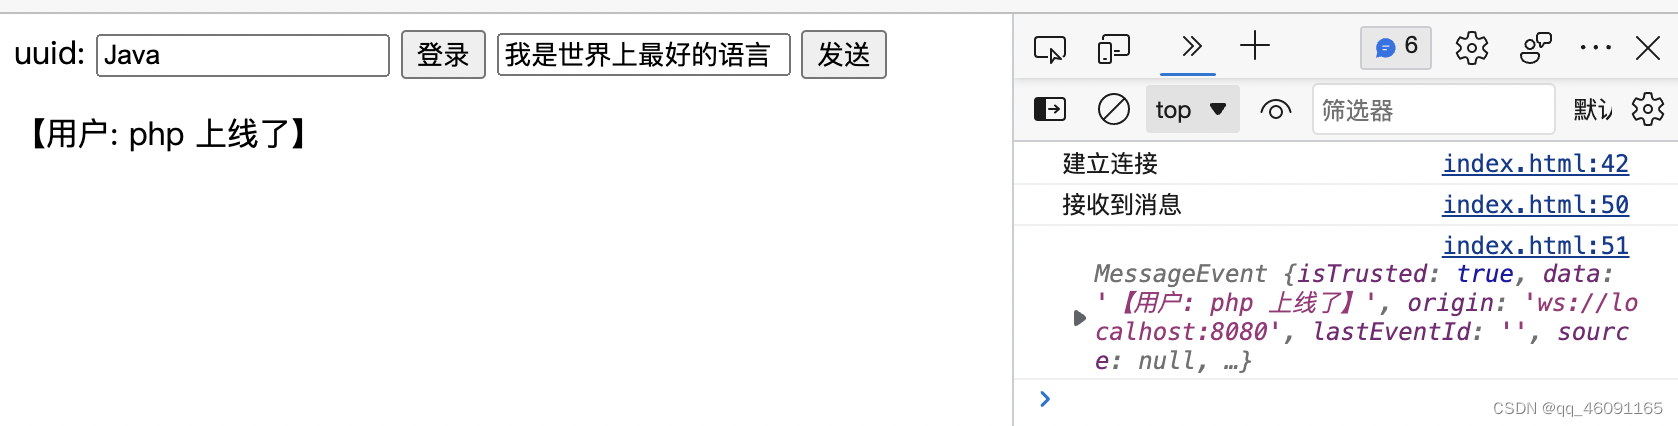
function sendMsg(){
var body = document.getElementById("send").value;
// 向服务器推送消息
webSocket.send(body)
}
</script>
3、效果展示
开启两个浏览器标签页分别访问,模拟两个用户登录

发送一条消息


 2万+
2万+


 被折叠的 条评论
为什么被折叠?
被折叠的 条评论
为什么被折叠?
 到【灌水乐园】发言


