


1.简易spring boot项目创建
controller层 service层 mapper层 pojo层创建

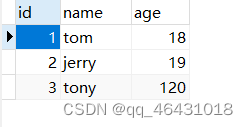
数据库表一张
pom文件添加两个依赖
        <!--使用POI读取文件-->
        <dependency>
            <groupId>org.apache.poi</groupId>
            <artifactId>poi</artifactId>
            <version>3.17</version>
        </dependency>
        <dependency>
            <groupId>org.apache.poi</groupId>
            <artifactId>poi-ooxml</artifactId>
            <version>3.17</version>
        </dependency>
2.编写pojo层
我用的lombok插件(使用方法很简单,哪里都有讲解)
@Data
@NoArgsConstructor
@AllArgsConstructor
@Accessors(chain = true)
public class StudentInformation implements Serializable {

    private Long id;
    private String name;
    private  Integer age;
}
3.编写mapper层
@Mapper
public interface StudentMapper {

    @Select("select * from student_information")
    List<StudentInformation> selectList();

}
4.编写service层
package com.st.service.impl;

import com.st.mapper.StudentMapper;
import com.st.pojo.StudentInformation;
import com.st.service.StudentService;
import org.apache.poi.hssf.usermodel.*;
import org.apache.poi.ss.usermodel.CellStyle;
import org.apache.poi.ss.usermodel.HorizontalAlignment;
import org.apache.poi.ss.usermodel.VerticalAlignment;
import org.apache.poi.ss.util.CellRangeAddress;
import org.springframework.beans.factory.annotation.Autowired;
import org.springframework.stereotype.Service;

import java.io.File;
import java.io.FileOutputStream;
import java.util.List;


@Service
public class StudentServiceImpl implements StudentService {

    @Autowired
    private StudentMapper studentMapper;


    public String createExcel() {
        //第一步创建workbook
        HSSFWorkbook workbook = new HSSFWorkbook();

        //第二步创建sheet TODO 不知道这个的作用
        HSSFSheet sheet = workbook.createSheet("基本信息栏");//相当于定义一个白板吧,excel表的左下方就是一个sheet 一个excel可以有多个sheet

        //第三步创建行,添加表头0行
        sheet.addMergedRegion(new CellRangeAddress(0, 0, 0, 2));
        HSSFRow row = sheet.createRow(0);


        //设置格式(水平垂直都居中)
        HSSFCellStyle style = workbook.createCellStyle();
        style.setAlignment(HorizontalAlignment.CENTER);;//水平居中
        style.setVerticalAlignment(VerticalAlignment.CENTER);//垂直居中

        HSSFCell cell1 = row.createCell(0);
        cell1.setCellValue("学生信息表");
        cell1.setCellStyle(style);

        HSSFRow row1 = sheet.createRow(1);

        //第四步创建单元格
        HSSFCell cell = row1.createCell(0);
        cell.setCellValue("学生id");
        cell.setCellStyle(style);

        cell = row1.createCell(1);
        cell.setCellValue("姓名");
        cell.setCellStyle(style);

        cell=row1.createCell(2);
        cell.setCellValue("年龄");
        cell.setCellStyle(style);

        //第五步插入数据
        List<StudentInformation> informations = studentMapper.selectList();
        for (int i=0;i<informations.size();i++){
            //创建行
            row = sheet.createRow(i+2);
            //创建单元格并添加数据
            HSSFCell cell2 = row.createCell(0);
            cell2.setCellStyle(style);
            cell2.setCellValue(informations.get(i).getId());

            cell2 = row.createCell(1);
            cell2.setCellStyle(style);
            cell2.setCellValue(informations.get(i).getName());

            cell2=row.createCell(2);
            cell2.setCellStyle(style);
            cell2.setCellValue(informations.get(i).getAge());
        }

       try {
           File file = new File("E:/project3/excel/学生信息表.xls");
           if (!file.exists()){
               FileOutputStream fileOutputStream = new FileOutputStream("E:/project3/excel/学生信息表.xls");
               workbook.write(fileOutputStream);
               fileOutputStream.close();
           }else {
               FileOutputStream fileOutputStream = new FileOutputStream("E:/project3/excel/学生信息表(1).xls");
               workbook.write(fileOutputStream);
               fileOutputStream.close();
           }
       }catch (Exception e){
           e.printStackTrace();
       }finally {
           System.out.println("文件生成成功");
           return "文件生成成功";

       }

    }
}
5.编写controller层
package com.st.controller;

import com.st.pojo.StudentInformation;
import com.st.service.impl.StudentServiceImpl;
import org.springframework.beans.factory.annotation.Autowired;
import org.springframework.stereotype.Controller;
import org.springframework.web.bind.annotation.*;

import java.util.List;

@Controller
//@CrossOrigin
public class StudentController {
    @Autowired
    private StudentServiceImpl studentService;

    @PostMapping(value = "/createExcel")
    public String createExcel(){
        return studentService.createExcel();
    }

}
6.yml文件内容
server:
  port: 8888
spring:
  datasource:
    username: root
    password: root
    url: jdbc:mysql://localhost:3306/student?serverTimezone=Asia/Shanghai
    driver-class-name: com.mysql.cj.jdbc.Driver
mybatis-plus:
  type-aliases-package: com.st.pojo
  #将所有的映射文件全部加载
  mapper-locations: classpath:/mappers/*.xml
  #开启驼峰映射
  configuration:
    map-underscore-to-camel-case: true
7.测试
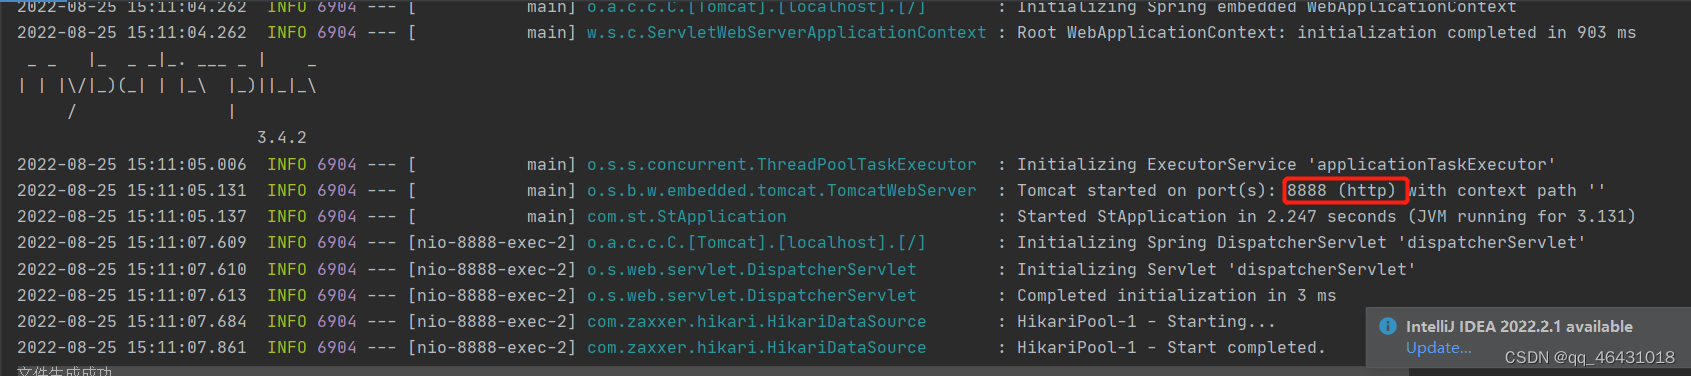
(1)启动服务
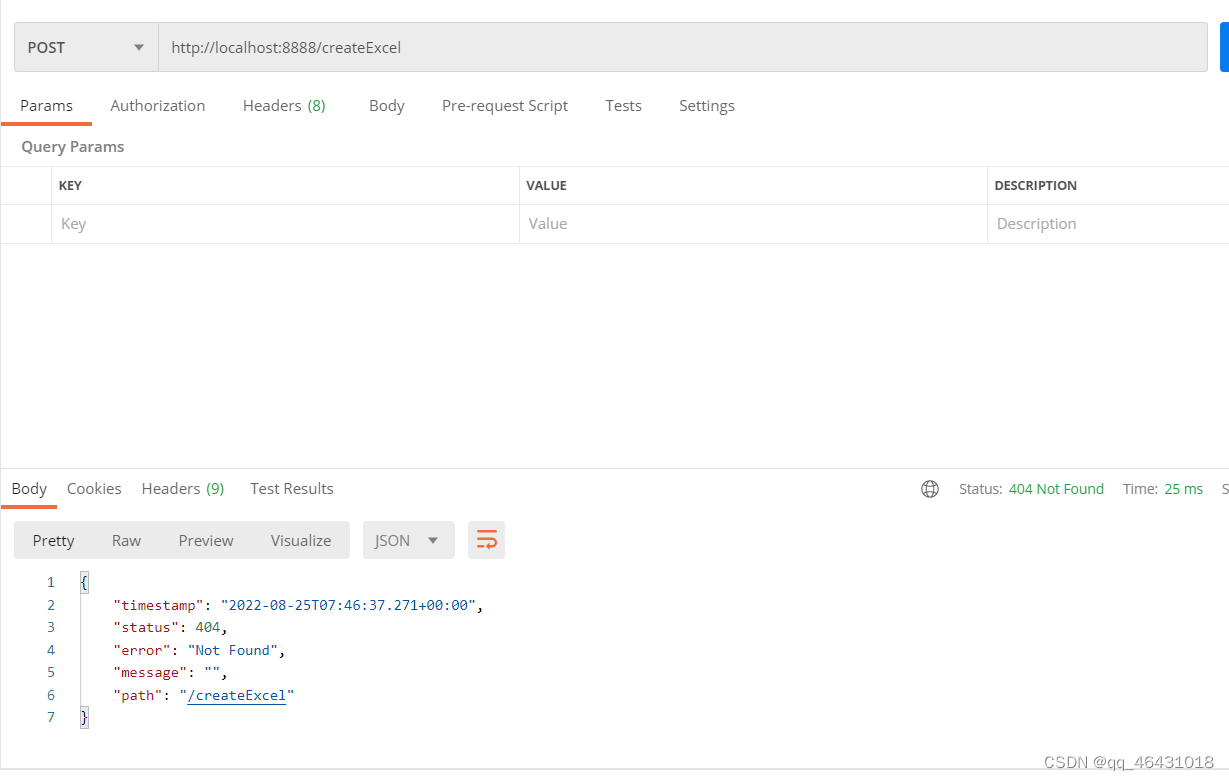
(2)postman调用接口
不用担心404问题,只要控制台输出文件上传成功字样,到相应的位置找到文件即可

8.结果
一个简单的小功能就实现了


 128
128


 被折叠的 条评论
为什么被折叠?
被折叠的 条评论
为什么被折叠?
 到【灌水乐园】发言


