


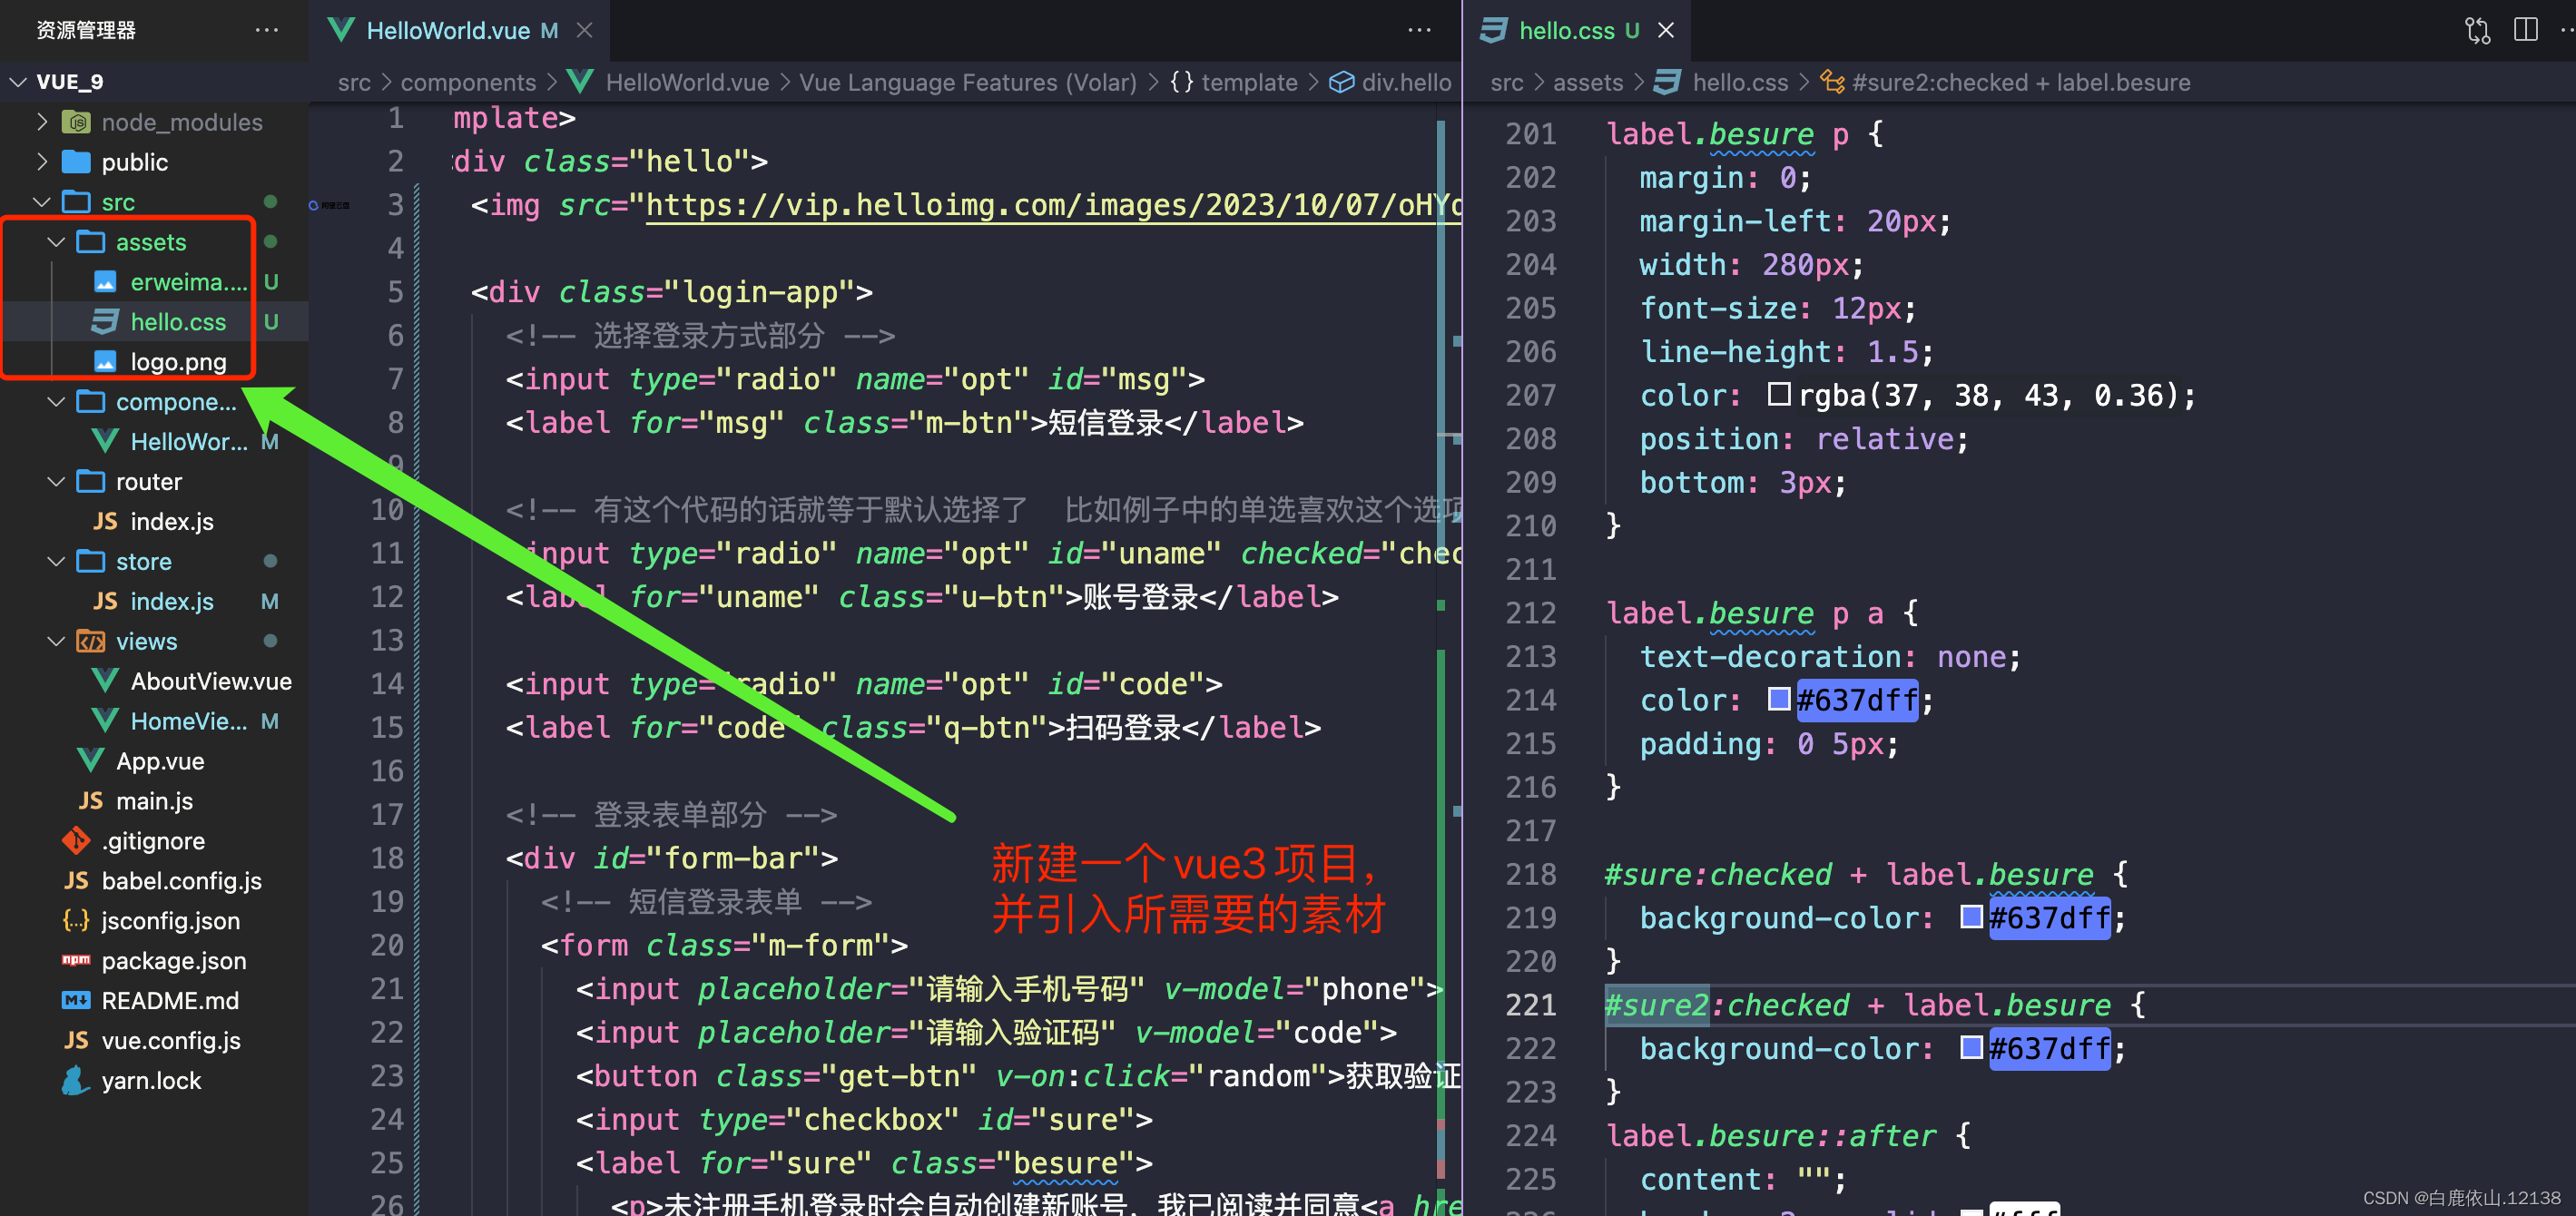
HelloWorld.vue源码:
<template>
  <div class="hello">
    <img src="https://vip.helloimg.com/images/2023/10/07/oHYqbE.png" class="logo">

    <div class="login-app">
      <!-- 选择登录方式部分 -->
      <input type="radio" name="opt" id="msg">
      <label for="msg" class="m-btn">短信登录</label>

      <!-- 有这个代码的话就等于默认选择了  比如例子中的单选喜欢这个选项有checked="checked" 所以喜欢这个选项是默认地被选中了 -->
      <input type="radio" name="opt" id="uname" checked="checked">
      <label for="uname" class="u-btn">账号登录</label>

      <input type="radio" name="opt" id="code">
      <label for="code" class="q-btn">扫码登录</label>

      <!-- 登录表单部分 -->
      <div id="form-bar">
        <!-- 短信登录表单 -->
        <form class="m-form">
          <input placeholder="请输入手机号码" v-model="phone">
          <input placeholder="请输入验证码" v-model="code">
          <button class="get-btn" v-on:click="random">获取验证码</button>
          <input type="checkbox" id="sure" v-model="sure" v-on:click="Sure">
          <label for="sure" class="besure">
            <p>未注册手机登录时会自动创建新账号,我已阅读并同意<a href="">服务协议</a>和<a href="">隐私权条款</a></p>
          </label>
          <button class="login-btn" @click="nextStep" v-bind:disabled="disabled">登录</button>
        </form>
        <!-- 账号登录表单 -->
        <form class="u-form">
          <input placeholder="请输入手机号码" v-model="iphone">
          <input type="password" placeholder="登录密码" v-model="password">
          <input type="checkbox" id="sure2"  v-model="sure" v-on:click="Sure">
          <label for="sure2" class="besure">
            <p>未注册手机登录时会自动创建新账号,我已阅读并同意<a href="">服务协议</a>和<a href="">隐私权条款</a></p>
          </label>
          <button class="login-btn" @click="finish"  v-bind:disabled="disabled">登录</button>
        </form>
        <!-- 扫码登录表单 -->
        <form class="q-form">
          <div class="code">
            <img src="../assets/erweima.png">
          </div>
        </form>
      </div>
    </div>
  </div>
</template>

<script>
import { getCurrentInstance, ref } from 'vue'
export default {
  name: 'HelloWorld',
  props: {
    msg: String
  },
  setup() {
    // 在 vue3 中放弃了 Object.defineProperty 来进行数据劫持,而改用了 Proxy 替代原本的方案。
    const { proxy } = getCurrentInstance()
    // v-model="phone" 只要使用了 v-model 就会在内部调用 input 元素中的 value 属性和 input 元素中的 input 事件
    const phone = ref('')
    const code = ref('')
    const iphone = ref('')
    const password = ref('')
    const arr = [1, 2, 3, 4, 5, 6, 7, 8, 9, 0]
    const sure = ref(false)
    const disabled = ref(true)
    // 判断是否选中协议,如果选中,则取消“禁用按钮”
    const Sure = () => {
      if (sure.value === false) {
        sure.value = true
      } else {
        sure.value = false
      }
      // console.log(sure.value);
      if (sure.value === true) {
        disabled.value = false
        // console.log(disabled.value);
      } else {
        disabled.value = true
      }
    }
    // 获取验证码箭头函数事件
    const random = () => {
      let str = ''
      for (let i = 0; i < 4; i++) {
        str += arr[Math.floor(Math.random() * arr.length)]
      }
      // 将str储存至vuex里面
      proxy.$store.commit('fn', str)
      alert('验证码为:' + str)
      return str
    }

    const nextStep = () => {
      // console.log(phone.value);
      // 验证手机号码和验证码是否为空
      if (phone.value.trim() === '' || code.value.trim() === '') {
        alert('手机号码和验证码不能为空!');
        return;
      }
      console.log(proxy.str);
      // 验证是否匹配store里的手机号码
      if (phone.value == proxy.$store.state.phone && code.value == proxy.$store.state.str) {
        alert('登录成功')
      } else if (code.value != proxy.$store.state.str) {
        alert('验证码错误')
      } else {
        alert('手机号未注册')
      }
    }
    const finish = () => {
      if (iphone.value.trim() === '' || password.value.trim() === '') {
        alert('手机号码和密码不能为空!');
        return;
      }
      // 验证是否匹配store里的手机号码和密码
      if (iphone.value == proxy.$store.state.iphone && password.value == proxy.$store.state.password) {
        alert('登录成功')
      } else {
        alert('登录失败')
      }
    }
    return {
      nextStep, finish, random, Sure, phone, code, arr, iphone, password, sure, disabled
    }
  },
}
</script>

<!-- Add "scoped" attribute to limit CSS to this component only -->
<style scoped>
@import '../assets/hello.css';
</style>
assets/hello.css源码:
* {
  margin: 0;
  padding: 0;
  /* 盒子模型会自动根据padding和border的值来调整content的值,就不需要手动调整。 */
  box-sizing: border-box;
}

.hello {
  /* background-color: #ecefff; */
  user-select: none;
  display: flex;
  /* 属性指定了弹性子元素在父容器中的位置。column:纵向排列。 */
  flex-direction: column;
  align-items: center;
  /* 内容对齐(justify-content)属性应用在弹性容器上,把弹性项沿着弹性容器的主轴线(main axis)对齐。 */
  /* flex-start:弹性项目向行头紧挨着填充。这个是默认值。第一个弹性项的main-start外边距边线被放置在该行的main-start边线,而后续弹性项依次平齐摆放。 */
  justify-content: flex-start;
  /* vh是css中的一个相对长度单位,相对于视窗的高度, 视窗被均分为100单位的vh,即1vh永远等于当前视窗高度的百分之一。 */
  height: 100vh;
  margin: 0;
}

.logo {
  width: 216px;
  margin-bottom: 60px;
}

.login-app {
  width: 348px;
  /* 意思是说,一个块元素,高度如果小于200px,那么这个块元素就不会再自动变小,而是保持200px不变。如果大于200px,那么不受限制 */
  min-height: 200px;
  margin-bottom: 60px;
  overflow: hidden;
  background-color: #fff;
  border-radius: 12px 12px 20px 20px;
  /* 避免空格换行缝隙影响布局 */
  font-size: 0;
}

/* input标签中,选择所有使用type="radio"的元素 */
input[type="radio"] {
  /* 单选框要默认隐藏 */
  display: none;
}

/* 选择所有 class="m-btn" class="u-btn" class="q-btn"的 <label> 元素 */
label.m-btn,
label.u-btn,
label.q-btn {
  /* 将块级元素于融合行内元素中,这样布局,子块级元素能够在同一行显示。 */
  display: inline-block;
  background-color: #f5f5f6;
  font-size: 18px;
  color: rgba(37, 38, 43, 0.36);
  padding: 16px;
  text-align: center;
  width: 33.3%;
  /* 鼠标经过或点击有小手样式 */
  cursor: pointer;
}

.m-btn {
  border-top-left-radius: 12px;
  border: 1px solid rgba(99, 125, 255, 0.24);
}

.u-btn {
  /* border-top-right-radius: 12px; */
  border: 1px solid rgba(99, 125, 255, 0.24);
  border-left: none;
  border-right: none;
}

.q-btn {
  border-top-right-radius: 12px;
  border: 1px solid rgba(99, 125, 255, 0.24);
}

/* 鼠标选中#msg,后改变checked输出元素之后的第一个 class='m-btn'元素的属性*/
#msg:checked + .m-btn,
#uname:checked + .u-btn,
#code:checked + .q-btn {
  background-color: #fff;
  color: #25262b;
  cursor: default;
}

/* 鼠标选中#msg,后改变checked输出元素之后的每一个 id='form-bar'元素的属性*/
#msg:checked ~ #form-bar {
  transform: translateX(0);
}

#uname:checked ~ #form-bar {
  transform: translateX(-348px);
}

#code:checked ~ #form-bar {
  transform: translateX(-692px);
}

#form-bar {
  display: flex;
  transition: transform 0.6s cubic-bezier(0.175, 0.885, 0.32, 1.275);
  font-size: 16px;
}

form {
  /* 要处理当 flex 容器空间不足时候,单个元素的收缩比例。当父元素的宽度小于子元素宽度之和并且超出了父元素的宽度时,flex-shrink 就会按照一定的比例进行收缩 */
  flex-shrink: 0;
  width: 100%;
  padding: 22px;
  position: relative;
  background-color: #ecefff;
}

/* 通用 input 样式 */
input {
  /* 表示使outline属性无效,使绘制于元素周围的一条线无效。 */
  outline: none;
  width: 100%;
  height: 46px;
  margin-bottom: 16px;
  background-color: rgba(39, 39, 41, 0.04);
  border: 1px solid transparent;
  border-radius: 8px;
  font-size: 14px;
  padding: 1px 12px;
  color: #25262b;
}

/* 匹配input元素中被用户选中或处于高亮状态的部分 */
input::placeholder {
  color: rgba(102, 104, 113, 0.36);
}

input:focus {
  border: 1px solid rgba(99, 125, 255, 0.48);
  background-color: #fff;
}

.m-form .get-btn {
  padding: 4px 12px;
  border-radius: 6px;
  font-size: 14px;
  color: #637dff;
  background-color: transparent;
  border: 1px solid rgba(99, 125, 255, 0.24);
  position: absolute;
  right: 36px;
  margin: 8px 0;
}

.login-btn {
  width: 100%;
  height: 48px;
  border: none;
  border-radius: 10px;
  background: linear-gradient(129.12deg, #446dff, rgba(99, 125, 255, 0.75));
  color: #fff;
  font-size: 16px;
  margin-top: 16px;
  margin-bottom: 60px;
}

button {
  cursor: pointer;
}

.m-form #sure {
  display: none;
}
.m-form #sure2 {
  display: none;
}
.m-form label.besure {
  position: absolute;
  border: 2px solid rgba(132, 133, 141, 0.2);
  width: 16px;
  height: 16px;
  border-radius: 50%;
  cursor: pointer;
  left: 22px;
  bottom: 45px;
}

.u-form #sure2 {
  display: none;
}

.u-form label.besure {
  position: absolute;
  border: 2px solid rgba(132, 133, 141, 0.2);
  width: 16px;
  height: 16px;
  border-radius: 50%;
  cursor: pointer;
  left: 22px;
  bottom: 45px;
}

label.besure p {
  margin: 0;
  margin-left: 20px;
  width: 280px;
  font-size: 12px;
  line-height: 1.5;
  color: rgba(37, 38, 43, 0.36);
  position: relative;
  bottom: 3px;
}

label.besure p a {
  text-decoration: none;
  color: #637dff;
  padding: 0 5px;
}

#sure:checked + label.besure {
  background-color: #637dff;
}
#sure2:checked + label.besure {
  background-color: #637dff;
}
label.besure::after {
  content: "";
  border: 2px solid #fff;
  position: absolute;
  width: 6px;
  height: 3px;
  border-top: none;
  border-right: none;
  /* translate相对于自身平移-50%, -50%;rotate定义 2D 旋转,在参数中规定角度。 */
  transform: translate(-50%, -50%) rotate(-45deg);
  top: 45%;
  left: 50%;
}

#sure:not(:checked) ~ .login-btn {
  /* opacity 属性设置一个元素的透明度级别。 */
  opacity: 0.5;
  cursor: not-allowed;
}
#sure2:not(:checked) ~ .login-btn {
  /* opacity 属性设置一个元素的透明度级别。 */
  opacity: 0.5;
  cursor: not-allowed;
}
.code {
  width: 128px;
  height: 128px;
  box-shadow: 0px 0px 1px 1px rgba(28, 28, 32, 0.05),
    0px 8px 24px rgba(28, 28, 32, 0.12);
  padding: 8px;
  border-radius: 10px;
  position: absolute;
  transform: translate(-50%, -50%);
  top: 40%;
  left: 50%;
}

.code img {
  width: 100%;
}
store/index.js源码:
import { createStore } from 'vuex'

export default createStore({
  state: {
    iphone: 123456,
    phone: 123456,
    password: 123456,
    str:''
  },
  getters: {
  },
  mutations: {
    fn(state,payload){
      state.str = payload;
      // console.log(state.str);
    }
  },
  actions: {
  },
  modules: {
  }
})
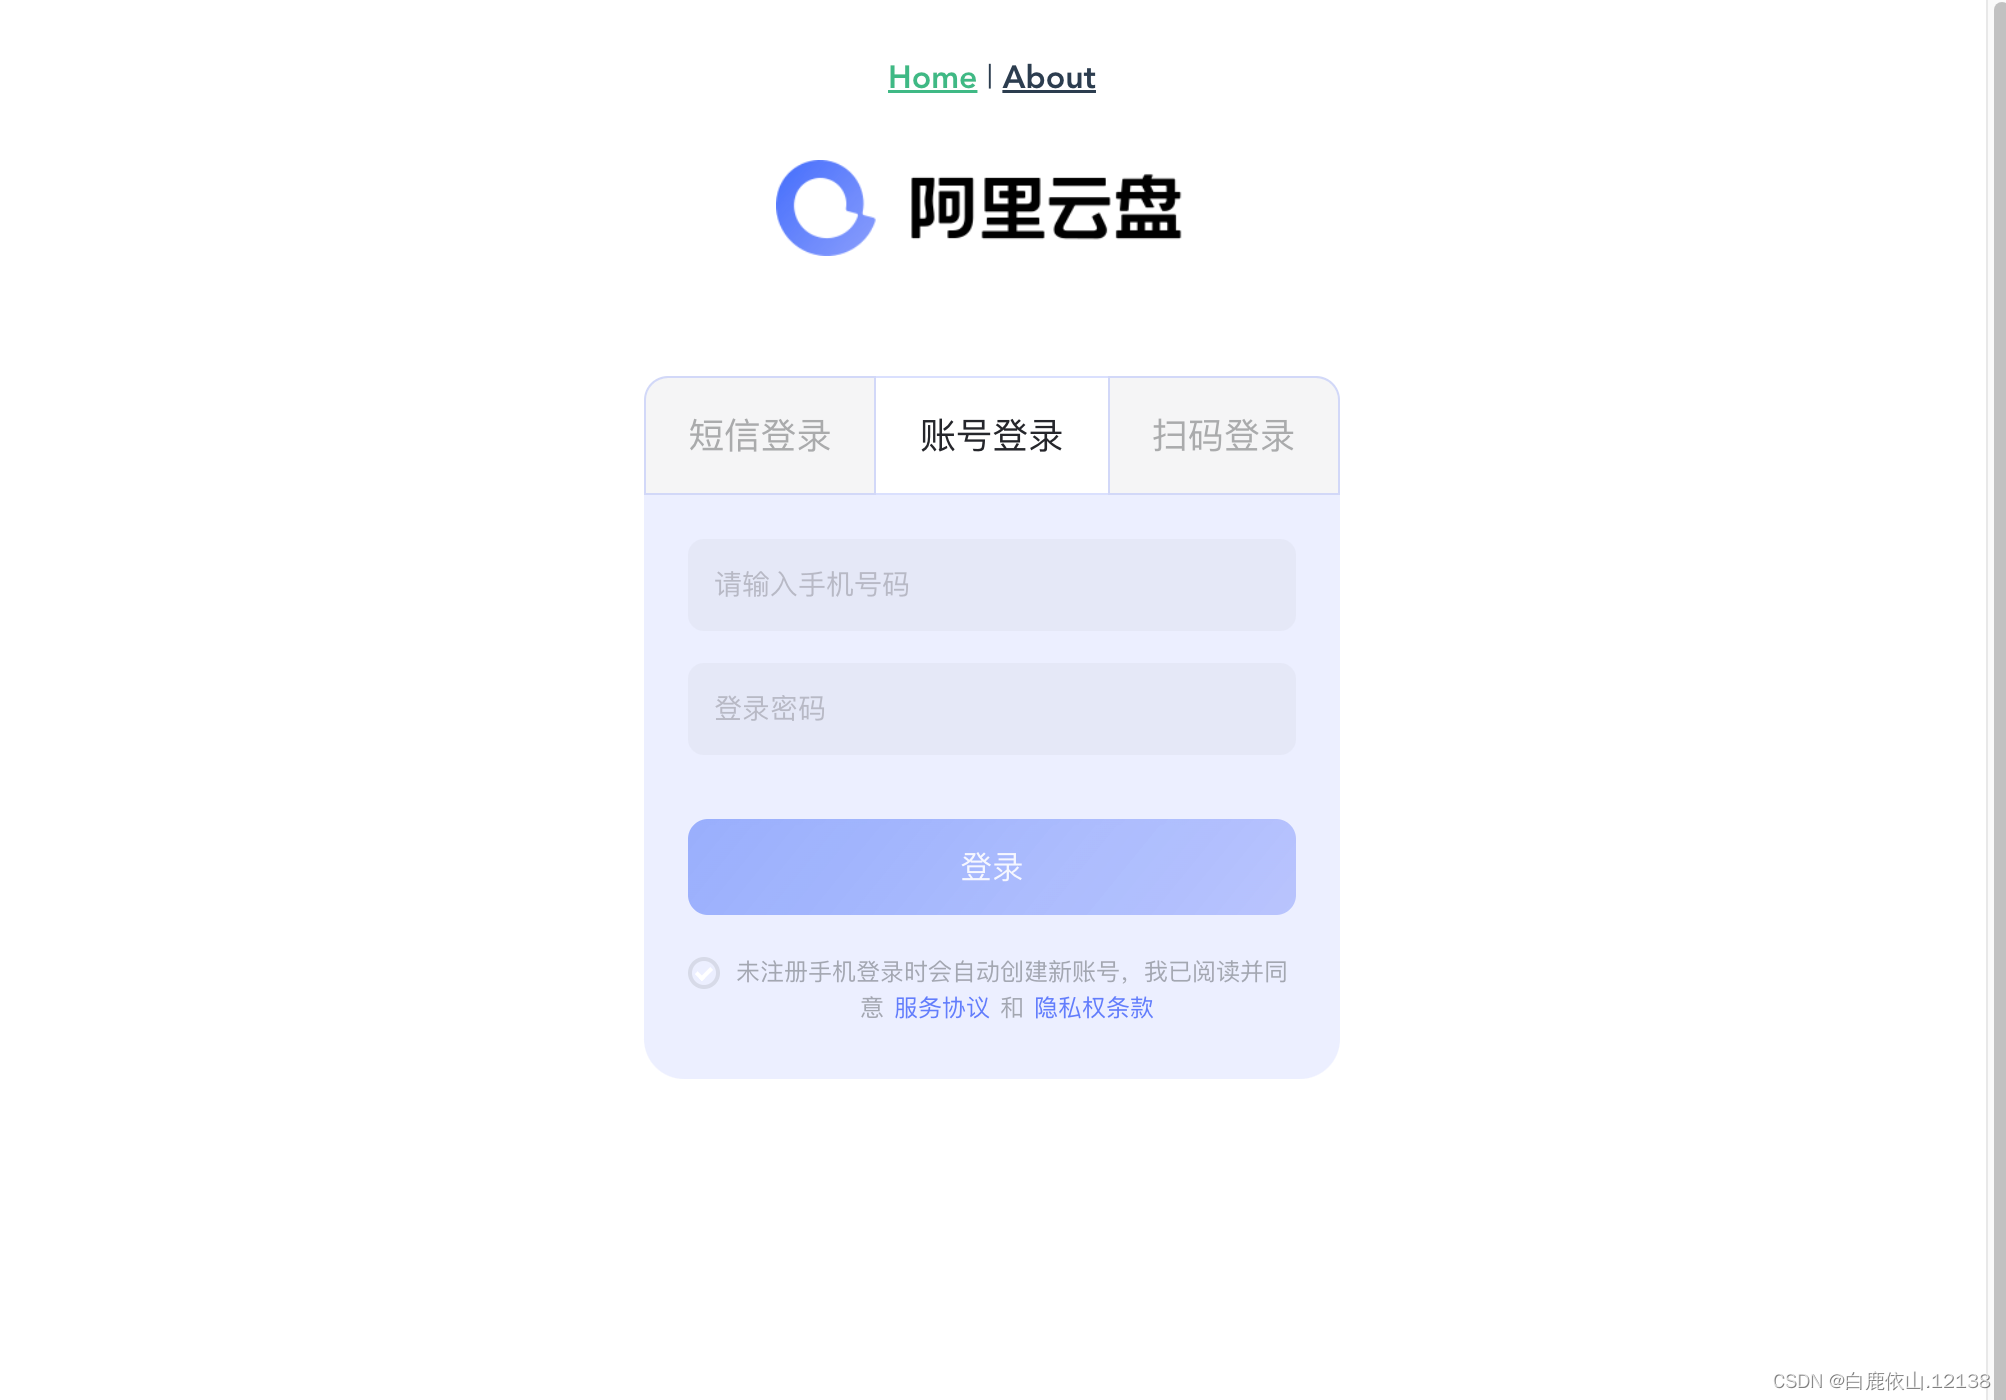
运行结果:


 5183
5183


 被折叠的 条评论
为什么被折叠?
被折叠的 条评论
为什么被折叠?
 到【灌水乐园】发言


