


SSM详细整合(有登录注册的例子)
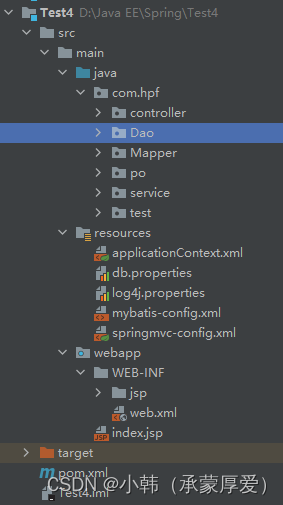
1.项目整体结构
2.环境搭建
- pom.xml (依赖)
① Spring框架所需jar包
② Spring MVC所需jar包
③ Mybatis框架所需jar包
④ Mybatis与Spring整个的中间jar包
⑤ 数据库驱动jar包
⑥ 数据源所需jar包
<?xml version="1.0" encoding="UTF-8"?>
<project xmlns="http://maven.apache.org/POM/4.0.0" xmlns:xsi="http://www.w3.org/2001/XMLSchema-instance"
  xsi:schemaLocation="http://maven.apache.org/POM/4.0.0 http://maven.apache.org/xsd/maven-4.0.0.xsd">
  <modelVersion>4.0.0</modelVersion>
  <groupId>org.example</groupId>
  <artifactId>Test4</artifactId>
  <version>1.0-SNAPSHOT</version>
  <packaging>war</packaging>
  <name>Test4 Maven Webapp</name>
  <!-- FIXME change it to the project's website -->
  <url>http://www.example.com</url>
  <properties>
    <project.build.sourceEncoding>UTF-8</project.build.sourceEncoding>
    <maven.compiler.source>1.7</maven.compiler.source>
    <maven.compiler.target>1.7</maven.compiler.target>
  </properties>

  <dependencies>
<!--Spring-->
    <dependency>
      <groupId>org.springframework</groupId>
      <artifactId>spring-context</artifactId>
      <version>5.3.18</version>
    </dependency>
    <dependency>
      <groupId>org.springframework</groupId>
      <artifactId>spring-web</artifactId>
      <version>5.3.18</version>
    </dependency>
    <dependency>
      <groupId>org.springframework</groupId>
      <artifactId>spring-tx</artifactId>
      <version>5.3.18</version>
    </dependency>
    <dependency>
      <groupId>org.springframework</groupId>
      <artifactId>spring-jdbc</artifactId>
      <version>5.3.18</version>
    </dependency>
    <dependency>
      <groupId>org.springframework</groupId>
      <artifactId>spring-webmvc</artifactId>
      <version>5.3.18</version>
    </dependency>
<!--mysql-connector-->
    <dependency>
      <groupId>mysql</groupId>
      <artifactId>mysql-connector-java</artifactId>
      <version>8.0.19</version>
    </dependency>
    <dependency>
      <groupId>com.mchange</groupId>
      <artifactId>c3p0</artifactId>
      <version>0.9.5.2</version>
    </dependency>
<!--    mybatis -->
    <dependency>
      <groupId>org.mybatis</groupId>
      <artifactId>mybatis</artifactId>
      <version>3.4.6</version>
    </dependency>
    <dependency>
      <groupId>org.mybatis</groupId>
      <artifactId>mybatis-spring</artifactId>
      <version>2.0.7</version>
    </dependency>
<!--servlet api-->
    <dependency>
      <groupId>javax.servlet</groupId>
      <artifactId>javax.servlet-api</artifactId>
      <version>3.0.1</version>
    </dependency>
    <dependency>
      <groupId>javax.servlet.jsp</groupId>
      <artifactId>javax.servlet.jsp-api</artifactId>
      <version>2.2.1</version>
    </dependency>
 <!-- jstl -->
    <dependency>
      <groupId>jstl</groupId>
      <artifactId>jstl</artifactId>
      <version>1.2</version>
    </dependency>
<!-- log -->
    <dependency>
      <groupId>log4j</groupId>
      <artifactId>log4j</artifactId>
      <version>1.2.17</version>
    </dependency>
      <dependency>
          <groupId>org.slf4j</groupId>
          <artifactId>slf4j-log4j12</artifactId>
          <version>1.7.25</version>
      </dependency>
<!--数据库连接池-->
    <dependency>
      <groupId>org.apache.commons</groupId>
      <artifactId>commons-dbcp2</artifactId>
      <version>2.1.1</version>
    </dependency>
    <dependency>
      <groupId>org.apache.commons</groupId>
      <artifactId>commons-pool2</artifactId>
      <version>2.4.2</version>
    </dependency>
<!--      Junit-->
      <dependency>
          <groupId>junit</groupId>
          <artifactId>junit</artifactId>
          <version>4.13.2</version>
      </dependency>
  </dependencies>

  <build>
    <finalName>Test4</finalName>
    <pluginManagement><!-- lock down plugins versions to avoid using Maven defaults (may be moved to parent pom) -->
      <plugins>
        <plugin>
          <artifactId>maven-clean-plugin</artifactId>
          <version>3.1.0</version>
        </plugin>
        <!-- see http://maven.apache.org/ref/current/maven-core/default-bindings.html#Plugin_bindings_for_war_packaging -->
        <plugin>
          <artifactId>maven-resources-plugin</artifactId>
          <version>3.0.2</version>
        </plugin>
        <plugin>
          <artifactId>maven-compiler-plugin</artifactId>
          <version>3.8.0</version>
        </plugin>
        <plugin>
          <artifactId>maven-surefire-plugin</artifactId>
          <version>2.22.1</version>
        </plugin>
        <plugin>
          <artifactId>maven-war-plugin</artifactId>
          <version>3.2.2</version>
        </plugin>
        <plugin>
          <artifactId>maven-install-plugin</artifactId>
          <version>2.5.2</version>
        </plugin>
        <plugin>
          <artifactId>maven-deploy-plugin</artifactId>
          <version>2.8.2</version>
        </plugin>
      </plugins>
    </pluginManagement>
    <resources>
      <resource>
        <!-- 设定主资源目录  -->
        <directory>src/main/resources</directory>
        <includes>
          <include>**/*.properties</include>
          <include>**/*.xml</include>
        </includes>
      </resource>
      <resource>
        <directory>src/main/java</directory>
        <includes>
          <include>**/*.properties</include>
          <include>**/*.xml</include>
        </includes>
        <filtering>true</filtering>
      </resource>
    </resources>
  </build>
</project>
- web.xml
<?xml version="1.0" encoding="UTF-8"?>
<web-app version="2.4"
         xmlns="http://java.sun.com/xml/ns/j2ee"
         xmlns:xsi="http://www.w3.org/2001/XMLSchema-instance"
         xsi:schemaLocation="http://java.sun.com/xml/ns/j2ee http://java.sun.com/xml/ns/j2ee/web-app_2_4.xsd">
<!-- Spring相关-->
  <context-param>
    <param-name>contextConfigLocation</param-name>
    <param-value>classpath:applicationContext.xml</param-value>
  </context-param>
<!--  监听器-->
  <listener>
    <listener-class>org.springframework.web.context.ContextLoaderListener</listener-class>
  </listener>
<!--前端控制器-->
  <servlet>
    <servlet-name>DispatcherServlet</servlet-name>
    <servlet-class>org.springframework.web.servlet.DispatcherServlet</servlet-class>
    <init-param>
      <param-name>contextConfigLocation</param-name>
      <param-value>classpath:springmvc-config.xml</param-value>
    </init-param>
    <load-on-startup>1</load-on-startup>
  </servlet>
  <servlet-mapping>
    <servlet-name>DispatcherServlet</servlet-name>
    <url-pattern>/</url-pattern>
  </servlet-mapping>
<!--  过滤器-->
  <filter>
    <filter-name>CharacterEncodingFilter</filter-name>
    <filter-class>org.springframework.web.filter.CharacterEncodingFilter</filter-class>
    <init-param>
      <param-name>encoding</param-name>
      <param-value>utf-8</param-value>
    </init-param>
  </filter>
  <filter-mapping>
    <filter-name>CharacterEncodingFilter</filter-name>
    <url-pattern>/*</url-pattern>
  </filter-mapping>
</web-app>
- 数据库常量配置文件db.properties
jdbc.driver=com.mysql.cj.jdbc.Driver
jdbc.url=jdbc:mysql://localhost:3306/db?useUnicode=true&characterEncoding=UTF-8&serverTimezone=GMT%2B8
jdbc.username=root
jdbc.password=1234
jdbc.maxTotal=30
jdbc.maxIdle=10
jdbc.initialSize=5
- Spring配置文件applicationContext.xml
<?xml version="1.0" encoding="UTF-8"?>
<beans xmlns="http://www.springframework.org/schema/beans"
    xmlns:xsi="http://www.w3.org/2001/XMLSchema-instance"
    xmlns:aop="http://www.springframework.org/schema/aop"
    xmlns:tx="http://www.springframework.org/schema/tx"
    xmlns:context="http://www.springframework.org/schema/context"
    xsi:schemaLocation="http://www.springframework.org/schema/beans
    http://www.springframework.org/schema/beans/spring-beans-4.3.xsd
    http://www.springframework.org/schema/tx
    http://www.springframework.org/schema/tx/spring-tx-4.3.xsd
    http://www.springframework.org/schema/context
    http://www.springframework.org/schema/context/spring-context-4.3.xsd
    http://www.springframework.org/schema/aop
    http://www.springframework.org/schema/aop/spring-aop-4.3.xsd">
    <!-- 读取db.properties -->
    <context:property-placeholder
        location="classpath:db.properties" />
    <!-- 配置数据源 -->
    <bean id="dataSource"
        class="org.apache.commons.dbcp2.BasicDataSource">
        <property name="driverClassName" value="${jdbc.driver}" />
        <property name="url" value="${jdbc.url}" />
        <property name="username" value="${jdbc.username}" />
        <property name="password" value="${jdbc.password}" />
        <property name="maxTotal" value="${jdbc.maxTotal}" />
        <property name="maxIdle" value="${jdbc.maxIdle}" />
        <property name="initialSize" value="${jdbc.initialSize}" />
    </bean>
    <!-- 事务管理器,依赖于数据源 -->
    <bean id="transactionManager"
        class="org.springframework.jdbc.datasource.DataSourceTransactionManager">
        <property name="dataSource" ref="dataSource" />
    </bean>
    <!-- 开启事务注解 -->
    <tx:annotation-driven
        transaction-manager="transactionManager" />
    <!-- 配置MyBatis工厂SqlSessionFactory -->
    <bean id="sqlSessionFactory"
        class="org.mybatis.spring.SqlSessionFactoryBean">
        <!--注入数据源 -->
        <property name="dataSource" ref="dataSource" />
        <!--指定核MyBatis心配置文件位置 -->
        <property name="configLocation" value="classpath:mybatis-config.xml" />
    </bean>
    <!-- 配置mapper扫描器 -->
    <bean class="org.mybatis.spring.mapper.MapperScannerConfigurer">
        <property name="basePackage" value="com.hpf.Mapper" />
    </bean>
    <!-- 扫描Service -->
    <context:component-scan base-package="com.hpf.service" />
    </bean>

</beans>
在applicationContext.xml中,首先定义了读取 properties 文件的配置,然后配置了数据源,接下来配置了事务管理器并开启了事务注解,最后配置了 MyBatis 工厂来与 Spring 整合。其中, MyBatis 工厂的作用就是构建 SqISessionFactory ,它通过 mybatis - spring 包中提供的 orgmybatis spring . SqISessionFactoryBean 类来配置。通常,在配置时需要提供两个参数:一个是数据源,另一个是 MyBatis 的配置文件路径。这样 Spring 的 loC 容器就会在初始化 id 为sqISessionFactory 的 Bean 时解析 MyBatis 的配置文件,并与数据源一同保存到 Spring 的 Bean 中。
5. Mybatis的配置文件mybatis-config.xml
<?xml version="1.0" encoding="UTF-8" ?>
<!DOCTYPE configuration PUBLIC "-//mybatis.org//DTD Config 3.0//EN"
"http://mybatis.org/dtd/mybatis-3-config.dtd">
<configuration>
    <!-- 别名定义 -->
    <typeAliases>
        <package name="com.hpf.po" />
    </typeAliases>
</configuration>
- 视图解析器配置文件springmvc-config.xml
<beans xmlns="http://www.springframework.org/schema/beans"
  xmlns:xsi="http://www.w3.org/2001/XMLSchema-instance"
  xmlns:mvc="http://www.springframework.org/schema/mvc"
  xmlns:context="http://www.springframework.org/schema/context"
  xmlns:tx="http://www.springframework.org/schema/tx"
  xsi:schemaLocation="http://www.springframework.org/schema/beans
  http://www.springframework.org/schema/beans/spring-beans-4.3.xsd
  http://www.springframework.org/schema/mvc
  http://www.springframework.org/schema/mvc/spring-mvc-4.3.xsd
  http://www.springframework.org/schema/context
  http://www.springframework.org/schema/context/spring-context-4.3.xsd">
    <!-- 配置包扫描器,扫描@Controller注解的类 -->
    <context:component-scan base-package="com.hpf.controller" />
    <!-- 加载注解驱动 -->
    <mvc:annotation-driven />
    <!-- 配置视图解析器 -->
    <bean class="org.springframework.web.servlet.view.InternalResourceViewResolver">
        <property name="prefix" value="/WEB-INF/jsp/" />
        <property name="suffix" value=".jsp" />
    </bean>
</beans>
- 日志配置文件
# Global logging configuration
log4j.rootLogger=ERROR, stdout
# MyBatis logging configuration...
log4j.logger.com.itheima=DEBUG
# Console output...
log4j.appender.stdout=org.apache.log4j.ConsoleAppender
log4j.appender.stdout.layout=org.apache.log4j.PatternLayout
log4j.appender.stdout.layout.ConversionPattern=%5p [%t] - %m%n
3.SSM框架整合
用户注册和登录为例
- 在src目录下,创建com.hpf.po包,并在包中创建持久化类User.
package com.hpf.po;
public class User {
	private Integer id;
	private String name;
	private String password;
	private String phone;
	private String jobs;
	private String email;
	public Integer getId() {
		return id;
	}
	public void setId(Integer id) {
		this.id = id;
	}
	public String getName() {
		return name;
	}
	public void setName(String name) {
		this.name = name;
	}
	public String getPassword() {
		return password;
	}
	public void setPassword(String password) {
		this.password = password;
	}
	public String getPhone() {
		return phone;
	}
	public void setPhone(String phone) {
		this.phone = phone;
	}
	public String getJobs() {
		return jobs;
	}
	public void setJobs(String jobs) {
		this.jobs = jobs;
	}
	public String getEmail() {
		return email;
	}
	public void setEmail(String email) {
		this.email = email;
	}
	@Override
	public String toString() {
		return "User [id=" + id + ", name=" + name + ", password=" + password + ", phone=" + phone + ", jobs=" + jobs
				+ ", email=" + email + "]";
	}
}
- 在src目录下,创建com.hpf.Mapper包,并在包中创建接口文件UserMapper以及对应的映射文件UserMapper.xml。
UserMapper.java:
package com.hpf.Mapper;
import com.hpf.po.User;
public interface UserMapper {
	//用户登录
	int findOne(User user);
	//用户注册
	void addOne(User user);
	//注册时的重名检测
	User checkReg(String username);
}
UserMapper.xml:
<?xml version="1.0" encoding="UTF-8"?>
<!DOCTYPE mapper
PUBLIC "-//mybatis.org//DTD Mapper 3.0//EN"
"http://mybatis.org/dtd/mybatis-3-mapper.dtd">
<mapper namespace="com.hpf.Mapper.UserMapper">
	<select id="findOne" resultType="Integer">
		select count(*) from user where
		name=#{name} and password=#{password}
	</select>
	<update id="addOne">
		insert into user(name,password,phone,jobs,email) values(#{name},#{password},#{phone},#{jobs},#{email})
	</update>
	<select id="checkReg" resultType="com.hpf.po.User">
		select * from user where name=#{name}
	</select>
	<select id="findUserById" parameterType="Integer" resultType="User">
		select * from User where id=#{id}
	</select>
</mapper>
- 在src目录下,创建com.hpf.service包,并在包中创建接口文件UserService以及接口实现类UserServiceImpl。
UserService.java:
package com.hpf.service;
import com.hpf.po.User;
public interface UserService {
	int findOne(User user);
	void addOne(User user);
	User checkReg(String username);
}
UserServiceImpl.java:
package com.hpf.service;
import org.springframework.beans.factory.annotation.Autowired;
import org.springframework.stereotype.Service;
import com.hpf.Mapper.UserMapper;
import com.hpf.po.User;
import org.springframework.transaction.annotation.Transactional;
@Service
@Transactional
public class UserServiceImpl implements UserService {
	@Autowired
	private UserMapper userMapper;
	public int findOne(User user) {
		return userMapper.findOne(user);
	}
	public void addOne(User user) {
		userMapper.addOne(user);
//		int i=1/0;   //测试事务
	}
	public User checkReg(String username) {
		return userMapper.checkReg(username);
	}
}
使用了@Service注解来标识业务层的实现类,使用了@Transactional注解来标识类中的所有方法都纳入Spring的事务管理,并使用@Autowired注解将UserMapper接口对象注入到本类中,然后调用相应方法方法。
4. 在src目录下,创建com.hpf.controller包,并在包中创建用于处理页面请求的控制类UserContrller。
package com.hpf.controller;
import javax.servlet.http.HttpServletRequest;
import javax.servlet.http.HttpServletResponse;
import org.springframework.beans.factory.annotation.Autowired;
import org.springframework.stereotype.Controller;
import org.springframework.ui.Model;
import org.springframework.web.bind.annotation.RequestMapping;
import com.hpf.po.User;
import com.hpf.service.UserService;
@Controller
@RequestMapping("/user")
public class UserContrller {
	@Autowired
	private UserService userService;
	@RequestMapping("/golog")
	public String log() {
		return "log";
	}
	@RequestMapping("/login")
	public String log(User user, Model model) {
		int u = userService.findOne(user);
		if (u != 0) {
			model.addAttribute("msg","欢迎您,登录成功!");
		} else
			model.addAttribute("msg","登录失败,用户名或密码错误!");
		return "message";
	}
	@RequestMapping("/goreg")
	public String reg() {
		return "reg";
	}
	@RequestMapping("/register")
	 public String register(User user, HttpServletRequest request , HttpServletResponse response, Model model){
		if(userService.checkReg(user.getName())!=null){
			model.addAttribute("msg","注册失败,用户名已存在!");
		}else{
			userService.addOne(user);
			model.addAttribute("msg","欢迎您,注册成功!");
		}
		return "message";
	}
}
- 在WEB-INF目录下,创建一个jsp文件夹,在该目录下创建登录页面log.jsp、注册页面reg.jsp以及信息显示的页面文件message.jsp。
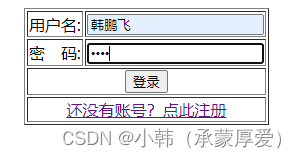
log.jsp:
<%@ page language="java" contentType="text/html; charset=UTF-8"
pageEncoding="UTF-8"%>
<!DOCTYPE html>
<html>
<head>
<meta charset="UTF-8">
<title>用户登录</title>
<style type="text/css">
div {
width: 300px;
height: 200px;
margin-left: auto;
margin-right: auto;
}
</style>
</head>
<body>
<div>
<form action=${pageContext.request.contextPath}/user/login method="post">
<table border="1">
<tr>
<td>用户名:</td>
<td><input type="text" name="name"></td></td>
</tr>
<tr>
<td>密 码:</td>
<td><input type="password" name="password"></td>
</tr>
<tr>
<td colspan="2" style="text-align: center;">
<input type="submit" value="登录"></td>
</tr>
<tr>
<td colspan="2" style="text-align: center;"><a
href="http://localhost:8080/user/goreg">还没有账号?点此注册</a></td>
</tr>
</table>
</form>
</div>
</body>
</html>
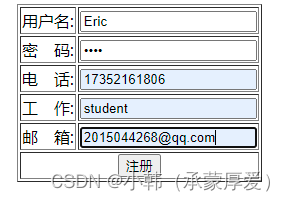
reg.jsp
<%@ page language="java" contentType="text/html; charset=UTF-8"
pageEncoding="UTF-8"%>
<!DOCTYPE html>
<html>
<head>
<meta charset="UTF-8">
<title>用户注册</title>
<style type="text/css">
div {
width: 300px;
height: 200px;
margin-left: auto;
margin-right: auto;
}
</style>
</head>
<body>
<div>
<form action=${pageContext.request.contextPath}/user/register method="post">
<table border="1">
<tr>
<td>用户名:</td>
<td><input type="text" name="name" ></td>
</tr>
<tr>
<td>密 码:</td>
<td><input type="password" name="password" ></td>
</tr>
<tr>
<td>电 话:</td>
<td><input type="text" name="phone" ></td>
</tr>
<tr>
<td>工 作:</td>
<td><input type="text" name="jobs" ></td>
</tr>
<tr>
<td>邮 箱:</td>
<td><input type="text" name="email" ></td>
</tr>
<tr>
<td colspan="2" style="text-align: center;"><input type="submit" value="注册"></td>
</tr>
</table>
</form>
</div>
</body>
</html>
message.jap:
<%--
  Created by IntelliJ IDEA.
  User: LENOVO
  Date: 2022/5/21
  Time: 11:04
  To change this template use File | Settings | File Templates.
--%>
<%@ page contentType="text/html;charset=UTF-8" language="java" %>
<html>
<head>
    <title>信息提示</title>
</head>
<body>
<h2><font color="#f00">${msg}</font></h2>
</body>
</html>
- 运行结果:
注册:
登录:
4.总结:
Spring+ Mybatis +SpringMVC的整合思路:
1.以Spring作为核心框架,数据持久化使用Mybatis完成,表现层使用SpringMVC
2.Spring提供对象管理、面向切面编程等实用功能
3.通过Spring提供的服务简化编码、降低开发难度、提高开发效率
MVC模式:
1.持久层—>mybatis:通过Spring 来管理持久层的 Mapper (相当于 dao 接口),来完成对数据库的操作。
2.业务层—>spring:通过Spring 来管理业务层的 service (通过调用 mapper 接口),通过spring的IOC和DI来实现完全的面向接口编程,降低类之间的耦合,并且使用spring AOP来控制事务处理。
3.表现层—>springMVC:通过Spring 来管理表现层的 Handler (通过调用 Service 接口),来实现流程跳转的控制。


 3万+
3万+


 被折叠的 条评论
为什么被折叠?
被折叠的 条评论
为什么被折叠?
 到【灌水乐园】发言


