


谷粒商城(五)
订单服务
1、环境搭建
1)、页面
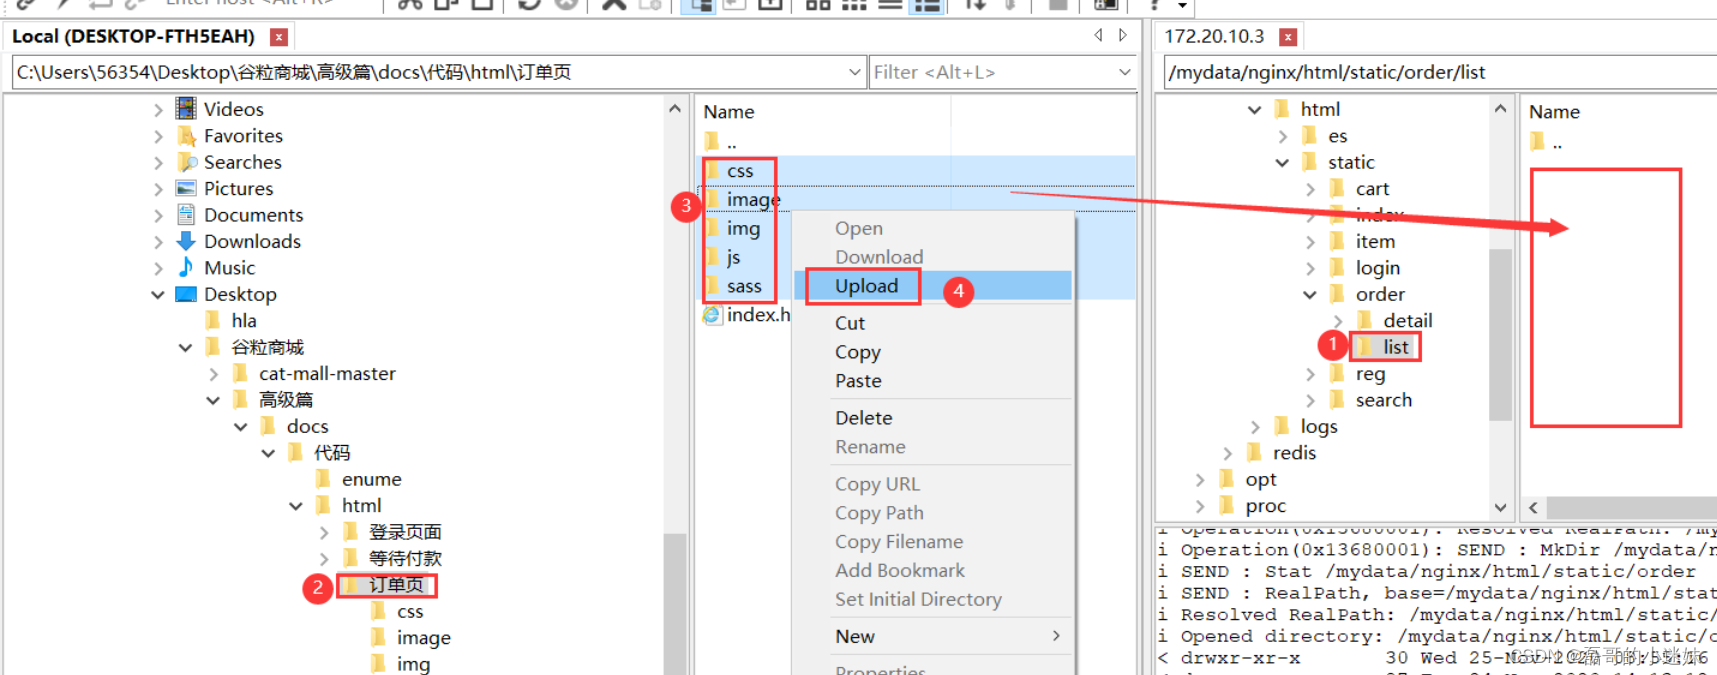
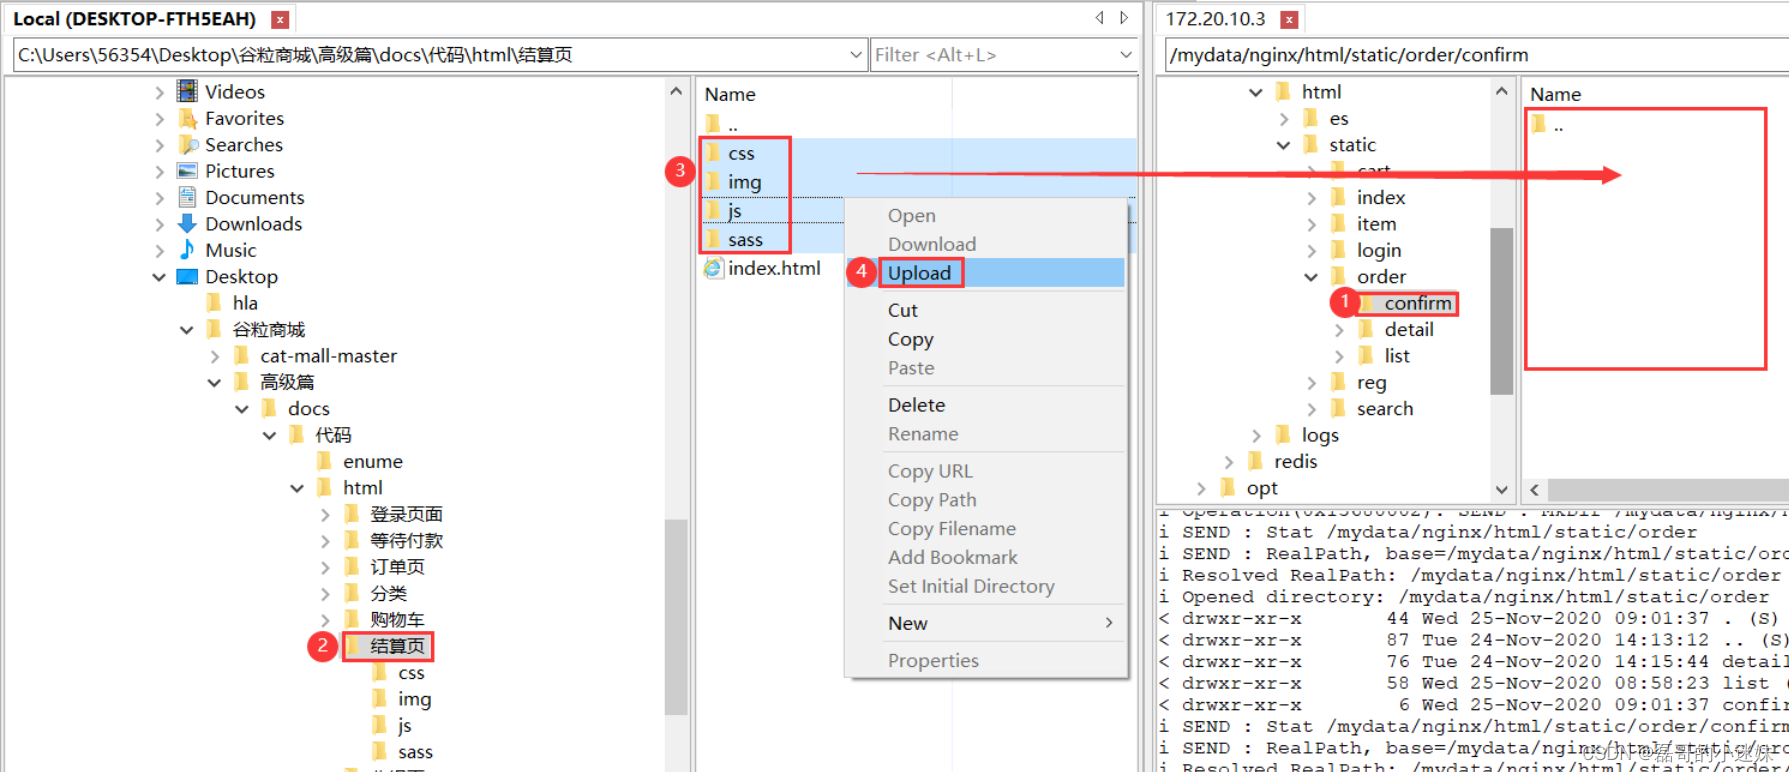
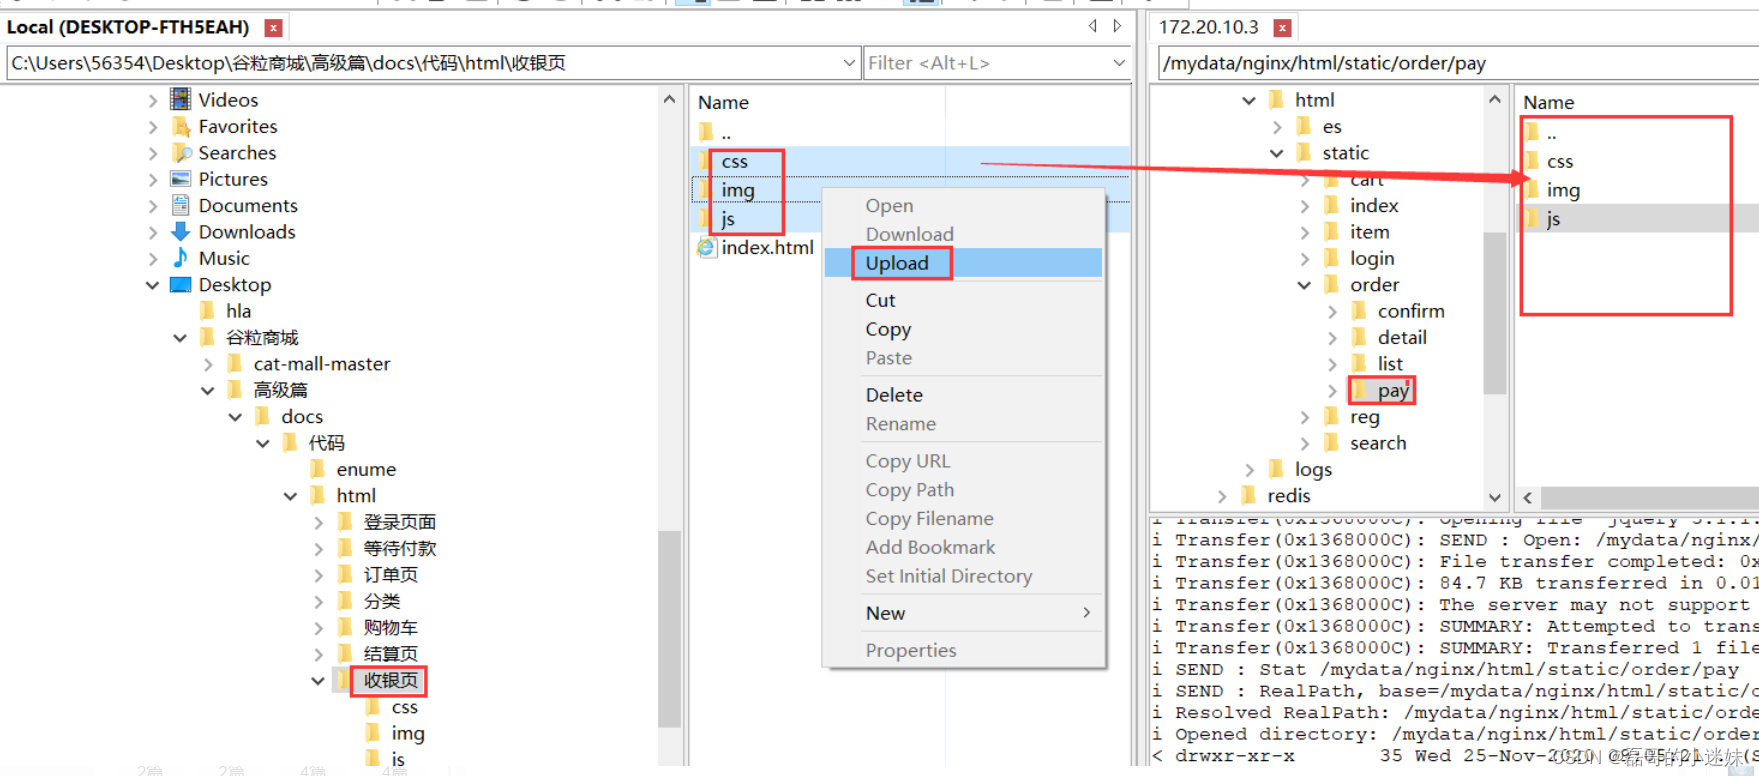
把静态资源放到虚拟机的 nginx 里
在 /mydata/nginx/html/static/ 目录先创建 order 文件夹,再分别创建文件夹 detail、list、confirm、pay,并把静态资源上传到这几个文件夹
detail
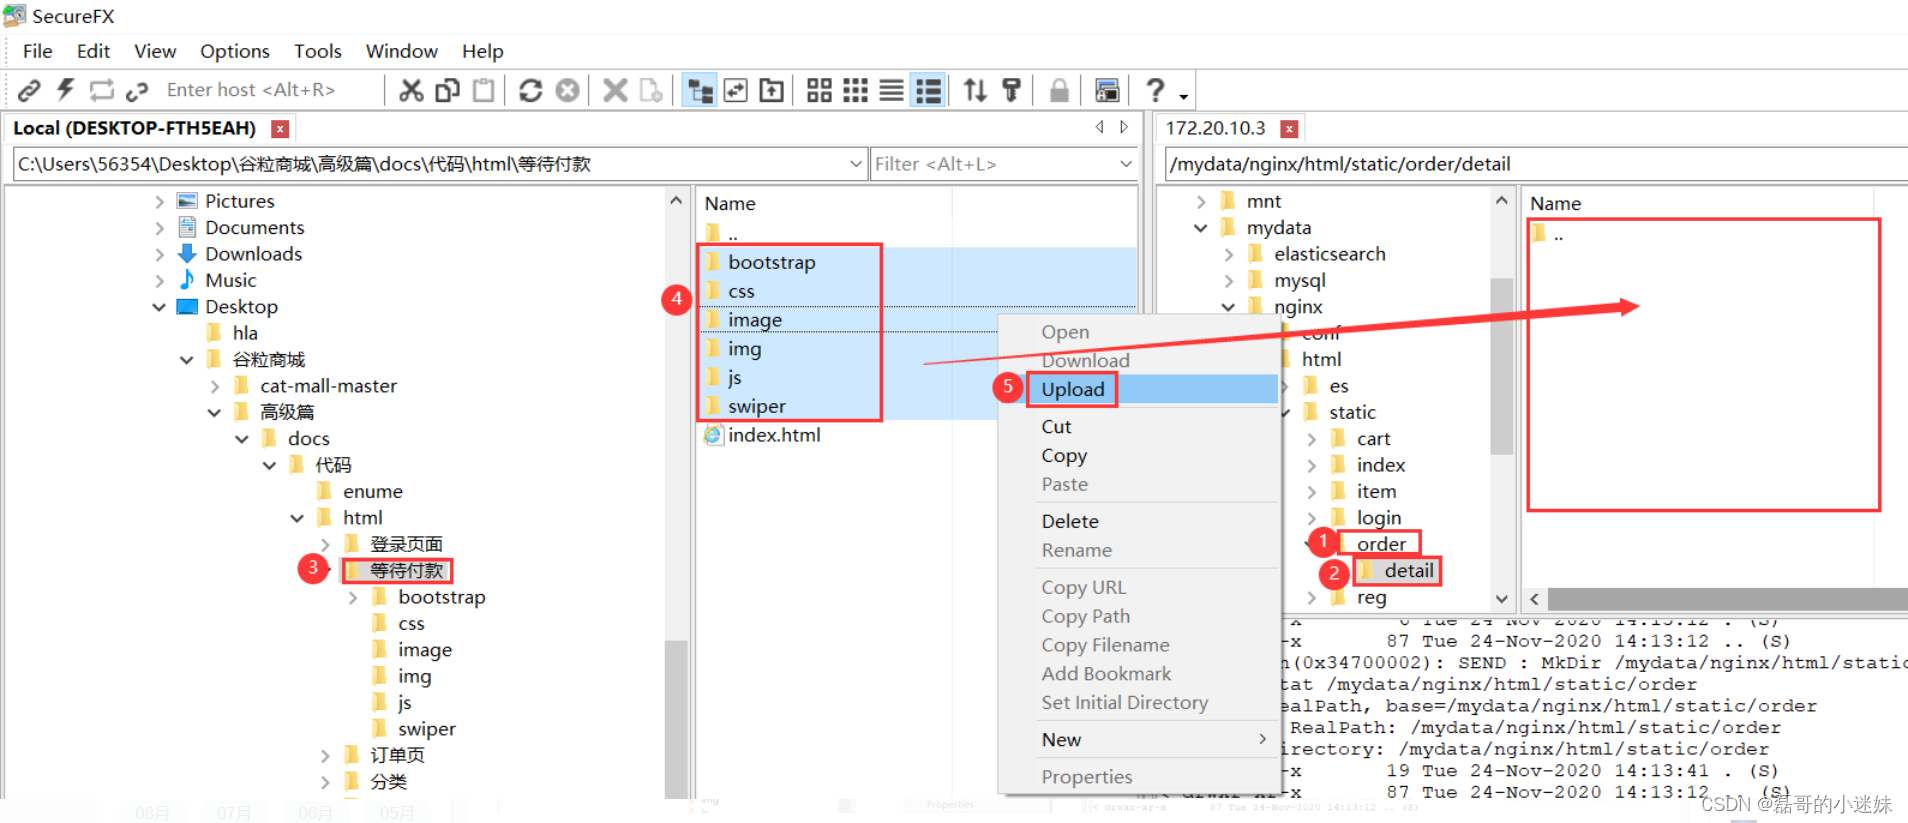
list
confirm
pay
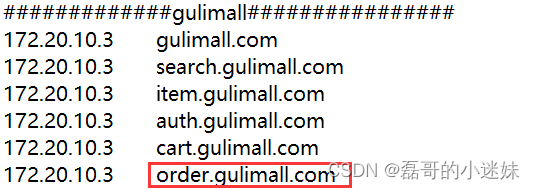
在C:\Windows\System32\drivers\etc\hosts文件里添加域名(把属性只读模式去掉,用记事本打开)
在gulimal-gateway添加路由
        - id: gulimall_order_route
          uri: lb://gulimall-order
          predicates:
            - Host=order.gulimall.com
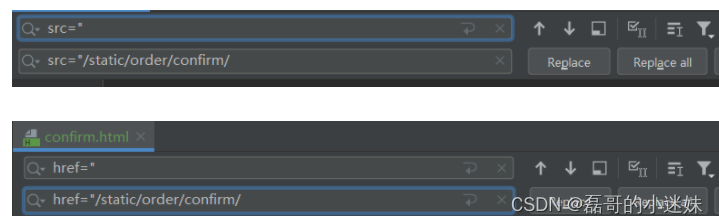
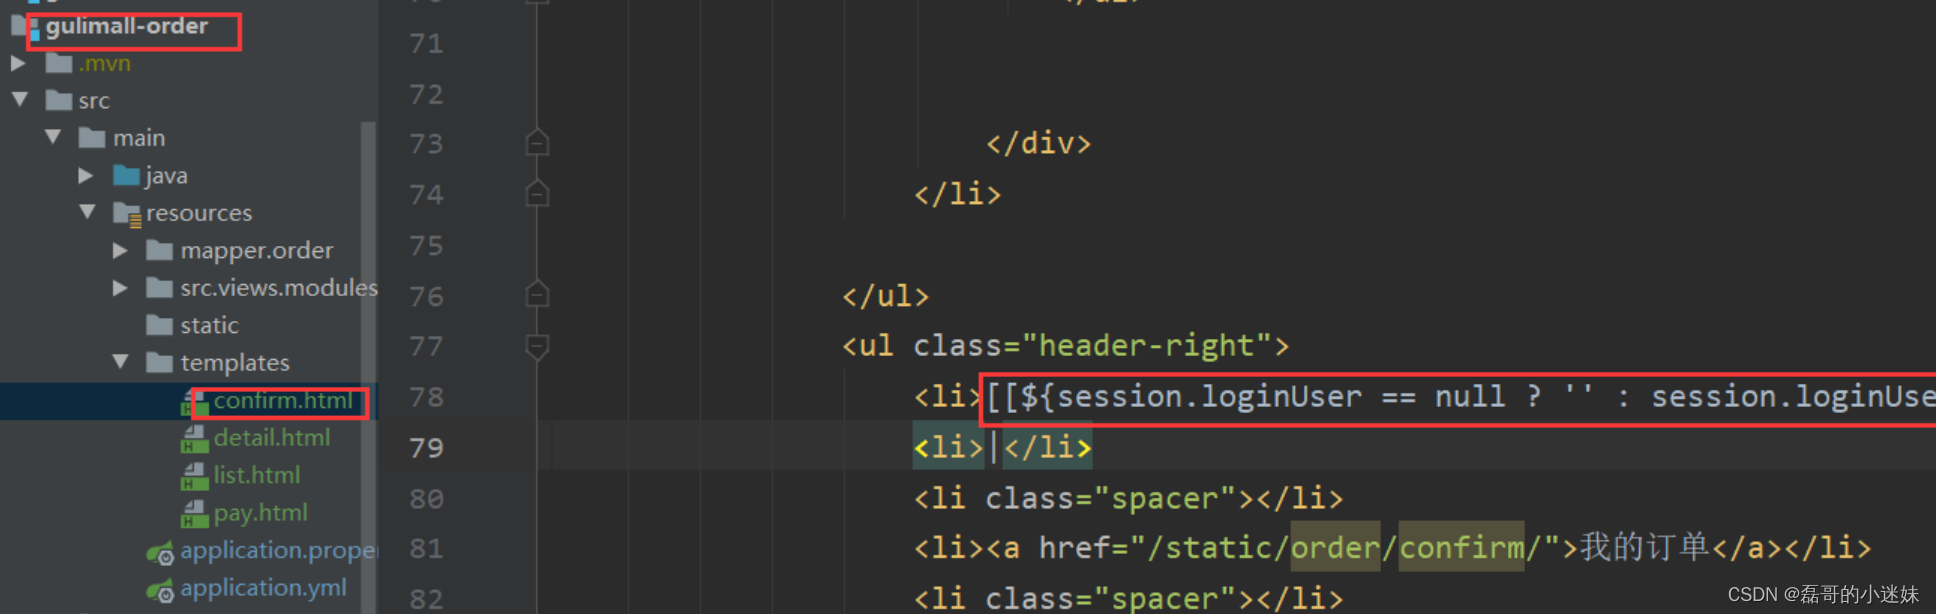
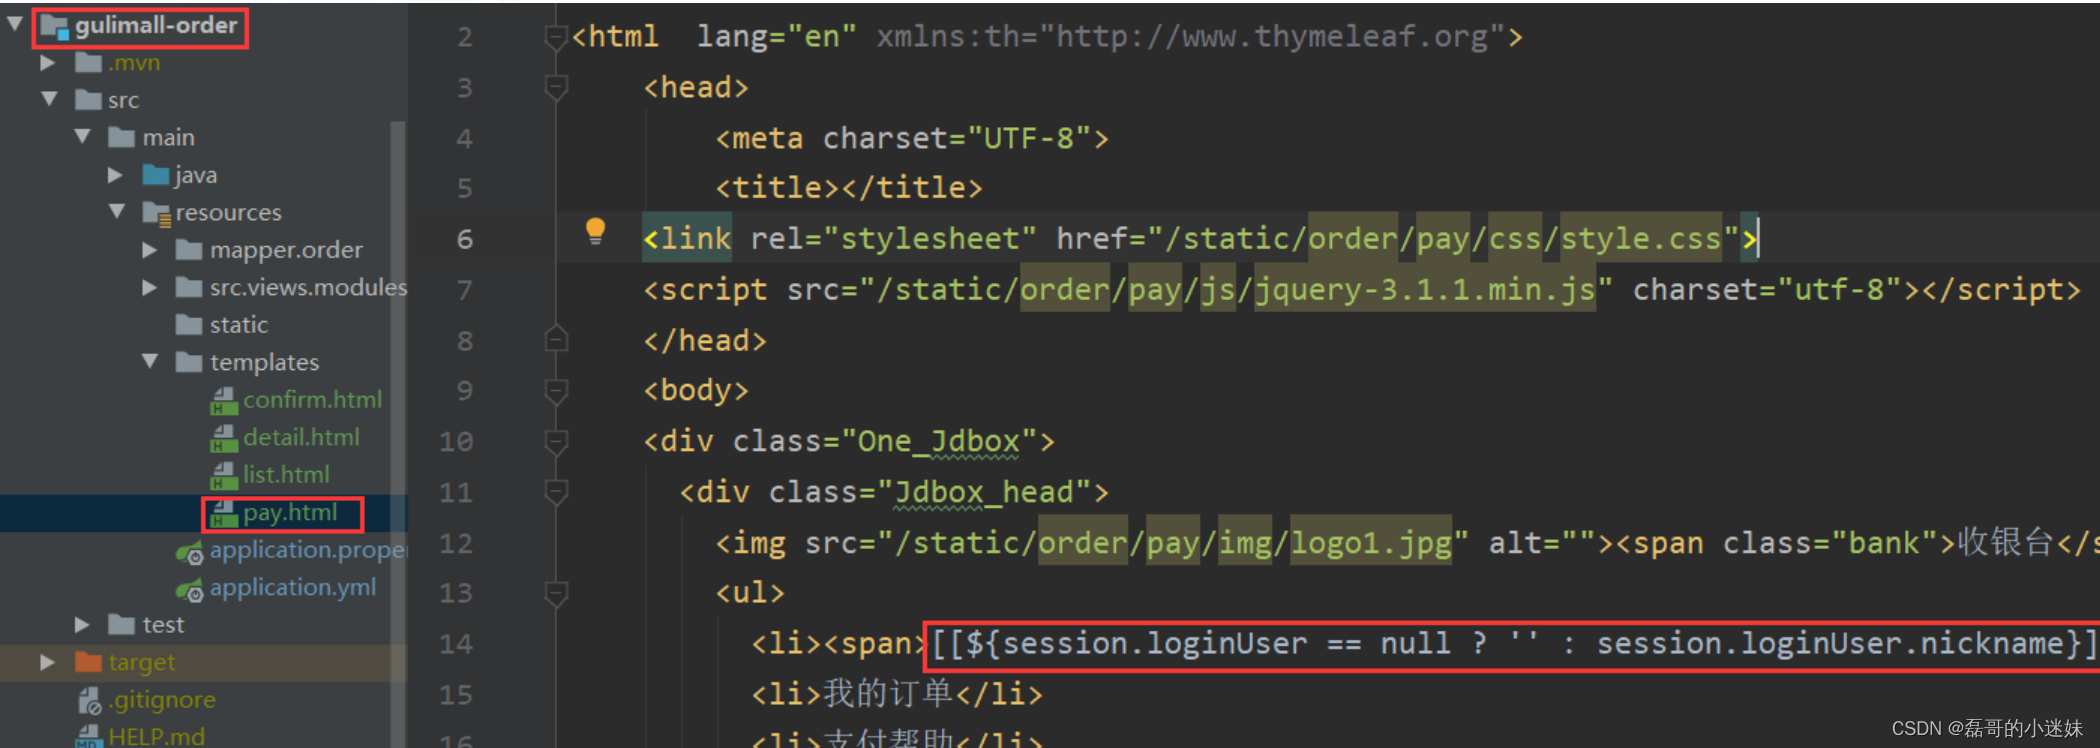
修改每个html的资源访问路径
加上thymeleaf模板空间
<!DOCTYPE html>
<html  lang="en" xmlns:th="http://www.thymeleaf.org">
confirm.html页面报错,搜素/*把它去掉即可

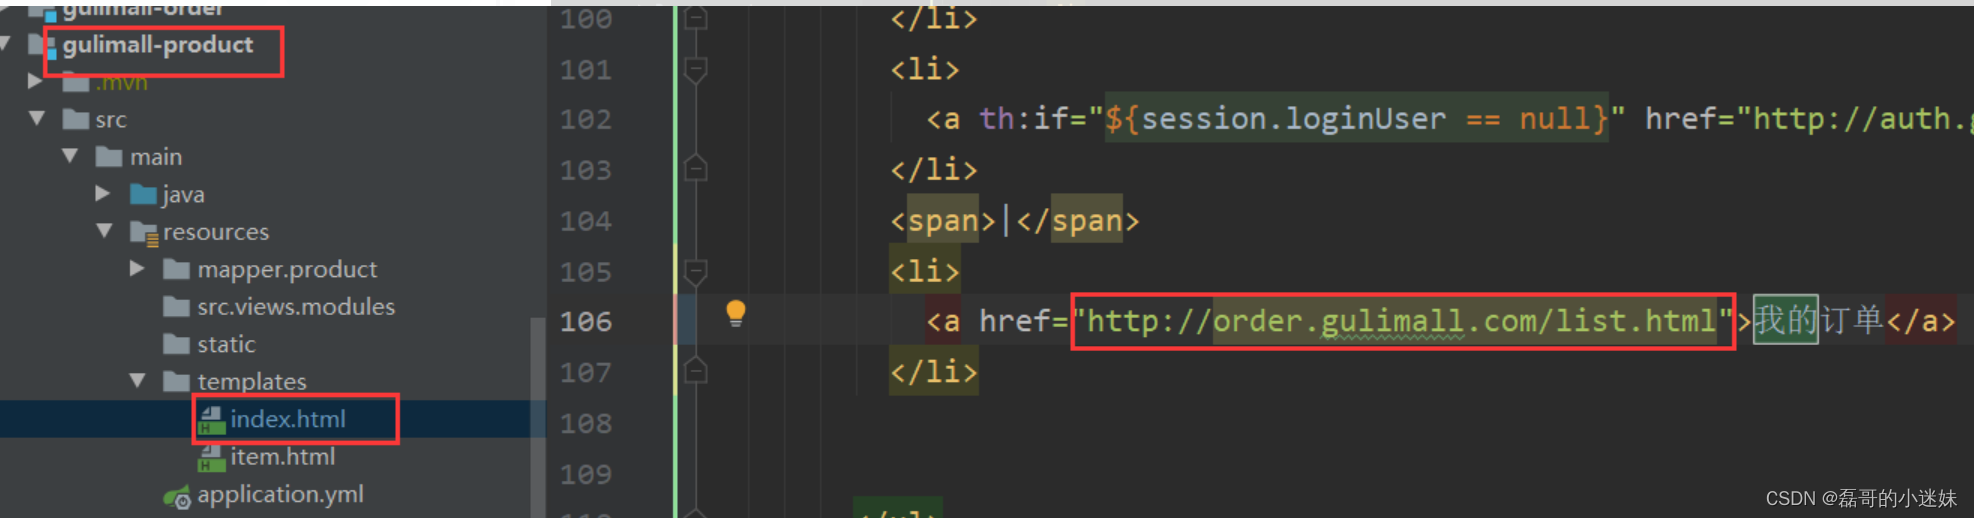
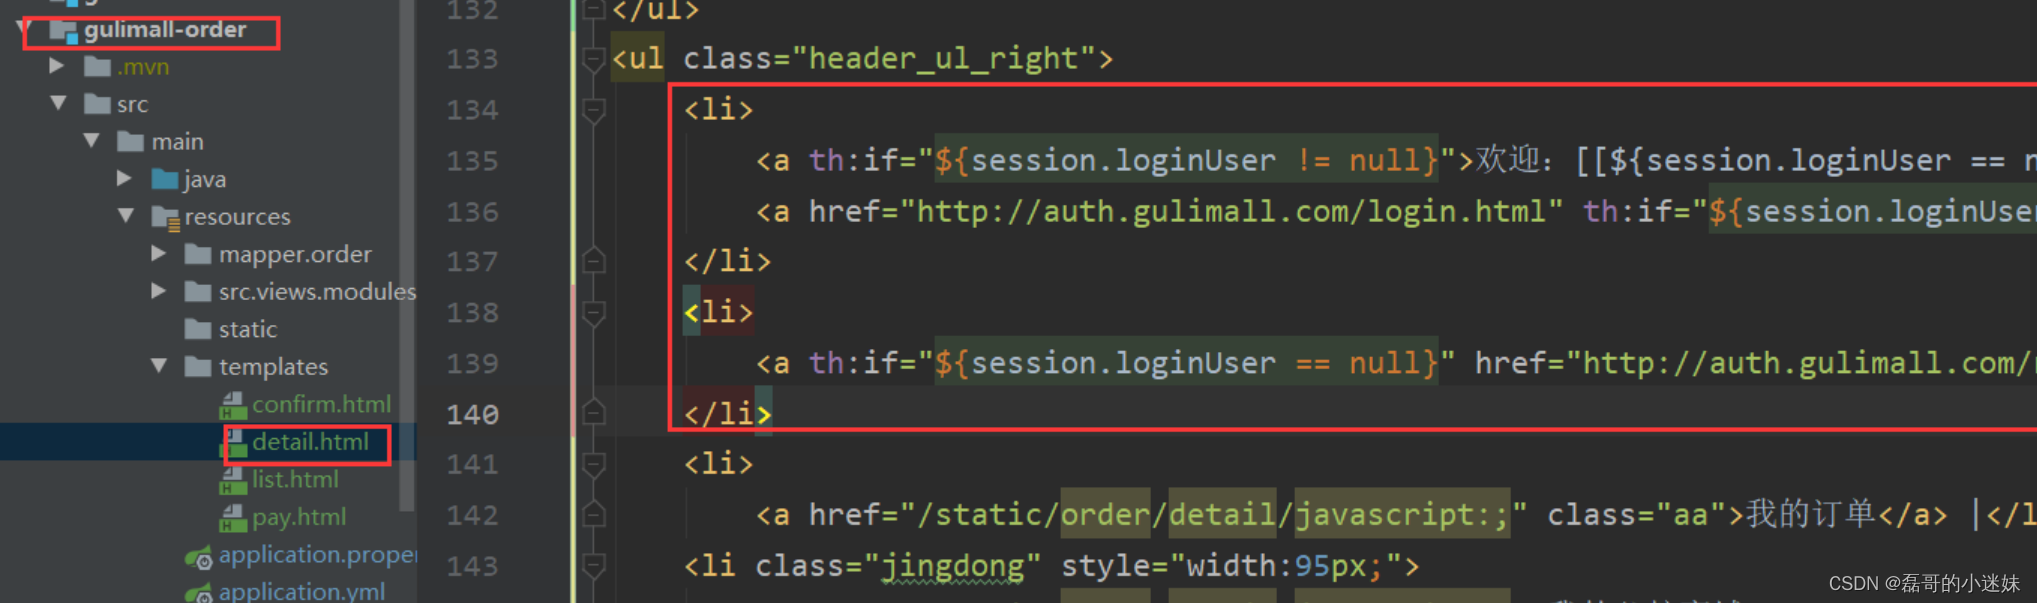
修改商城首页 、我的订单、用户登录 的链接地址
2)、代码
pom 文件
<dependency>
    <groupId>org.springframework.boot</groupId>
    <artifactId>spring-boot-starter-amqp</artifactId>
</dependency>

<!--引入redis-->
<dependency>
    <groupId>org.springframework.boot</groupId>
    <artifactId>spring-boot-starter-data-redis</artifactId>
    <!--不加载自身的 lettuce-->
    <exclusions>
        <exclusion>
            <groupId>io.lettuce</groupId>
            <artifactId>lettuce-core</artifactId>
        </exclusion>
    </exclusions>
</dependency>
<!--jedis-->
<dependency>
    <groupId>redis.clients</groupId>
    <artifactId>jedis</artifactId>
</dependency>

<!--模板引擎 thymeleaf-->
<dependency>
    <groupId>org.springframework.boot</groupId>
    <artifactId>spring-boot-starter-thymeleaf</artifactId>
</dependency>
common中有 springSession
<dependency>
    <groupId>org.springframework.session</groupId>
    <artifactId>spring-session-data-redis</artifactId>
    <version>2.3.1.RELEASE</version>
</dependency>
配置文件
spring:
  rabbitmq:
    host: localhost
    port: 5672
    virtual-host: /gulimall-order
    #开启消息抵达服务器确认
    publisher-confirms: true
    #开启发送端抵达队列确认
    publisher-returns: true
    #只要抵达队列,以异步发送优先回调我们这个returnConfirm
    template:
      mandatory: true
    #手动确认收货(ack)
    listener:
      simple:
        acknowledge-mode: manual
  datasource:
    username: root
    password: root
    url: jdbc:mysql://localhost:3306/gulimall_oms?useUnicode=true&characterEncoding=UTF-8&useSSL=false&serverTimezone=UTC
    driver-class-name: com.mysql.cj.jdbc.Driver
  redis:
    host: 127.0.0.1
    port: 6379
  thymeleaf:
    cache: false
  cloud:
    nacos:
      discovery:
        server-addr: 127.0.0.1:8848
  application:
    name: gulimall-order
springSession 的配置类 GulimallSessionConfig
/**
 * SpringSession整合子域
 * 以及redis数据存储为json
 */
@Configuration
public class GulimallSessionConfig {

    /**
     * 设置cookie信息
     * @return
     */
    @Bean
    public CookieSerializer CookieSerializer(){
        DefaultCookieSerializer cookieSerializer = new DefaultCookieSerializer();
        // 设置一个域名的名字
        cookieSerializer.setDomainName("localhost");
        // cookie的路径
        cookieSerializer.setCookieName("GULIMALLSESSION");
        return cookieSerializer;
    }

    /**
     * 设置json转换
     * @return
     */
    @Bean
    public RedisSerializer<Object> springSessionDefaultRedisSerializer() {
        // 使用jackson提供的转换器
        return new GenericJackson2JsonRedisSerializer();
    }

}
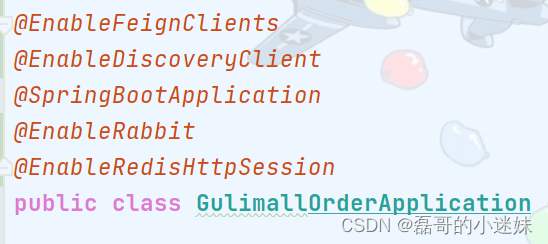
主启动类
@EnableDiscoveryClient
@SpringBootApplication
@EnableRabbit
@EnableRedisHttpSession
public class GulimallOrderApplication {
访问页面
@Controller
public class HelloController {
    @GetMapping("{page}.html")
    public String listPage(@PathVariable("page") String page){
        return page;
    }
}
2、订单登录拦截
用户的购物车数据是存放在redis,其中键是和user-key、userId 绑定,user-key 存放在cookie中,userId 是 session 中存放的用户对象的id
前面使用 SpringSession 是将登录用户放入session,改 session 所在的cookie 的domain范围,使得多个服务的浏览器页面可以共享此session信息
订单服务的页面使用前提一定是已经登录,添加拦截器
LoginUserInterceptor
/**
 * 访问订单服务的所有请求,必须先登录
 */
@Component
public class LoginUserInterceptor implements HandlerInterceptor {

    public static ThreadLocal<MemberEntity> threadLocalLoginUser = new ThreadLocal<>();

    @Override
    public boolean preHandle(HttpServletRequest request, HttpServletResponse response, Object handler) throws Exception {
        MemberEntity member = (MemberEntity) request.getSession().getAttribute(AuthServerConstant.LOGIN_USER);
        if (member != null){
            threadLocalLoginUser.set(member);
            return true;
        }else {
            request.getSession().setAttribute("msg","请先进行登录");
            response.sendRedirect("http://localhost:20000/login.html");
            return false;
        }
    }
}
配置拦截器 OrderWebConfiguration
@Configuration
public class OrderWebConfiguration implements WebMvcConfigurer {
    @Autowired
    LoginUserInterceptor loginUserInterceptor;

    @Override
    public void addInterceptors(InterceptorRegistry registry) {
        registry.addInterceptor(loginUserInterceptor).addPathPatterns("/**");
    }
}
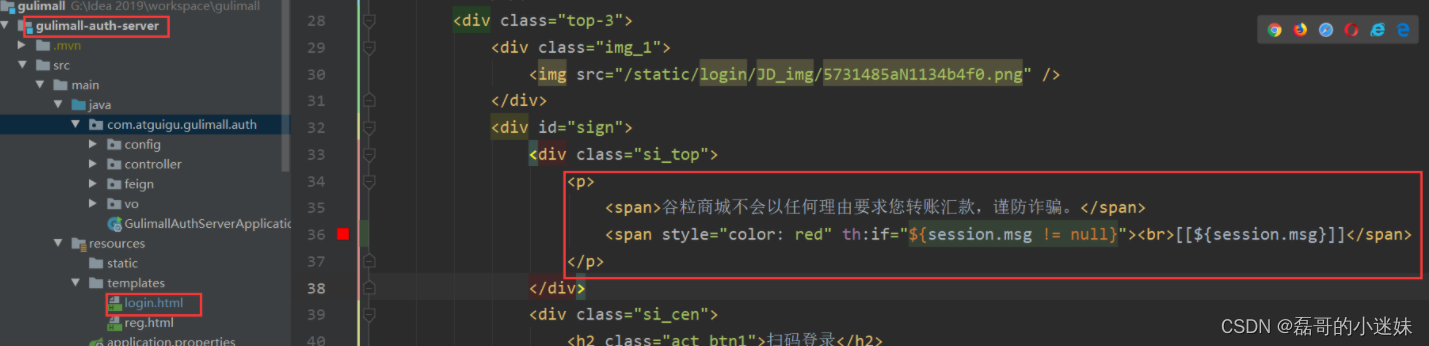
修改 gulimall-auth-server 的 login.html 页面
3、订单确认页
1)、VO模型
在订单服务设计模型接收订单确认页数据
OrderConfirmVo
/**
 * 订单确认页需要用的数据
 */
@Data
public class OrderConfirmVo {
    //收货地址,ums_member_receive_address表
    List<OrderMemberReceiveAddressVo> address;
    //结算商品
    List<OrderCartItemVo> items;
    //积分
    Integer integration;
    //总件数
    Integer count;
    //订单总额(结算商品的总金额)
    BigDecimal total;
    //应付价格
    // BigDecimal payPrice;
    //防重令牌
    String orderToken;

    public Integer getCount() {
        int countNum = 0;
        if (items != null && items.size()>0){
            //如果Stream为空,就直接返回 0
            countNum = items.stream().map(OrderCartItemVo::getCount).reduce(0,Integer::sum);
        }
        return countNum;
    }

    public BigDecimal getTotal() {
        BigDecimal total = new BigDecimal("0");
        if (items != null && items.size()>0){
            total = items.stream().map(OrderCartItemVo::getTotalPrice).reduce(new BigDecimal("0"),BigDecimal::add);
        }
        return total;
    }
}
这里使用了 stream 的
reduce操作
参考文档
收货地址VO,直接从会员服务 gulimall-member 复制过来的
OrderMemberReceiveAddressVo
/**
 * 会员收货地址
 */
@Data
public class OrderMemberReceiveAddressVo implements Serializable {
	private static final long serialVersionUID = 1L;

	private Long id;
	/**
	 * member_id
	 */
	private Long memberId;
	/**
	 * 收货人姓名
	 */
	private String name;
	/**
	 * 电话
	 */
	private String phone;
	/**
	 * 邮政编码
	 */
	private String postCode;
	/**
	 * 省份/直辖市
	 */
	private String province;
	/**
	 * 城市
	 */
	private String city;
	/**
	 * 区
	 */
	private String region;
	/**
	 * 详细地址(街道)
	 */
	private String detailAddress;
	/**
	 * 省市区代码
	 */
	private String areacode;
	/**
	 * 是否默认
	 */
	private Integer defaultStatus;

}
商品项VO,直接从购物车服务 gulimall-cart 复制过来的
OrderCartItemVo
/**
 * 结算的商品项
 */
@Data
public class OrderCartItemVo {
    //商品id
    private Long skuId;
    //购物车中是否选中
    private Boolean check = true;
    //商品的标题
    private String title;
    //商品的图片
    private String image;
    //商品套餐属性,{机身颜色:黑曜石  内存大小:8GB+256GB}
    private List<String> skuAttr;
    //商品的价格
    private BigDecimal price;
    //商品的数量
    private Integer count;
    //当前购物项总价,使用自定义 get
    private BigDecimal totalPrice;

    //计算当前购物项总价
    public BigDecimal getTotalPrice() {
        //new BigDecimal("" + this.count)
        return price.multiply(new BigDecimal(count));
    }
}
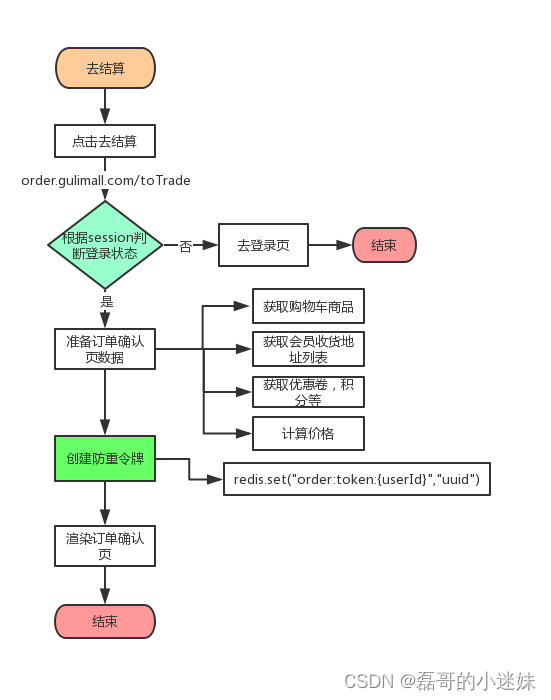
2)、订单确认页数据查询
1 接口编写
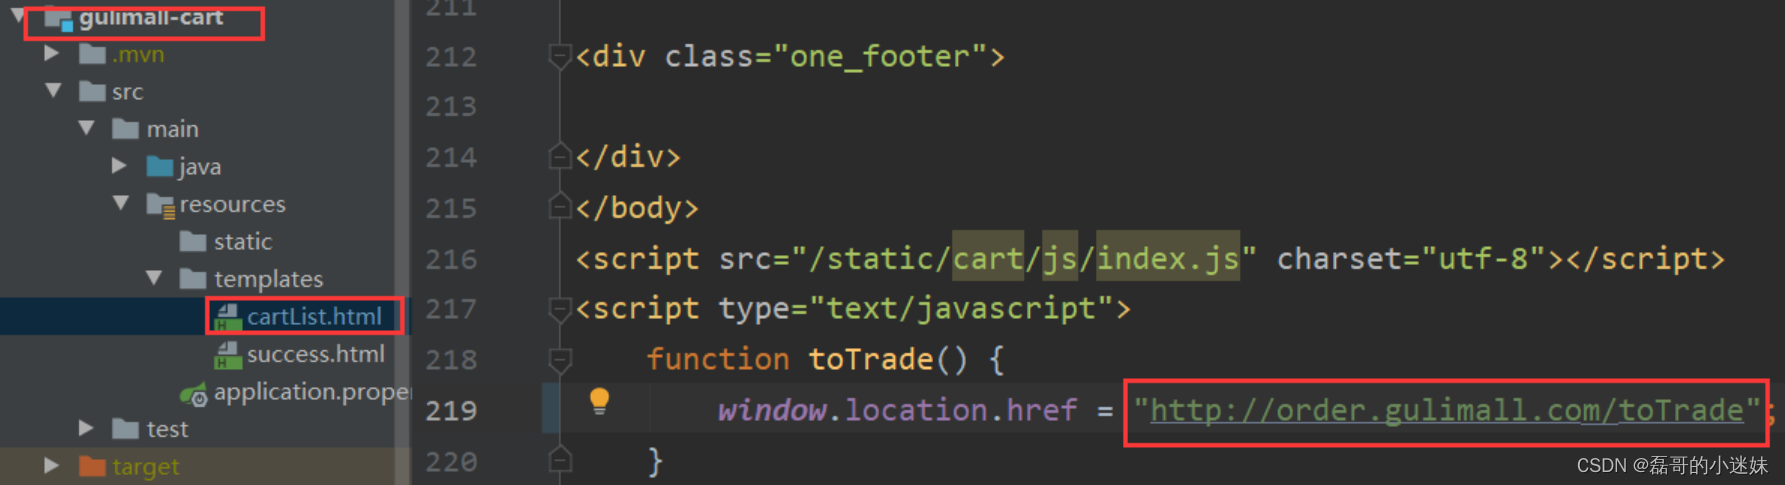
修改 “ 去结算 ” 的链接地址
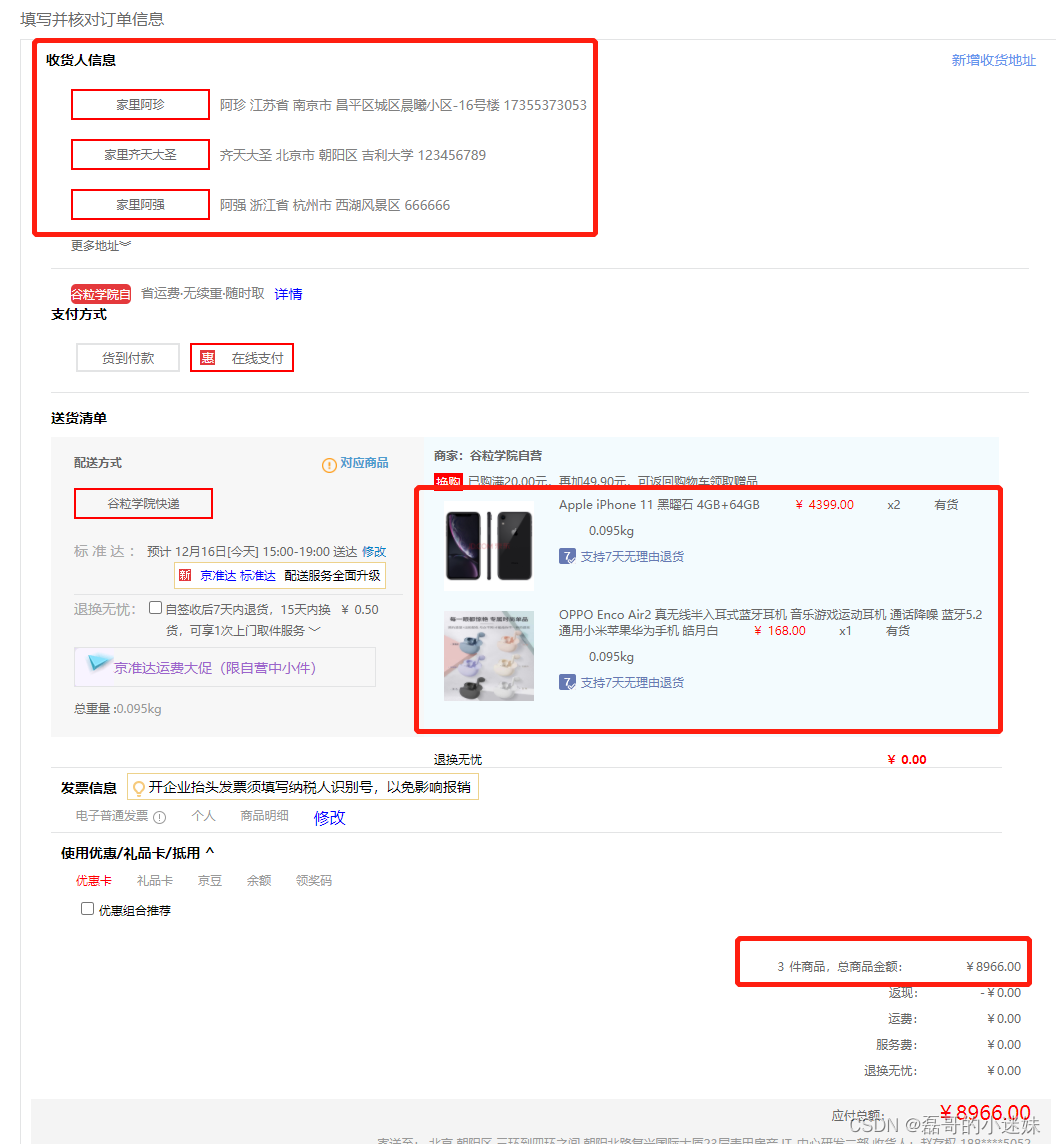
修改订单确认页
<!--地址-->
<div class="top-3" th:each="addr:${orderConfirmData.address}">
	<p>[[${addr.name}]]</p><span>[[${addr.name}]] [[${addr.province}]]  [[${addr.city}]] [[${addr.detailAddress}]] [[${addr.phone}]]</span>
</div>
<p class="p2">更多地址︾</p>
<div class="hh1"/></div>
<div class="to_right">
	<h5>商家:谷粒学院自营</h5>
	<div><button>换购</button><span>已购满20.00元,再加49.90元,可返回购物车领取赠品</span></div>
	<!--图片-->
	<div class="yun1" th:each="item:${orderConfirmData.items}">
		<img th:src="${item.image}" class="yun"/>
		<div class="mi">
			<p>[[${item.title}]] <span style="color: red;"> ¥ [[${#numbers.formatDecimal(item.price, 1, 2)}]]</span> <span> x[[${item.count}]] </span> <span>有货</span></p>
			<p><span>0.095kg</span></p>
			<p class="tui-1"><img src="/confirm/img/i_07.png" />支持7天无理由退货</p>
		</div>
	</div>

	<div class="hh1"></div>
	<p>退换无忧 <span class="money">¥ 0.00</span></p>
</div>
<p class="qian_y">
	<span>[[${orderConfirmData.count}]]</span>
	<span>件商品,总商品金额:</span>
	<span class="rmb">¥[[${#numbers.formatDecimal(orderConfirmData.total, 1, 2)}]]</span>
</p>
<div class="yfze">
	<p class="yfze_a"><span class="z">应付总额:</span><span class="hq">¥[[${#numbers.formatDecimal(orderConfirmData.total, 1, 2)}]]</span></p>
	<p class="yfze_b">寄送至: 北京 朝阳区 三环到四环之间 朝阳北路复兴国际大厦23层麦田房产 IT-中心研发二部 收货人:赵存权 188****5052</p>
</div>
编写接口 OrderWebController
@Controller
public class OrderWebController {

    @Autowired
    OrderService orderService;

    @GetMapping("/{page}.html")
    public String listPage(@PathVariable("page") String page){
        return page;
    }

    @GetMapping("/toTrade")
    public String toTrade(Model model){
        OrderConfirmVo confirmVo = orderService.confirmOrder();
        //展示订单确认的数据
        model.addAttribute("orderConfirmData",confirmVo);
        return "confirm";
    }
}
实现类 OrderServiceImpl
    @Autowired
    MemberFeignService memberFeignService;
    @Autowired
    CartFeignService cartFeignService;

    @Override
    public OrderConfirmVo confirmOrder() {
        OrderConfirmVo orderConfirmVo = new OrderConfirmVo();
        MemberEntity member = LoginUserInterceptor.threadLocalLoginUser.get();
        //远程服务查询收货地址
        List<OrderMemberReceiveAddressVo> addressVos = memberFeignService.getAddress(member.getId()).getData(new TypeReference<List<OrderMemberReceiveAddressVo>>() {});
        orderConfirmVo.setAddress(addressVos);
        //远程服务查询结算商品项
        List<OrderCartItemVo> itemVos = cartFeignService.getCurrentUserCartItems().getData(new TypeReference<List<OrderCartItemVo>>() {});
        orderConfirmVo.setItems(itemVos);
        //用户积分
        orderConfirmVo.setIntegration(member.getIntegration());
        return orderConfirmVo;
    }
2 调用远程服务
订单服务 gulimall-order 启动类添加注解
会员服务 gulimall-member 查询收货地址
会员服务 gulimall-member 中的接口 MemberReceiveAddressController
注意此处的参数 memberId
要么有 @PathVariable 或者 @RequestParam 、 @RequestBody
否则远程调用时无法接收参数
    /**
     * 通过用户id获取收货地址列表
     */
    @GetMapping("/{memberId}/getAddress")
    public R getAddress(@PathVariable("memberId")Long memberId){
        List<MemberReceiveAddressEntity> address = memberReceiveAddressService.getAddress(memberId);
        return R.ok().setData(address);
    }
会员服务 gulimall-member 中的实现类 MemberReceiveAddressServiceImpl
    @Override
    public List<MemberReceiveAddressEntity> getAddress(Long memberId) {
        return this.list(new QueryWrapper<MemberReceiveAddressEntity>().eq("member_id",memberId));
    }
订单服务 gulimall-order 中的 feign 接口 MemberFeignService
@FeignClient("gulimall-member")
public interface MemberFeignService {
    @RequestMapping("/member/memberreceiveaddress/{memberId}/getAddress")
    R getAddress(@PathVariable("memberId")Long memberId);
}
购物车服务 gulimall-cart 查询结算商品项
购物车服务 gulimall-cart 中的接口 CartController
    @Autowired
    CartService cartService;

    /**
     * 获取当前登录用户被选中的购物车商品项(只针对已登录的购物车,不包括临时购物车)
     */
    @GetMapping("/getCurrentUserCartItems")
    @ResponseBody
    public R getCurrentUserCartItems(){
        List<CartItem> cartItems = cartService.getCurrentUserCartItems();
        return R.ok().setData(cartItems);
    }
购物车服务 gulimall-cart 中的实现类 CartServiceImpl
    @Override
    public List<CartItem> getCurrentUserCartItems() {
        UserInfoTo userInfoTo = (UserInfoTo) CartInterceptor.threadLocal.get();
        String cartKey = "";
        if (userInfoTo.getUserId() == null){
            return null;
        }else {
            //有UserId表示已登录(无论是否登录都有UserKey)
            cartKey=CartConstant.CART_PREFIX + userInfoTo.getUserId();
            //getCartItems获取的是加入购物车时redis中的价格,不是数据库最新数据
            List<CartItem> cartItems = getCartItems(cartKey).stream().filter(CartItem::getCheck).peek(item -> {
                // 远程服务查询商品信息
                R infoR = productFeignService.info(item.getSkuId());
                item.setPrice(infoR.get("skuInfo", new TypeReference<SkuInfoVo>() {}).getPrice());
            }).collect(Collectors.toList());
            return cartItems;
        }
    }
这里使用了 stream 的
peek操作
peek与map不同:
peek接收一个Consumer没有返回值,而map接收一个Function有返回值
这意味着 map 对于Stream的元素的所有操作都会作为新的结果返回到Stream中,而 peek 不会
这就是为什么peek String不会发生变化而peek Object会发送变化的原因
参考文档
订单服务 gulimall-order 中的 feign 接口 CartFeignService
@FeignClient("gulimall-cart")
public interface CartFeignService {
    @GetMapping("/getCurrentUserCartItems")
    R getCurrentUserCartItems();
}
其中购物车服务中远程调用了商品服务,来查询商品信息,更新最新的商品价格信息,因为 redis 中的数据是加入购物车时的数据
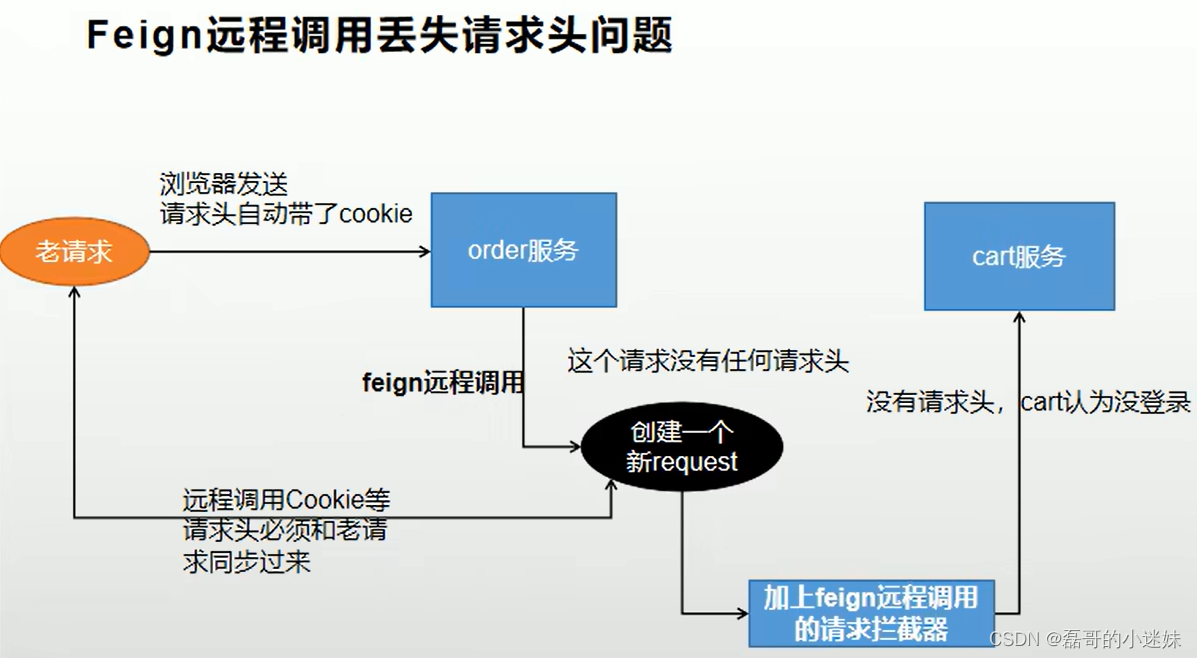
3)、Feign远程调用丢失请求头
启动服务报错
报错信息:
 [THYMELEAF][http-nio-40000-exec-1] Exception processing template "getCurrentUserCartItems": Error resolving template [getCurrentUserCartItems], template might not exist or might not be accessible by any of the configured Template Resolvers

org.thymeleaf.exceptions.TemplateInputException: Error resolving template [getCurrentUserCartItems], template might not exist or might not be accessible by any of the configured Template Resolvers
debug 发现购物车服务 gulimall-cart 中此代码没有获取到登录用户信息
UserInfoTo userInfoTo = (UserInfoTo) CartInterceptor.threadLocal.get();
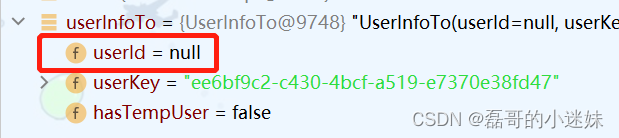
但是单独访问购物车服务 gulimall-cart 的页面发现登录没有问题,因为访问页面时会携带指定请求头
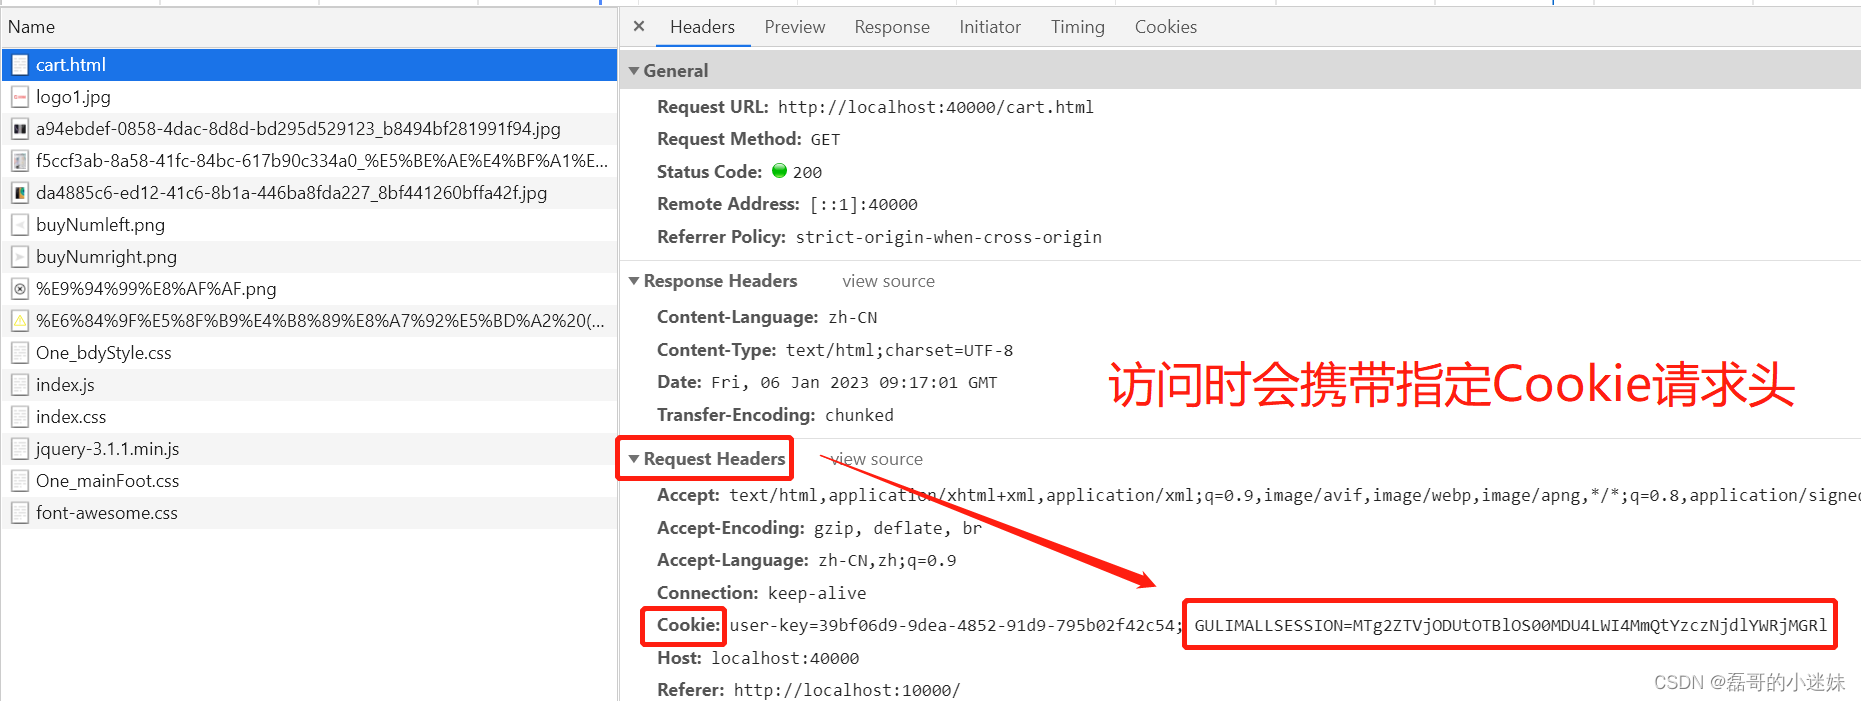
因为 feign 远程调用的请求头中没有含有 JSESSIONID 的 cookie,所以也就不能得到服务端的 session 数据,cart 认为没登录,获取不了用户信息
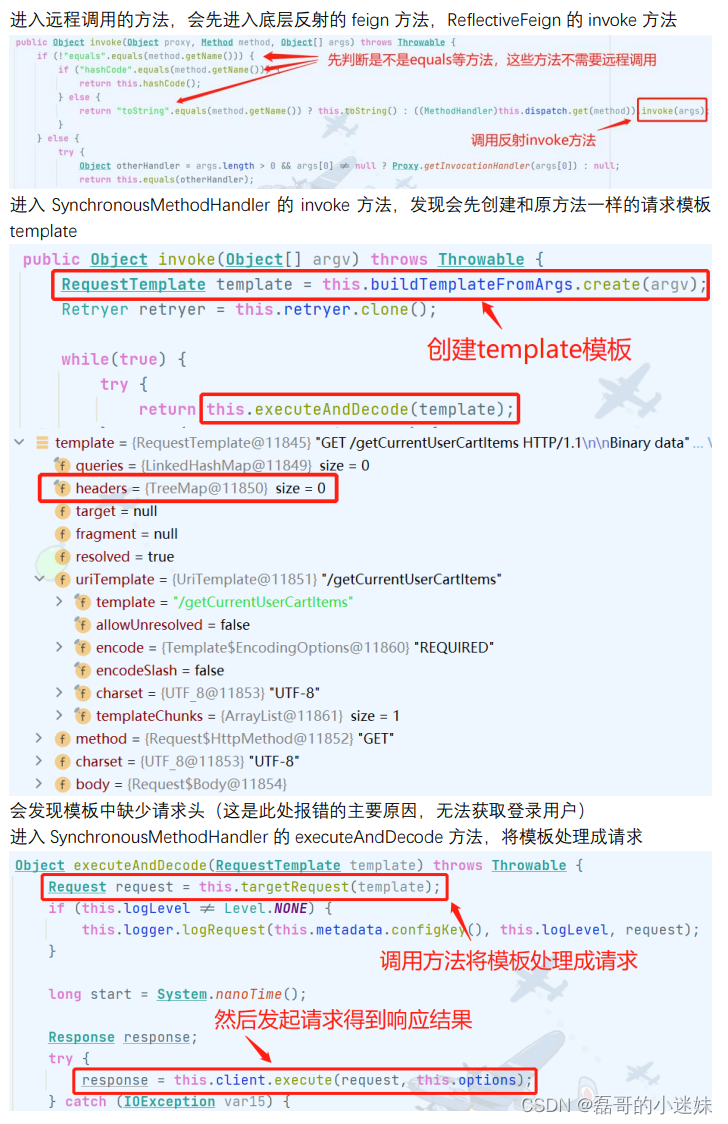
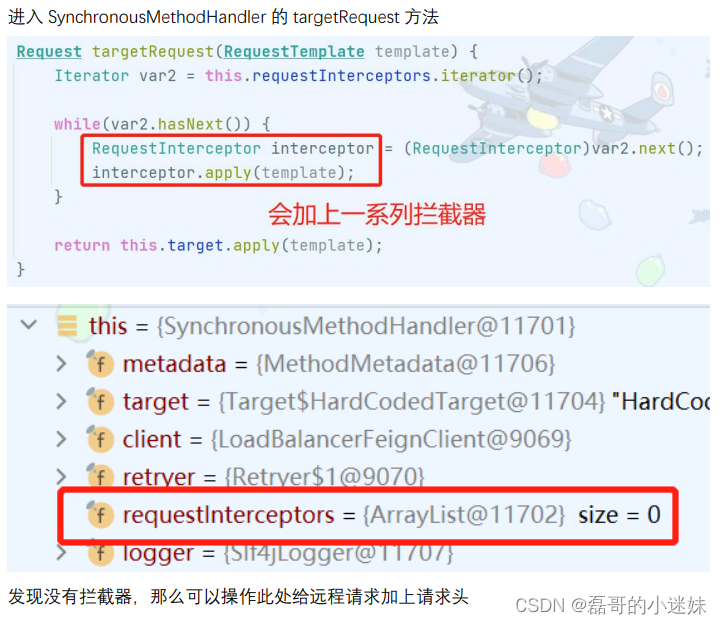
但是在 feign 的调用过程中,会使用容器中的 RequestInterceptor 对RequestTemplate 进行处理,因此我们可以通过向容器中导入定制的RequestInterceptor 为请求加上 cookie
RequestContextHolder 为SpingMVC中共享request数据的上下文,底层由ThreadLocal实现。经过RequestInterceptor处理后的请求如下,已经加上了请求头的Cookie信息
feign的远程调用默认不带cookie信息,需要自己在调用方配置requesttemplate,添加header信息
源码查看:
解决
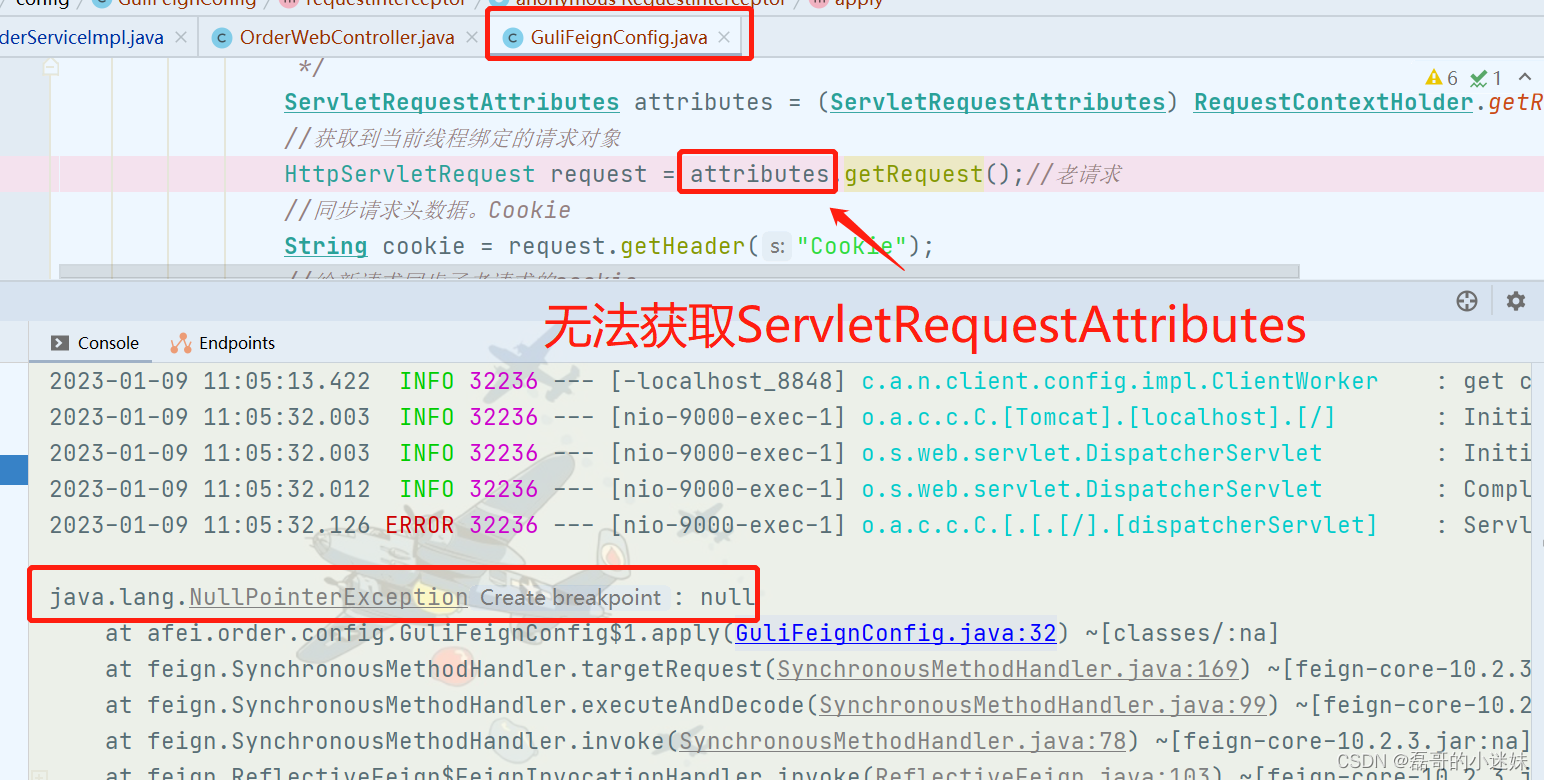
增加配置 GuliFeignConfig
@Configuration
public class GuliFeignConfig {

    @Bean("requestInterceptor")
    public RequestInterceptor requestInterceptor(){
        return new RequestInterceptor(){
            @Override
            public void apply(RequestTemplate requestTemplate) {
                /**
                 * 使用 RequestContextHolder 拿到刚进来的请求
                 *  为什么可以在controller以外拿到HttpServletRequest请求?
                 *  springmvc在处理请求的时候,会把请求对象放到RequestContextHolder持有的ThreadLocal对象中
                 */
                ServletRequestAttributes attributes = (ServletRequestAttributes) RequestContextHolder.getRequestAttributes();
                //获取到当前线程绑定的请求对象
                HttpServletRequest request = attributes.getRequest();//老请求
                //同步请求头数据。Cookie
                String cookie = request.getHeader("Cookie");
                //给新请求同步了老请求的cookie
                requestTemplate.header("Cookie",cookie);
                System.out.println("feign远程之前先执行RequestInterceptor.apply()");
            }
        };
    }
}
为什么可以在controller以外拿到 HttpServletRequest 信息?
参考文档1
参考文档2
参考文档3
RequestContextHolder为什么能获取到当前的HttpServletRequest——因为存放在 ThreadLocal 中,所以仅限当前线程
HttpServletRequest是在什么时候设置到RequestContextHolder——DispatcherServlet在处理请求的时候,父类FrameworkServlet方法processRequest就有向RequestContextHolder初始化绑定一些通用参数
4)、Feign异步远程调用丢失请求头
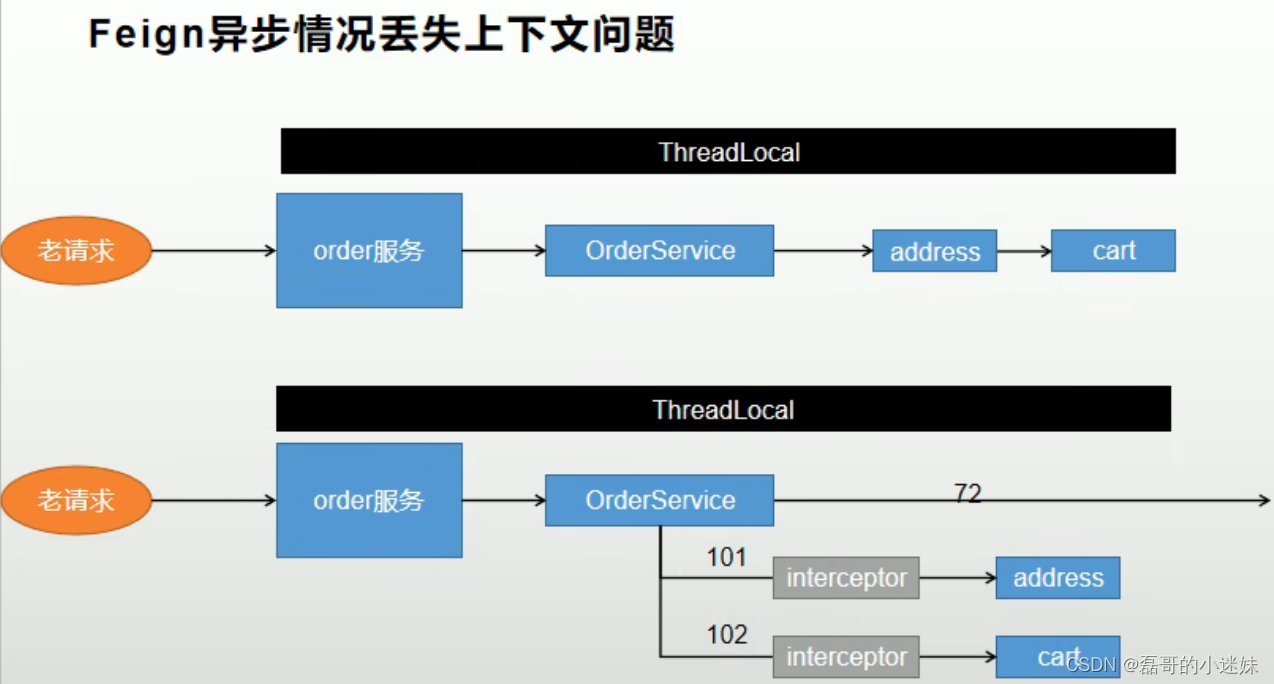
因为涉及多个远程服务调用,所以使用异步操作来减短服务耗时
异步编排修改业务方法
1、配置文件增加线程池属性的配置
#线程池属性的配置
gulimall:
  thread:
    core-pool-size: 20
    maximum-pool-size: 200
    keep-alive-time: 10
2、创建类获取属性 ThreadPoolProperties
@ConfigurationProperties(prefix = "gulimall.thread")
@Component
@Data
public class ThreadPoolProperties {
    private Integer corePoolSize;
    private Integer maximumPoolSize;
    private Long keepAliveTime;
}
3、配置自己的线程池 MyThreadConfig
@Configuration
public class MyThreadConfig {
    @Bean
    public ThreadPoolExecutor threadPoolExecutor(ThreadPoolProperties pool){
        return new ThreadPoolExecutor(pool.getCorePoolSize(),
                pool.getMaximumPoolSize(),
                pool.getKeepAliveTime(),
                TimeUnit.SECONDS,
                new LinkedBlockingDeque<>(100000),
                Executors.defaultThreadFactory(),
                new ThreadPoolExecutor.AbortPolicy());
    }
}
修改业务实现类 OrderServiceImpl
    @Override
    public OrderConfirmVo confirmOrder() throws ExecutionException, InterruptedException {
        OrderConfirmVo orderConfirmVo = new OrderConfirmVo();
        MemberEntity member = LoginUserInterceptor.threadLocalLoginUser.get();

        CompletableFuture<Void> addressFuture = CompletableFuture.runAsync(() -> {
            //远程服务查询收货地址
            List<OrderMemberReceiveAddressVo> addressVos = memberFeignService.getAddress(member.getId()).getData(new TypeReference<List<OrderMemberReceiveAddressVo>>() {
            });
            orderConfirmVo.setAddress(addressVos);
        }, executor);

        CompletableFuture<Void> itemFuture = CompletableFuture.runAsync(() -> {
            //远程服务查询结算商品项
            List<OrderCartItemVo> itemVos = cartFeignService.getCurrentUserCartItems().getData(new TypeReference<List<OrderCartItemVo>>() {
            });
            orderConfirmVo.setItems(itemVos);
        }, executor);

        //用户积分
        orderConfirmVo.setIntegration(member.getIntegration());

        //5、TODO 防重令牌
        CompletableFuture.allOf(addressFuture,itemFuture).get();
        return orderConfirmVo;
    }
启动服务报错
在 GuliFeignConfig 中是使用 RequestContextHolder 来获取 HttpServletRequest,而 RequestContextHolder 的数据是存储在 ThreadLocal 中,ThreadLocal数据存储是将当前线程thread作为key,所以此处异步无法获取主线程中ThreadLocal的数据,所以报错空指针

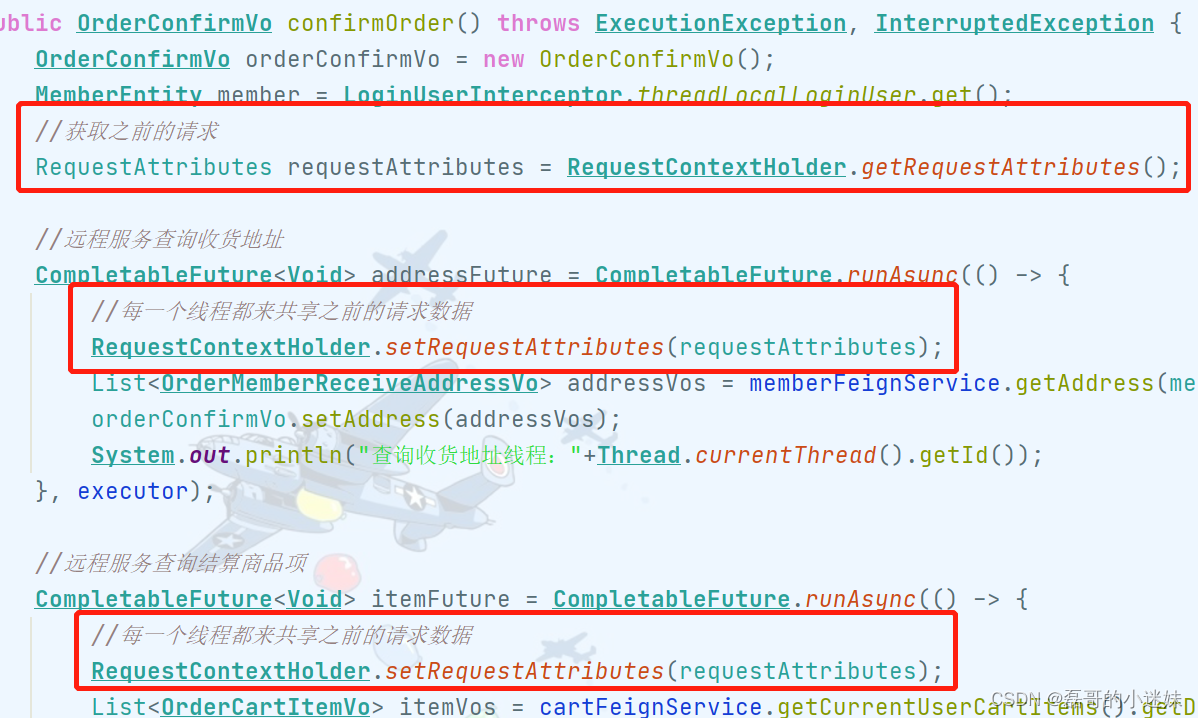
解决
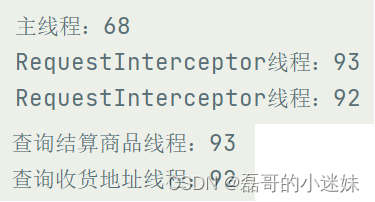
在主线程获取当前请求的 RequestAttributes,然后在远程服务调用之前设置进各自的线程
5)、订单确认页完善
1 查询库存
修改业务实现类 OrderServiceImpl
    @Override
    public OrderConfirmVo confirmOrder() throws ExecutionException, InterruptedException {
        OrderConfirmVo orderConfirmVo = new OrderConfirmVo();
        MemberEntity member = LoginUserInterceptor.threadLocalLoginUser.get();
        //获取之前的请求
        RequestAttributes requestAttributes = RequestContextHolder.getRequestAttributes();

        //远程服务查询收货地址
        CompletableFuture<Void> addressFuture = CompletableFuture.runAsync(() -> {
            //每一个线程都来共享之前的请求数据
            RequestContextHolder.setRequestAttributes(requestAttributes);
            List<OrderMemberReceiveAddressVo> addressVos = memberFeignService.getAddress(member.getId()).getData(new TypeReference<List<OrderMemberReceiveAddressVo>>() {});
            orderConfirmVo.setAddress(addressVos);
        }, executor);

        //远程服务查询结算商品项
        CompletableFuture<Void> itemFuture = CompletableFuture.runAsync(() -> {
            //每一个线程都来共享之前的请求数据
            RequestContextHolder.setRequestAttributes(requestAttributes);
            List<OrderCartItemVo> itemVos = cartFeignService.getCurrentUserCartItems().getData(new TypeReference<List<OrderCartItemVo>>() {});
            orderConfirmVo.setItems(itemVos);
        }, executor).thenRunAsync(()->{
            List<OrderCartItemVo> itemVos = orderConfirmVo.getItems();
            R wareR = wareFeignService.getSkuHasStock(itemVos.stream().map(OrderCartItemVo::getSkuId).collect(Collectors.toList()));
            List<SkuHasStockTo> skuHasStockTos = wareR.getData(new TypeReference<List<SkuHasStockTo>>() {});
            if (skuHasStockTos != null && skuHasStockTos.size()>0){
                Map<Long, Boolean> map = skuHasStockTos.stream().collect(Collectors.toMap(SkuHasStockTo::getSkuId, SkuHasStockTo::getHasStock));
                orderConfirmVo.setStocks(map);
            }
        },executor);

        //用户积分
        orderConfirmVo.setIntegration(member.getIntegration());

        //5、TODO 防重令牌
        CompletableFuture.allOf(addressFuture,itemFuture).get();
        return orderConfirmVo;
    }
调用远程服务 WareFeignService
@FeignClient("gulimall-ware")
public interface WareFeignService {

    @PostMapping("/ware/waresku/hasStock")
    R getSkuHasStock(@RequestBody List<Long> skuIds);
}
页面修改
<span>[[${orderConfirmData.stocks[item.skuId]?"有货":"无货"}]]</span>
2 模拟运费
修改页面
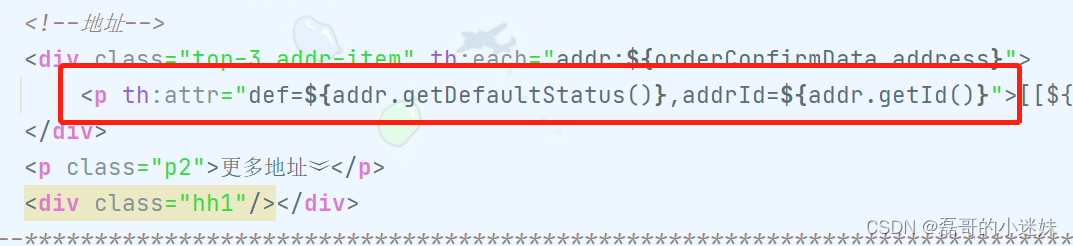
<p th:attr="def=${addr.getDefaultStatus()},addrId=${addr.getId()}">
<p class="qian_y">
<span>运费: </span>
<span class="rmb">   ¥<b id="fareEle"></b></span>
</p>
<div class="yfze">
	<p class="yfze_a"><span class="z">应付总额:</span><span class="hq">¥<b id="payPriceEle"></b></span></p>
	<p class="yfze_b">寄送至: <span id="recieveAddressEle"></span> 收货人:<span id="recieverEle"></span></p>
</div>
<button class="tijiao">提交订单</button>
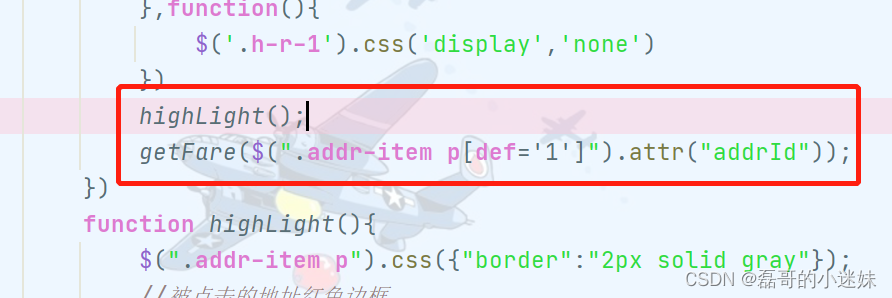
function highLight(){
$(".addr-item p").css({"border":"2px solid gray"});
//被点击的地址红色边框
$(".addr-item p[def='1']").css({"border":"2px solid red"});
}
$(".addr-item p").click(function (){
$(".addr-item p").attr("def","0");
$(this).attr("def","1");
highLight();
//获取当前地址id
var addrId = $(this).attr("addrId");
//发送ajax获取运费
getFare(addrId);
});
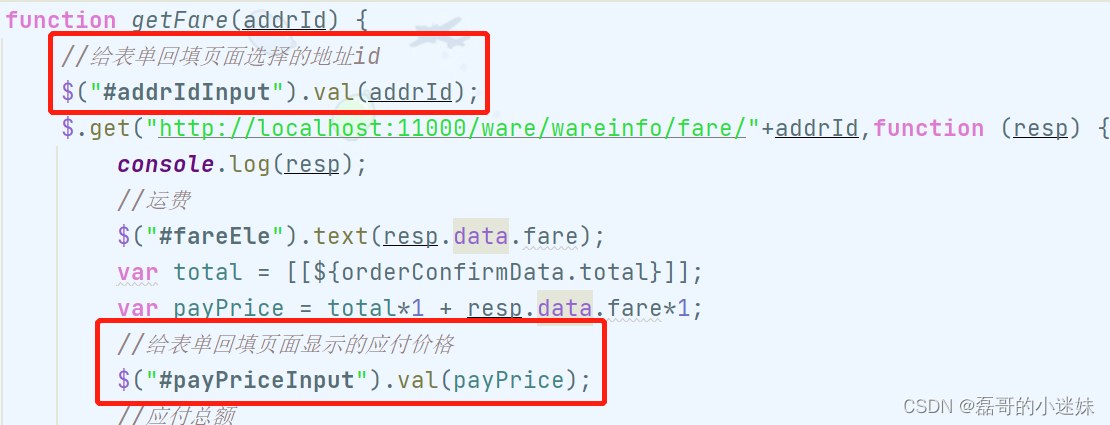
function getFare(addrId) {
$.get("http://localhost:11000/ware/wareinfo/fare/"+addrId,function (resp) {
console.log(resp);
//运费
$("#fareEle").text(resp.data.fare);
var total = [[${orderConfirmData.total}]];
var payPrice = total*1 + resp.data.fare*1;
//应付总额
$("#payPriceEle").text(payPrice);
//设置收货信息
$("#recieveAddressEle").text(resp.data.address.province+" "+resp.data.address.city+" "+resp.data.address.detailAddress);
$("#recieverEle").text(resp.data.address.name+" "+resp.data.address.phone);
});
}
gulimall-ware 服务新增接口 WareInfoController
    /**
     * 根据收货地址id查询运费
     */
    @GetMapping("/fare/{addrId}")
    public R getFare(@PathVariable("addrId") Long addrId){
        FareVo fareVo = wareInfoService.getFare(addrId);
        return R.ok().setData(fareVo);
    }
实现类 WareInfoServiceImpl
    @Autowired
    MemberFeignService memberFeignService;

    @Override
    public FareVo getFare(Long addrId) {
        FareVo fareVo = new FareVo();
        R r = memberFeignService.info(addrId);
        WareMemberReceiveAddressVo memberReceiveAddress = r.get("memberReceiveAddress", new TypeReference<WareMemberReceiveAddressVo>() {});
        if (memberReceiveAddress != null){
            //模拟计算运费
            String phone = memberReceiveAddress.getPhone();
            String substring = phone.substring(phone.length() - 1, phone.length());
            BigDecimal bigDecimal = new BigDecimal(substring);
            fareVo.setAddress(memberReceiveAddress);
            fareVo.setFare(bigDecimal);
            return fareVo;
        }
        return null;
    }
调用远程服务 MemberFeignService
@FeignClient("gulimall-member")
public interface MemberFeignService {
    @RequestMapping("/member/memberreceiveaddress/info/{id}")
    R info(@PathVariable("id") Long id);
}
由于此处我没有使用 nginx ,一直是 localhost 本地的服务,没修改域名,所以此处 order 订单服务的页面发送请求访问 ware 库存服务出现了跨域问题
解决:
在目标访问服务 ware 增加配置@Configuration public class WareCorsConfig implements WebMvcConfigurer { @Override public void addCorsMappings(CorsRegistry registry) { // 添加映射路径 registry.addMapping("/**") // 放行哪些原始域 // .allowedOriginPatterns("*") // 2.2 之后的版本用的 .allowedOrigins("*") // 是否发送 Cookie 信息 .allowCredentials(true) // 放行哪些原始域(请求方式) .allowedMethods("GET", "POST", "PUT", "DELETE", "OPTIONS") // 放行哪些头部信息 .allowedHeaders("*") // 暴露哪些头部信息(因为跨域访问默认不能获取全部头部信息) .exposedHeaders("Header1", "Header2"); } }

6)、接口幂等性
为了防止订单被重复提交,使用 token 机制解决接口幂等性
页面提交 token,在业务方法中判断 token 是否存在 redis 中,存在则表示第一次请求,然后删除 token,继续执行业务
在结算的业务方法中设置 token ,并存入 redis
OrderServiceImpl.confirmOrder()
//5、TODO 防重令牌
String token = UUID.randomUUID().toString().replace("-", "");
orderConfirmVo.setOrderToken(token);
//存入redis order:token:用户id —— token
stringRedisTemplate.opsForValue().set(OrderConstant.USER_ORDER_TOKEN_PREFIX+member.getId(),token,30, TimeUnit.MINUTES);
OrderConstant
public class OrderConstant {
public static final String USER_ORDER_TOKEN_PREFIX="order:token:";
}
在页面获取 token,并提交给服务器
修改页面:
<form action="http://localhost:9000/submitOrder" method="post">
<input id="addrIdInput" name="addrId" type="hidden"/>
<input id="payPriceInput" name="payPrice" type="hidden"/>
<input name="orderToken" type="hidden" th:value="${orderConfirmData.orderToken}"/>
<button type="submit">提交订单</button>
</form>
服务器接收页面提交的 token,将其与 redis 中的进行对比
编写接口 OrderWebController
@PostMapping("/submitOrder")
public String submitOrder(OrderSubmitVo submitVo,Model model, RedirectAttributes redirectAttributes){
OrderSubmitResponseVo responseVo = orderService.submitOrder(submitVo);
//提交成功跳转支付页
return "pay";
}
进行令牌校验
OrderServiceImpl.submitOrder()
该语句表示:
如果 redis 调用 get 方法根据 key 获取的值与 args 提供的值相同,则让 redis 根据 key 的值执行删除方法,并返回 1。否则返回 0
@Override
public OrderSubmitResponseVo submitOrder(OrderSubmitVo submitVo) {
OrderSubmitResponseVo responseVo = new OrderSubmitResponseVo();
//1、令牌校验
MemberEntity member = LoginUserInterceptor.threadLocalLoginUser.get();
String redisKey = OrderConstant.USER_ORDER_TOKEN_PREFIX + member.getId();
// 原子验证令牌和删除令牌【0-执行失败;1-执行成功】
String script = "if redis.call('get', KEYS[1]) == ARGV[1] then return redis.call('del', KEYS[1]) else return 0 end";
Long execute = stringRedisTemplate.execute(new DefaultRedisScript<>(script, Long.class), Arrays.asList(redisKey), submitVo.getOrderToken());
if (execute == 0L){
responseVo.setCode(1);
}else {
//2、业务方法
}
return responseVo;
}
4、订单提交
1)、VO
为保证幂等性,数据库设置 订单号唯一

实体类接收页面提交数据
OrderSubmitVo
/**
* 从页面接收的数据,用于和后端数据对比(令牌校验、价格校验)
*/
@Data
public class OrderSubmitVo {
//收货地址id
private Long addrId;
//页面提交的应付价格,用于验价(页面和数据库对比)
private BigDecimal payPrice;
//前端接收的令牌
private String orderToken;
//此处无需页面提交结算的是商品,直接去购物车获取被勾选中的商品
//支付方式
// private String payType;
//订单备注
// private String note;
}
提交订单后需要返回给页面的实体类
OrderSubmitResponseVo
/**
*结算页的订单提交之后要返回给的数据
*/
@Data
public class OrderSubmitResponseVo {
//订单提交成功要返回的订单相关数据
private OrderEntity order;
//订单提交是否成功【0-订单创建成功;1-令牌验证失败;2-验价失败;3-库存锁定失败】
private Integer code;
}
订单状态的枚举类
OrderStatusEnum
public enum OrderStatusEnum {
CREATE_NEW(0,"待付款"),
PAYED(1,"已付款"),
SENDED(2,"已发货"),
RECIEVED(3,"已完成"),
CANCLED(4,"已取消"),
SERVICING(5,"售后中"),
SERVICED(6,"售后完成");
private Integer code;
private String msg;
OrderStatusEnum(Integer code, String msg) {
this.code = code;
this.msg = msg;
}
public Integer getCode() {
return code;
}
public String getMsg() {
return msg;
}
}
自定义异常类,商品无库存异常 NoStockException
public class NoStockException extends RuntimeException {
@Getter
@Setter
private Long skuId;
public NoStockException(Long skuId) {
super("商品"+ skuId+ "库存不足");
}
public NoStockException() {
super("商品库存不足");
}
}
2)、创建订单、验价
需要创建单个订单 oms_order 与多个订单项 oms_order_item
注意:
在使用BigDecimal进行计算的时候,一定要使用其String构造器,不然可能会发生损失精度的问题
业务接口 OrderWebController
@PostMapping("/submitOrder")
public String submitOrder(OrderSubmitVo submitVo,Model model, RedirectAttributes redirectAttributes){
OrderSubmitResponseVo responseVo = orderService.submitOrder(submitVo);
log.error("======================订单创建成功{}:",responseVo);
if (responseVo.getCode() == 0 ) {
//提交成功跳转支付页
model.addAttribute("submitOrderResp", responseVo);
return "pay";
}else {
// 根据状态码验证对应的状态
String msg = "下单失败:";
switch (responseVo.getCode()) {
case 1: msg += "订单信息过期,请刷新后再次提交"; break;
case 2: msg += "订单商品价格发生变化,请确认后再次提交"; break;
case 3: msg += "库存锁定失败,商品库存不足"; break;
}
redirectAttributes.addFlashAttribute("msg",msg);
//失败则返回结算页
return "redirect:http://localhost:9000/toTrade";
}
}
修改订单支付页 pay.html
<span>订单提交成功,请尽快付款!订单号:[[${submitOrderResp.order.orderSn}]]</span>
<span>应付金额<font>[[${#numbers.formatDecimal(submitOrderResp.order.payAmount,0,2)}]]</font>元</span>
业务类中创建订单及订单项 OrderServiceImpl
//提交订单
@Transactional //本方法内出现异常则回滚,若远程服务出现异常不会回滚
@Override
public OrderSubmitResponseVo submitOrder(OrderSubmitVo submitVo) {
OrderSubmitResponseVo responseVo = new OrderSubmitResponseVo();
//1、令牌校验
MemberEntity member = LoginUserInterceptor.threadLocalLoginUser.get();
String redisKey = OrderConstant.USER_ORDER_TOKEN_PREFIX + member.getId();
// 原子验证令牌和删除令牌【0-执行失败;1-执行成功】
String script = "if redis.call('get', KEYS[1]) == ARGV[1] then return redis.call('del', KEYS[1]) else return 0 end";
Long execute = stringRedisTemplate.execute(new DefaultRedisScript<>(script, Long.class), Arrays.asList(redisKey), submitVo.getOrderToken());
if (execute == 0L){
// 验证令牌验证失败
responseVo.setCode(1);
return responseVo;
}else {
//创建单个订单oms_order与多个订单项oms_order_item,锁定库存wms_ware_sku,验价
//2、创建订单
String orderSn = IdWorker.getTimeId().substring(0, 20);
//2.1 构建订单oms_order
OrderEntity orderEntity = buildOrder(submitVo, orderSn);
//2.2 构建指定订单号的多个订单项oms_order_item(从购物车获取数据)
List<OrderItemEntity> orderItemEntityList = buildOrderItems(orderSn);
//2.3 订单oms_order的价格部分:订单金额、优惠、成长值等
setOrderPrice(orderEntity, orderItemEntityList);
//3、验价:订单创建好的应付总额 和购物车中计算好的应付价格
BigDecimal payAmount = orderEntity.getPayAmount(); //购物车价格
BigDecimal payPrice = submitVo.getPayPrice(); //页面价格
if(Math.abs(payAmount.subtract(payPrice).doubleValue()) >= 0.01) {
// 商品价格比较失败
responseVo.setCode(2);
return responseVo;
}else {
//2.4 保存订单入数据库
saveOrder(orderEntity,orderItemEntityList);
//4、锁定库存
//4.1 准备要锁定库存的参数数据
WareSkuLockVo wareSkuLockVo = new WareSkuLockVo();
wareSkuLockVo.setOrderSn(orderSn);
List<OrderCartItemVo> lockedItems = orderItemEntityList.stream().map(orderItem -> {
OrderCartItemVo lockedItem = new OrderCartItemVo();
lockedItem.setSkuId(orderItem.getSkuId());
lockedItem.setTitle(orderItem.getSkuName());
lockedItem.setCount(orderItem.getSkuQuantity());
lockedItem.setPrice(orderItem.getRealAmount()); //防止报空指针
return lockedItem;
}).collect(Collectors.toList());
wareSkuLockVo.setLockedItems(lockedItems);
//4.2 调用远程服务
R r = wareFeignService.orderLockStock(wareSkuLockVo);
if (r.getCode() != 0) {
//库存锁定失败
responseVo.setCode(3);
//锁定失败
throw new NoStockException((String) r.get("msg"));
}else {
responseVo.setOrder(orderEntity);
responseVo.setCode(0);
return responseVo;
}
}
}
}
创建单个订单 oms_order 与多个订单项 oms_order_item
构建订单 buildOrder()
//构建订单
private OrderEntity buildOrder(OrderSubmitVo submitVo, String orderSn) {
OrderEntity orderEntity = new OrderEntity();
orderEntity.setOrderSn(orderSn);
MemberEntity member = LoginUserInterceptor.threadLocalLoginUser.get();
orderEntity.setMemberId(member.getId());
orderEntity.setMemberUsername(member.getUsername());
orderEntity.setCreateTime(new Date());
//获取运费
FareVo fareVo = wareFeignService.getFare(submitVo.getAddrId()).getData(new TypeReference<FareVo>() {});
orderEntity.setFreightAmount(fareVo.getFare());
// 设置收货人信息
orderEntity.setReceiverCity(fareVo.getAddress().getCity());
orderEntity.setReceiverDetailAddress(fareVo.getAddress().getDetailAddress());
orderEntity.setReceiverName(fareVo.getAddress().getName());
orderEntity.setReceiverPhone(fareVo.getAddress().getPhone());
orderEntity.setReceiverPostCode(fareVo.getAddress().getPostCode());
orderEntity.setReceiverRegion(fareVo.getAddress().getRegion());
// 设置订单的相关状态信息【0->待付款;1->待发货;2->已发货;3->已完成;4->已关闭;5->无效订单】
orderEntity.setStatus(OrderStatusEnum.CREATE_NEW.getCode());
orderEntity.setAutoConfirmDay(7);
// 订单价格部分:订单金额、优惠、成长值等
//设置删除状态【0->未删除;1->已删除】
orderEntity.setDeleteStatus(0);
return orderEntity;
}
其中调用远程服务 WareFeignService
/**
* 根据收货地址id查询运费
*/
@GetMapping("/ware/wareinfo/fare/{addrId}")
R getFare(@PathVariable("addrId") Long addrId);
构建订单对应多个订单项 buildOrderItems()
//设置指定订单对应的多个订单项
private List<OrderItemEntity> buildOrderItems(String orderSn){
//获取购物车被勾选商品项
List<OrderCartItemVo> cartVos = cartFeignService.getCurrentUserCartItems().getData(new TypeReference<List<OrderCartItemVo>>() {});
if (cartVos!=null && cartVos.size()>0){
List<OrderItemEntity> itemEntities = cartVos.stream().map(cart -> {
OrderItemEntity item = new OrderItemEntity();
item.setOrderSn(orderSn);
//spu部分
OrderProSpuInfoVo spuInfo = productFeignService.getSpuInfoBySkuId(cart.getSkuId()).getData(new TypeReference<OrderProSpuInfoVo>() {
});
item.setSpuId(spuInfo.getId());
item.setSpuBrand(spuInfo.getBrandId().toString());
item.setSpuName(spuInfo.getSpuName());
item.setCategoryId(spuInfo.getCatalogId());
//sku部分
item.setSkuId(cart.getSkuId());
item.setSkuName(cart.getTitle());
item.setSkuPic(cart.getImage());
item.setSkuPrice(cart.getPrice());
item.setSkuQuantity(cart.getCount());
String attr = StringUtils.collectionToDelimitedString(cart.getSkuAttr(), ";");
System.out.println(cart.getSkuAttr().toString());
System.out.println(attr);
item.setSkuAttrsVals(attr);
//优惠部分(全为0)
item.setPromotionAmount(new BigDecimal("0"));
item.setIntegrationAmount(new BigDecimal("0"));
item.setCouponAmount(new BigDecimal("0"));
// 当前订单项的实际金额
BigDecimal origin = item.getSkuPrice().multiply(new BigDecimal(item.getSkuQuantity().toString()));
// 实际金额总额减去各种优惠后的价格
BigDecimal subtract = origin.subtract(item.getCouponAmount()).subtract(item.getIntegrationAmount()).subtract(item.getPromotionAmount());
item.setRealAmount(subtract);
//积分部分(商品价格*数量)
item.setGiftGrowth(cart.getPrice().multiply(new BigDecimal(cart.getCount().toString())).intValue());
item.setGiftIntegration(cart.getPrice().multiply(new BigDecimal(cart.getCount().toString())).intValue());
return item;
}).collect(Collectors.toList());
return itemEntities;
}
return null;
}
其中调用远程服务 ProductFeignService
@FeignClient("gulimall-product")
public interface ProductFeignService {
@GetMapping("/product/spuinfo/skuId/{id}")
R getSpuInfoBySkuId(@PathVariable("id") Long skuId);
}
gulimall-product 服务中的接口及方法
//根据skuid获取spu信息
@GetMapping("/skuId/{id}")
public R getSpuInfoBySkuId(@PathVariable("id") Long skuId){
SpuInfoEntity spuInfo = spuInfoService.getSpuInfoBySkuId(skuId);
return R.ok().setData(spuInfo);
}
//根据skuid获取spu信息
@Override
public SpuInfoEntity getSpuInfoBySkuId(Long skuId) {
SkuInfoEntity sku = skuInfoService.getById(skuId);
SpuInfoEntity spu = this.getById(sku.getSpuId());
return spu;
}
设置订单中的价格、积分相关数据 setOrderPrice()
//设置订单中的价格、积分相关数据
private void setOrderPrice(OrderEntity orderEntity, List<OrderItemEntity> orderItemEntityList) {
BigDecimal totalAmount = new BigDecimal("0");
BigDecimal promotionAmount = new BigDecimal("0");
BigDecimal integrationAmount = new BigDecimal("0");
BigDecimal couponAmount = new BigDecimal("0");
BigDecimal integration = new BigDecimal("0");
BigDecimal growth = new BigDecimal("0");
for (OrderItemEntity item : orderItemEntityList) {
totalAmount = totalAmount.add(item.getRealAmount());
promotionAmount = promotionAmount.add(item.getPromotionAmount());
integrationAmount = integrationAmount.add(item.getIntegrationAmount());
couponAmount = couponAmount.add(item.getCouponAmount());
integration = integration.add(new BigDecimal(item.getGiftIntegration().toString()));
growth = growth.add(new BigDecimal(item.getGiftGrowth().toString()));
}
orderEntity.setTotalAmount(totalAmount);
orderEntity.setPayAmount(totalAmount.add(orderEntity.getFreightAmount()));
orderEntity.setPromotionAmount(promotionAmount);
orderEntity.setIntegrationAmount(integrationAmount);
orderEntity.setCouponAmount(couponAmount);
orderEntity.setIntegration(integration.intValue());
orderEntity.setGrowth(growth.intValue());
}
存入数据库 saveOrder()
//将订单数据存入数据库
private void saveOrder(OrderEntity orderEntity, List<OrderItemEntity> orderItemEntityList) {
orderEntity.setModifyTime(new Date());
this.save(orderEntity);
orderItemService.saveBatch(orderItemEntityList);
}
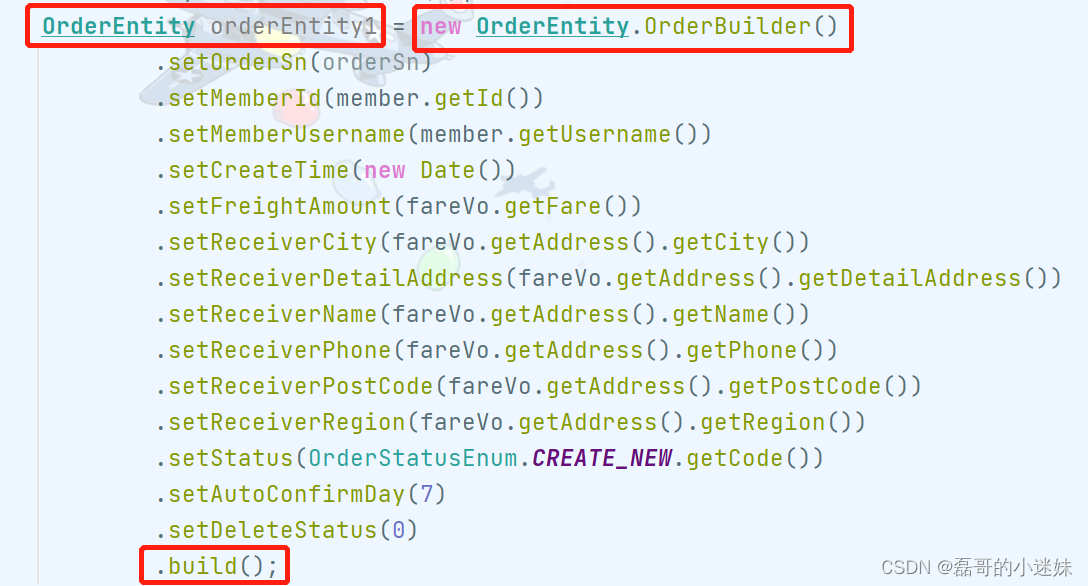
上面创建订单的方法中有一堆 set 属性,代码不好看,使用 builder 设计模式替代
参考文章
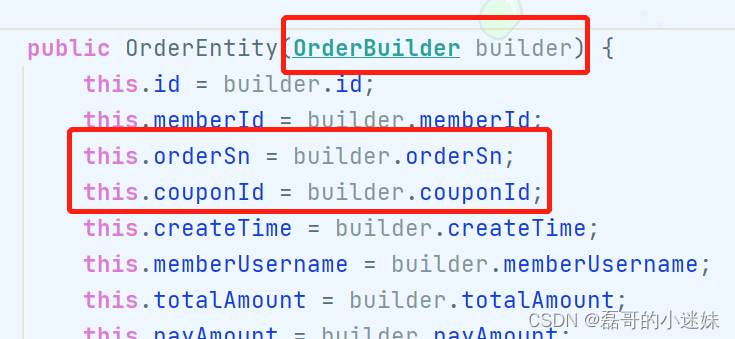
构建步骤:
1、OrderEntity 增加内部静态类OrderBuilder,其中的属性与 OrderEntity 一模一样
2、 然后提供 builder 的setter 方法(IDEA可以生成)
3、添加build()方法public OrderEntity build(){ return new OrderEntity(this); }4、需要在 OrderEntity 中
添加构造器,所以先添加注解@NoArgsConstructor
@AllArgsConstructor
构造器如下
如何使用:

3)、锁定库存
1 库存服务
库存服务中 gulimall-ware 编写接口锁定库存
注意此处只针对单个库存中库存数量足够进行锁定的仓库,数量不足的直接返回锁定失败,不考虑多个仓库组合发货,只看单个仓库
要锁定的商品信息 WareSkuLockVo
/**
* 要进行库存锁定的信息
*/
@Data
public class WareSkuLockVo {
//进行锁定的订单号
private String orderSn;
//进行库存锁定的商品信息
private List<WareCartItemVo> lockedItems;
}
商品信息 WareCartItemVo
直接复制购物车服务的 VO
/**
* 结算的商品项
*/
@Data
public class WareCartItemVo {
//商品id
private Long skuId;
//购物车中是否选中
private Boolean check = true;
//商品的标题
private String title;
//商品的图片
private String image;
//商品套餐属性,{机身颜色:黑曜石 内存大小:8GB+256GB}
private List<String> skuAttr;
//商品的价格
private BigDecimal price;
//商品的数量
private Integer count;
//当前购物项总价,使用自定义 get
private BigDecimal totalPrice;
//计算当前购物项总价
public BigDecimal getTotalPrice() {
//new BigDecimal("" + this.count)
return price.multiply(new BigDecimal(count));
}
}
指明商品在哪些仓库中有足够的库存 SkuWareHasStock
/**
* 锁定库存时需要指明商品在哪些仓库中有足够的库存
*/
@Data
public class SkuWareHasStock {
//商品项id
private Long skuId;
//需要被锁定的商品数量(购物车中的商品数量)
private Integer num;
//哪些仓库有该商品的库存(一定够数)
private List<Long> wareId;
}
接口 WareSkuController
/**
* 锁定库存(指定订单号、以及对应商品项)
* 只从一个仓库中锁定库存,若有多个仓库有货,但单个仓库库存不足,则视为锁定失败
*/
@PostMapping("/orderLockStock")
public R orderLockStock(@RequestBody WareSkuLockVo wareSkuLockVo){
Boolean result = wareSkuService.orderLockStock(wareSkuLockVo);
if (result){
return R.ok();
}else {
return R.error(BizCodeEnume.NO_STOCK_EXCEPTION.getCode(),BizCodeEnume.NO_STOCK_EXCEPTION.getMsg());
}
}
错误码和错误信息定义类中增加 BizCodeEnume
NO_STOCK_EXCEPTION(21000,"商品库存不足");
实现类 WareSkuServiceImpl
//本方法内出现异常则回滚
@Transactional
@Override
public Boolean orderLockStock(WareSkuLockVo wareSkuLockVo) {
List<WareCartItemVo> lockedItems = wareSkuLockVo.getLockedItems();
//1、找寻有库存的仓库
List<SkuWareHasStock> hasStocks = lockedItems.stream().map(item -> {
//查询商品是否有库存,返回有库存并且库存数量足够的仓库id
SkuWareHasStock hasStock = new SkuWareHasStock();
hasStock.setSkuId(item.getSkuId());
hasStock.setNum(item.getCount());
List<Long> wareIds = baseMapper.listWareIdHasSkuStock(item.getSkuId(),item.getCount());
hasStock.setWareId(wareIds);
return hasStock;
}).collect(Collectors.toList());
//2、进行库存锁定
for (SkuWareHasStock skuWareHasStock : hasStocks) {
Boolean skuStocked = false;
List<Long> wareIds = skuWareHasStock.getWareId();
if (wareIds == null || wareIds.size() < 0){
throw new NoStockException(skuWareHasStock.getSkuId().toString());
}
for (Long wareId : wareIds) {
//锁定库存 wms_ware_sku
Long count = baseMapper.lockWareSku(skuWareHasStock.getSkuId(), skuWareHasStock.getNum(), wareId);
if (count == 1){
//锁定成功
skuStocked = true;
break;
}
}
if (!skuStocked){
//锁定失败
throw new NoStockException(skuWareHasStock.getSkuId().toString());
}
}
return true;
}
找寻商品有库存的仓库 WareSkuDao.listWareIdHasSkuStock()
List<Long> listWareIdHasSkuStock(@Param("skuId") Long skuId, @Param("num") Integer num);
<select id="listWareIdHasSkuStock" resultType="java.lang.Long">
SELECT ware_id FROM `wms_ware_sku`
where sku_id = #{skuId} AND stock - stock_locked >= #{num}
</select>
锁定库存 WareSkuDao.lockWareSku()
Long lockWareSku(@Param("skuId") Long skuId, @Param("num") Integer num, @Param("wareId") Long wareId);
<update id="lockWareSku">
UPDATE `wms_ware_sku` SET stock_locked= stock_locked + #{num}
WHERE sku_id=#{skuId} AND ware_id=#{wareId} AND stock - stock_locked >= #{num}
</update>
2 订单服务
订单服务中 gulimall-order
要锁定的商品信息 WareSkuLockVo
/**
* 要进行库存锁定的信息
*/
@Data
public class WareSkuLockVo {
//进行锁定的订单号
private String orderSn;
//进行库存锁定的商品信息
private List<OrderCartItemVo> lockedItems;
}
远程服务 WareFeignService
/**
* 锁定库存(指定订单号、以及对应商品项)
* 只从一个仓库中锁定库存,若有多个仓库有货,但单个仓库库存不足,则视为锁定失败
*/
@PostMapping("/ware/waresku/orderLockStock")
R orderLockStock(@RequestBody WareSkuLockVo wareSkuLockVo);
5、使用延迟队列
若远程库存服务方法执行成功,但是 feign 自身因网络问题超时导致订单未接收到结果,则订单回滚,远程库存服务不回滚
若远程服务执行成功,订单服务也成功接收数据,但是订单服务自身报错,则订单回滚,已执行的远程库存服务不回滚
即当此处报错,订单有 @Transactional 会回滚,但是库存不回滚
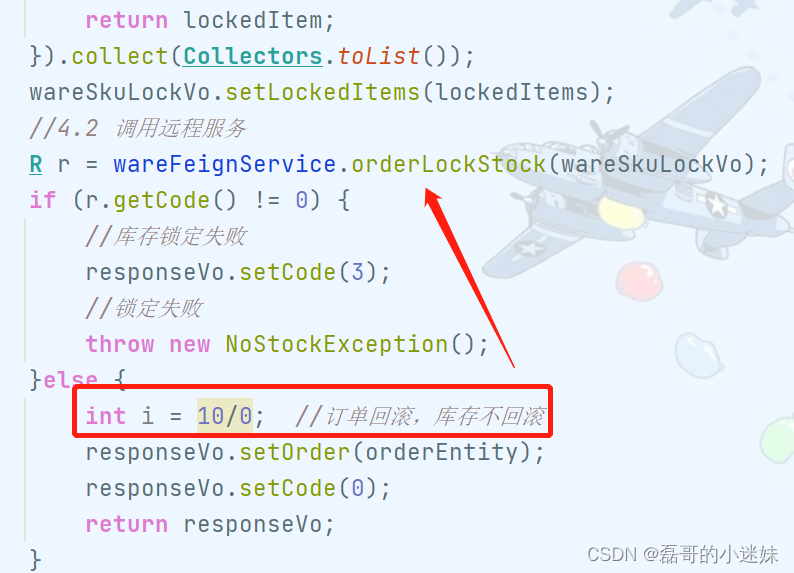
@Transactional 本地事务,只能控制住自己的回滚,无法控制其他服务的回滚
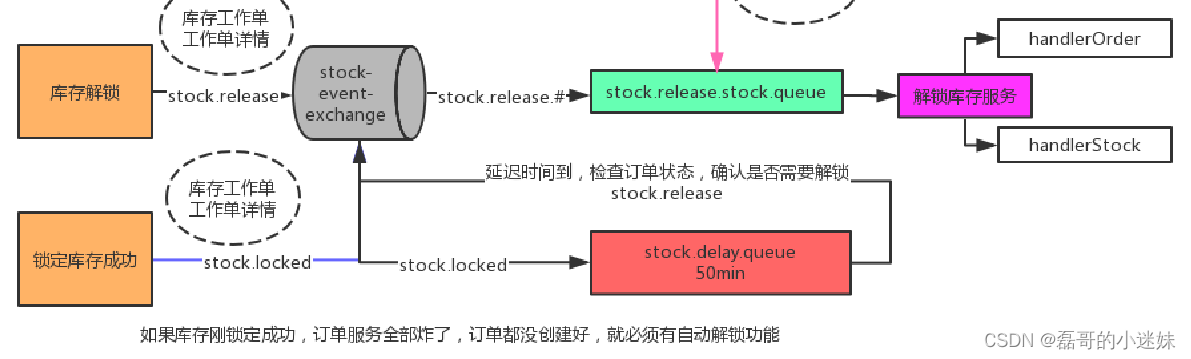
本小节需要完成下图的 订单部分、库存部分
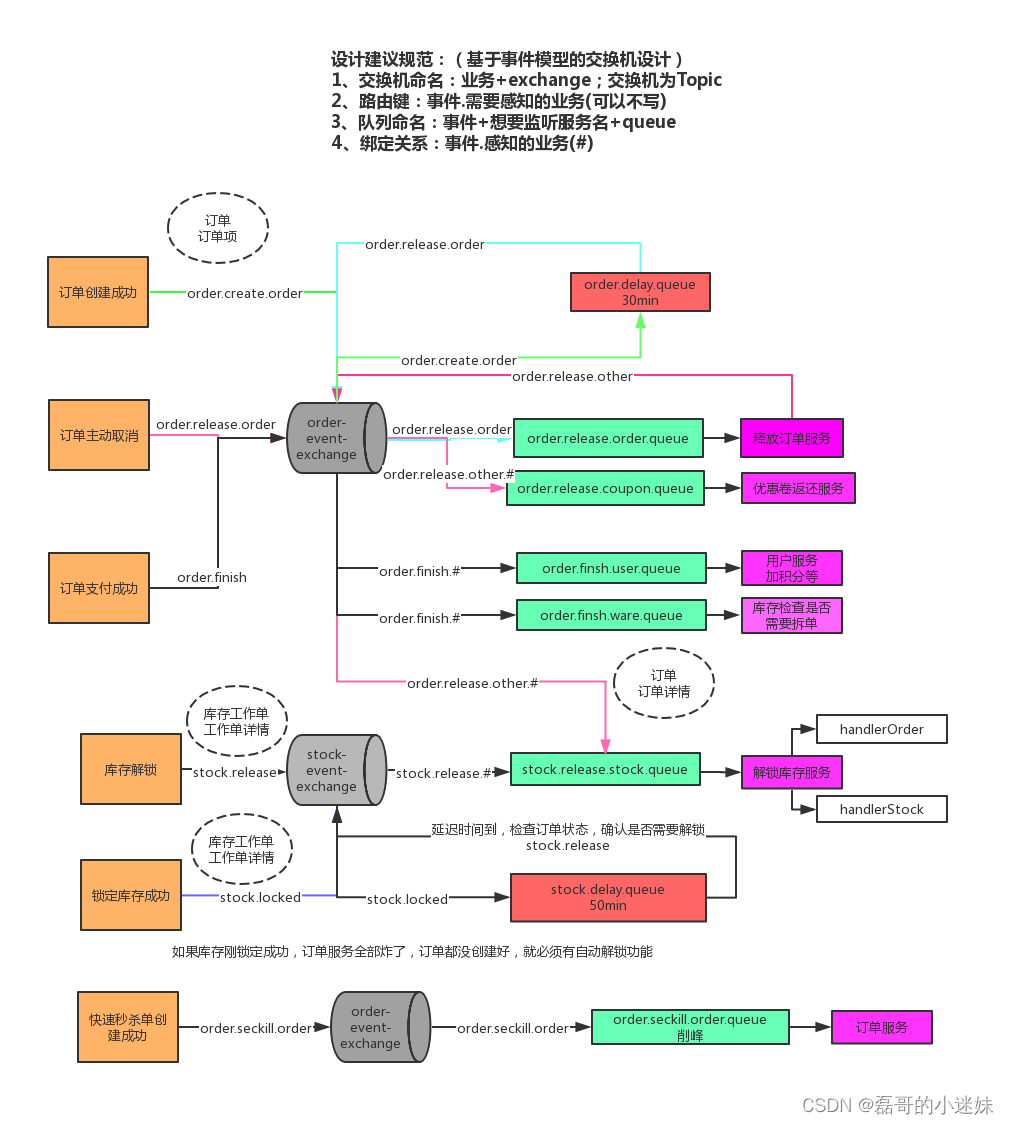
1)、库存自动解锁
1 准备MQ
导入依赖
<dependency>
<groupId>org.springframework.boot</groupId>
<artifactId>spring-boot-starter-amqp</artifactId>
</dependency>
配置 yml
spring:
rabbitmq:
host: localhost
port: 5672
virtual-host: /gulimall-ware
#手动确认收货(ack)
listener:
simple:
acknowledge-mode: manual
启动类使用注解 @EnableRabbit
没有此注解好像也可以使用
@EnableRabbit
public class GulimallWareApplication
RabbitMQ 配置,创建交换机、队列、绑定关系
MyRabbitConfig
@Configuration
public class MyRabbitConfig {
@Autowired
RabbitTemplate rabbitTemplate;
/**
* 使用JSON序列化机制,进行消息转换
*/
@Bean
public MessageConverter messageConverter(){
return new Jackson2JsonMessageConverter();
}
@Bean
public Exchange stockEventExchange(){
return new TopicExchange("stock-event-exchange",true,false);
}
@Bean
public Queue stockReleaseStockQueue(){
return new Queue("stock.release.stock.queue",true,false,false);
}
@Bean
public Queue stockDelayQueue(){
Map<String, Object> arguments = new HashMap<>();
arguments.put("x-dead-letter-exchange","stock-event-exchange");
//注意此处是release,一定时间后自动发送路由键release给交换机
arguments.put("x-dead-letter-routing-key","stock.release");
arguments.put("x-message-ttl", 2*60000);
return new Queue("stock.delay.queue",true,false,false,arguments);
}
@Bean
public Binding stockRelease(){
return new Binding("stock.release.stock.queue",
Binding.DestinationType.QUEUE,
"stock-event-exchange",
"stock.release.#",null);
}
@Bean
public Binding stockLocked(){
return new Binding("stock.delay.queue",
Binding.DestinationType.QUEUE,
"stock-event-exchange",
"stock.locked",null);
}
}
原始队列(stock.delay.queue)不让有任何监听者,当其中的消息过期后,自动转发 到死信队列(stock.release.stock.queue),监听者都监听死信队列
2 增强库存锁定逻辑
锁定库存时使用工作单记录锁定数据,将数据发送给MQ,控制回滚解锁
数据库增加两个字段
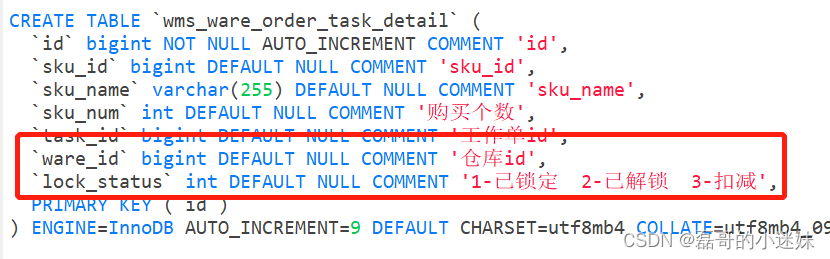
修改实体类 WareOrderTaskDetailEntity
//仓库id
private Long wareId;
//1-已锁定 2-已解锁 3-扣减
private Integer lockStatus;
修改 WareOrderTaskDetailDao.xml

修改 WareSkuServiceImpl.orderLockStock() ,实现锁定库存后保存工作单数据
3 MQ实现
在 common 中新建用于 MQ 传递的实体类
一般 MQ 使用的模型多个服务需要使用,所以放在 common 中
StockLockedTo
/**
* 解锁锁定库存,发送至MQ延迟队列的VO模型
*/
@Data
public class StockLockedTo {
private String orderSn;
private Long skuId;
private String skuName;
private Integer skuNum;
/**
* 工作单id
*/
private Long taskId;
/**
* 工作明细单id
*/
private Long detailTaskId;
//仓库id
private Long wareId;
//1-已锁定 2-已解锁 3-扣减
private Integer lockStatus;
}
在 WareSkuServiceImpl.orderLockStock() 中,锁定库存之后,发送消息
@Transactional
@Override
public Boolean orderLockStock(WareSkuLockVo wareSkuLockVo) {
List<WareCartItemVo> lockedItems = wareSkuLockVo.getLockedItems();
//1、找寻有库存的仓库
List<SkuWareHasStock> hasStocks = lockedItems.stream().map(item -> {
//查询商品是否有库存,返回有库存并且库存数量足够的仓库id
SkuWareHasStock hasStock = new SkuWareHasStock();
hasStock.setSkuId(item.getSkuId());
hasStock.setNum(item.getCount());
List<Long> wareIds = baseMapper.listWareIdHasSkuStock(item.getSkuId(),item.getCount());
hasStock.setWareId(wareIds);
return hasStock;
}).collect(Collectors.toList());
//2、进行库存锁定,若有任一商品锁定失败就会抛异常回滚
/**
* 若每个商品都锁定成功,将当前商品对应的工作单发送给MQ。后续若需要解锁可根据MQ数据解锁(例如订单报错但库存不报错)
* 若任一商品锁定失败回滚(已锁的会回滚解锁),消息虽已发出,但是库里无工作单,不影响
*/
WareOrderTaskEntity taskEntity = new WareOrderTaskEntity();
taskEntity.setOrderSn(wareSkuLockVo.getOrderSn());
taskService.save(taskEntity);
WareOrderTaskEntity task = taskService.getOne(new QueryWrapper<WareOrderTaskEntity>().eq("order_sn", wareSkuLockVo.getOrderSn()));
for (SkuWareHasStock skuWareHasStock : hasStocks) {
Boolean skuStocked = false;
List<Long> wareIds = skuWareHasStock.getWareId();
if (wareIds == null || wareIds.size() < 0){
throw new NoStockException(skuWareHasStock.getSkuId());
}
for (Long wareId : wareIds) {
//锁定库存 wms_ware_sku
Long count = baseMapper.lockWareSku(skuWareHasStock.getSkuId(), skuWareHasStock.getNum(), wareId);
if (count == 1){
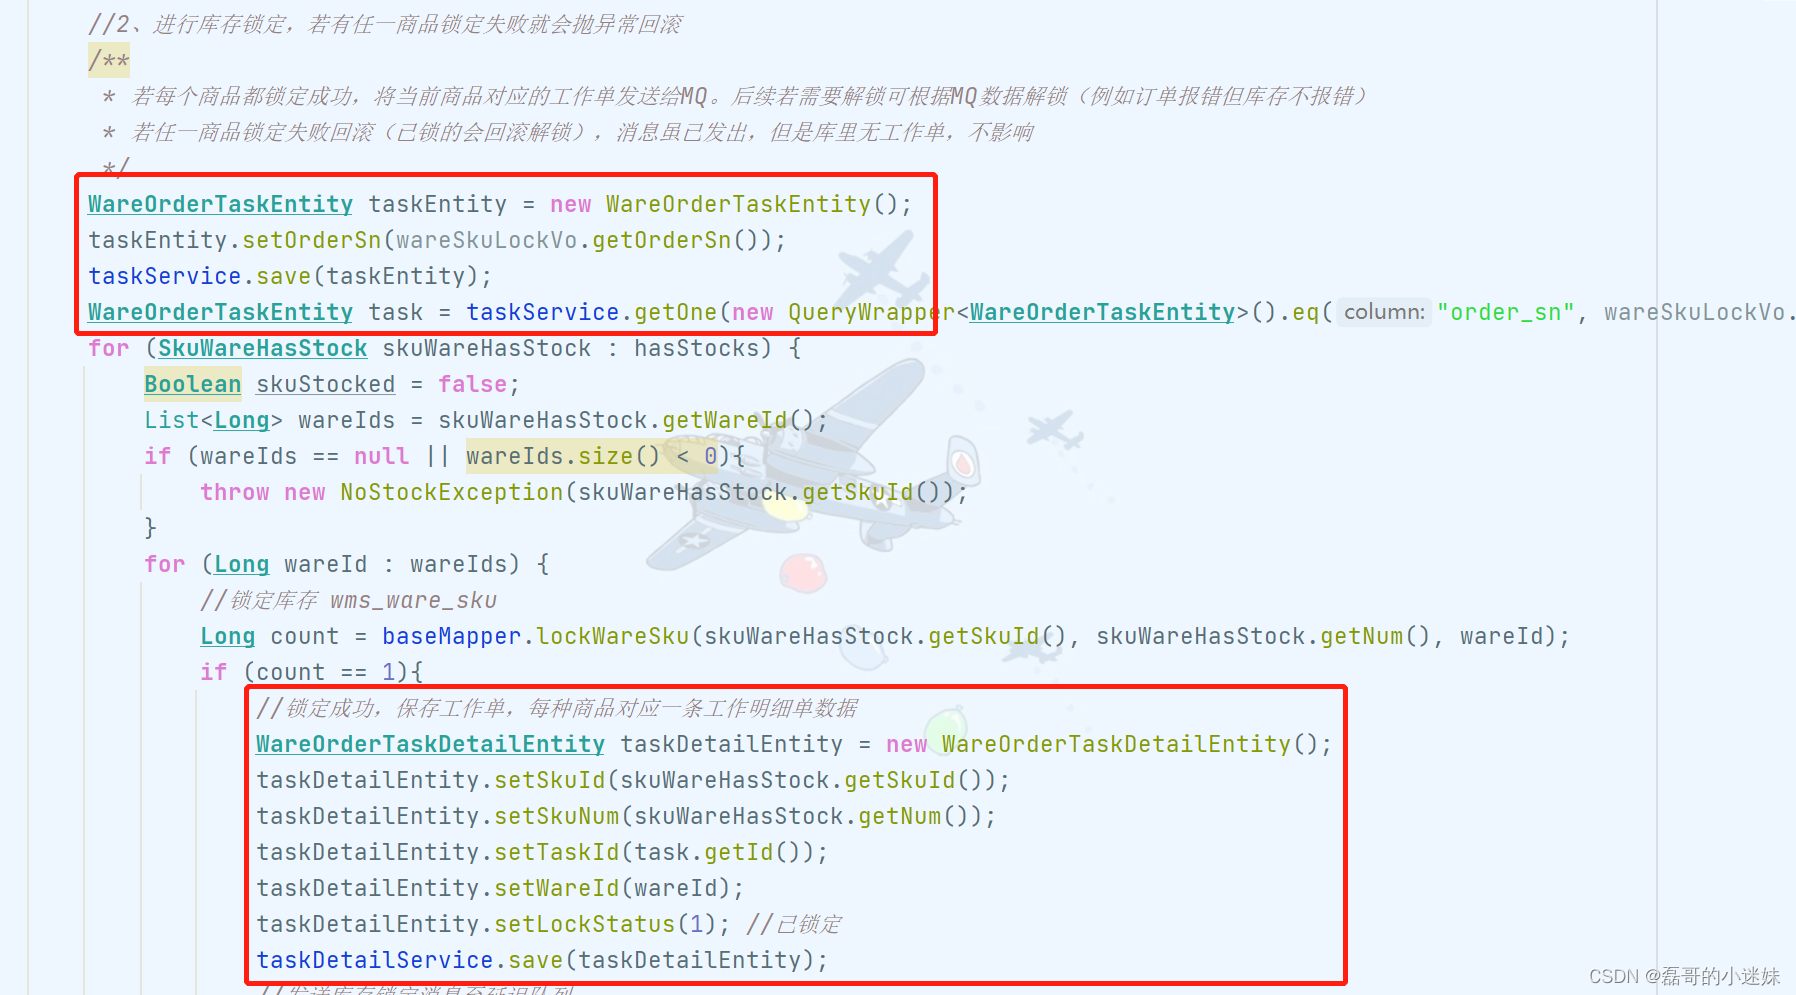
//锁定成功,保存工作单,每种商品对应一条工作明细单数据
WareOrderTaskDetailEntity taskDetailEntity = new WareOrderTaskDetailEntity();
taskDetailEntity.setSkuId(skuWareHasStock.getSkuId());
taskDetailEntity.setSkuNum(skuWareHasStock.getNum());
taskDetailEntity.setTaskId(task.getId());
taskDetailEntity.setWareId(wareId);
taskDetailEntity.setLockStatus(1); //已锁定
taskDetailService.save(taskDetailEntity);
// 3、 发送库存锁定消息至延迟队列
StockLockedTo lockedTo = new StockLockedTo();
BeanUtils.copyProperties(taskDetailEntity,lockedTo);
lockedTo.setOrderSn(wareSkuLockVo.getOrderSn());
lockedTo.setDetailTaskId(taskDetailEntity.getId());
rabbitTemplate.convertAndSend("stock-event-exchange","stock.locked",lockedTo);
skuStocked = true;
break;
}
}
if (!skuStocked){
//锁定失败
throw new NoStockException(skuWareHasStock.getSkuId());
}
}
return true;
}
gulimall-ware 新建类用于监听消息
StockReleaseListener
/**
* 监听库存解锁队列,接收MQ的解锁消息,是否解锁
*/
@RabbitListener(queues = "stock.release.stock.queue")
@Component
@Slf4j
public class StockReleaseListener {
@Autowired
WareSkuService wareSkuService;
@RabbitHandler
public void handleStockLockedRelease(StockLockedTo lockedTo, Channel channel, Message message) throws IOException {
log.info("************************收到库存解锁的消息********************************");
try {
wareSkuService.unLockStock(lockedTo);
//解锁逻辑之后消费消息
channel.basicAck(message.getMessageProperties().getDeliveryTag(),false); //是否批量确认消息
} catch (IOException e) {
e.printStackTrace();
//若有任何异常,拒收消息,并重新入队
channel.basicReject(message.getMessageProperties().getDeliveryTag(),true); //消息是否重新入队
}
}
}
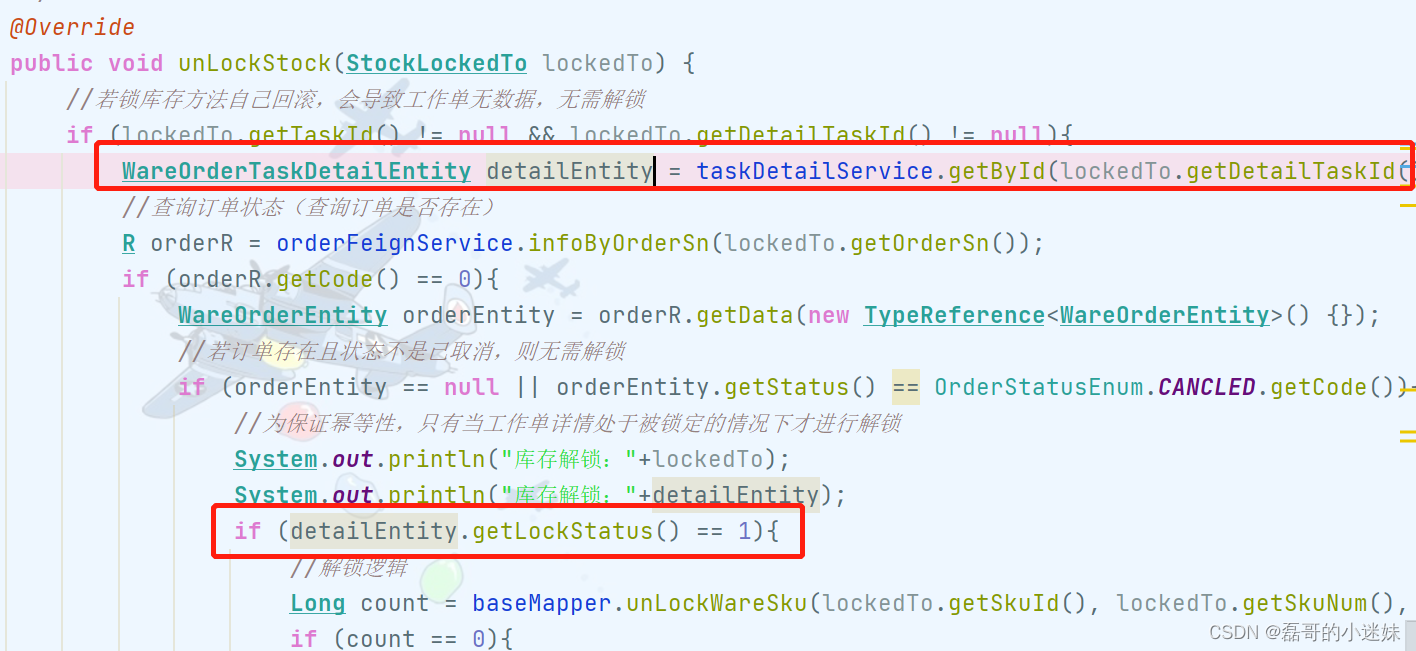
库存解锁逻辑
WareSkuServiceImpl.unLockStock()
当订单状态为已取消、查询没有订单时,一定时间后需要库存自动解锁
(若工作单无数据说明锁定失败,无需解锁;若解锁过程出现任何异常,都应拒收消息并重新入队)
注意:此处有坑,下面订单自动取消的库存解锁中说明
/**
* 1、若库存工作单无数据,说明库存未锁定、或锁定失败,无需解锁
* 2、工作单有数据,需要判断订单状态
* ① 订单存在,状态为已取消,需要解锁
* ② 订单不存在,需要解锁
* 为保证幂等性,需要分别对订单的状态和工作单的状态都进行判断
*/
@Override
public void unLockStock(StockLockedTo lockedTo) {
if (lockedTo.getTaskId() != null && lockedTo.getDetailTaskId() != null){
//查询订单状态
R orderR = orderFeignService.infoByOrderSn(lockedTo.getOrderSn());
if (orderR.getCode() == 0){
WareOrderEntity orderEntity = orderR.getData(new TypeReference<WareOrderEntity>() {});
if (orderEntity == null || orderEntity.getStatus() == OrderStatusEnum.CANCLED.getCode()){
//为保证幂等性,只有当工作单详情处于被锁定的情况下才进行解锁
if (lockedTo.getLockStatus() == 1){
//解锁逻辑
Long count = baseMapper.unLockWareSku(lockedTo.getSkuId(), lockedTo.getSkuNum(), lockedTo.getWareId());
if (count == 0){
throw new RuntimeException("解锁库存失败");
}
//更新工作单状态
WareOrderTaskDetailEntity taskDetailEntity = new WareOrderTaskDetailEntity();
taskDetailEntity.setId(lockedTo.getDetailTaskId());
taskDetailEntity.setSkuId(lockedTo.getSkuId());
taskDetailEntity.setLockStatus(2);
taskDetailService.updateById(taskDetailEntity);
}
}
//若订单存在且状态不是已取消,则无需解锁
}else {
throw new RuntimeException("远程调用订单服务失败");
}
}
//若锁库存方法自己回滚,会导致工作单无数据,无需解锁
}
库存解锁
baseMapper.unLockWareSku()
<update id="unLockWareSku">
UPDATE `wms_ware_sku` SET stock_locked= stock_locked - #{skuNum}
WHERE sku_id=#{skuId} AND ware_id=#{wareId}
</update>
远程调用查询订单状态
gulimall-order 中逻辑
@RequestMapping("/status/{orderSn}")
public R infoByOrderSn(@PathVariable("orderSn") String orderSn){
OrderEntity order = orderService.getByOrderSn(orderSn);
return R.ok().setData(order);
}
@Override
public OrderEntity getByOrderSn(String orderSn) {
return getOne(new QueryWrapper<OrderEntity>().eq("order_sn",orderSn));
}
gulimall-ware 中的 OrderFeignService
@FeignClient("gulimall-order")
public interface OrderFeignService {
@RequestMapping("/order/order/status/{orderSn}")
R infoByOrderSn(@PathVariable("orderSn") String orderSn);
}
注意此处,因为 gulimall-order 订单服务设置了拦截器,必须用户登录才可以访问订单服务接口
但是此处本身没登录,因为远程调用接口的源头是 MQ监听器,不是用户
修改 gulimall-order 订单服务拦截器 LoginUserInterceptor
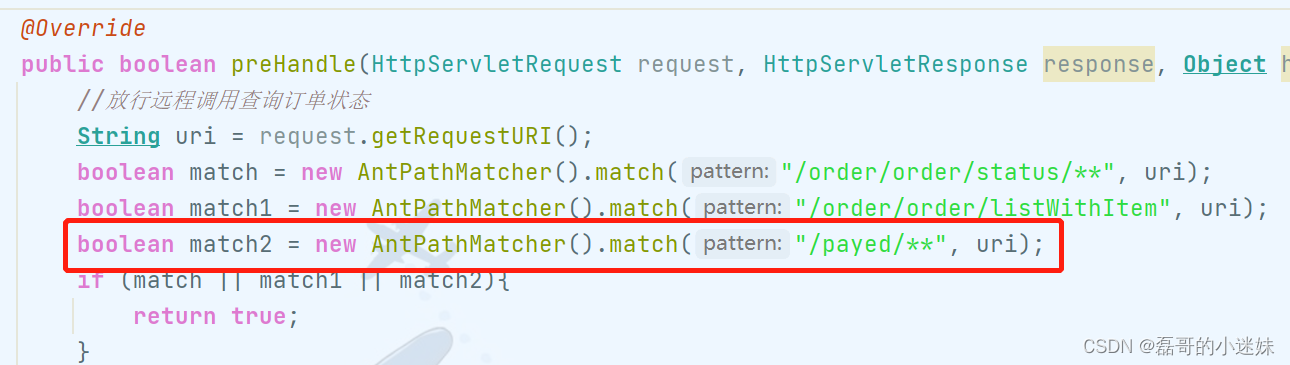
@Override
public boolean preHandle(HttpServletRequest request, HttpServletResponse response, Object handler) throws Exception {
//放行远程调用查询订单状态
String uri = request.getRequestURI();
boolean match = new AntPathMatcher().match("/order/order/status/**", uri);
if (match){
return true;
}
MemberEntity member = (MemberEntity) request.getSession().getAttribute(AuthServerConstant.LOGIN_USER);
if (member != null){
threadLocalLoginUser.set(member);
return true;
}else {
request.getSession().setAttribute("msg","请先进行登录");
response.sendRedirect("http://localhost:20000/login.html");
return false;
}
}
测试:
当订单报错时,订单数据回滚,但是库存被锁定

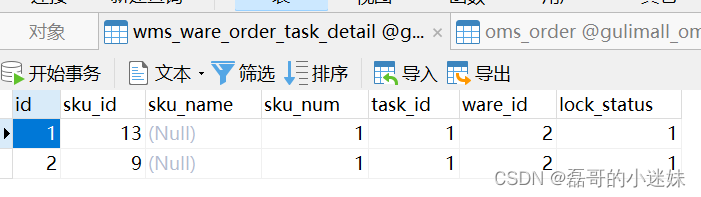
两分钟后,库存自动解锁
2)、订单超时自动取消
1 订单超时自动取消
依赖等配置同上
RabbitMQ 配置,创建交换机、队列、绑定关系
MyMQConfig
@Configuration
public class MyMQConfig {
/**
* 直接注入,只要发送消息、或者有监听队列,就会在RabbitMQ创建,不需要AmqpAdmin
* 如果创建之后有改动,只要MQ已经存在,就不会覆盖
*/
@Bean
public Exchange orderEventExchange(){
/**
* String name, 交换机的名字
* boolean durable, 是否持久
* boolean autoDelete, 是否自动删除
* Map<String, Object> arguments 参数
*/
return new TopicExchange("order-event-exchange",true,false);
}
@Bean
public Queue orderDelayQueue(){
/**
* String name, 队列的名字
* boolean durable, 是否持久
* boolean exclusive, 是否排他(只能有一个人连)
* boolean autoDelete, 是否自动删除
* Map<String, Object> arguments 参数
*/
Map<String, Object> arguments = new HashMap<>();
arguments.put("x-dead-letter-exchange","order-event-exchange");
arguments.put("x-dead-letter-routing-key","order.release.order"); //延迟之后此队列要自动发的路由
arguments.put("x-message-ttl", 1*60000);
return new Queue("order.delay.queue",true,false,false,arguments);
}
@Bean
public Queue orderReleaseOrderQueue(){
return new Queue("order.release.order.queue",true,false,false);
}
@Bean
public Binding orderCreateOrder(){
/**
* String destination, 目的地
* DestinationType destinationType, 目的地类型(交换机或者队列)
* String exchange, 交换机的名字
* String routingKey, 路由键
* Map<String, Object> arguments 参数
*
* 将exchange指定的交换机和destination目的地进行绑定,
* 使用routingkey作为指定的路由键
*/
return new Binding("order.delay.queue",
Binding.DestinationType.QUEUE,
"order-event-exchange",
"order.create.order",null);
}
@Bean
public Binding orderReleaseOrder(){
return new Binding("order.release.order.queue",
Binding.DestinationType.QUEUE,
"order-event-exchange",
"order.release.order",null);
}
}
监听消息
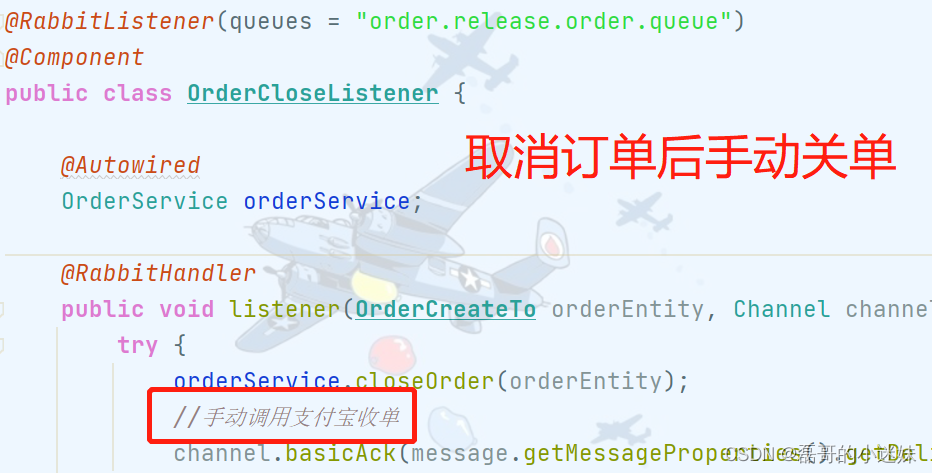
OrderCloseListener
@RabbitListener(queues = "order.release.order.queue")
@Component
public class OrderCloseListener {
@Autowired
OrderService orderService;
@RabbitHandler
public void listener(OrderCreateTo orderEntity, Channel channel, Message message) throws IOException {
try {
orderService.closeOrder(orderEntity);
channel.basicAck(message.getMessageProperties().getDeliveryTag(),false);
} catch (Exception e) {
e.printStackTrace();
channel.basicReject(message.getMessageProperties().getDeliveryTag(),true);
}
}
}
实现类编写订单超时后关单逻辑
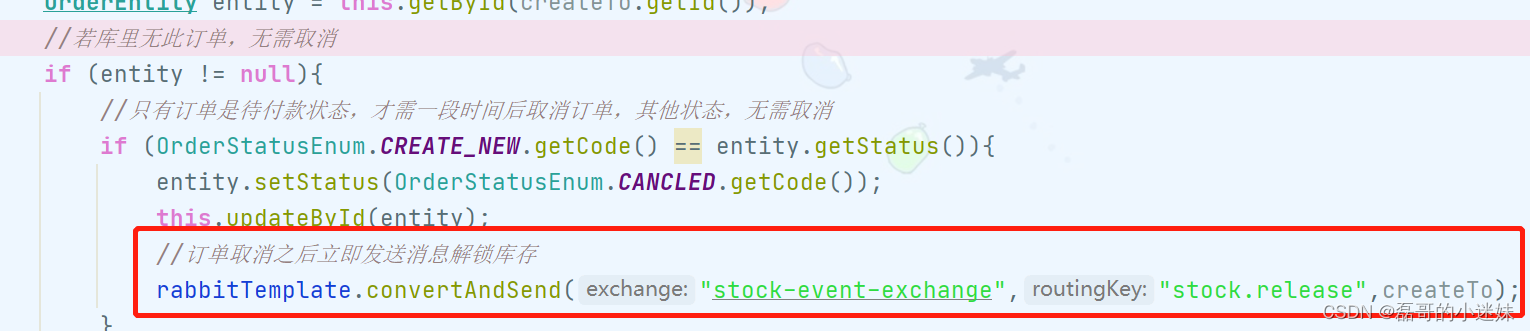
OrderServiceImpl.closeOrder()
当订单状态为CREATE_NEW,一定时间后需要取消订单
(取消订单然后库存自动解锁,设置的延时时间:订单的时间要比解锁的时间短)
@Override
public void closeOrder(OrderCreateTo createTo) {
OrderEntity entity = this.getById(createTo.getId());
//若库里无此订单,无需取消
if (entity != null){
//只有订单是待付款状态,才需一段时间后取消订单,其他状态,无需取消
if (OrderStatusEnum.CREATE_NEW.getCode() == entity.getStatus()){
entity.setStatus(OrderStatusEnum.CANCLED.getCode());
this.updateById(entity);
}
}
}
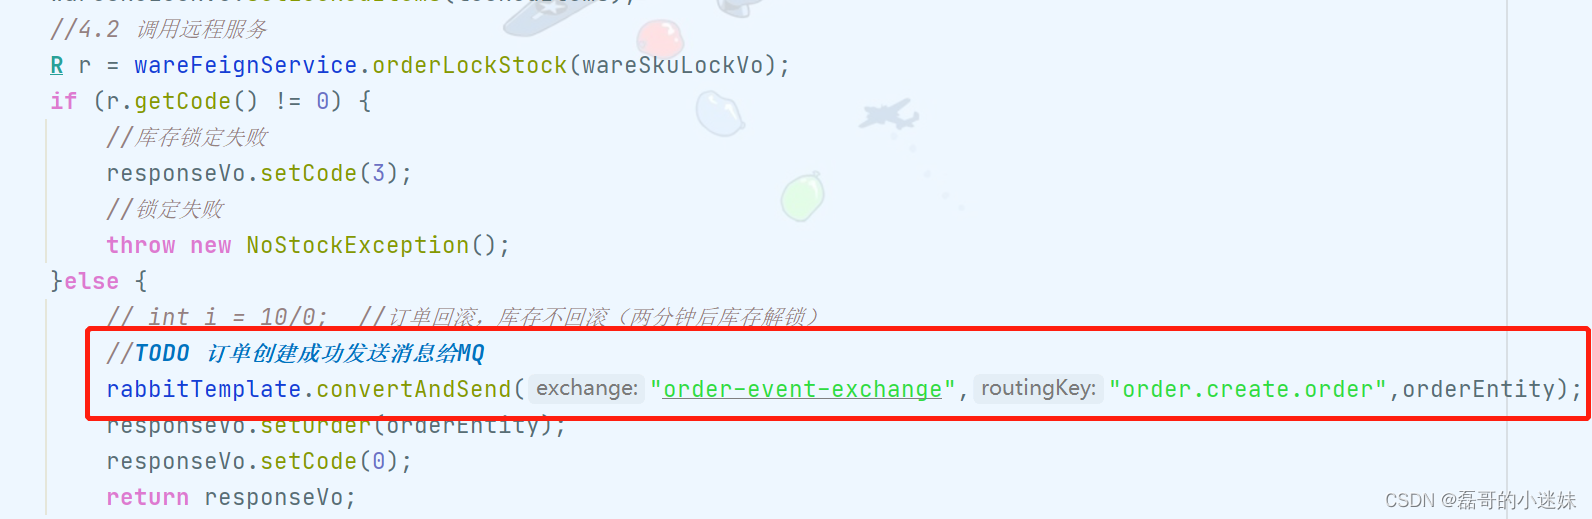
修改提交订单逻辑
OrderServiceImpl.submitOrder()
rabbitTemplate.convertAndSend("order-event-exchange","order.create.order",orderEntity);
2 解锁库存
若出现机器卡顿、消息延迟等情况,导致订单未即使取消,库存先收到消息,判断时发现订单未取消,无需解锁。
然后订单才收到消息,执行取消订单。此时就导致订单取消但库存未解锁
所以需要在订单取消之后再进行库存解锁
此处示例,将取消订单的队列设置为 1 分钟,自动解锁的队列设置 2 分钟,模拟库存未收到信息,订单先收到消息
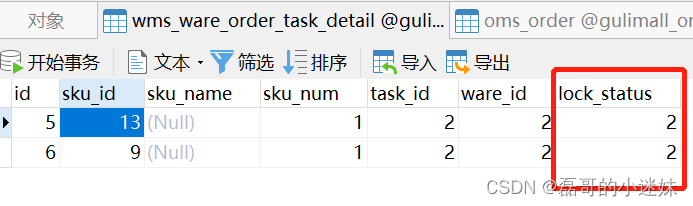
当测试的时候发现有问题:库存扣除了两遍,导致库存为负数
打印两个解锁库存方法中的 WareOrderTaskDetailEntity,发现库存解锁接收的参数不是最新参数,导致判断失误
解决:直接查询数据库最新数据

注意此处需要在 order 服务中给 ware 服务创建的 queue 队列发送消息,所以需要保证两个服务是在一个虚拟主机内 virtual-host ,否则发送消息时MQ会报错 404
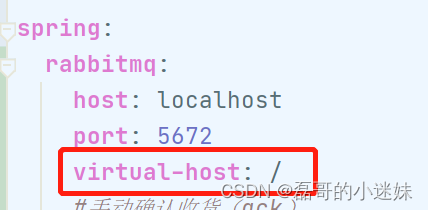
当订单取消的时候,立即发送消息给库存服务进行解锁库存,此处不需要延迟队列
修改关单逻辑
OrderServiceImpl.closeOrder()
//订单取消之后立即发送消息解锁库存
rabbitTemplate.convertAndSend("stock-event-exchange","stock.release",createTo);
修改库存解锁监听类
StockReleaseListener
@RabbitHandler
public void handleOrderCloseRelease(OrderCreateTo createTo, Channel channel, Message message) throws IOException {
log.info("************************订单关闭准备解锁库存********************************");
try {
wareSkuService.unLockStockForOrder(createTo);
channel.basicAck(message.getMessageProperties().getDeliveryTag(),false); //是否批量确认消息
} catch (IOException e) {
e.printStackTrace();
channel.basicReject(message.getMessageProperties().getDeliveryTag(),true); //消息是否重新入队
}
}
订单关闭后自动解锁库存逻辑
WareSkuServiceImpl.unLockStockForOrder()
/**
* 防止订单服务卡顿,导致订单状态一直改变不了,库存消息优先到期,查订单状态新建状态,什么都不做就走了
* 导致卡顿的订单,永远不能解锁库存(订单卡顿后会重试,重试之后仍然可以解锁库存)
*/
@Transactional
@Override
public void unLockStockForOrder(OrderCreateTo createTo) {
WareOrderTaskEntity taskEntity = taskService.getOne(new QueryWrapper<WareOrderTaskEntity>().eq("order_sn", createTo.getOrderSn()));
//为保证幂等性,只有当工作单详情处于被锁定的情况下才进行解锁
List<WareOrderTaskDetailEntity> detailList = taskDetailService.list(
new QueryWrapper<WareOrderTaskDetailEntity>()
.eq("task_id", taskEntity.getId())
.eq("lock_status",1));
for (WareOrderTaskDetailEntity detailEntity : detailList) {
//解锁逻辑
Long count = baseMapper.unLockWareSku(detailEntity.getSkuId(), detailEntity.getSkuNum(), detailEntity.getWareId());
if (count == 0) {
throw new RuntimeException("解锁库存失败");
}
//更新工作详情单状态
detailEntity.setLockStatus(2);
taskDetailService.updateById(detailEntity);
}
}
支付
1、内网穿透
内网穿透功能可以允许我们使用外网的网址来访问自己本地的主机
实现外网域名映射到本地服务器端口
正常的外网需要访问我们项目的流程是:
1、买服务器并且有公网固定 IP
2、买域名映射到服务器的 IP
3、域名需要进行备案和审核
内网穿透的几个常用软件
1、natapp:https://natapp.cn/ 优惠码:022B93FD(9 折)[仅限第一次使用]
2、续断:www.zhexi.tech 优惠码:SBQMEA(95 折)[仅限第一次使用]
3、花生壳:https://www.oray.com
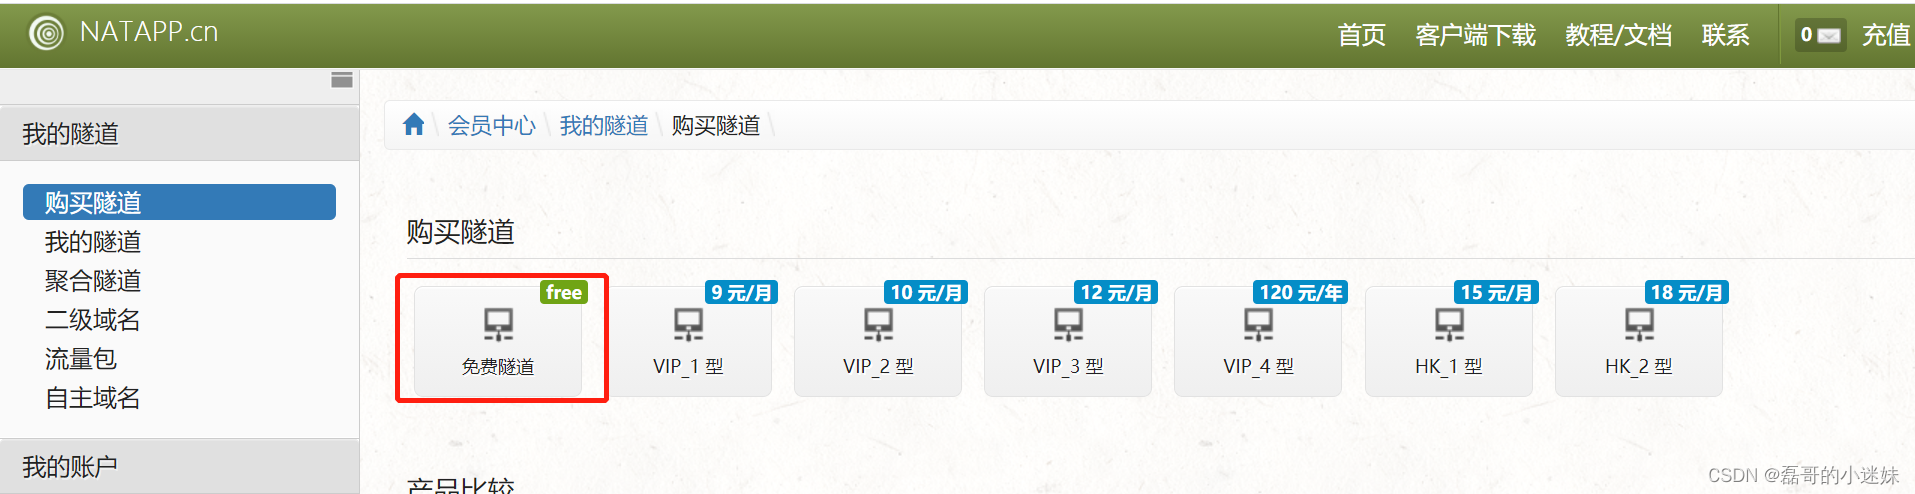
此处使用 natapp 的免费渠道
-
打开 官网 注册并登陆:https://natapp.cn/login
-
登陆后选择购买隧道:选择免费隧道(有效期一个月)
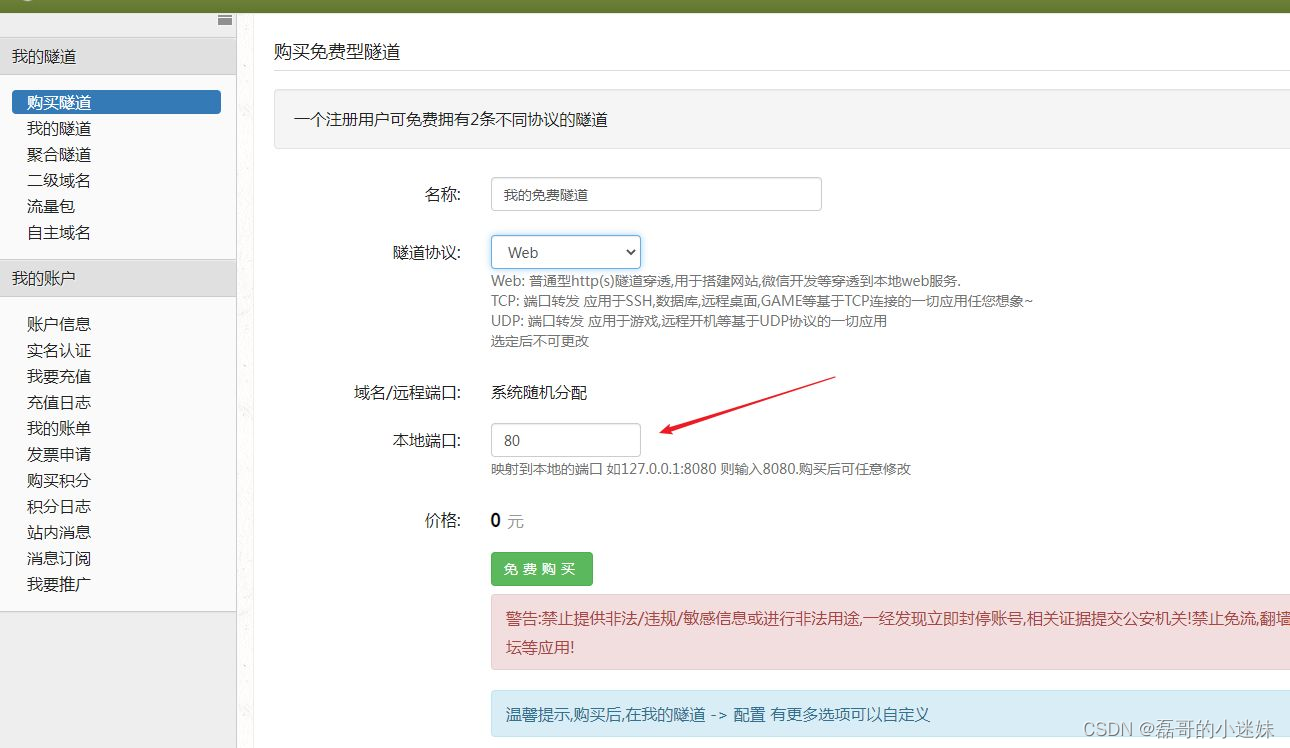
-
指定名字,选择Web协议,并指定本地的应用通讯的端口
-
购买成功后会生成认证令牌:复制并保存

-
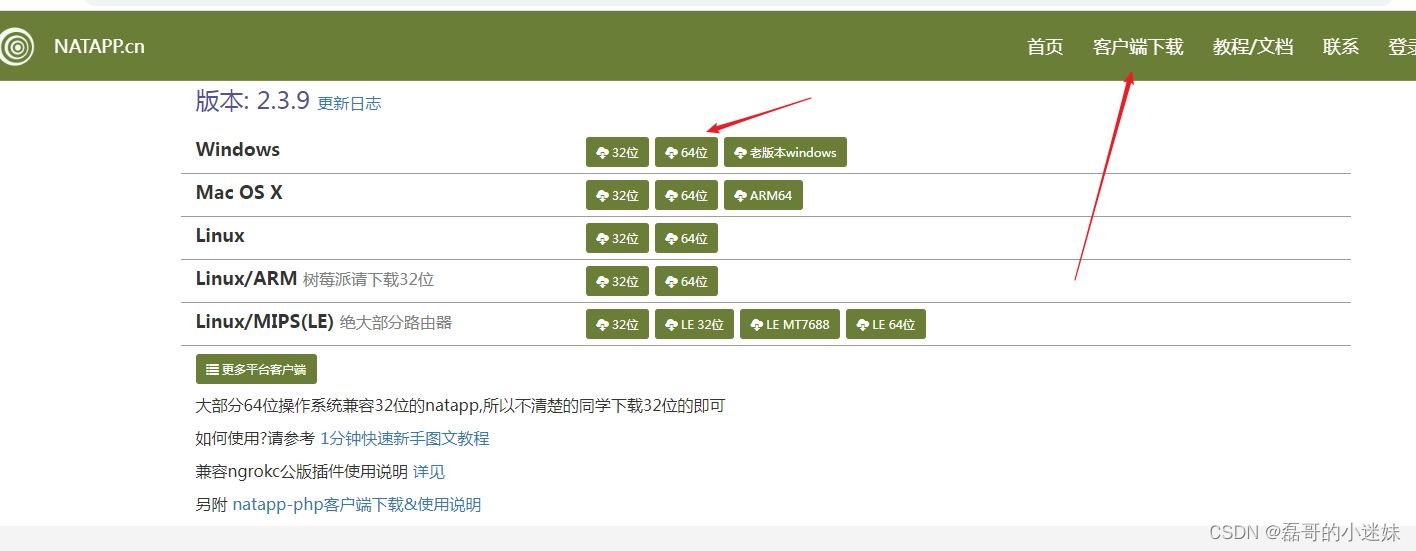
下载客户端工具:根据你电脑情况选择合适的版本下载,这里我选用Windows64位
-
创建配置文件:config.ini 点击此处下载 https://natapp.cn/article/config_ini
-
将配置文件中的 authtoken 换成我们刚申请的免费隧道的令牌
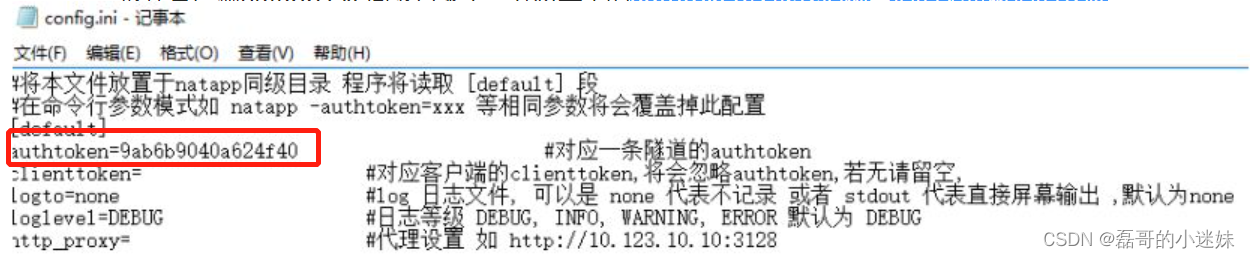
-
将配置文件放在客户端natapp.exe同级目录下
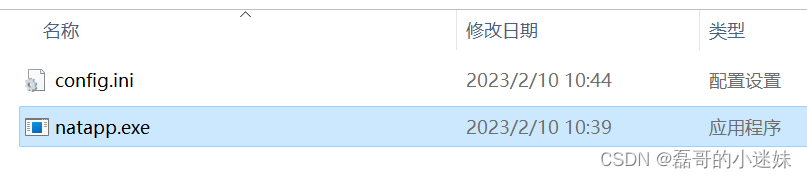
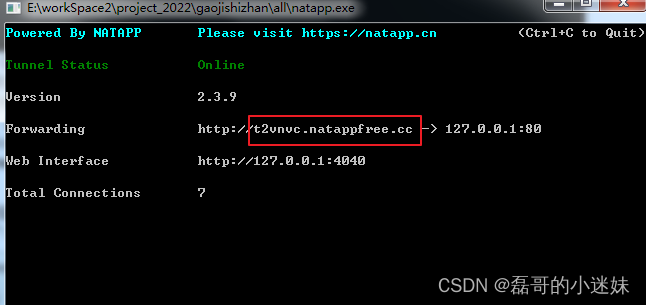
-
启动客户端:windows下,直接双击 natapp.exe 即可。红框内就是我们的隧道通信地址
注意:每次启动客户端都会分配一个新的隧道地址
2、支付宝沙箱
1)、支付宝加密原理
有对称加密,和非对称加密
加密——对称加密
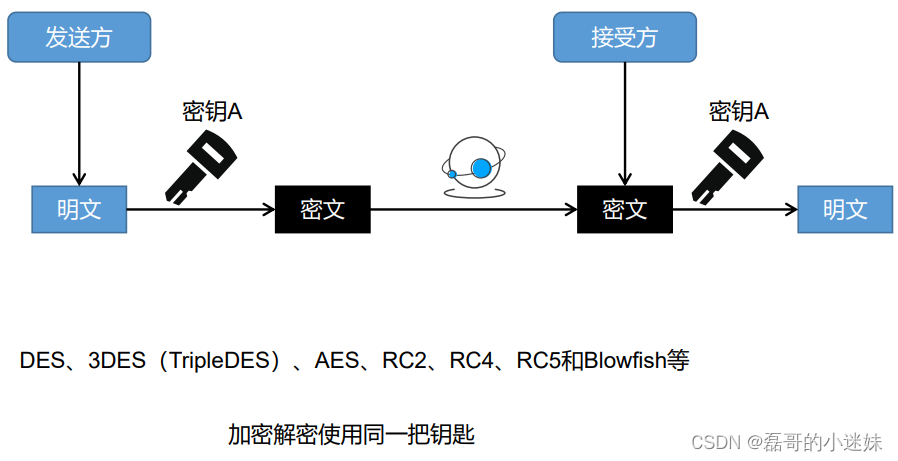
加密——非对称加密
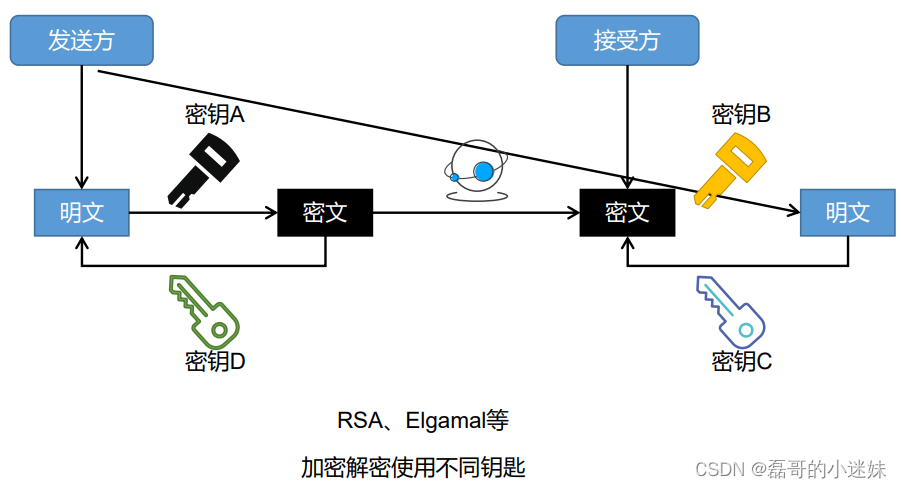
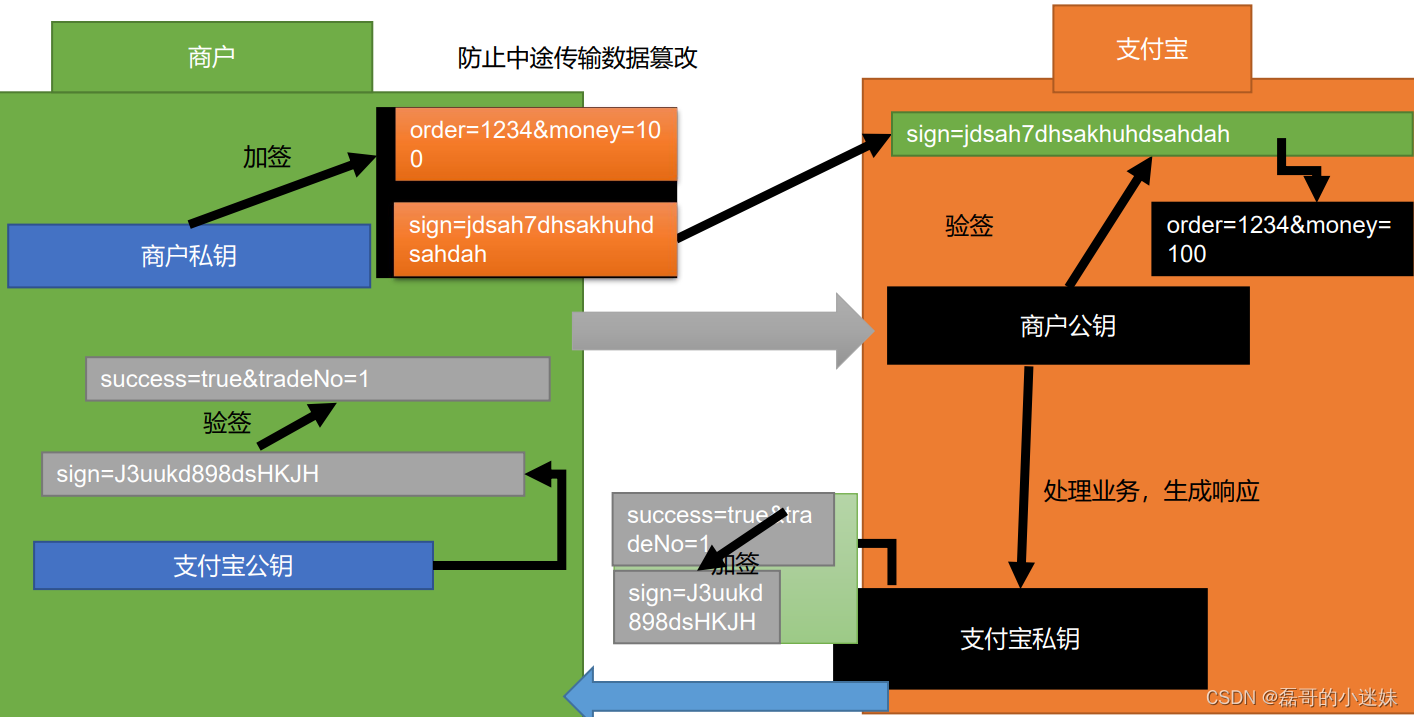
- 支付宝加密采用 RSA 非对称加密,分别在商户端和支付宝端有两对公钥和私钥。除了加密之外,还会对数据加签,即除了发送需要的数据之外还会发送一个 sign 标签,其与数据一一对应。若解密正确但携带的 sign 不正确,也可以拒绝访问
- 在发送订单数据时,直接使用明文,但会使用商户私钥加一个对应的签名,支付宝端会使用商户公钥对签名进行验签,只有数据明文和签名对应的时候才能说明传输正确
- 支付成功后,支付宝发送支付成功数据之外,还会使用支付宝私钥加一个对应的签名,商户端收到支付成功数据之后也会使用支付宝公钥延签,成功后才能确认
2)、沙箱手册
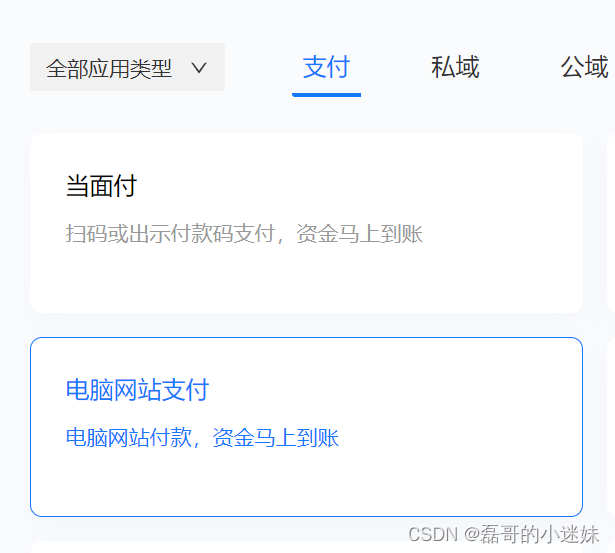
进入 API,选择电脑网站支付
进入开发文档
下载 demo,可查看沙箱环境代码使用
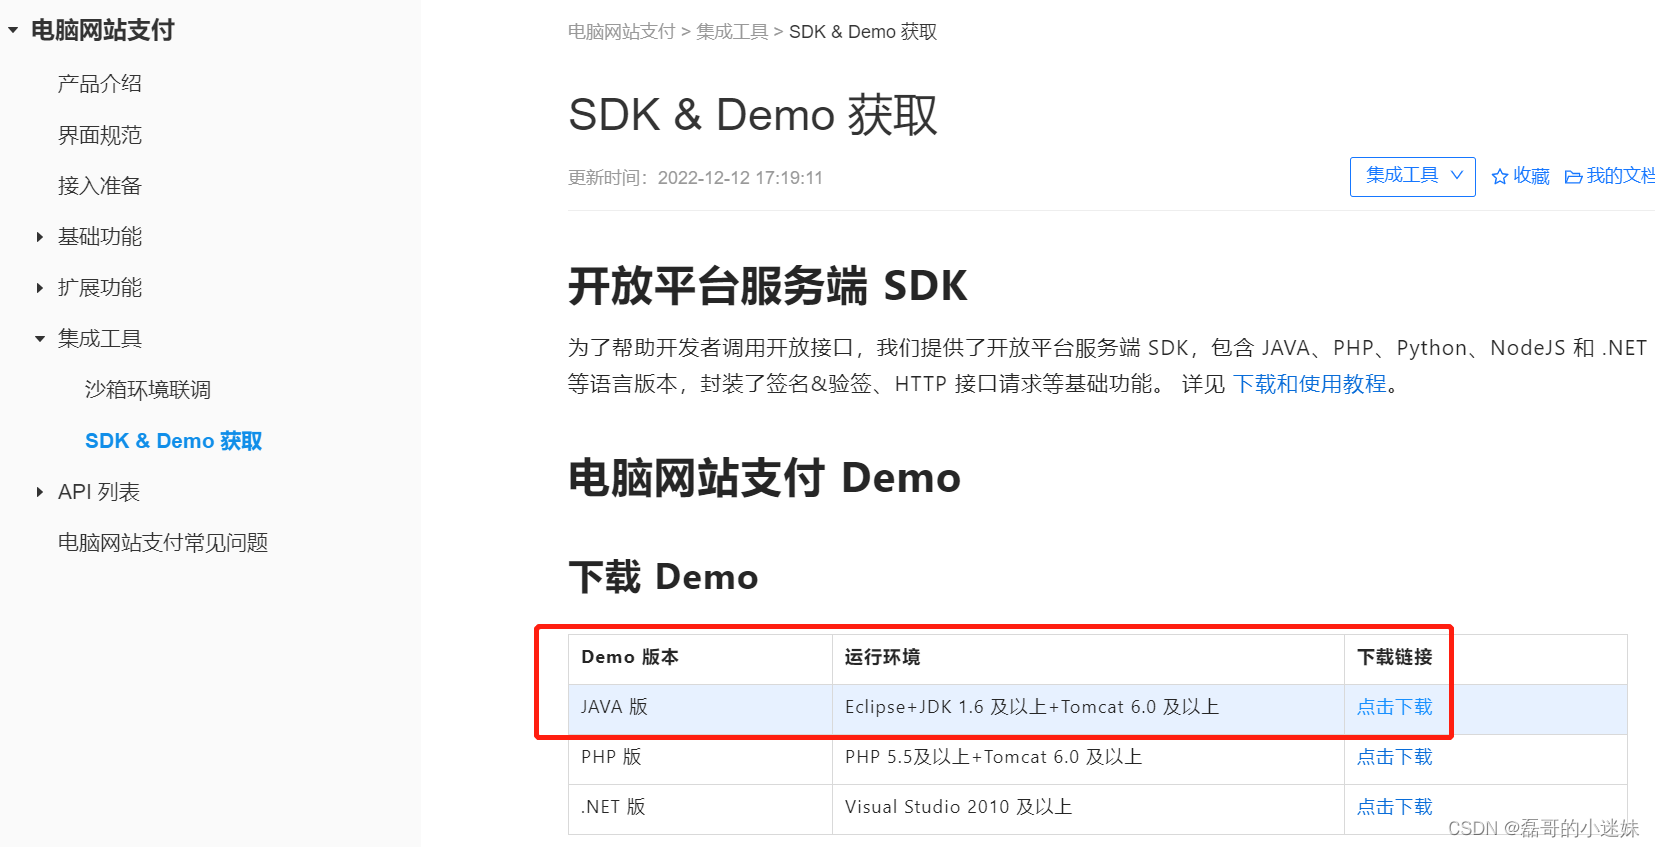
AlipayConfig 类为用户自定义配置信息,如私钥密钥等
根据 index.jsp 可以查看其中其他 jsp 文件中的代码的作用(付款、交易查询、退款、退款查询、交易关闭等相关代码)
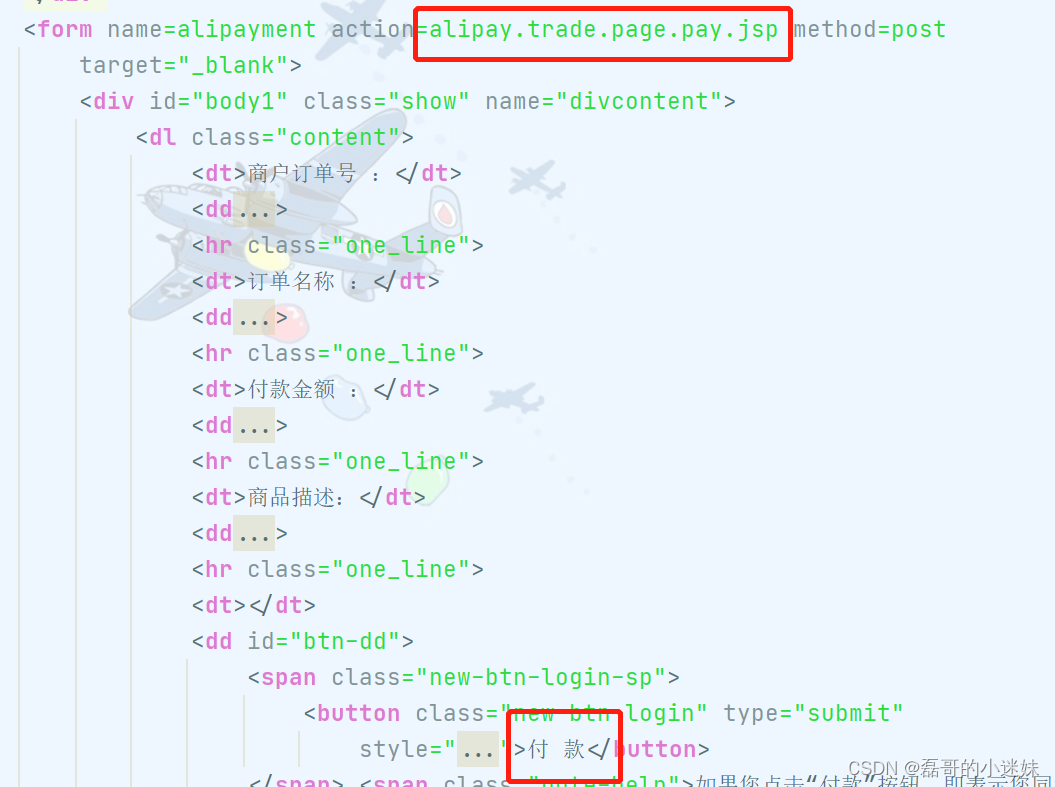
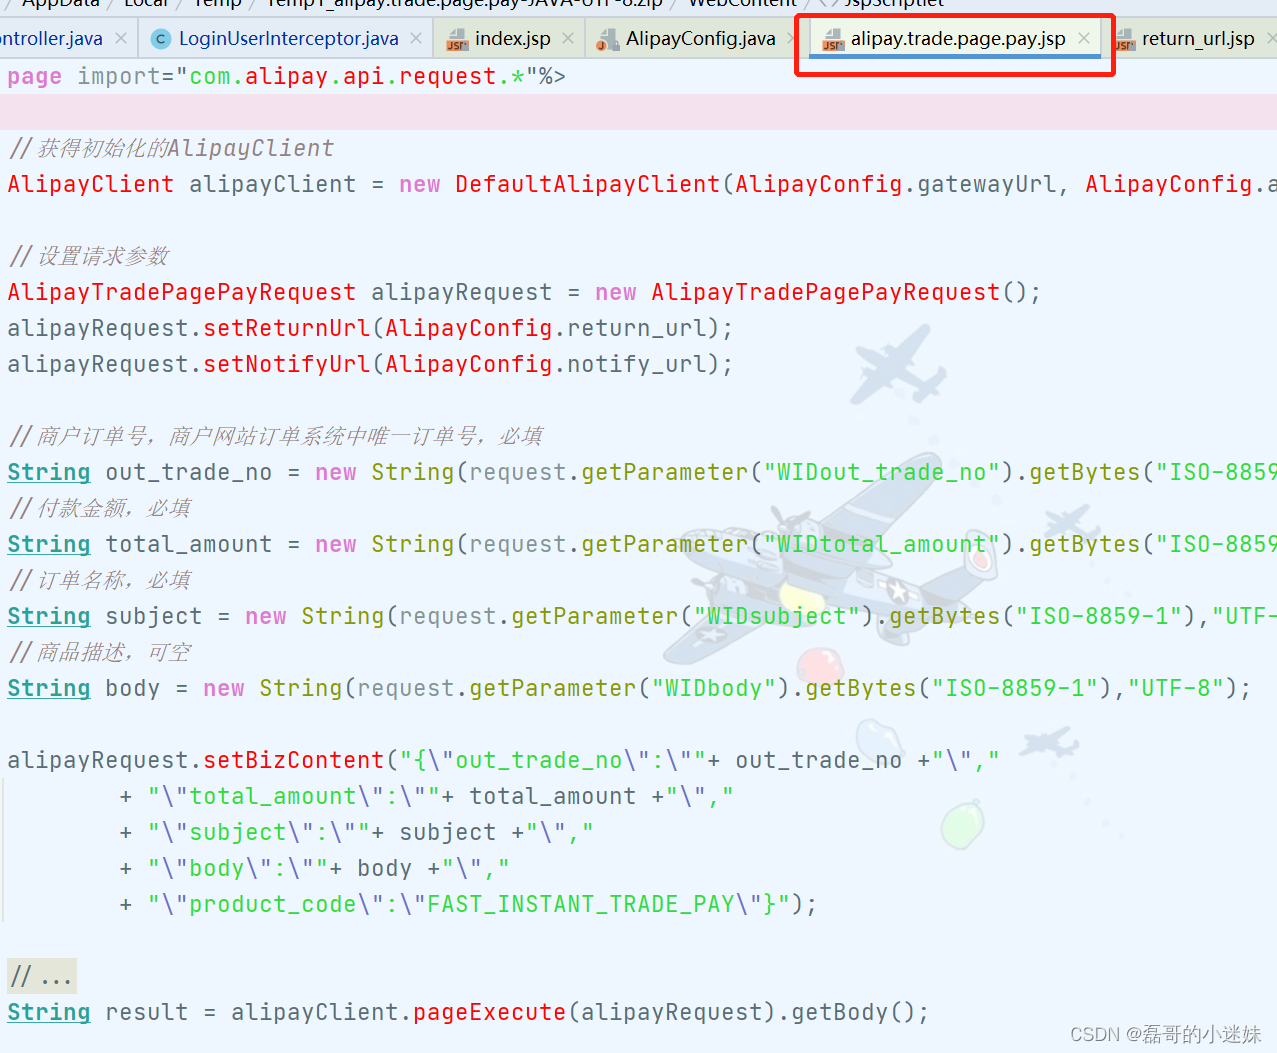
例如 alipay.trade.page.pay.jsp 即为用户付款的接口代码
沙箱环境数据可进入 操作指南
其中需要使用的付款账号及密钥配置见此处
3)、整合业务
1、若支付时显示 支付存在钓鱼风险
如果同时打开了支付宝服务商管理平台,那么在跳转到支付宝时会看到一个显示“支付存在钓鱼风险”的错误页面。
解决方案是:退出服务商管理平台。最简单的方式就是关掉所有的浏览器窗口再重新访问。新建一个无痕窗口或者换个浏览器也能解决
2、若支付时显示 支付宝沙箱订单信息无法识别
可能是传输数据的时候格式不对
1 订单服务整合支付
导入依赖
<dependency>
<groupId>com.alipay.sdk</groupId>
<artifactId>alipay-sdk-java</artifactId>
<version>4.34.0.ALL</version>
</dependency>
编写支付配置类 AlipayTemplate
注意:
1、同步通知,地址可以是内部服务器地址
—— 同步通知,支付成功后页面跳转到那里
2、异步通知,则是支付宝调用的地址,必须是外网可访问地址。异步通知说明
—— 支付成功异步回调,返回支付成功相关的信息
@ConfigurationProperties(prefix = "alipay") //可使用此注解,将数据放在配置文件
@Component
@Data
public class AlipayTemplate {
// 应用ID,您的APPID,收款账号既是您的APPID对应支付宝账号
public static String app_id = "2021000122617155";
// 商户私钥,您的PKCS8格式RSA2私钥
public static String privateKey = "11";
// 支付宝公钥,查看地址:https://openhome.alipay.com/platform/keyManage.htm 对应APPID下的支付宝公钥。
public static String alipayPublicKey = "11";
// 服务器异步通知页面路径 需http://格式的完整路径,不能加?id=123这类自定义参数,必须外网可以正常访问
public static String notify_url = "http://5z64tq.natappfree.cc/notifyP";
// 页面跳转同步通知页面路径 需http://格式的完整路径,不能加?id=123这类自定义参数,可写内网地址
public static String return_url = "http://localhost:8080/returnP";
// 签名方式
public static String sign_type = "RSA2";
// 字符编码格式
public static String charset = "utf-8";
// 支付宝网关
public static String gatewayUrl = "https://openapi.alipaydev.com/gateway.do";
public String pay(PayVo vo) throws AlipayApiException {
AlipayConfig alipayConfig = new AlipayConfig();
alipayConfig.setServerUrl(gatewayUrl);
alipayConfig.setAppId(app_id);
alipayConfig.setPrivateKey(privateKey);
alipayConfig.setFormat("json");
alipayConfig.setAlipayPublicKey(alipayPublicKey);
alipayConfig.setCharset(charset);
alipayConfig.setSignType(sign_type);
AlipayClient alipayClient = new DefaultAlipayClient(alipayConfig);
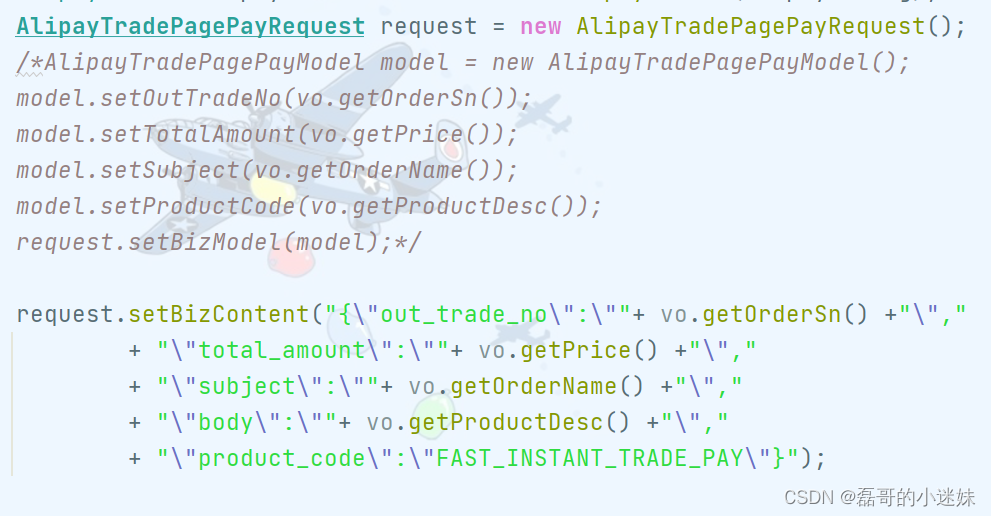
AlipayTradePagePayRequest request = new AlipayTradePagePayRequest();
AlipayTradePagePayModel model = new AlipayTradePagePayModel();
model.setOutTradeNo(vo.getOrderSn());
model.setTotalAmount(vo.getPrice());
model.setSubject(vo.getOrderName());
model.setProductCode(vo.getProductDesc());
request.setBizModel(model);
request.setReturnUrl(return_url);
request.setNotifyUrl(notify_url);
AlipayTradePagePayResponse response = alipayClient.pageExecute(request);
System.out.println(response.getBody());
if (response.isSuccess()) {
System.out.println("调用成功");
return response.getBody();
} else {
System.out.println("调用失败");
return response.getBody();
}
}
}
商家订单支付数据模型 PayVo
@Data
public class PayVo {
private String orderSn; // 商户订单号 必填
private String orderName; // 订单名称 必填
private String price; // 付款金额 必填
private String productDesc; // 商品描述 可空
}
支付接口 PayWebController
@Controller
public class PayWebController {
@Autowired
AlipayTemplate alipayTemplate;
@Autowired
OrderService orderService;
@ResponseBody
@GetMapping(value = "/payOrder", produces = "text/html")
public String payedPage(@RequestParam("orderSn") String orderSn) throws AlipayApiException {
PayVo payVo = orderService.getPayVo(orderSn);
//支付宝返回的是一个页面。将此页面直接交给浏览器就行
String pay = alipayTemplate.pay(payVo);
return pay;
}
}
业务类根据订单号获取支付所需数据 OrderServiceImpl
@Override
public PayVo getPayVo(String orderSn) {
PayVo payVo = new PayVo();
payVo.setOrderSn(orderSn);
List<OrderItemEntity> itemList = orderItemService.list(new QueryWrapper<OrderItemEntity>().eq("order_sn", orderSn));
OrderItemEntity entity = itemList.get(0);
//订单名称
payVo.setOrderName(entity.getSkuName());
//商品描述
payVo.setProductDesc(entity.getSkuAttrsVals());
//付款金额,因为有多位小数,此处向上取两位小数
OrderEntity orderEntity = this.getOne(new QueryWrapper<OrderEntity>().eq("order_sn", orderSn));
BigDecimal bigDecimal = orderEntity.getPayAmount().setScale(2, BigDecimal.ROUND_UP);
payVo.setPrice(bigDecimal.toString());
return payVo;
}
页面按钮
<a th:href="'http://localhost:9000/payOrder?orderSn='+${submitOrderResp.order.orderSn}">支付宝</a>
访问接口,打印返回数据response.getBody(),发现返回的其实是一个支付页面
使用注解 @GetMapping(value = "/payOrder", produces = "text/html")使其直接跳转该支付页面

使用沙箱环境提供的账号付款之后,发现同步回调的路径如下 。用户各种数据都在路径中,不安全,所以 选择使用异步回调
http://localhost:8080/returnP?
charset=UTF8&
out_trade_no=111&method=alipay.trade.page.pay.return&
total_amount=88.88&
sign=111&trade_no=111&
auth_app_id=111&version=1.0&app_id=111&
sign_type=RSA2&seller_id=111&
timestamp=2023-02-09+10%3A18%3A48

同步通知配置跳转页面地址
//同步通知,支付成功,一般跳转到成功页,此处跳转会员服务的订单列表页
private String return_url = "http://localhost:8000/orderList.html";
2 会员服务展示我的订单
使用提供的 html 页面,和之前一样,如果使用 nginx ,记得更改静态资源路径
会员服务添加依赖
(注意如果没由此依赖,访问页面报错 404 )
<!--模板引擎 thymeleaf-->
<dependency>
<groupId>org.springframework.boot</groupId>
<artifactId>spring-boot-starter-thymeleaf</artifactId>
</dependency>
编写接口 MemberWebController
@Controller
public class MemberWebController {
@Autowired
OrderFeignService orderFeignService;
/**
* 查出当前登录用户的所有订单列表数据
*/
@GetMapping("/orderList.html")
public String memberOrderPage(@RequestParam(value = "pageNum",defaultValue = "1") Integer pageNum, Model model){
Map<String, Object> page = new HashMap<>();
page.put("pageNum",pageNum);
R r = orderFeignService.listWithItem(page);
model.addAttribute("orderList",r);
return "orderList";
}
}
因为需要远程调用 订单服务的接口,订单服务设置了拦截器,所以编写配置 GuliFeignConfig
@Configuration
public class GuliFeignConfig {
@Bean("requestInterceptor")
public RequestInterceptor requestInterceptor(){
return new RequestInterceptor(){
@Override
public void apply(RequestTemplate requestTemplate) {
/**
* 使用 RequestContextHolder 拿到刚进来的请求
* 为什么可以在controller以外拿到HttpServletRequest请求?
* springmvc在处理请求的时候,会把请求对象放到RequestContextHolder持有的ThreadLocal对象中
*/
ServletRequestAttributes attributes = (ServletRequestAttributes) RequestContextHolder.getRequestAttributes();
//获取到当前线程绑定的请求对象
HttpServletRequest request = attributes.getRequest();//老请求
//同步请求头数据。Cookie
String cookie = request.getHeader("Cookie");
System.out.println(cookie);
//给新请求同步了老请求的cookie
requestTemplate.header("Cookie",cookie);
System.out.println("feign远程之前先执行RequestInterceptor.apply()");
}
};
}
}
feign 接口 OrderFeignService
(注意如果没有 @ResponseBody,会报错 no suitable HttpMessageConverter)
@FeignClient("gulimall-order")
public interface OrderFeignService {
@RequestMapping("/order/order/listWithItem")
@ResponseBody
R listWithItem(@RequestBody Map<String, Object> params);
}
实体类增加字段 OrderEntity
//订单详情
// @Transient 不好使
@TableField(exist = false)
private List<OrderItemEntity> itemList;
支付服务编写接口 OrderController
/**
* 查出当前登录用户的所有订单列表数据
*/
@RequestMapping("/listWithItem")
public R listWithItem(@RequestBody Map<String, Object> params){
PageUtils page = orderService.queryPageWithItem(params);
return R.ok().put("page", page);
}
实现类编写业务OrderServiceImpl
@Override
public PageUtils queryPageWithItem(Map<String, Object> params) {
//查询当前用户的订单
IPage<OrderEntity> page = this.page(
new Query<OrderEntity>().getPage(params),
new QueryWrapper<OrderEntity>().eq("member_id", LoginUserInterceptor.threadLocalLoginUser.get().getId())
);
//修改分页里的数据
List<OrderEntity> entities = page.getRecords().stream().map(order -> {
List<OrderItemEntity> itemEntities = orderItemService.list(new QueryWrapper<OrderItemEntity>().eq("order_sn", order.getOrderSn()));
order.setItemList(itemEntities);
return order;
}).collect(Collectors.toList());
page.setRecords(entities);
return new PageUtils(page);
}
此处我遇到一个问题,当支付宝回调内部会员服务时,并不会携带支付时的用户信息Cookie,所以导致会员服务远程调用支付服务会被拦截器拦截。
因为本身支付宝不携带Cookie,所以使用拦截器RequestInterceptor设置requestTemplate的方法行不通,只有在支付服务的拦截器中放行此回调

页面修改
<table class="table" th:each="order:${orderList.page.list}">
<tr>
<td colspan="7" style="background:#F7F7F7" >
<span style="color:#AAAAAA">2017-12-09 20:50:10</span>
<span><ruby style="color:#AAAAAA">订单号:</ruby> [[${order.orderSn}]]</span>
<span>谷粒官方旗舰店<i class="table_i"></i></span>
<i class="table_i5 isShow"></i>
</td>
</tr>
<tr class="tr" th:each="item:${order.itemList}">
<td colspan="3">
<img style="height: 60px; width: 60px;" th:src="${item.skuPic}" alt="" class="img">
<div>
<p style="width: 242px; height: auto;overflow: auto">
[[${item.skuName}]]
</p>
<div><i class="table_i4"></i>找搭配</div>
</div>
<div style="margin-left:15px;">x[[${item.skuQuantity}]]</div>
<div style="clear:both"></div>
</td>
<td th:if="${itemStat.index==0}" th:rowspan="${itemStat.size}">[[${order.receiverName}]]<i><i class="table_i1"></i></i></td>
<td th:if="${itemStat.index==0}" th:rowspan="${itemStat.size}" style="padding-left:10px;color:#AAAAB1;">
<p style="margin-bottom:5px;">总额 ¥[[${order.payAmount}]]</p>
<hr style="width:90%;">
<p>在线支付</p>
</td>
<td>
<ul>
<li style="color:#71B247;" th:if="${order.status==0}">待付款</li>
<li style="color:#71B247;" th:if="${order.status==1}">已付款</li>
<li style="color:#71B247;" th:if="${order.status==2}">已发货</li>
<li style="color:#71B247;" th:if="${order.status==3}">已完成</li>
<li style="color:#71B247;" th:if="${order.status==4}">已取消</li>
<li style="color:#71B247;" th:if="${order.status==5}">售后中</li>
<li style="color:#71B247;" th:if="${order.status==6}">售后完成</li>
<li style="margin:4px 0;" class="hide"><i class="table_i2"></i>跟踪<i class="table_i3"></i>
<div class="hi">
<div class="p-tit">
普通快递 运单号:390085324974
</div>
<div class="hideList">
<ul>
<li>
[北京市] 在北京昌平区南口公司进行签收扫描,快件已被拍照(您
的快件已签收,感谢您使用韵达快递)签收
</li>
<li>
[北京市] 在北京昌平区南口公司进行签收扫描,快件已被拍照(您
的快件已签收,感谢您使用韵达快递)签收
</li>
<li>
[北京昌平区南口公司] 在北京昌平区南口公司进行派件扫描
</li>
<li>
[北京市] 在北京昌平区南口公司进行派件扫描;派送业务员:业务员;联系电话:17319268636
</li>
</ul>
</div>
</div>
</li>
<li class="tdLi">订单详情</li>
</ul>
</td>
<td th:if="${itemStat.index==0}" th:rowspan="${itemStat.size}">
<button>确认收货</button>
<p style="margin:4px 0; ">取消订单</p>
<p>催单</p>
</td>
3 支付宝异步通知
异步通知必须是外网可访问地址,所以需要配置内网穿透
若使用了域名,并使用 nginx 将请求转发到网关,网关服务再根据请求头分配路由
需要进行以下设置
1、将外网映射到本地的order.gulimall.com:80
2、由于回调的请求头不是order.gulimall.com,因此nginx转发到网关后找不到对应的服务,所以需要对nginx进行设置
设置 nginx 监听端口80,以及域名为指定外网域名
服务器编写接收异步通知的接口为 order.gulimall.com/payed/notify
将外网映射到本地的 order.gulimall.com:80,由于nginx的设置,在使用外网域名访问80端口时,会携带请求头去网关服务,再根据网关的路由映射到订单服务
但是由于此处是外网映射的,所以无要求的请求头。在nginx中配置,当路径为/payed时手动设置请求头为order.gulimall.com,然后携带请求头去网关服务,再根据网关的路由映射到订单服务

因为订单服务有拦截器,所以需要进行放行
查看支付宝对于 异步通知的说明
支付宝用 POST 方式发送通知信息,并且需要接收 success 字符,否则会一直重复发送通知
设置异步通知路径
// 服务器异步通知页面路径 需http://格式的完整路径,不能加?id=123这类自定义参数,必须外网可以正常访问
public static String notify_url = "http://6ayzgs.natappfree.cc/payed/notify";
编写接口 OrderPayedListener,先打印支付宝请求发送的参数
System.out.println("支付宝异步通知:"+requestParams);
for (String key : requestParams.keySet()) {
String value = request.getParameter(key);
String[] value1 = requestParams.get(key);
System.out.println("参数" + key + "。值" + value);
}
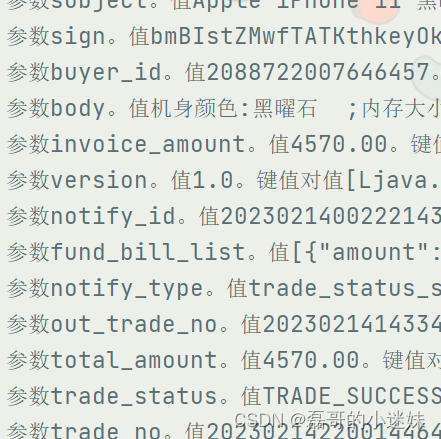
编写实体类模型接收对应的参数 PayAsyncVo
/**
* 支付宝异步通知发送的请求参数
*/
@ToString
@Data
public class PayAsyncVo {
private String gmt_create; //2023-02-14 14:33:59
private String charset;
private String gmt_payment;//2023-02-14 14:34:04
private Date notify_time; //2023-02-14 14:34:06
private String subject; //Apple iPhone 11 黑曜石 4GB+64GB
private String sign;
private String buyer_id;//支付者的id
private String body;//订单的信息 机身颜色:黑曜石
private String invoice_amount;//支付金额
private String version;
private String notify_id;//通知id
private String fund_bill_list;
private String notify_type;//通知类型; trade_status_sync
private String out_trade_no;//订单号
private String total_amount;//支付的总额
private String trade_status;//交易状态 TRADE_SUCCESS
private String trade_no;//支付宝流水号
private String auth_app_id;//app_id应用id
private String receipt_amount;//商家收到的款
private String point_amount;//
private String app_id;//app_id应用id
private String buyer_pay_amount;//最终支付的金额
private String sign_type;//签名类型
private String seller_id;//商家的id
}
编写接口 OrderPayedListener
其中验签的代码来自支付宝提供的 demo 里的 notify_url.jsp
@RestController
public class OrderPayedListener {
@Autowired
OrderService orderService;
@PostMapping("/payed/notify")
public String handleAlipayed(PayAsyncVo vo, HttpServletRequest request) throws UnsupportedEncodingException, AlipayApiException {
//获取支付宝POST过来反馈信息
Map<String,String> params = new HashMap<String,String>();
Map<String,String[]> requestParams = request.getParameterMap();
for (Iterator<String> iter = requestParams.keySet().iterator(); iter.hasNext();) {
String name = (String) iter.next();
String[] values = (String[]) requestParams.get(name);
String valueStr = "";
for (int i = 0; i < values.length; i++) {
valueStr = (i == values.length - 1) ? valueStr + values[i]
: valueStr + values[i] + ",";
}
//乱码解决,这段代码在出现乱码时使用
// valueStr = new String(valueStr.getBytes("ISO-8859-1"), "utf-8");
params.put(name, valueStr);
}
boolean signVerified = AlipaySignature.rsaCheckV1(params, AlipayTemplate.alipayPublicKey,
AlipayTemplate.charset, AlipayTemplate.sign_type); //调用SDK验证签名
if(signVerified) {//验证成功
System.out.println("支付宝异步通知验签成功");
//修改订单状态
orderService.handlePayResult(vo);
return "success";
}else {//验证失败
System.out.println("支付宝异步通知验签失败");
return "error";
}
}
}
实现类编写方法,处理支付之后的订单 OrderServiceImpl
@Override
public void handlePayResult(PayAsyncVo vo) {
//更改订单状态
OrderEntity order = this.getOne(new QueryWrapper<OrderEntity>().eq("order_sn", vo.getOut_trade_no()));
order.setStatus(OrderStatusEnum.PAYED.getCode());
updateById(order);
//支付信息表保存信息 `oms_payment_info`
PaymentInfoEntity paymentInfo = new PaymentInfoEntity();
paymentInfo.setOrderSn(vo.getOut_trade_no());
paymentInfo.setOrderId(order.getId());
paymentInfo.setAlipayTradeNo(vo.getTrade_no());
paymentInfo.setTotalAmount(new BigDecimal(vo.getInvoice_amount()));
paymentInfo.setSubject(vo.getSubject());
paymentInfo.setPaymentStatus(vo.getTrade_status());
paymentInfo.setCreateTime(order.getCreateTime());
paymentInfo.setCallbackTime(vo.getNotify_time());
paymentInfoService.save(paymentInfo);
}
因为请求参数是 String ,实体类接收时间是使用 Date,会出现以下错误
Field error in object 'payAsyncVo' on field 'notify_time': rejected value [2023-02-14 15:33:20];
codes [typeMismatch.payAsyncVo.notify_time,typeMismatch.notify_time,typeMismatch.java.util.Date,typeMismatch];
arguments [org.springframework.context.support.DefaultMessageSourceResolvable: codes [payAsyncVo.notify_time,notify_time]; arguments []; default message [notify_time]];
default message [Failed to convert property value of type 'java.lang.String' to required type 'java.util.Date' for property 'notify_time'; nested exception is org.springframework.core.convert.ConversionFailedException: Failed to convert from type [java.lang.String] to type [java.util.Date] for value '2023-02-14 15:33:20'
配置文件处理日期格式化
#springMVC的日期格式化
spring:
mvc:
date-format: yyyy-MM-dd HH:mm:ss
4 收单
请求参数中设置订单超时时间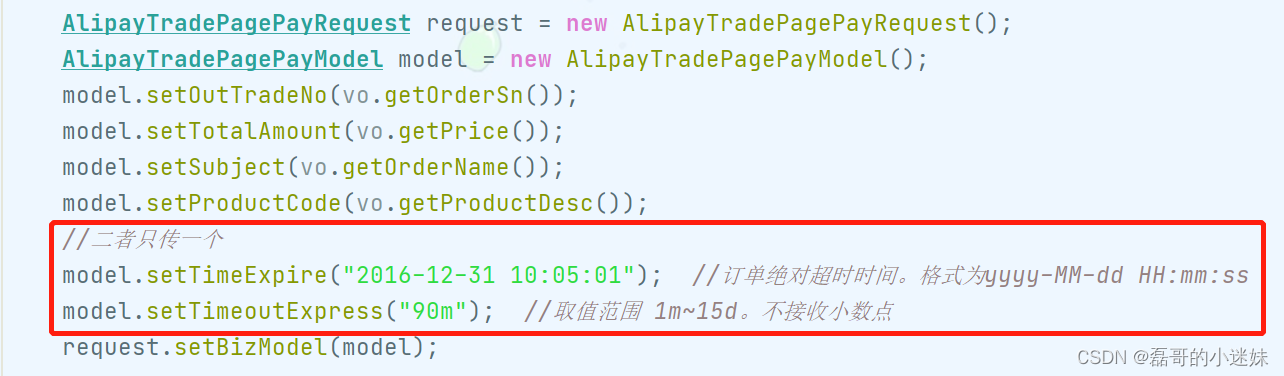
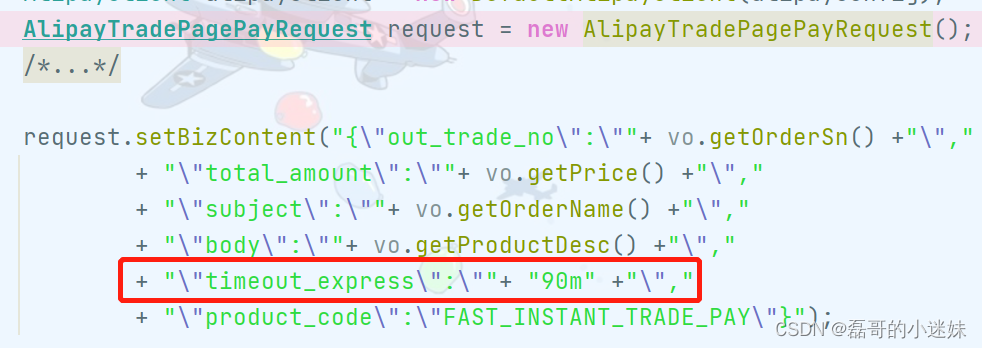
或者看 demo 里面的 alipay.trade.close.jsp 也可以
秒杀
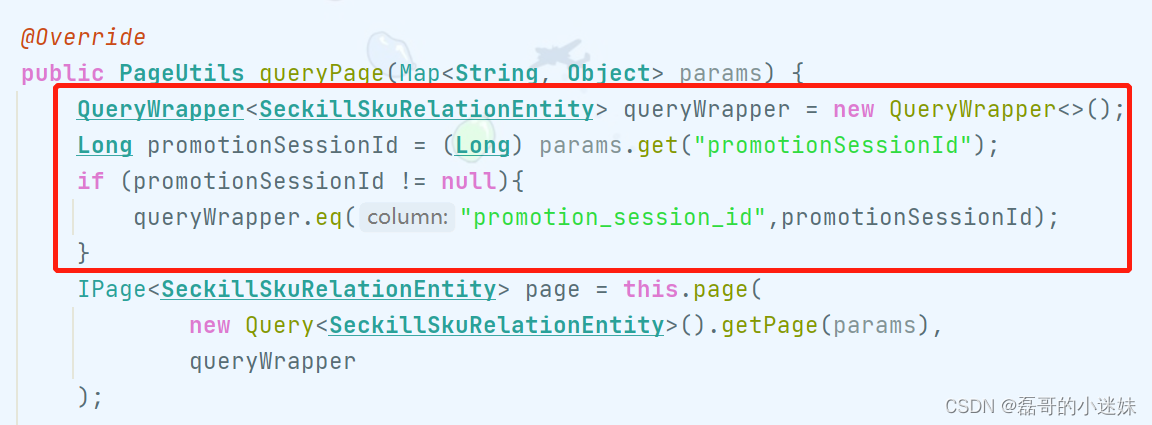
后台管理系统,查看当前秒杀场次关联的商品时,会显示所有场次的关联数据,修改代码
SeckillSkuRelationServiceImpl
1、搭建服务
pom 依赖
<?xml version="1.0" encoding="UTF-8"?>
<project xmlns="http://maven.apache.org/POM/4.0.0" xmlns:xsi="http://www.w3.org/2001/XMLSchema-instance"
xsi:schemaLocation="http://maven.apache.org/POM/4.0.0 https://maven.apache.org/xsd/maven-4.0.0.xsd">
<modelVersion>4.0.0</modelVersion>
<parent>
<groupId>org.springframework.boot</groupId>
<artifactId>spring-boot-starter-parent</artifactId>
<version>2.1.8.RELEASE</version>
<relativePath/> <!-- lookup parent from repository -->
</parent>
<groupId>afei.gulimall</groupId>
<artifactId>gulimall-seckill</artifactId>
<version>0.0.1-SNAPSHOT</version>
<name>gulimall-seckill</name>
<description>秒杀服务</description>
<properties>
<java.version>1.8</java.version>
<spring-cloud.version>Greenwich.SR3</spring-cloud.version>
</properties>
<dependencies>
<dependency>
<groupId>afei.gulimall</groupId>
<artifactId>gulimall-common</artifactId>
<version>0.0.1-SNAPSHOT</version>
<exclusions>
<exclusion>
<groupId>org.springframework.session</groupId>
<artifactId>spring-session-data-redis</artifactId>
</exclusion>
</exclusions>
</dependency>
<dependency>
<groupId>org.springframework.boot</groupId>
<artifactId>spring-boot-starter-data-redis</artifactId>
</dependency>
<dependency>
<groupId>org.springframework.boot</groupId>
<artifactId>spring-boot-starter-web</artifactId>
</dependency>
<dependency>
<groupId>org.springframework.cloud</groupId>
<artifactId>spring-cloud-starter-openfeign</artifactId>
</dependency>
<dependency>
<groupId>org.projectlombok</groupId>
<artifactId>lombok</artifactId>
<optional>true</optional>
</dependency>
<dependency>
<groupId>org.springframework.boot</groupId>
<artifactId>spring-boot-starter-test</artifactId>
<scope>test</scope>
</dependency>
</dependencies>
<dependencyManagement>
<dependencies>
<dependency>
<groupId>org.springframework.cloud</groupId>
<artifactId>spring-cloud-dependencies</artifactId>
<version>${spring-cloud.version}</version>
<type>pom</type>
<scope>import</scope>
</dependency>
</dependencies>
</dependencyManagement>
<build>
<plugins>
<plugin>
<groupId>org.springframework.boot</groupId>
<artifactId>spring-boot-maven-plugin</artifactId>
<configuration>
<excludes>
<exclude>
<groupId>org.projectlombok</groupId>
<artifactId>lombok</artifactId>
</exclude>
</excludes>
</configuration>
</plugin>
</plugins>
</build>
</project>
配置文件
spring.application.name=gulimall-seckill
server.port=25000
spring.data.redis.host=localhost
spring.data.redis.port=6379
spring.cloud.nacos.discovery.server-addr=127.0.0.1:8848
启动类注解
@EnableFeignClients
@EnableDiscoveryClient
@SpringBootApplication(exclude = {DataSourceAutoConfiguration.class})
public class GulimallSeckillApplication {
2、秒杀商品定时上架
1)、秒杀流程
- 项目独立部署,独立秒杀模块gulimall-seckill
- 使用定时任务每天三点上架最新秒杀商品,削减高峰期压力,上架最近三天的秒杀商品
- 实现秒杀商品库存加密,为秒杀商品添加唯一商品随机码,在购买秒杀商品时才暴露
- 库存预热,先从数据库中扣除一部分库存以redisson信号量的形式存储在redis中
- 队列削峰,秒杀成功后立即返回,然后以发送消息的形式创建订单
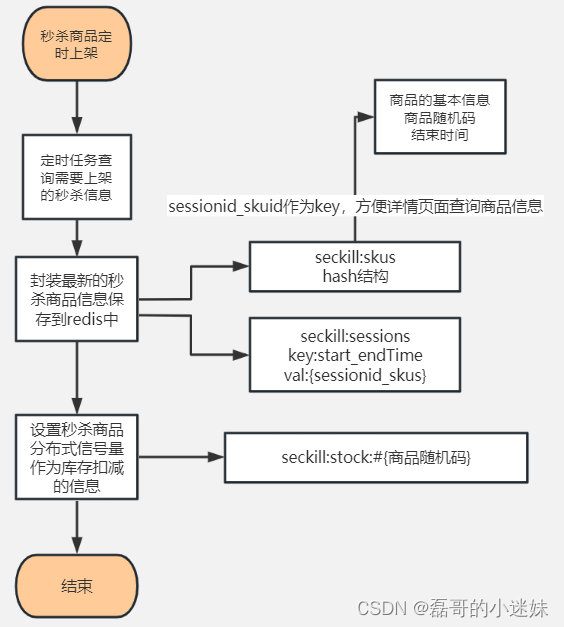
2)、gulimall-coupon 服务查询秒杀商品
修改实体类 SeckillSessionEntity
添加属性,方便查询商品
@TableField(exist = false)
List<SeckillSkuRelationEntity> relationEntities;
编写接口 SeckillSessionController
//查询最近三天的秒杀商品
@GetMapping("/lasts3DaySession")
public R getLasts3DaySession(){
List<SeckillSessionEntity> session = seckillSessionService.getLasts3DaySession();
return R.ok().setData(session);
}
实现类编写业务方法SeckillSessionServiceImpl
注意:此处从数据库获取时间数据有问题
@Autowired
SeckillSkuRelationService relationService;
@Override
public List<SeckillSessionEntity> getLasts3DaySession() {
List<SeckillSessionEntity> list = this.list(new QueryWrapper<SeckillSessionEntity>().between("start_time", startTime(), endTime()));
if (list != null && list.size()>0){
List<SeckillSessionEntity> sessionEntities = list.stream().map(session -> {
List<SeckillSkuRelationEntity> relationEntities = relationService.list(new QueryWrapper<SeckillSkuRelationEntity>().eq("promotion_session_id", session.getId()));
session.setRelationEntities(relationEntities);
return session;
}).collect(Collectors.toList());
return sessionEntities;
}
return null;
}
public String startTime(){
LocalDate now = LocalDate.now(); //2023-02-20
LocalTime time = LocalTime.MIN; //00:00
LocalDateTime dateTime = LocalDateTime.of(now, time); //2023-02-20T00:00
//格式化:日期 ——> 字符串
//此处格式化前2023-02-20T00:00,格式化后为 2023-02-20 12:00,不知道为啥
// DateTimeFormatter formatter = DateTimeFormatter.ofPattern("yyyy-MM-dd hh:mm:ss");
// String startTime = formatter.format(dateTime);
String format = dateTime.format(DateTimeFormatter.ofPattern("yyyy-MM-dd HH:mm:ss"));
return startTime;
}
public String endTime(){
LocalDate now = LocalDate.now(); //2023-02-20
LocalDate plus = now.plusDays(2); //2023-02-22
LocalTime time = LocalTime.MAX; //23:59:59.999999999
LocalDateTime dateTime = LocalDateTime.of(plus, time); //2023-02-22T23:59:59.999999999
//格式化:日期 ——> 字符串
String end = dateTime.format(DateTimeFormatter.ofPattern("yyyy-MM-dd HH:mm:ss")); //2023-02-22 23:59:59
return end;
}
测试接口

注意:此处从数据库获取时间数据有问题
测试发现打印的时间,比库中的时间多了8小时
解决方法,参考文档
修改数据库连接的时区 &serverTimezone=Asia/Shanghai
3)、gulimall-seckill 服务准备模型
实体类 CouponSeckillSessionEntity 是拷贝自 SeckillSessionEntity,方便接收远程服务返回的数据
实体类CouponSeckillSkuRelationEntity是拷贝自 SeckillSkuRelationEntity,方便接收远程服务返回的数据
实体类ProductSkuInfoEntity是拷贝自 SkuInfoEntity,方便接收远程服务返回的数据
秒杀商品上架时需要上架商品信息,准备实体类 SeckillSkuVo
/**
* 包含 sku 信息以及 SeckillSkuRelationEntity 信息
*/
@Data
public class SeckillSkuVo {
private Long id;
/**
* 活动id
*/
private Long promotionId;
/**
* 活动场次id
*/
private Long promotionSessionId;
private Long skuId;
/**
* 秒杀价格
*/
private BigDecimal seckillPrice;
/**
* 秒杀总量
*/
private BigDecimal seckillCount;
/**
* 每人限购数量
*/
private BigDecimal seckillLimit;
private Integer seckillSort;
//sku信息
private ProductSkuInfoEntity skuInfo;
//秒杀时间
private Long startTime;
private Long endTime;
//随机码
private String randomCode;
}
4)、定时上架
定时服务类 SeckillSkuScheduled
@Slf4j
@Component
@EnableAsync
@EnableScheduling
public class SeckillSkuScheduled {
@Autowired
SeckillService seckillService;
@Autowired
RedissonClient redissonClient;
@Scheduled(cron = "0 0 3 * * ?")
public void uploadSeckillSkuLatest3Days() {
System.out.println("上架秒杀的信息...........");
RLock lock = redissonClient.getLock(SeckillConstant.UPLOAD_LOCK);
lock.lock();
try{
seckillService.uploadSeckillSkuLatest3Days();
}finally {
lock.unlock();
}
}
}
实现类编写业务方法 SeckillServiceImpl
@Override
public void uploadSeckillSkuLatest3Days() {
R r = couponFeignService.getLasts3DaySession();
if (r.getCode() == 0) {
System.out.println("远程调用成功");
List<CouponSeckillSessionEntity> data = r.getData(new TypeReference<List<CouponSeckillSessionEntity>>() {
});
// 1、redis缓存秒杀活动信息
saveSessionInfos(data);
// 2、redis缓存获得关联商品信息
saveSessionSkuInfos(data);
}
}
远程调用接口 CouponFeignService
@FeignClient("gulimall-coupon")
public interface CouponFeignService {
//查询最近三天的秒杀商品
@GetMapping("/coupon/seckillsession/lasts3DaySession")
R getLasts3DaySession();
}
4)、redis 缓存
- redis缓存秒杀活动信息,其存储结构为 List ,键值设计为
【seckill:sessions:start_endTime】 【sessionId_skuId】 - redis缓存秒杀商品信息,其存储结构为 hash ,键值设计为
【seckill:skus】 【sessionId_skuId】【json商品信息】
此处是将所有秒杀场次的商品放在一起 - 使用库存作为 redisson 分布式信号量
【seckill:stock:token】 【100库存数】-
引入依赖
<dependency> <groupId>org.redisson</groupId> <artifactId>redisson</artifactId> <version>3.12.0</version> </dependency> -
配置类
public class MyRedissonConfig { /** * 所有对Redisson的使用都是通过 RedissonClient 对象 */ @Bean(destroyMethod = "shutdown") public RedissonClient redisson(){ // 1 创建配置 Config config = new Config(); //注意:用"rediss://"或者"redis://" config.useSingleServer().setAddress("redis://127.0.0.1:6379"); // 2 根据Config创建RedissonClient实例 RedissonClient redissonClient = Redisson.create(config); return redissonClient; } }
-
公共枚举类 SeckillConstant
public class SeckillConstant {
public static final String SESSIONS_CACHE_PREFIX = "seckill:sessions:";
public static final String SKUS_CHARE_PREFIX = "seckill:skus:";
public static final String STOCK_CACHE_PREFIX = "seckill:stock:";
public static final String UPLOAD_LOCK = "seckill:upload:lock";
}
缓存秒杀活动信息
@Autowired
StringRedisTemplate stringRedisTemplate;
//缓存秒杀活动信息 seckill:sessions:start_endTime sessionId_skuId
private void saveSessionInfos(List<CouponSeckillSessionEntity> sessionEntities) {
if (!CollectionUtils.isEmpty(sessionEntities)) {
sessionEntities.forEach(session -> {
long start = session.getStartTime().getTime();
long end = session.getEndTime().getTime();
String key = SeckillConstant.SESSIONS_CACHE_PREFIX + start + "_" + end;
//防止重复缓存
if (!stringRedisTemplate.hasKey(key)){
List<String> value = session.getRelationEntities().stream().map(relation -> {
Long skuId = relation.getSkuId();
Long sessionId = relation.getPromotionSessionId();
String s = sessionId + "_" + skuId;
return s;
}).collect(Collectors.toList());
stringRedisTemplate.opsForList().leftPushAll(key, value);
}
});
}
}
缓存秒杀商品信息
@Autowired
ProductFeignService productFeignService;
@Autowired
RedissonClient redissonClient;
/**
* hash结构 缓存秒杀商品信息 seckill:skus sessionId_skuId json商品信息
* 此处是将所有秒杀场次的商品放在一起
*/
//使用库存作为分布式信号量 seckill:stock:token 100库存数
private void saveSessionSkuInfos(List<CouponSeckillSessionEntity> sessionEntities) {
if (!CollectionUtils.isEmpty(sessionEntities)) {
String hashKey = SeckillConstant.SKUS_CHARE_PREFIX;
BoundHashOperations<String, Object, Object> ops = stringRedisTemplate.boundHashOps(hashKey);
sessionEntities.forEach(session -> {
session.getRelationEntities().forEach(relation -> {
Long skuId = relation.getSkuId();
SeckillSkuVo seckillSkuVo = new SeckillSkuVo();
//1 缓存秒杀信息
BeanUtils.copyProperties(relation,seckillSkuVo);
//2 缓存商品基本信息
R r = productFeignService.info(skuId);
if (r.getCode() == 0){
ProductSkuInfoEntity skuInfo = r.get("skuInfo", new TypeReference<ProductSkuInfoEntity>() {
});
seckillSkuVo.setSkuInfo(skuInfo);
}
//3 当前商品的秒杀时间
seckillSkuVo.setStartTime(session.getStartTime().getTime());
seckillSkuVo.setEndTime(session.getEndTime().getTime());
//4 随机码:防止恶意访问购买秒杀商品,只有扣除库存的时候才需要携带随机码
String uuid = UUID.randomUUID().toString().replace("_", "");
seckillSkuVo.setRandomCode(uuid);
//redisson信号量扣减库存,使用库存作为分布式信号量,限流
//注意若两个场次都有商品1的秒杀,应该有两个库存信号量
RSemaphore stock = redissonClient.getSemaphore(SeckillConstant.STOCK_CACHE_PREFIX+uuid);
// 商品可以秒杀的数量作为信号量
stock.trySetPermits(relation.getSeckillCount().intValue());
String jsonString = JSON.toJSONString(seckillSkuVo);
ops.put(relation.getPromotionSessionId() + "_" +skuId,jsonString);
});
});
}
}
调用远程服务 ProductFeignService
@FeignClient("gulimall-product")
public interface ProductFeignService {
@RequestMapping("/product/skuinfo/info/{skuId}")
R info(@PathVariable("skuId") Long skuId);
}
5)、幂等性处理
测试如下
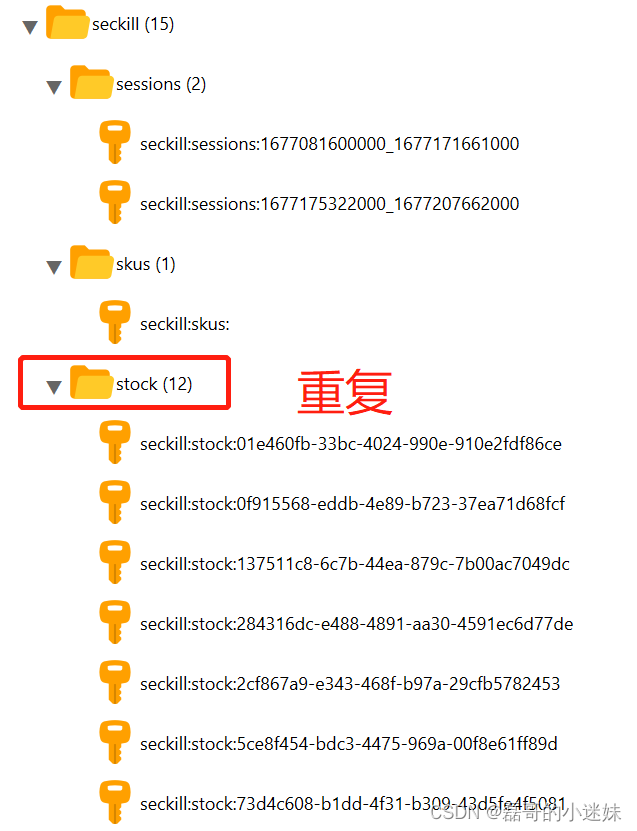
定时执行时,其他键都会重复,redis 会直接覆盖原值,但是库存的信号量因为使用随机码作为 键,就会多次建立缓存
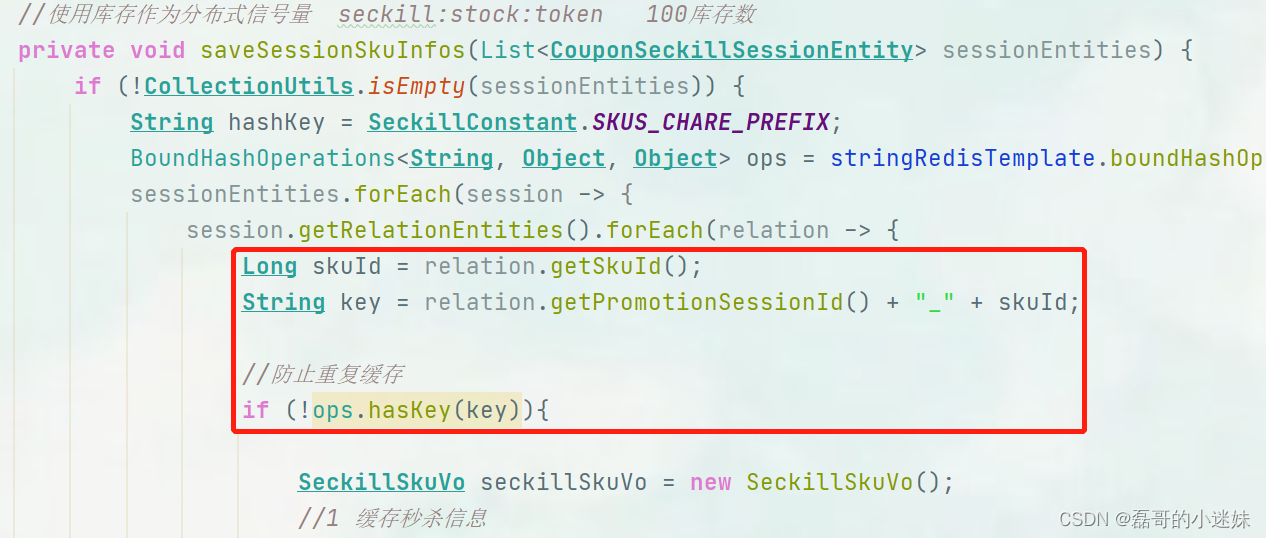
分布式情况下,为了防止多台服务器重复上架商品,使用分布式锁
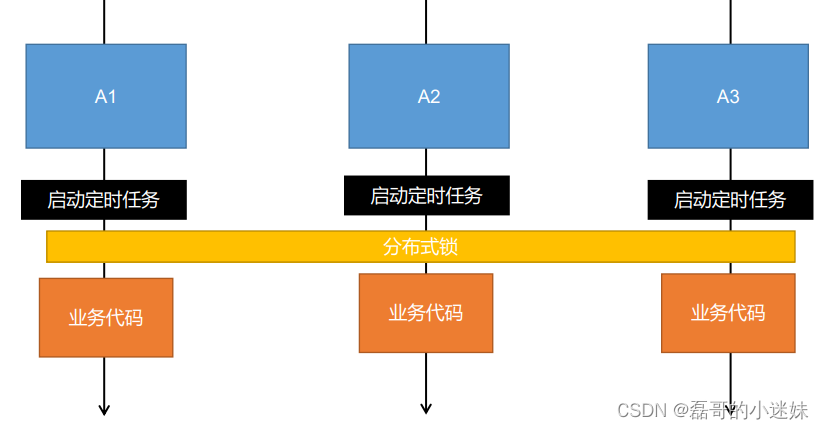
使用 redisson 加锁
@Scheduled(cron = "*/30 * * * * ?")
public void uploadSeckillSkuLatest3Days() {
System.out.println("上架秒杀的信息...........");
RLock lock = redissonClient.getLock(SeckillConstant.UPLOAD_LOCK);
lock.lock();
try{
seckillService.uploadSeckillSkuLatest3Days();
}finally {
lock.unlock();
}
}
处理之后,redis
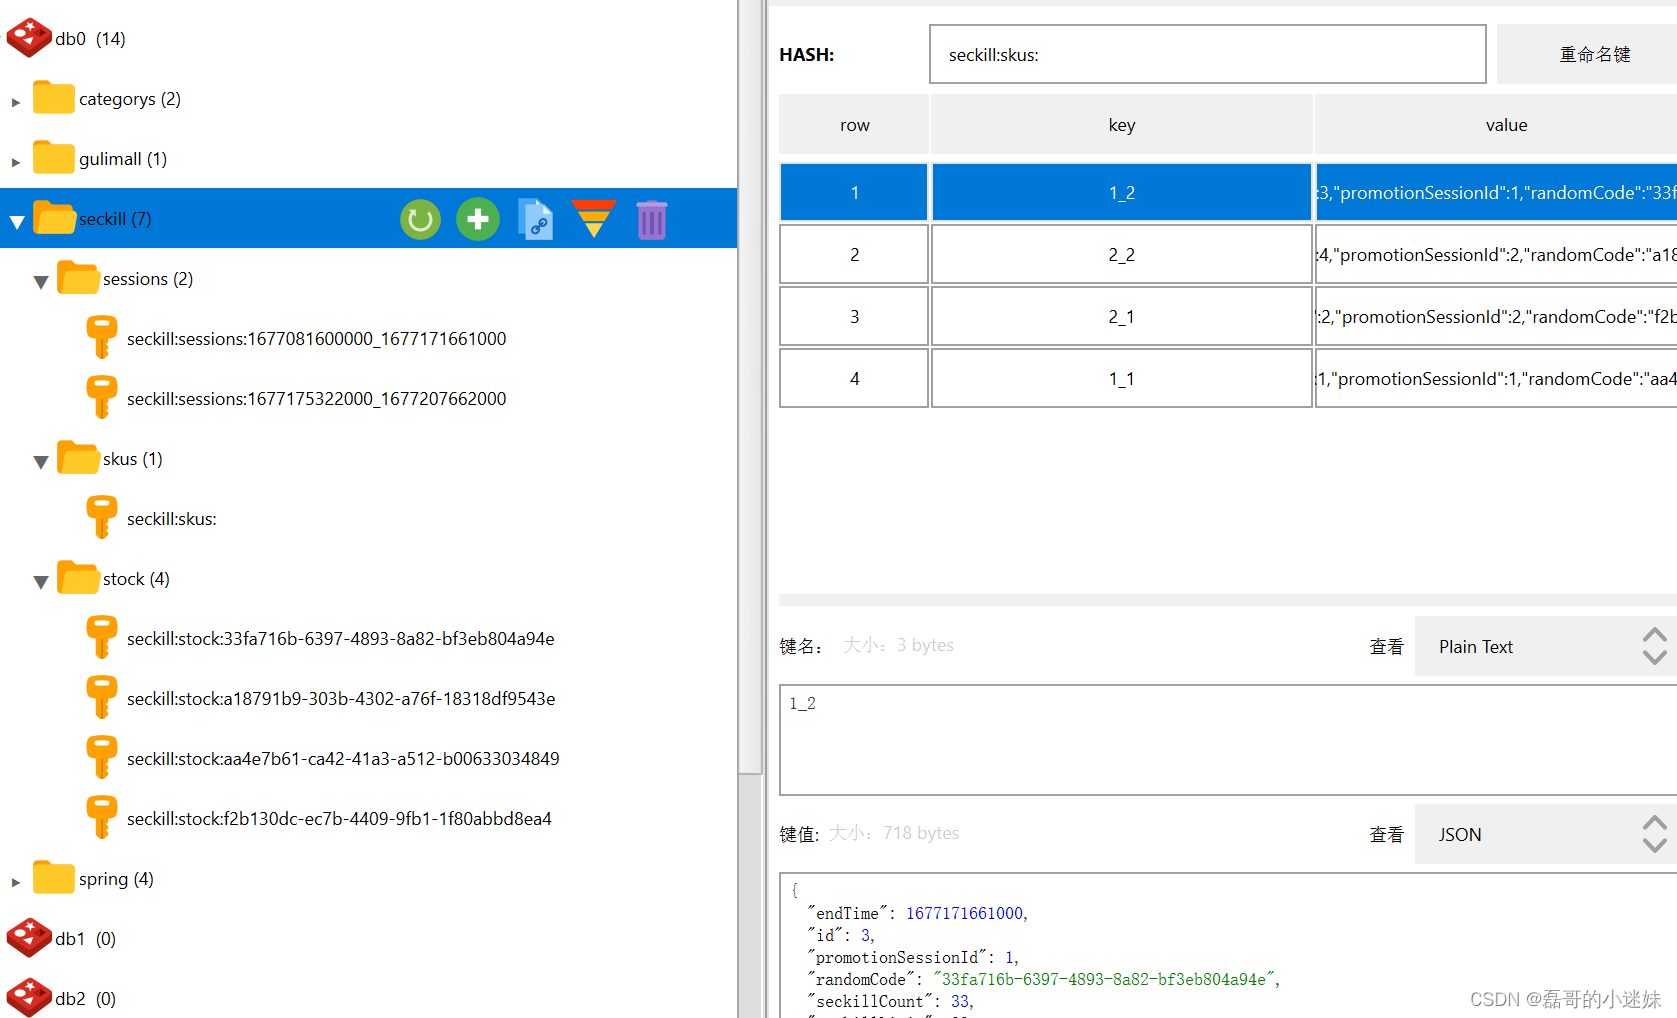
3、获取秒杀商品
1)、商城首页显示正在进行秒杀的商品
效果
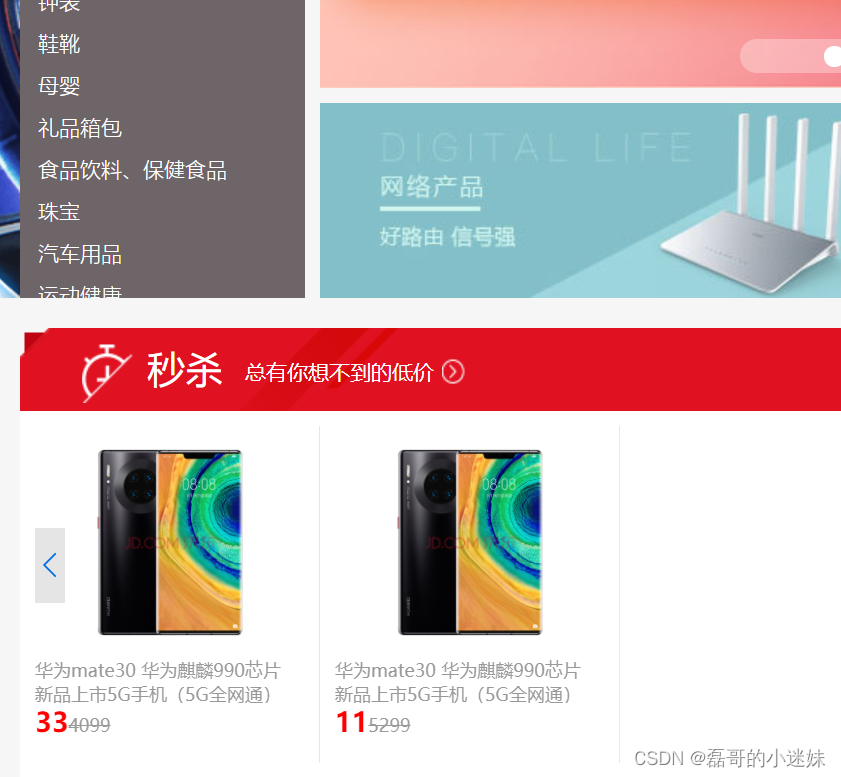
秒杀服务 gulimall-seckill
编写接口 SeckillController
@Controller
public class SeckillController {
@Autowired
SeckillService seckillService;
/**
* 返回当前时间可以参与的秒杀商品信息,用于商城首页显示
*/
@GetMapping(value = "/getCurrentSeckillSkus")
@ResponseBody
public R getCurrentSeckillSkus() {
//获取到当前可以参加秒杀商品的信息
List<SeckillSkuVo> vos = seckillService.getCurrentSeckillSkus();
return R.ok().setData(vos);
}
}
业务实现类编写 SeckillServiceImpl.getCurrentSeckillSkus()
//Redis 2.8以上版本给我们提供了一个更好的遍历key的命令 SCAN https://www.yisu.com/zixun/447525.html
@Override
public List<SeckillSkuVo> getCurrentSeckillSkus() {
Set<String> keys = stringRedisTemplate.keys(SeckillConstant.SESSIONS_CACHE_PREFIX + "*");
long now = System.currentTimeMillis();
for (String sessionKey : keys) {
String[] split = sessionKey.replace(SeckillConstant.SESSIONS_CACHE_PREFIX, "").split("_");
Long start = Long.parseLong(split[0]);
Long end = Long.parseLong(split[1]);
if (start < now && now < end){
List<String> range = stringRedisTemplate.opsForList().range(sessionKey, 0, -1);
BoundHashOperations<String, String, String> ops = stringRedisTemplate.boundHashOps(SeckillConstant.SKUS_CHARE_PREFIX);
if (!CollectionUtils.isEmpty(range)){
return ops.multiGet(range).stream().map(s-> JSON.parseObject(s, SeckillSkuVo.class)).collect(Collectors.toList());
}
break;
}
}
return null;
}
单个场次会有多个商品进行秒杀,可以使用 redis的lrange命令 来直接获取多个值
List<String> range = stringRedisTemplate.opsForList().range(sessionRedisKey, 0, -1);
Redis LRANGE 命令将返回存储在key列表的特定元素。
偏移量开始和停止是从0开始的索引,0是第一元素(该列表的头部),1是列表的下一个元素。这些偏移量也可以是表示开始在列表的末尾偏移负数。
例如,-1是该列表的最后一个元素,-2倒数第二个
由于缓存活动场次的 key 与缓存秒杀商品的 key 一致,所以拿到当前秒杀的场次商品 key 之后,在秒杀商品中遍历获取
由于请求参数 key 是有多个,是集合 list ,可以使用 ops.multiGet(List<String> keys) 获取,不需要遍历
处理跨域
因为这里直接跳转访问 25000 接口,而没有使用 nginx ,需要设置跨域

商品服务 gulimall-seckill 新增类 WareCorsConfig
@Configuration
public class WareCorsConfig implements WebMvcConfigurer {
    @Override
    public void addCorsMappings(CorsRegistry registry) {
        // 添加映射路径
        registry.addMapping("/**")
                // 放行哪些原始域
                // .allowedOriginPatterns("*")  // 2.2 之后的版本用的
                .allowedOrigins("*")
                // 是否发送 Cookie 信息
                .allowCredentials(true)
                // 放行哪些原始域(请求方式)
                .allowedMethods("GET", "POST", "PUT", "DELETE", "OPTIONS")
                // 放行哪些头部信息
                .allowedHeaders("*")
                // 暴露哪些头部信息(因为跨域访问默认不能获取全部头部信息)
                .exposedHeaders("Header1", "Header2");
    }
}
商品服务 gulimall-product
页面需要显示
修改页面 index.html
<div class="swiper-wrapper">
<div class="swiper-slide">
<!-- 动态拼装秒杀商品信息 -->
<ul id="seckillSkuContent"></ul>
</div>
</div>
<script type="text/javascript">
function search() {
var keyword=$("#searchText").val()
window.location.href="http://localhost:3000/list.html?keyword="+keyword;
}
//展示当前秒杀商品
$.get("http://localhost:25000/getCurrentSeckillSkus", function (res) {
if (res.data.length > 0) {
res.data.forEach(function (item) {
$("<li οnclick='toDetail(" + item.skuId + ")'></li>")
.append($("<img style='width: 130px; height: 130px' src='" + item.skuInfo.skuDefaultImg + "' />"))
.append($("<p>"+item.skuInfo.skuTitle+"</p>"))
.append($("<span>" + item.seckillPrice + "</span>"))
.append($("<s>" + item.skuInfo.price + "</s>"))
.appendTo("#seckillSkuContent");
})
}
})
//点击商品跳转详情页
function toDetail(skuId) {
location.href = "http://localhost:10000/" + skuId + ".html";
}
</script>
2)、商品详情显示参与的秒杀场次
效果
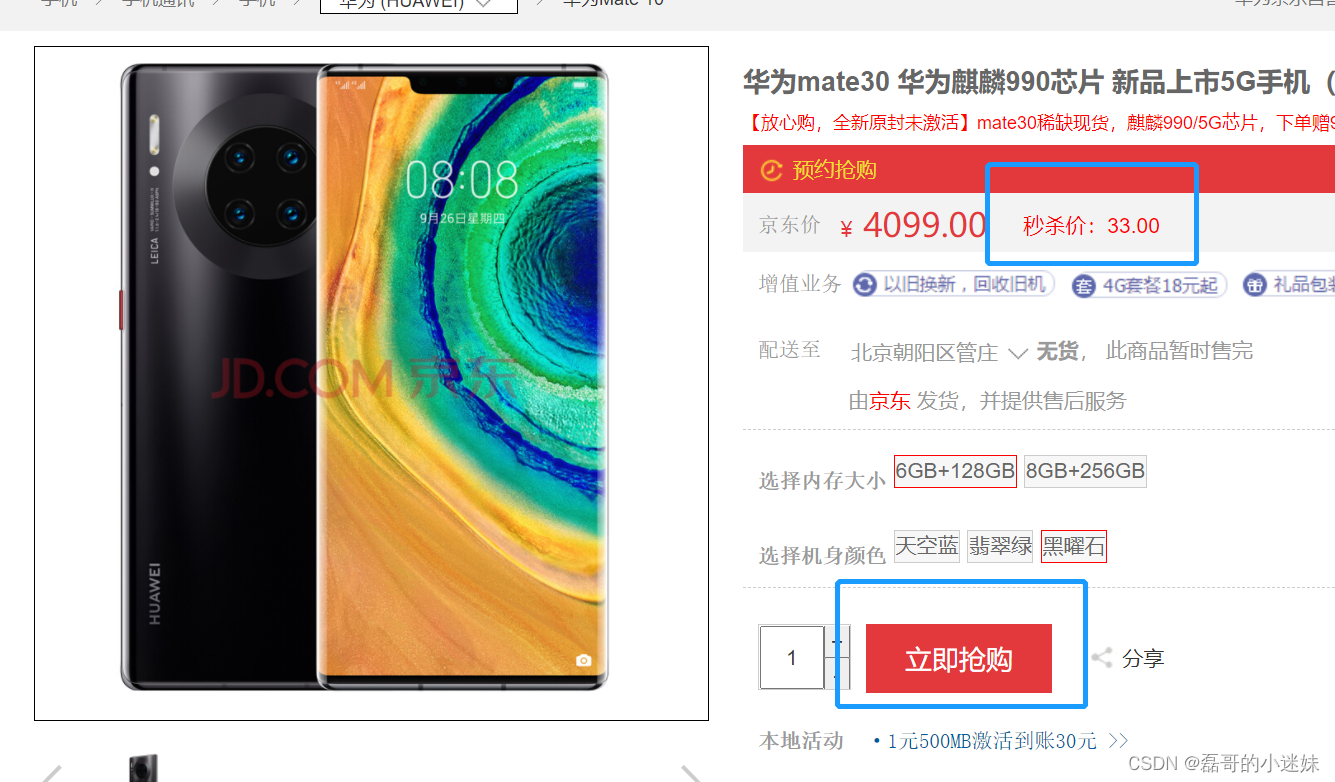
秒杀服务 gulimall-seckill
编写接口 SeckillController
/**
* 返回当前商品所参与的所有秒杀场次信息
*/
@ResponseBody
@GetMapping("/sku/seckill/{skuId}")
public R getSkuSecKillInfo(@PathVariable("skuId") Long skuId){
SeckillSkuVo vo = seckillService.getSkuSecKillInfo(skuId);
return R.ok().setData(vo);
}
业务实现类编写 SeckillServiceImpl.getSkuSecKillInfo()
@Override
public SeckillSkuVo getSkuSecKillInfo(Long skuId) {
BoundHashOperations<String, String, String> hashOps = stringRedisTemplate.boundHashOps(SeckillConstant.SKUS_CHARE_PREFIX);
Set<String> keys = hashOps.keys();
/**
* 此处需要在redis中获取匹配 *_skuId 这多个key的值
* 1 可以使用上面那种 stringRedisTemplate.keys(*_skuId)
* 2 或者使用正则匹配
*/
String regx = "\\d_" + skuId;
for (String skuKey : keys) {
if(Pattern.matches(regx,skuKey)){
String json = hashOps.get(skuKey);
SeckillSkuVo vo = JSON.parseObject(json, SeckillSkuVo.class);
//查看秒杀活动是否结束
long now = System.currentTimeMillis();
if (now >= vo.getStartTime() && now <= vo.getEndTime()){
return vo;
}else {
vo.setRandomCode(null); //没理解随机码使用
}
}
}
return null;
}
商品服务 gulimall-product
商品服务中新增类用于接收远程服务返回的数据 SeckillSkuVo 与 秒杀服务 gulimall-seckill 中的此类一模一样
修改 商品详情页面数据模型 SkuItemVo ,增加属性如下
//商品秒杀信息
SeckillSkuVo seckillSkuVo;
修改商品详情页的业务实现类方法 SkuInfoServiceImpl.item()
//商品秒杀信息
CompletableFuture<Void> seckillFuture = CompletableFuture.runAsync(() -> {
R r = seckillFeignService.getSkuSecKillInfo(skuId);
if (0==r.getCode()){
SeckillSkuVo seckillSkuVo = r.getData(new TypeReference<SeckillSkuVo>() {
});
if (seckillSkuVo!=null){
skuItemVo.setSeckillSkuVo(seckillSkuVo);
}
}
}, executor);
//全部执行完成后返回
CompletableFuture.allOf(descFuture,saleAttrFuture,baseAttrFuture,
imageFuture,seckillFuture).get();
调用 feign 接口SeckillFeignService
@FeignClient("gulimall-seckill")
public interface SeckillFeignService {
/**
* 注意远程调用传递对象数据时,是转化为 JSON 格式传递,所以传送、接收双方都需要使用@RequestBody注解,且解析JSON的方式要一致
* 远程调用:是通过注册中心找到gulimall-coupon服务,再向指定路径发送请求,将 JSON 参数放在请求体位置
* 所以 这里的请求参数对象 和 接收方的请求参数对象 不需要是同一个类,只需要json数据模型兼容即可
*/
@GetMapping("/sku/seckill/{skuId}")
R getSkuSecKillInfo(@PathVariable("skuId") Long skuId);
}
页面需要显示
修改页面 item.html
<div class="box-summary clear">
<ul>
<li>京东价</li>
<li>
<span>¥</span>
<span th:text="${#numbers.formatDecimal(item.info.price,0,2)}">4499.00</span>
</li>
<li style="color: red" th:if="${item.seckillSkuVo != null}">
<span th:if="${#dates.createNow().getTime() <= item.seckillSkuVo.startTime}">
商品将会在[[${#dates.format(new java.util.Date(item.seckillSkuVo.startTime),"yyyy-MM-dd HH:mm:ss")}]]进行秒杀
</span>
<span th:if="${item.seckillSkuVo.startTime <= #dates.createNow().getTime() && #dates.createNow().getTime() <= item.seckillSkuVo.endTime}">
秒杀价:[[${#numbers.formatDecimal(item.seckillSkuVo.seckillPrice,1,2)}]]
</span>
</li>
<li>
<a href="item/">
预约说明
</a>
</li>
</ul>
</div>
4、秒杀实现
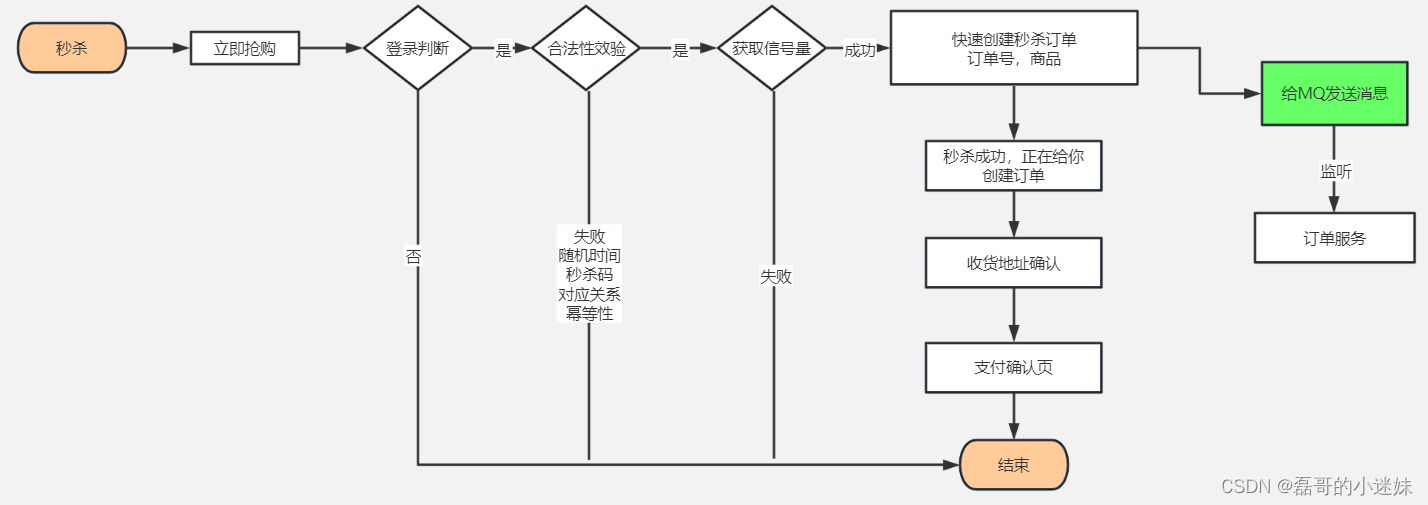
1)、秒杀服务 gulimall-seckill 登录检查
可以有效防止机器恶意大请求秒杀
依赖
<!--springSession-->
<dependency>
<groupId>org.springframework.session</groupId>
<artifactId>spring-session-data-redis</artifactId>
<version>2.3.1.RELEASE</version>
</dependency>
<dependency>
<groupId>org.springframework.boot</groupId>
<artifactId>spring-boot-starter-data-redis</artifactId>
</dependency>
application.properties 配置文件
spring.session.store-type=redis
配置类 GulimallSessionConfig
使用注解 @EnableRedisHttpSession
@EnableRedisHttpSession
@Configuration
public class GulimallSessionConfig {
/**
* 设置cookie信息
* @return
*/
@Bean
public CookieSerializer CookieSerializer(){
DefaultCookieSerializer cookieSerializer = new DefaultCookieSerializer();
// 设置一个域名的名字
cookieSerializer.setDomainName("localhost");
// cookie的路径
cookieSerializer.setCookieName("GULIMALLSESSION");
return cookieSerializer;
}
/**
* 设置json转换
* @return
*/
@Bean
public RedisSerializer<Object> springSessionDefaultRedisSerializer() {
// 使用jackson提供的转换器
return new GenericJackson2JsonRedisSerializer();
}
}
添加拦截器 LoginUserInterceptor
@Component
public class LoginUserInterceptor implements HandlerInterceptor {
public static ThreadLocal<MemberEntity> threadLocalLoginUser = new ThreadLocal<>();
@Override
public boolean preHandle(HttpServletRequest request, HttpServletResponse response, Object handler) throws Exception {
//仅仅对秒杀商品进行登录拦截
String uri = request.getRequestURI();
boolean match = new AntPathMatcher().match("/kill/**", uri);
if (match){
MemberEntity member = (MemberEntity) request.getSession().getAttribute(AuthServerConstant.LOGIN_USER);
if (member != null){
threadLocalLoginUser.set(member);
return true;
}else {
request.getSession().setAttribute("msg","请先进行登录");
System.out.println("被秒杀服务的拦截器拦截啦!!"+uri);
response.sendRedirect("http://localhost:20000/login.html");
return false;
}
}
return true;
}
}
配置拦截器 SeckillWebConfiguration
也可在此处设置拦截的路径
@Configuration
public class SeckillWebConfiguration implements WebMvcConfigurer {
@Autowired
LoginUserInterceptor loginUserInterceptor;
//也可在此处设置拦截的路径
@Override
public void addInterceptors(InterceptorRegistry registry) {
registry.addInterceptor(loginUserInterceptor).addPathPatterns("/**");
}
}
2)、修改商品详情页面
修改加入购物车点击按钮
<div class="box-btns-two" th:if="${item.seckillSkuVo != null && (item.seckillSkuVo.startTime <= #dates.createNow().getTime() && #dates.createNow().getTime() <= item.seckillSkuVo.endTime)}">
<a id="seckillA" th:attr="skuId=${item.info.skuId},sessionId=${item.seckillSkuVo.promotionSessionId},code=${item.seckillSkuVo.randomCode}">
立即抢购
</a>
</div>
<div class="box-btns-two" th:if="${item.seckillSkuVo == null || (item.seckillSkuVo.startTime > #dates.createNow().getTime() || #dates.createNow().getTime() > item.seckillSkuVo.endTime)}">
<a id="addToCartA" th:attr="skuId=${item.info.skuId}">
加入购物车
</a>
</div>
添加点击事件
$("#seckillA").click(function(){
var isLogin = [[${session.loginUser != null}]]; //true表示已登录
if (isLogin){
var killId = $(this).attr("sessionId") +"_"+ $(this).attr("skuId");
var key = $(this).attr("code");
var num = $("#numInput").val();
location.href = "http://localhost:25000/kill?killId=" + killId + "&key=" + key + "&num=" + num;
}else {
alert("秒杀请先登录!");
}
return false;
});
3)、秒杀服务 gulimall-seckill
1 秒杀成功页面
将 gulimall-cart 购物车服务中的成功页面,复制进秒杀服务,并进行修改
即秒杀时候,点击立即抢购,跳转至成功页面,点击立即支付,跳转至支付页面
添加依赖
<!--模板引擎 thymeleaf-->
<dependency>
<groupId>org.springframework.boot</groupId>
<artifactId>spring-boot-starter-thymeleaf</artifactId>
</dependency>
成功页面
<div class="main">
<div class="success-wrap">
<div class="w" id="result">
<div class="m succeed-box">
<div th:if="${orderSn != null}" class="mc success-cont">
<h1>恭喜,秒杀成功,订单号[[${orderSn}]]</h1>
<h2>正在准备订单数据,10s以后自动跳转支付 <a style="color: red" th:href="${'http://localhost:9000/payOrder?orderSn='+orderSn}">去支付</a></h2>
</div>
<div th:if="${orderSn == null}">
<h1>手气不好,秒杀失败,下次再来</h1>
</div>
</div>
</div>
</div>
</div>
2 秒杀接口

编写秒杀接口 SeckillController
/**
* 秒杀商品
* @param killId sessionId_skuId
* @param key 随机码
* @param num 秒杀数量
*/
@GetMapping("/kill")
public String seckill(@RequestParam("killId") String killId,
@RequestParam("key") String key,
@RequestParam("num") Integer num,
Model model){
String orderSn = seckillService.seckill(killId,key,num);
model.addAttribute("orderSn", orderSn);
return "success";
}
编写秒杀商品业务方法
SeckillServiceImpl.seckill()
/**
* 秒杀商品
* @param killId sessionId_skuId
* @param key 随机码
* @param num 秒杀数量
*/
@Override
public String seckill(String killId, String key, Integer num) {
long s1 = System.currentTimeMillis();
//1、获取 redis 中秒杀商品信息
BoundHashOperations<String, String, String> ops = stringRedisTemplate.boundHashOps(SeckillConstant.SKUS_CHARE_PREFIX);
String json = ops.get(killId);
//1.1 是否有此商品秒杀
if (!StringUtils.isEmpty(json)){
SeckillSkuVo vo = JSON.parseObject(json, SeckillSkuVo.class);
Long start = vo.getStartTime();
Long end = vo.getEndTime();
//1.2 是否在秒杀时间内
if (start < s1 && s1 < end){
String randomCode = vo.getRandomCode();
String kid = vo.getPromotionSessionId() + "_" + vo.getSkuId();
//1.3 校验随机码
if (randomCode.equals(key) && kid.equals(killId)){
//1.4 校验购买数量是否超限制
if (num <= vo.getSeckillLimit().intValue()){
//1.5 防止用户重复提交秒杀,幂等性处理。如果秒杀成功,就去占位 userId_sessionId_skuId
MemberEntity memberEntity = LoginUserInterceptor.threadLocalLoginUser.get();
String redisk = memberEntity.getId()+"_"+vo.getPromotionSessionId()+"_"+vo.getSkuId();
long ttl = end - start; //秒杀场次过期时间
Boolean ifAbsent = stringRedisTemplate.opsForValue().setIfAbsent(redisk, num.toString(), ttl, TimeUnit.MILLISECONDS);
if (ifAbsent){
// 1.6 占位成功,说明该用户未秒杀过该商品,则继续尝试获取库存信号量
RSemaphore semaphore = redissonClient.getSemaphore(SeckillConstant.STOCK_CACHE_PREFIX + key);
boolean b = semaphore.tryAcquire(num);
if (b){
//1.7 发送MQ消息,然后删除占位的redis
SeckillOrderTo to = new SeckillOrderTo();
String orderSn = IdWorker.getTimeId().substring(0,20);
to.setOrderSn(orderSn);
to.setPromotionSessionId(vo.getPromotionSessionId());
to.setSkuId(vo.getSkuId());
to.setNum(num);
to.setMemberId(memberEntity.getId());
to.setSeckillPrice(vo.getSeckillPrice());
rabbitTemplate.convertAndSend("order-event-exchange","order.seckill.order",to);
Boolean delete = stringRedisTemplate.delete(redisk);
if (!delete){
log.error("用户占位redis删除失败,key:{}",redisk);
}
long s2 = System.currentTimeMillis();
log.info("耗时..." + (s2-s1));
return orderSn;
}
}
}
}
}
}
return null;
}
common 中新增 MQ 消息传递模型
SeckillOrderTo
/**
* @Description:秒杀MQ消息传递模型
* @date:2023/3/6 16:34
*/
@Data
public class SeckillOrderTo {
/**
* 订单号
*/
private String orderSn;
/**
* 活动场次id
*/
private Long promotionSessionId;
/**
* 商品id
*/
private Long skuId;
/**
* 秒杀价格
*/
private BigDecimal seckillPrice;
/**
* 购买数量
*/
private Integer num;
/**
* 会员id
*/
private Long memberId;
}
秒杀服务 gulimall-seckill 里面生成订单号等信息,然后发送消息到订单服务进行创建订单
此处有漏洞
生成订单号跳转成功页面是 秒杀服务 控制的,生成订单号后发送消息给订单服务
保存订单是 订单服务 控制的,消费消息保存订单
因为订单服务中业务复杂,执行较慢,可能还没保存订单,秒杀服务就跳转了成功页面,当用户点击去支付,查询订单会发现数据库无此订单,就报错
3 引入MQ
引入依赖
<!-- rabbitMQ -->
<dependency>
    <groupId>org.springframework.boot</groupId>
    <artifactId>spring-boot-starter-amqp</artifactId>
</dependency>
修改配置文件
spring.rabbitmq.host=localhost
spring.rabbitmq.port=5672
spring.rabbitmq.virtual-host=/
添加配置类
MyRabbitConfig
@Configuration
public class MyRabbitConfig {
    /**
     * 使用JSON序列化机制,进行消息转换
     */
    @Bean
    public MessageConverter messageConverter(){
        return new Jackson2JsonMessageConverter();
    }
}
4)、订单服务 gulimall-order
修改 MQ 配置类,新增队列和绑定关系 MyMQConfig
@Bean
public Queue orderSeckillOrderQueue(){
    return new Queue("order.seckill.order.queue",true,false,false);
}

@Bean
public Binding orderSeckillOrder(){
    /**
     * 	String destination, 目的地
     * 	DestinationType destinationType, 目的地类型(交换机或者队列)
     * 	String exchange, 交换机的名字
     * 	String routingKey, 路由键
     *  Map<String, Object> arguments 参数
     *
     * 将exchange指定的交换机和destination目的地进行绑定,
     * 使用routingkey作为指定的路由键
     */
    return new Binding("order.seckill.order.queue",
            Binding.DestinationType.QUEUE,
            "order-event-exchange",
            "order.seckill.order",null);
}
新增秒杀消息监听类 OrderSeckillListener
@Slf4j
@RabbitListener(queues = "order.seckill.order.queue")
@Component
public class OrderSeckillListener {

    @Autowired
    OrderService orderService;

    @RabbitHandler
    public void listener(SeckillOrderTo to, Channel channel, Message message) throws IOException {
        try {
            log.info("准备创建秒杀单的详细信息。。。");
            orderService.createSeckillOrder(to);
            channel.basicAck(message.getMessageProperties().getDeliveryTag(),false);
        } catch (Exception e) {
            e.printStackTrace();
            // 创建失败 拒绝消息 使消息重新入队
            channel.basicReject(message.getMessageProperties().getDeliveryTag(),true);
        }
    }
}
创建秒杀订单业务方法 OrderServiceImpl.createSeckillOrder()
/**
 * 此处为简易创建订单,秒杀中缺少收货人信息
 * 秒杀只针对一种商品,即单个订单中只会有一种商品
 * @param to
 */
@Override
public void createSeckillOrder(SeckillOrderTo to) {
    //1、构建订单oms_order
    OrderEntity orderEntity = new OrderEntity();
    orderEntity.setOrderSn(to.getOrderSn());
    orderEntity.setMemberId(to.getMemberId());
    orderEntity.setCreateTime(new Date());
    // 设置订单的相关状态信息【0->待付款;1->待发货;2->已发货;3->已完成;4->已关闭;5->无效订单】
    orderEntity.setStatus(OrderStatusEnum.CREATE_NEW.getCode());
    orderEntity.setAutoConfirmDay(7);
    // 订单价格部分
    orderEntity.setPayAmount(to.getSeckillPrice());
    //设置删除状态【0->未删除;1->已删除】
    orderEntity.setDeleteStatus(0);

    //2、构建订单项oms_order_item
    OrderItemEntity item = new OrderItemEntity();
    item.setOrderSn(to.getOrderSn());
    //spu部分
    OrderProSpuInfoVo spuInfo = productFeignService.getSpuInfoBySkuId(to.getSkuId()).getData(new TypeReference<OrderProSpuInfoVo>() {
    });
    item.setSpuId(spuInfo.getId());
    item.setSpuBrand(spuInfo.getBrandId().toString());
    item.setSpuName(spuInfo.getSpuName());
    item.setCategoryId(spuInfo.getCatalogId());
    //sku部分
    R info = productFeignService.info(to.getSkuId());
    if (0==info.getCode()){
        OrderProSkuInfoVo skuInfo = info.get("skuInfo", new TypeReference<OrderProSkuInfoVo>() {
        });
        item.setSkuId(skuInfo.getSkuId());
        item.setSkuName(skuInfo.getSkuTitle());
        item.setSkuPic(skuInfo.getSkuDefaultImg());
        item.setSkuPrice(skuInfo.getPrice());
    }
    item.setSkuQuantity(to.getNum());
    //优惠部分(全为0)
    item.setPromotionAmount(new BigDecimal("0"));
    item.setIntegrationAmount(new BigDecimal("0"));
    item.setCouponAmount(new BigDecimal("0"));
    // 当前订单项的实际金额
    BigDecimal origin = item.getSkuPrice().multiply(new BigDecimal(item.getSkuQuantity().toString()));
    // 实际金额总额减去各种优惠后的价格
    BigDecimal subtract = origin.subtract(item.getCouponAmount()).subtract(item.getIntegrationAmount()).subtract(item.getPromotionAmount());
    item.setRealAmount(subtract);
    //积分部分(实际金额)
    item.setGiftGrowth(origin.intValue());
    item.setGiftIntegration(origin.intValue());

    //3、保存订单入数据库
    saveOrder(orderEntity,Arrays.asList(item));

    /**
     *  后续锁定库存,调用远程服务 wareFeignService.orderLockStock(wareSkuLockVo)
     *      创建订单成功后给延迟队列发送消息
     *  可参考购物车提交订单
     */
}
其中 OrderProSkuInfoVo模型是拷贝自 商品服务 的 SkuInfoVo 模型
远程服务接口ProductFeignService
@RequestMapping("/product/skuinfo/info/{skuId}")
R info(@PathVariable("skuId") Long skuId);
5、整合 sentinel
1)、配置
依赖
gulimall-common 引入 sentinel 依赖
<!--sentinel熔断、限流 2.1.2.RELEASE-->
<dependency>
    <groupId>com.alibaba.cloud</groupId>
    <artifactId>spring-cloud-starter-alibaba-sentinel</artifactId>
</dependency>
其他分布式服务引入 sentinel 的 actuator,用于适配 feign 组件,以及支持 Endpoint 特性暴露信息
<!-- sentinel的actuator -->
<dependency>
    <groupId>org.springframework.boot</groupId>
    <artifactId>spring-boot-starter-actuator</artifactId>
</dependency>
根据导入的 sentinel 版本,下载对应的控制台,此处是 1.7.1 版本

配置文件
#Sentinel控制台地址
spring.cloud.sentinel.transport.dashboard=localhost:8080
#Sentinel传输端口
spring.cloud.sentinel.transport.port=8719
适配 feign 需要以下配置
feign.sentinel.enabled=true
使用 Endpoint 特性需要以下配置
# Spring Boot 1.x 中,暴露的 endpoint 路径为 /sentinel
management.security.enabled=false
# Spring Boot 2.x 中,暴露的 endpoint 路径为 /actuator/sentinel
management.endpoints.web.exposure.include=*
2)、自定义流控响应
配置任一流控规则之后,发现被控制的接口访问返回的提示如下:
若想要自定义响应,添加配置类
在需要的服务中新增 SeckillSentinelConfig
/**
 * Sentinel-自定义流控响应
 */
@Configuration
public class SeckillSentinelConfig implements BlockExceptionHandler {

    /**
     * 2.2.0以后的版本实现的是BlockExceptionHandler;以前的版本实现的是WebCallbackManager
     * @param httpServletRequest
     * @param httpServletResponse
     * @param e
     * @throws Exception
     */
    @Override
    public void handle(HttpServletRequest httpServletRequest, HttpServletResponse httpServletResponse, BlockException e) throws Exception {
        R error = R.error(BizCodeEnume.TOO_MANY_REQUESTS_EXCEPTION.getCode(), BizCodeEnume.TOO_MANY_REQUESTS_EXCEPTION.getMsg());
        httpServletResponse.setCharacterEncoding("UTF-8");
        httpServletResponse.setContentType("application/json");
        httpServletResponse.getWriter().write(JSON.toJSONString(error));
    }

    /**
     * 因为版本冲突导致无法引入 WebCallbackManager
     */
   /*public SeckillSentinelConfig() {
       WebCallbackManager.setUrlBlockHandler((request, response, ex) -> {
           R error = R.error(BizCodeEnum.TOO_MANY_REQUESTS_EXCEPTION.getCode(), BizCodeEnum.TOO_MANY_REQUESTS_EXCEPTION.getMsg());
           response.setCharacterEncoding("UTF-8");
           response.setContentType("application/json");
           response.getWriter().write(JSON.toJSONString(error));
       });
   }*/
}
3)、熔断降级
不同服务之间相互调用,组成复杂的调用链路。以上的问题在链路调用中会产生放大的效果。复杂链路上的某一环不稳定,就可能会层层级联,最终导致整个链路都不可用。因此我们需要对不稳定的弱依赖服务调用进行熔断降级,暂时切断不稳定调用,避免局部不稳定因素导致整体的雪崩。熔断降级作为保护自身的手段,通常在客户端(调用端)进行配置
1 调用方熔断保护
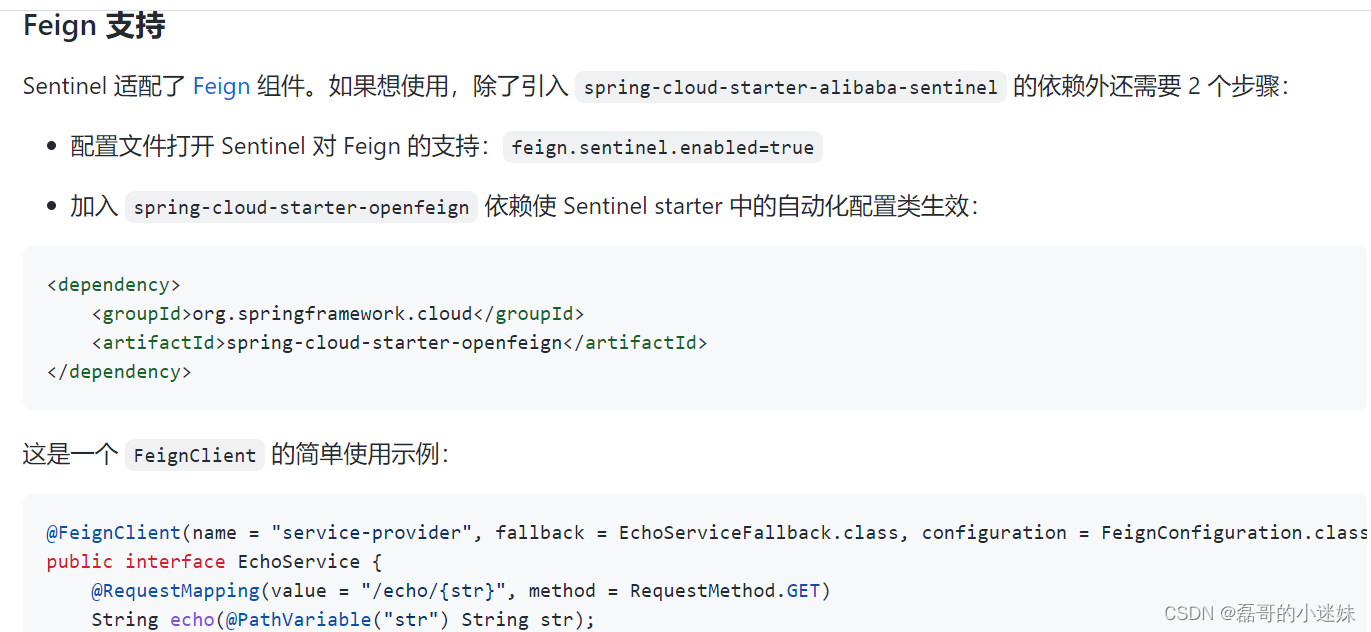
gulimall-product 中添加配置
# sentinel
spring:
  cloud:
    sentinel:
      transport:
        dashboard: localhost:8080
# sentinel - feign
feign:
  sentinel:
    enabled: true
因为在商品详情页面展示商品信息的业务方法中SkuInfoServiceImpl.item() 远程调用了 秒杀服务 gulimall-seckill
访问 http://localhost:10000/2.html ,观察控制台
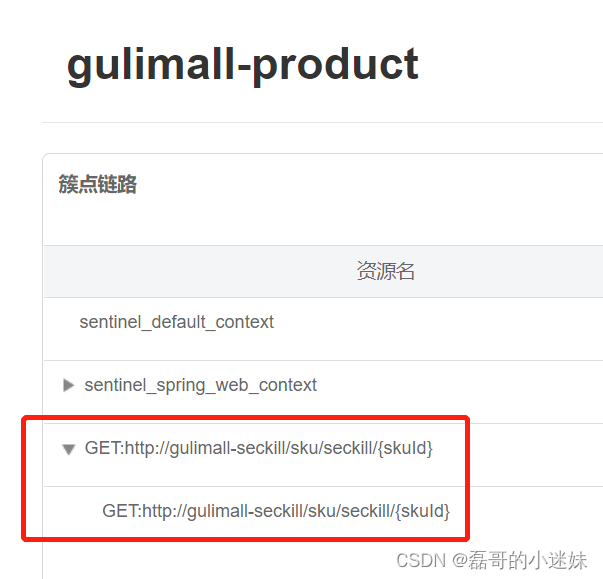
当 gulimall-seckill 服务停止的时候,访问商品详情页面就会报错 500,为了保证详情页可用,对其进行熔断
熔断是针对于调用者来说的,当调用秒杀服务失败,回调同名响应方法
修改 gulimall-product 商品服务的 feign 接口 SeckillFeignService
@FeignClient注解中添加 fallback 属性
@FeignClient(value = "gulimall-seckill",fallback = SeckillFeignServiceFallBack.class)
public interface SeckillFeignService {
    @GetMapping("/sku/seckill/{skuId}")
    R getSkuSecKillInfo(@PathVariable("skuId") Long skuId);
}
自定义一远程调用失败的实现类 SeckillFeignServiceFallBack
/**
 * sentinel 熔断的响应回调
 */
@Slf4j
@Component
public class SeckillFeignServiceFallBack implements SeckillFeignService {
    @Override
    public R getSkuSecKillInfo(Long skuId) {
        log.info("熔断方法调用.....getSkuSecKillInfo");
        return R.error(BizCodeEnume.TOO_MANY_REQUESTS_EXCEPTION.getCode(),BizCodeEnume.TOO_MANY_REQUESTS_EXCEPTION.getMsg());
    }
}
此时停止秒杀服务 gulimall-seckill ,仅仅启动商品服务 gulimall-product,访问商品详情页面,不会报错,而是打印熔断方法调用

2 调用方手动指定远程服务的降级
指的是调用方在控制台给远程服务做降级
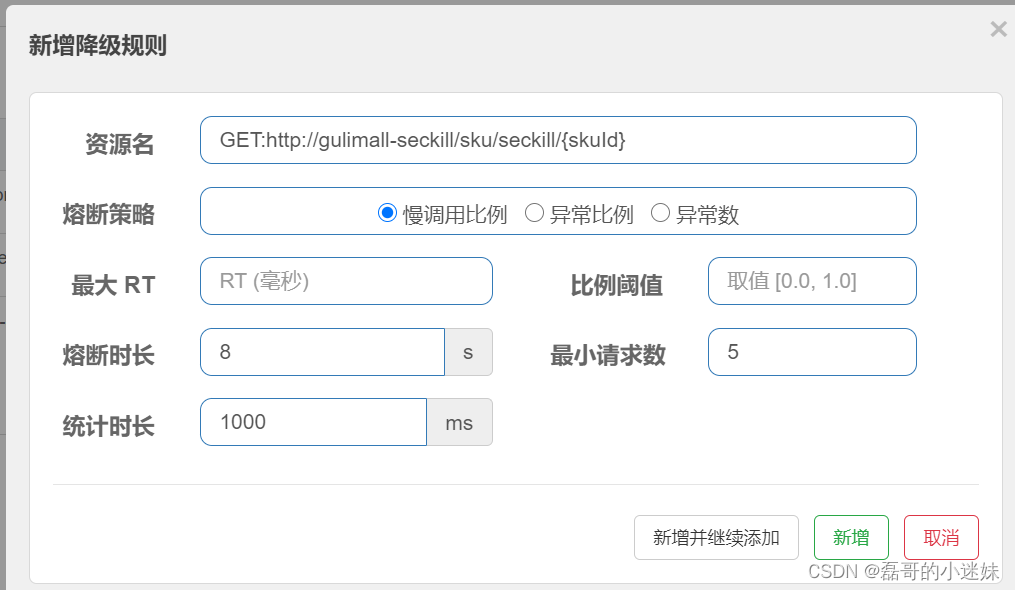
远程服务被降级之后,在熔断时长内,就会触发调用方的熔断策略
3 远程服务自身做流控
指的是远程服务自己在控制台给自己做流控
超大流量的时候,必须牺牲一些远程服务,在服务的提供方(远程服务)指定自身的降级策略
这样提供方(远程服务)是在运行的,但不执行自己的业务逻辑,而是返回默认的熔断数据(可自定义:上面自定义流控响应已设置)
例如假设其他服务会调用秒杀服务的接口 http://localhost:25000/getCurrentSeckillSkus
设置降级之后,返回默认的熔断数据
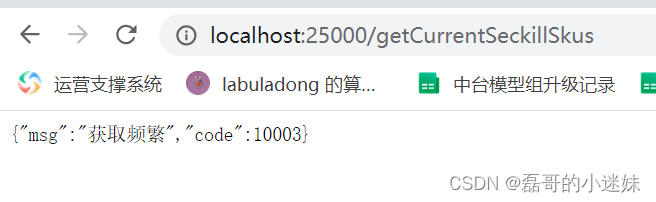
4)、自定义资源
有时候需要做流控的并不是一个接口,有可能是一段代码、一个方法
1 抛出异常的方式定义资源
try-catch 风格的 API。用这种方式,当资源发生了限流之后会抛出 BlockException。这个时候可以捕捉异常,进行限流之后的逻辑处理。示例代码如下:
// 1.5.0 版本开始可以利用 try-with-resources 特性(使用有限制)
// 资源名可使用任意有业务语义的字符串,比如方法名、接口名或其它可唯一标识的字符串。
try (Entry entry = SphU.entry("resourceName")) {
    // 被保护的业务逻辑
    // do something here...
} catch (BlockException ex) {
    // 资源访问阻止,被限流或被降级
    // 在此处进行相应的处理操作
}
然后在控制台进行流控配置时,资源名称的位置就可以填自定义资源名称
2 注解方式定义资源
Sentinel 支持通过 @SentinelResource 注解定义资源并配置 blockHandler 和 fallback 函数来进行限流之后的处理。示例:
// 原本的业务方法.
@SentinelResource(value="resourceName", blockHandler = "blockHandlerForGetUser")
public User getUserById(String id) {
    throw new RuntimeException("getUserById command failed");
}

// blockHandler 函数,原方法调用被限流/降级/系统保护的时候调用
public User blockHandlerForGetUser(String id, BlockException ex) {
    log.error("getUserById被限流了。。");
    return new User("admin");
}
注意:
blockHandler 函数会在原方法被限流/降级/系统保护的时候调用,而 fallback 函数会针对所有类型的异常。请注意 blockHandler 和 fallback 函数的形式要求


 1605
1605


 被折叠的 条评论
为什么被折叠?
被折叠的 条评论
为什么被折叠?
 到【灌水乐园】发言


