


 文章讲述了如何在微信小程序中根据用户的不同角色权限动态渲染底部tabbar,使用VantUI组件库,并在全局配置、登录页面和自定义tabbar组件中进行详细设置,实现了登录后页面跳转和tabbar更新的功能。
微信小程序模拟登录后 根据不同角色权限 渲染底部tabbar
(底部tabbar 用的是vant ui 提供的组件)
1.权限一: 拥有的底部栏如图

1.2 权限二: 拥有的底部栏 如图

1.3 定义全局属性用于存储底部的tabbar渲染

一: 首先在全局文件App.json 配置tabbar (最少2个 最多5个),并且配置页面
{
    "pages": [
        "pages/login/index",

        "pages/zy/index",
        "pages/myInfo/index",
        "pages/onlyOne/index",
        "pages/friend/index",
        "pages/setting/index"
    ],
    "window": {
        "backgroundTextStyle": "light",
        "navigationBarBackgroundColor": "#fff",
        "navigationBarTitleText": "微信登录",
        "navigationBarTextStyle": "black"
    },
    "tabBar": {
      "custom": true,
      "color": "#666666",
      "selectedColor": "#FF5F15",
      "backgroundColor": "#ffffff",
      "borderStyle": "black",
      "list": [
        {
          "pagePath": "pages/zy/index",
          "text": "主页"
        },
        {
          "pagePath": "pages/myInfo/index",
          "text": "我的信息"
        },
        {
          "pagePath": "pages/onlyOne/index",
          "text": "个人中心"
        },
        {
          "pagePath": "pages/friend/index",
          "text": "朋友信息"
        },
        {
          "pagePath": "pages/setting/index",
          "text": "手机设置"
        }
      ]
    },
    "sitemapLocation": "sitemap.json"
}
二:login 页面
1.wxml:
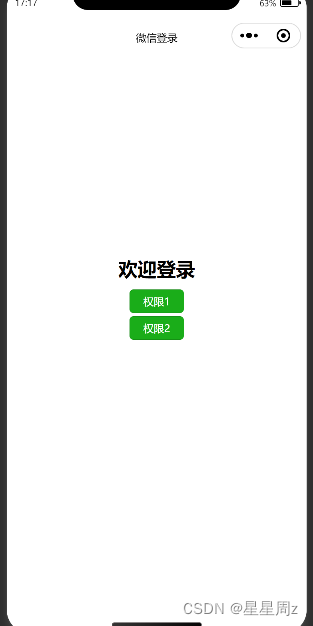
<view class="title">
欢迎登录
</view>
<!-- <button open-type="chooseAvatar" bind:chooseavatar="onChooseAvatar" type="primary" size="mini">微信授权登录</button> -->
<view>
<button bindtap="login" data-type="1" type="primary" size="mini">权限1</button>
</view>
<view>
<button bindtap="login" data-type="2" type="primary" size="mini">权限2</button>
</view>
2. js
// pages/login/index.js
const app = getApp().globalData //获取并设置tabbar
Page({
/**
* 页面的初始数据
*/
data: {
},
login(e){
const type = e.target.dataset.type
if(type == 1){ //用户权限
app.routerList = [
{
name:"主页",
icon:"home-o",
url:"/pages/zy/index",
},
{
name:"我的信息",
icon:"chat-o",
url:"/pages/myInfo/index",
},
{
name:"个人中心",
icon:"https://b.yzcdn.cn/vant/icon-demo-1126.png",
url:"/pages/onlyOne/index",
}
]
wx.reLaunch({
url: '/pages/zy/index',
})
}else{
app.routerList = [
{
name:"朋友信息",
icon:"friends-o",
url:"/pages/friend/index",
},
{
name:"手机设置",
icon:"setting-o",
url:"/pages/setting/index",
},
{
name:"个人中心",
icon:"https://b.yzcdn.cn/vant/icon-demo-1126.png",
url:"/pages/onlyOne/index",
}
]
wx.reLaunch({
url: '/pages/friend/index',
})
}
},
})如此一来便有了 登录后的路由信息
紧接着 第二步: 创建custom-tab-bar 文件夹 与pages 同级(如图:)

第三步:
custom-tab-bar 中编写代码
1.在index.wxml  中编写:

<van-tabbar active="{{ active }}" bind:change="onChange">
  <van-tabbar-item bindtap="loadPage" data-url="{{item.url}}" wx:for="{{routerList}}" wx:key="index" icon="{{item.icon}}">
      {{item.name}}
  </van-tabbar-item>
</van-tabbar>

2.在index.json 中编写:注意此处用的vant ui 库 如没下载清先npm下载后使用
https://vant-contrib.gitee.io/vant-weapp/#/tabbar#api

{
  "component": true,
  "usingComponents": {
    "van-tabbar": "@vant/weapp/tabbar/index",
    "van-tabbar-item": "@vant/weapp/tabbar-item/index",
    "van-icon": "@vant/weapp/icon/index"
  }
}

3.在index.js中:
Component({
  /**
   * 组件的属性列表
   */
  properties: {
    active:{      //对外提供当前选中的项 可以直接在每个页面中引入  以避免 tabbar显示与点击不同步的现象
      type:Number,
      value:0
    }
  },
  /**
   * 组件的初始数据
   */
  data: {
    routerList:[]
  },
  lifetimes:{
    attached(){
      this.setData({ routerList: getApp().globalData.routerList});  //获取路由
      console.log(this.data.routerList)
    }
  },
  /**
   * 组件的方法列表
   */
  methods: {
    onChange(event) {
      // event.detail 的值为当前选中项的索引
      this.setData({ active: event.detail });
    },
    loadPage(event){
      wx.switchTab({
        url: event.target.dataset.url,
      })
    },
  }
})
第四步:
1.1 在每个页面的onShow 生命周期函数中加上这句代码:
如果不加会导致tabbar显示与点击不同步的现象
  onShow() {
    if (typeof this.getTabBar === 'function' &&
      this.getTabBar()) {
      console.log(this.getTabBar())
      this.getTabBar().setData({
        active: 1        //这里的active的值根据你的routerList 顺序一致
      })
    }
  },


 被折叠的 条评论
为什么被折叠?
被折叠的 条评论
为什么被折叠?
 到【灌水乐园】发言


