


首战Flutter开发tflite详细记录
2023-04-23
0. 简介
之前自学了flutter,也写过几个项目,稍微有点开发经验。这次有个同学找到我,让帮忙写一个展示他们模型的平台出来。模型简单来说就是压缩图片(input: shape[1, 1, 256, 256]; output: shape[1, 2, 128, 128]),需求:
- 能从手机上选择图片
- 能成功运行模型(两个,encoder和decoder)
- 能将输出存储为字节流到文件
- 能从文件中读取字节流并恢复为图片
感觉上都是比较简单的(除了第一次接触flutter使用tensorflow-lite),所以就直接开始做了。
仓库链接:JSYRD/krccsnet (github.com)
1. Plugin-List
除开tflite相关部分,根据需求可知大概需要以下插件:
image_picker | Flutter Package (pub.dev) 用于选择图片
file_picker | Flutter Package (pub.dev) 用于读取文件
permission_handler | Flutter Package (pub.dev) 用于管理权限
image | Dart Package (pub.dev) 用于处理图像(不是dart:ui中的image)
由于可能会与dart:ui中的image冲突,所以我们可以:
import 'package:image/image.dart' as image_utils;
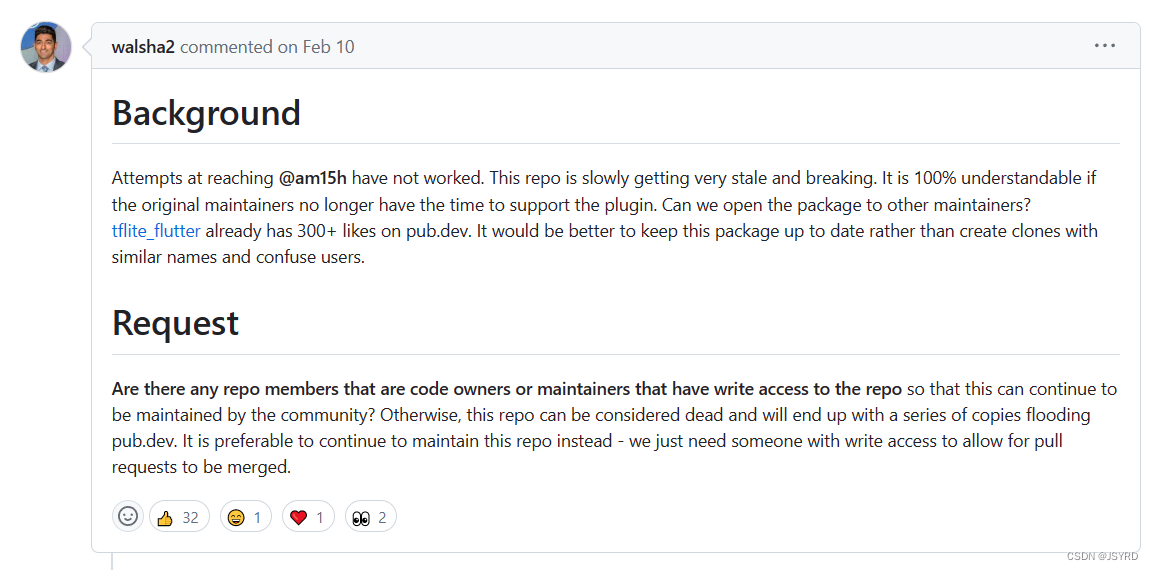
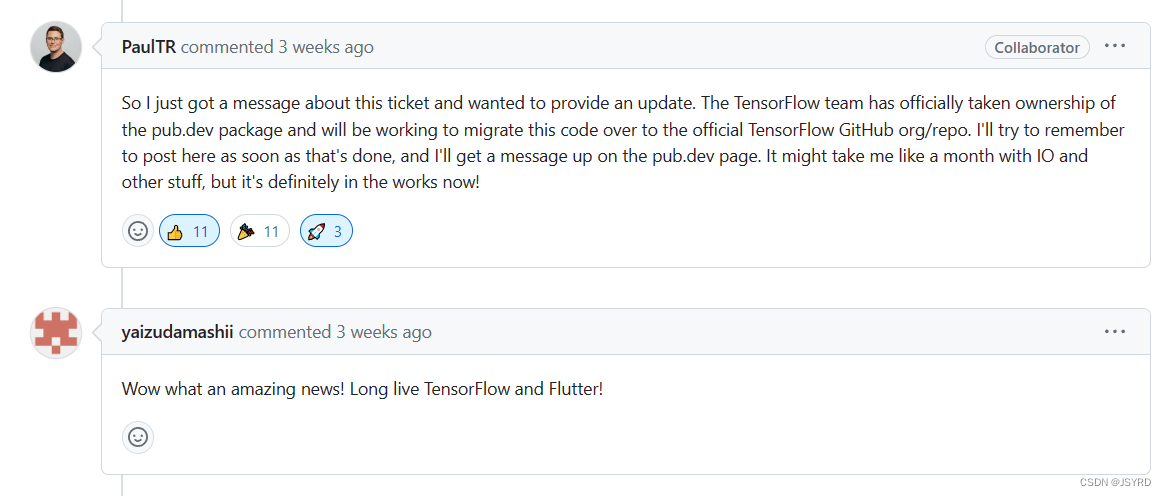
关于tflite模型的使用,pub.dev上搜索"tflite"第一个结果并不是官方的插件,而是自制并且貌似适用范围比较窄。继续搜索后发现
tflite_flutter | Flutter Package (pub.dev)
是tensorflow官方开发的插件,并且刚刚发布17天。官方插件有如下优点:
Overview
TensorFlow Lite Flutter plugin provides a flexible and fast solution for accessing TensorFlow Lite interpreter and performing inference. The API is similar to the TFLite Java and Swift APIs. It directly binds to TFLite C API making it efficient (low-latency). Offers acceleration support using NNAPI, GPU delegates on Android, Metal and CoreML delegates on iOS, and XNNPack delegate on Desktop platforms.
Key Features
- Multi-platform Support for Android, iOS, Windows, Mac, Linux.
- Flexibility to use any TFLite Model.
- Acceleration using multi-threading and delegate support.
- Similar structure as TensorFlow Lite Java API.
- Inference speeds close to native Android Apps built using the Java API.
- You can choose to use any TensorFlow version by building binaries locally.
- Run inference in different isolates to prevent jank in UI thread.
比较符合需求
p.s.: 截止2023-04-20,插件依然是v0.9.1,非正式版,在插件介绍中也有声明:
Announcement
Update: 2 April, 2023
The TensorFlow team has taken official ownership of this plugin and will begin migrating to the TensorFlow org with a team managed repo. You can follow the package on pub.dev for updates as we make progress. Our goal is to have this moved over by mid-May, then we’ll start work on updates and accepting community contributions.
Feel free to reach out to me with questions until then.
Thanks!
- ptruiz@google.com
所以对某些模型和设备可能会存在bug。
需要注意的点:
- 在Dart中,传给模型的Tensor事实上是
List<dynamic>- 模型运行需要两个参数:
input ,output,会自动将结果填入output中,所以需要提前准备好一个空的outputTensor
2. 准备和思路
由于对美观基本没要求,基本上Scaffold搭个页面,能显示图片,放几个按钮再输出下状态就行,最终效果大致如下:
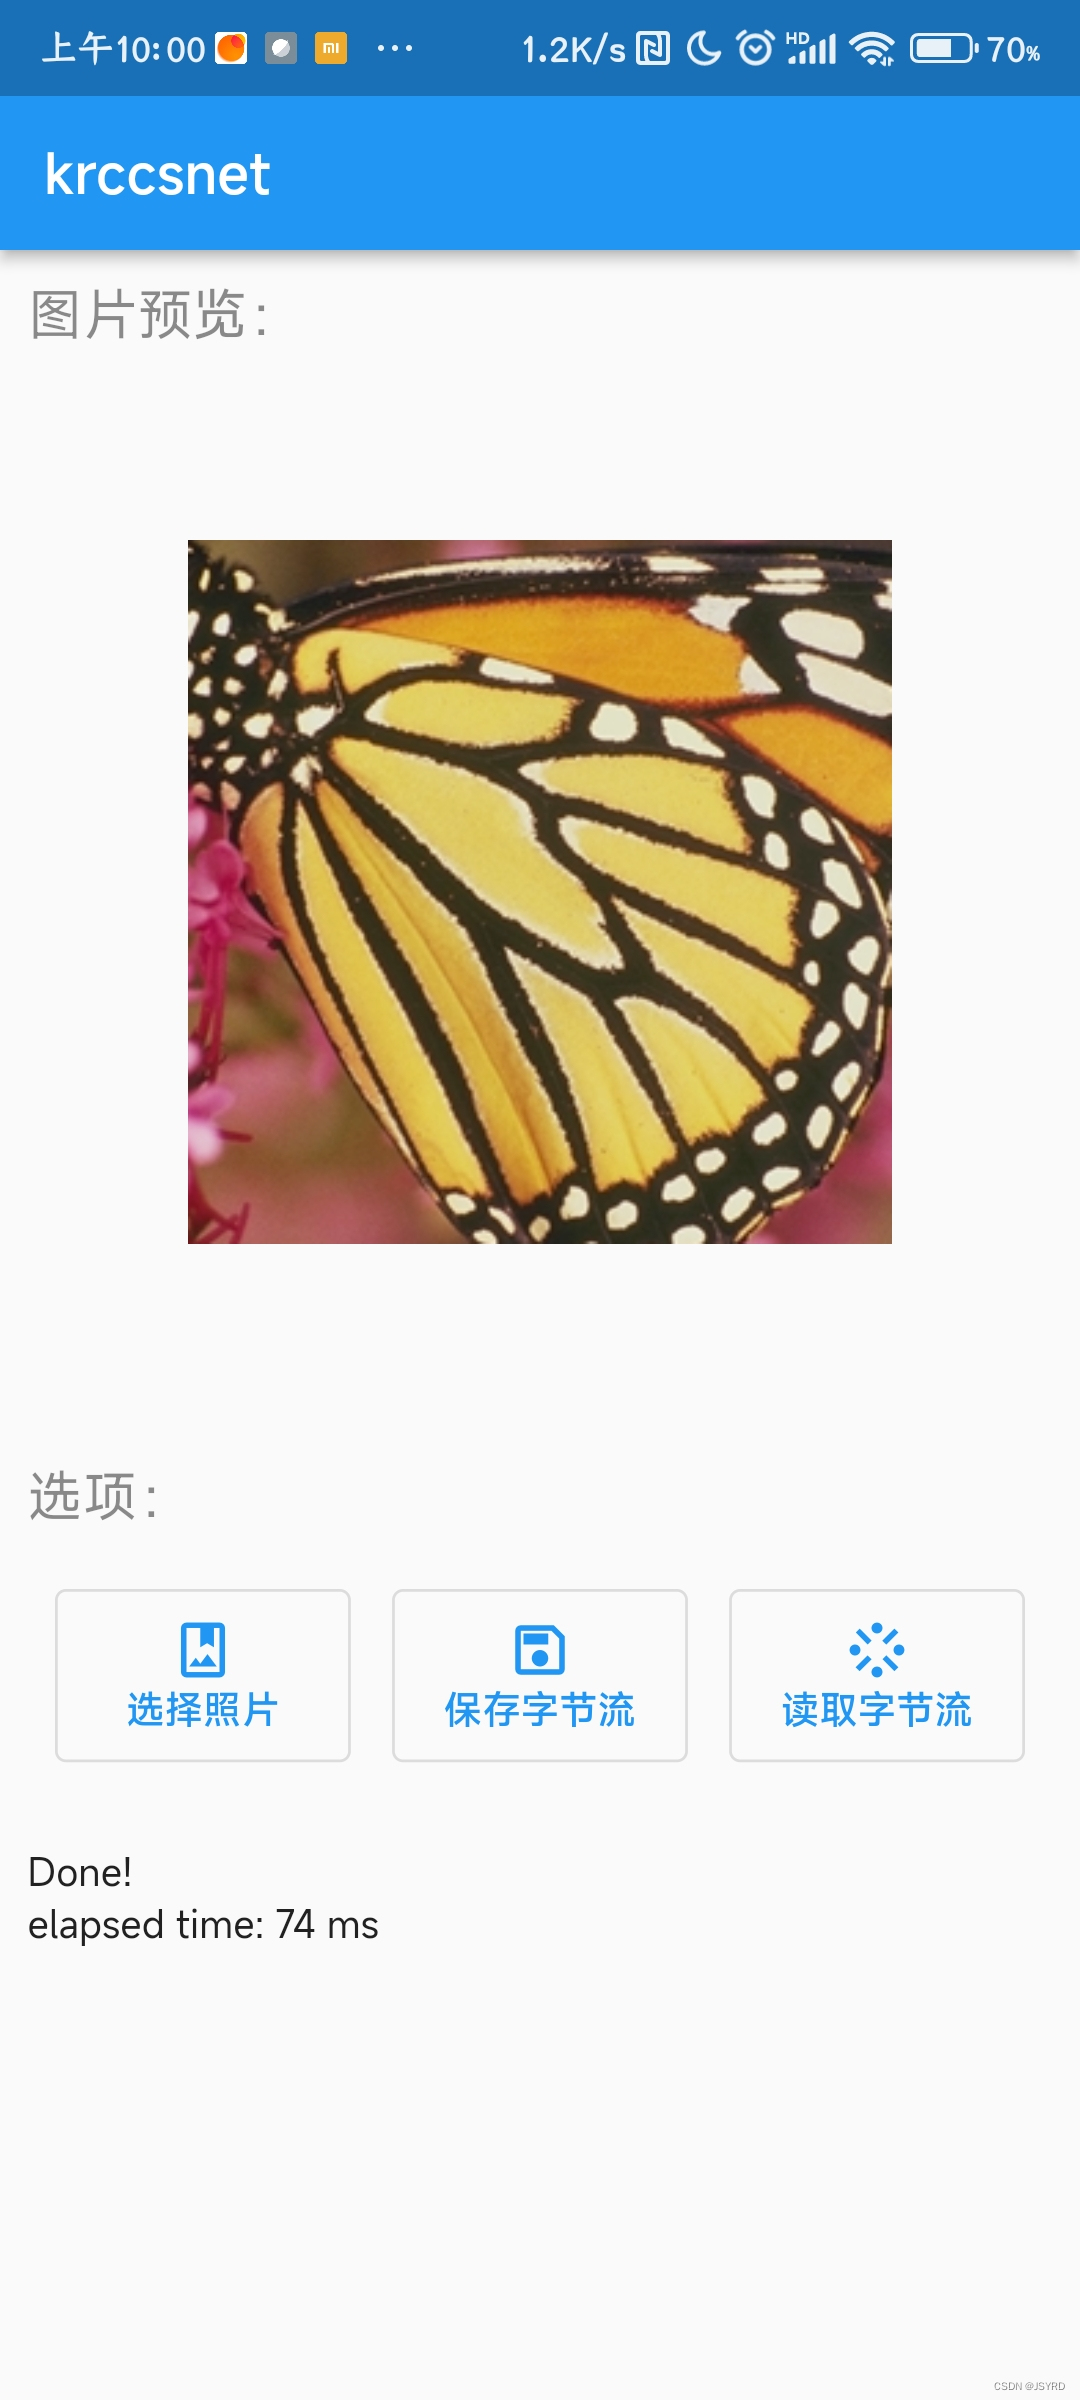
具体实现细节就不再赘述,可以自行翻代码,这里重点讲几个按钮的功能的实现。
准备工作
准备模型(版权原因,模型未放在仓库中),放在assets/下,并在pubspec.yaml中添加:
  assets:
  - assets/rena.png
  - assets/tflite_0.5encoder.tflite
  - assets/tflite_0.5decoder.tflite
由于模型的使用需要初始化其Interpreter,所以我们需要在一开始时加载Interpreter,以保证后续使用。这里选择在HomePage.initState()中调用加载模型的方法:
late Interpreter encoderInterpreter;
late Interpreter decoderInterpreter;
void initState() {
loadModel();
super.initState();
// selectedImage = Image.asset('assets/rena.png');
}
void loadModel() async {
var interpreteroptions = InterpreterOptions();
interpreteroptions.useNnApiForAndroid = true;
encoderInterpreter = await Interpreter.fromAsset('tflite_0.5encoder.tflite',
options: interpreteroptions);
decoderInterpreter = await Interpreter.fromAsset('tflite_0.5decoder.tflite',
options: interpreteroptions);
}
选择照片的实现
给选择照片按钮绑定方法openGallery。方法实现思路如下:
- 使用image_picker插件提供的方法获取一个图片;
- 渲染并处理图片,而后将处理图片后得到的tensor交由模型处理;
- 将模型给出的输出(字节)返回。
需要注意的是需求是选择完图片后自动开始编码,所以集成到了该方法中,事实上可以再拆分出一个按钮来控制开始编码。
考虑到渲染并处理图片,以及模型的运行需要时间。如果采用同步或者异步单线程的方法会导致主线程阻塞,所以我们使用多线程,把耗时操作放在副线程运行,避免阻塞:
  void openGallery() async {
    final ImagePicker _picker = ImagePicker();
    XFile? pickedFile = await _picker.pickImage(source: ImageSource.gallery); // 选择一个图片
    if (pickedFile == null) {
    } else {
      setState(() {
        selectedImage = Image.file(File(pickedFile.path));
        byteStreamReady = false;
      });
      ReceivePort receivePort = ReceivePort();
      await Isolate.spawn(KrccsnetEncoder.encode, [
        receivePort.sendPort,
        pickedFile.path,
        encoderInterpreter.address,
      ]);//编码,运行模型
      setState(() {
        benchmarkText = "encoding";
      });
      receivePort.listen((message) {//得到输出的tensor
        setState(() {
          benchmarkText = "Done!\nelapsed time: ${message[0] as int} ms";
          outputTensor = message[1] as List<dynamic>;
          byteStreamReady = true;
        });
      });
    }
  }
这里我将处理图片和运行模型的部分抽象成了方法encode,并且将几个类似方法放在一起抽象成了类KrccsnetEncoder,具体细节后文解读。
需要注意的是,dart的多线程并没有内存共享,唯一的通讯方式是通过Port。
在使用
Isolate.spawn创建新线程时,有一个参数List<Object> message,代表传给要运行的方法的参数。但需要注意的是,无论是通过Port还是通过message传递参数时,都要求内容必须可序列化。这就导致了我们没有办法直接将Interpreter传给KrccsnetEncoder.encode,但好在插件想到了这个问题,所以提供了Interpreter.address和配套的Interpreter.fromAddress()方法,便于在线程之间通信使用。
保存字节流的实现
给保存字节流按钮绑定方法saveByteStream。 上一步我们通过模型运行后得到了一个输出List<dynamic> outputTensor,事实上是一个shape[1, 2, 128, 128], fp32,我们需要将其转化为字节流并存储。由于存储文件涉及到路径和文件名,所以我又写了一个页面用于选择路径和填写文件名,然后使用showDialog()方法就可以达到弹窗的效果:
  void saveByteStream() async {
    if (byteStreamReady) {
      await showDialog(
          context: context,
          builder: (BuildContext context) {
            return SaveFilePage(
              outputTensor: outputTensor,
            );
          });
    } else {
      ScaffoldMessenger.of(context).showSnackBar(const SnackBar(
          content: Text("字节流未生成"),
          showCloseIcon: true,
          closeIconColor: Colors.lightBlue));
    }
  }
这里将outputTensor作为参数传给了SaveFilePage,所以需要稍微修改一下常规的StatefulWidget Snipple:
class SaveFilePage extends StatefulWidget {
const SaveFilePage({super.key, required this.outputTensor});
final List<dynamic> outputTensor;
State<SaveFilePage> createState() => _SaveFilePageState();
}
class _SaveFilePageState extends State<SaveFilePage> {
final TextEditingController _getFileName = TextEditingController();
late final List<dynamic> outputTensor;
String? saveDirectory;
void initState() {
super.initState();
outputTensor = widget.outputTensor;
loadDefaultDirectory();
}
直接在_SaveFilePageState中调用widget.outputTensor就可以获取到SaveFilePage的outputTensor了。

同样的,限于篇幅,页面搭建细节不再赘述,可以自行翻代码。这里还是重点讲解功能的实现。
首先存储路径的部分是一个TextButton,点击文字部分就会自动跳出资源管理器,让用户自行选择存储路径,这样较为符合逻辑。
由于实现逻辑较为简单,就直接采用匿名函数的方式写在页面逻辑中了:
                    onPressed: () async {
                      if (await Permission.storage.request().isGranted) {
                        String? selectedDirectory =
                            await FilePicker.platform.getDirectoryPath();
                        if (selectedDirectory != null) {
                          setState(() {
                            saveDirectory = selectedDirectory;
                          });
                        }
                      }
                    },
需要注意的是这里可能需要获取存储权限,所以需要利用Permission.storage.request().isGranted获取权限。然后用file_picker提供的方法即可。
填写文件名的部分使用了一个TextField,内容用一个Controller _getFileName来控制。
最后给确定按钮实现一下逻辑。点击确定后需要获取刚才得到的路径和文件名,拼接成一个完整文件路径。然后需要将传进来的outputTensor进行处理后存储。
      actions: [
        ElevatedButton(
            onPressed: () {
              SaveReadUtils.saveOutputTensor(
                  "$saveDirectory/${_getFileName.text}.krc", outputTensor);
              Navigator.pop(context);
            },
            child: const Text("确定"))
      ],
同样的,这里我将处理Tensor和保存字节流的部分封装了起来,后文统一详细解读。
读取字节流的实现
类似与存储字节流,思路同样也是获取权限后选择文件,然后将从选择的文件中读取的字节流转化成Tensor,再将Tensor转化为Image,最终显示出来。
  void readByteStream() async {
    if (await Permission.storage.request().isGranted) {
      FilePickerResult? result =
          await FilePicker.platform.pickFiles(type: FileType.any);
      if (result != null) {//选择一个文件

        var input = await SaveReadUtils.readTensor(result.files.first.path!);//将文件读取为Tensor

        ReceivePort receivePort = ReceivePort();
        await Isolate.spawn(KrccsnetEncoder.decode,
            [receivePort.sendPort, input, decoderInterpreter.address]);		//将Tensor交由模型解码

        setState(() {
          benchmarkText = "decoding";
        });
        receivePort.listen((message) {	//得到解码后的字节流
          // message: Uint8List
          var rawImage = image_utils.Image.fromBytes(
              width: 256, height: 256, bytes: message);

          setState(() {
            selectedImage = Image.memory(image_utils.encodePng(rawImage));//转为图片
            benchmarkText = "Done!";
          });
        });
      }
    }
  }
3. 数据处理
本项目用到的就只有图片,由于需要存储,所以一共包含两对四种数据处理方式:
- 从图片到张量
- 从张量到字节流
- 从字节流到张量
- 从张量到图片
编解码输入输出张量
这个插件运行模型时的输入输出都是将Dart中的List<dynamic>看作张量。所以我们只需要将我们需要构造成张量的数据构造成List<dynamic>即可。注意shape要与本身预计的输入和输出一致。并且interpreter.run(input, output)需要传入一个空的output参数,以便将运行结果填入。
从图片到张量
png图片本质上是一个一个像素,像素又可以简单看成由RGB(A)组成的。本模型的输入为shape[1, 1, 256, 256],值为每个点对应的归一化的亮度。所以我们只需要获取每个点的亮度,填入到List中即可:
  static List<dynamic> getEncodeInputTensor(image_utils.Image rawImage) {
    var input = List<double>.filled(IMAGE_HEIGHT * IMAGE_WIDTH, 0.0)
        .reshape([1, 1, IMAGE_HEIGHT, IMAGE_WIDTH]);
    // fill with lumianceNormalized, shape: n c h w
    for (int ch = 0; ch < IMAGE_HEIGHT; ++ch) {
      for (int cw = 0; cw < IMAGE_WIDTH; ++cw) {
        input[0][0][ch][cw] = rawImage.getPixel(cw, ch).luminanceNormalized;
      }
    }
    return input;
  }
我们前面只获得了图片文件的路径,还需要将图片文件先转为image_utils.Image:
  static void encode(List<Object> options) async {
    SendPort sendPort = options[0] as SendPort;
    Interpreter encoderInterpreter = Interpreter.fromAddress(options[2] as int);

    File(options[1] as String).readAsBytes().then((imageBytes) async {
      image_utils.Decoder? rawImageDecoder =
          image_utils.findDecoderForData(imageBytes);

      if (rawImageDecoder == null) {
        throw Exception("Format not supported.");
      }

      var rawImage = rawImageDecoder.decode(imageBytes)!;//转为image_utils.Image 注意这里不是Krccsnet.decode,注意区分

      var input = getEncodeInputTensor(rawImage);//转为tensor
      var output = getEncodeOutputTensor();		//获得空Tensor,shape[1, 2, 128, 128]

      int krccsnetTime = await _encode(encoderInterpreter, input, output, 1);
      sendPort.send([krccsnetTime, output]);
    });
  }
getEncodeOutputTensor()定义如下:
  static List<dynamic> getEncodeOutputTensor() {
    // fill output , shape 1, 2, 128, 128
    var output = List<double>.filled(IMAGE_HEIGHT * IMAGE_WIDTH ~/ 2, 0.0)
        .reshape([1, 2, IMAGE_HEIGHT ~/ 2, IMAGE_WIDTH ~/ 2]);
    return output;
  }
_encode方法只是简单将模型运行过程封装,具体实现如下:
  static Future<int> _encode(Interpreter encoderInterpreter,
      List<dynamic> input, List<dynamic> output, int times) async {
    if (times <= 0) {
      throw Exception("times can't be $times, must > 0");
    }
    var start = DateTime.now().millisecondsSinceEpoch;
    for (int roll = 0; roll < times; ++roll) {
      encoderInterpreter.run(input, output);
    }
    var end = DateTime.now().millisecondsSinceEpoch;
    int krccsnetTime = (end - start) ~/ times;
    return krccsnetTime;
  }
为了方便测试性能,定义了参数times,以连续运行多轮取平均值。
从张量到字节流
上文提到存储时需要将张量转化为字节流。我们已经从图片得到了张量outputTensor,事实上是一个List<dynamic>,所以我们只需要考虑如何存储一个List即可。由于本模型使用FP32,所以可以保证outputTensor中存放的都是FP32数据。也就是说事实上只需要将Tensor拆分成一个个List<double>,再进行顺序存储即可。具体实现如下:
  static Future<void> saveOutputTensor(
      String saveFullDirectory, List<dynamic> outputTensor) async {
    // save output , shape 1, 2, 128, 128
    File(saveFullDirectory).createSync();

    for (int j = 0; j < 2; ++j) {
      for (int i = 0; i < IMAGE_HEIGHT ~/ 2; ++i) {
        await File(saveFullDirectory).writeAsBytes(
            Float32List.fromList(outputTensor[0][j][i] as List<double>)
                .buffer
                .asUint8List(),
            mode: FileMode.append);
      }
    }
  }
注意:
由于存储只能以字节形式存储,所以我们需要使用.asUint8List()方法将一个FP32拆分成4个Uint8作为字节存储,所以后续读取的时候同样需要将4个字节还原成一个FP32。
从字节流到张量
首先需要从文件读出所有字节,然后按照我们编码的方式,将每4个字节编码为一个FP32。幸运的是有内置方法可以使用:
  static Future<List<dynamic>> readTensor(String readFullDirectory) async {
    var input = KrccsnetEncoder.getDecodeInputTensor();
    Uint8List rawBytes =
        await File(readFullDirectory).readAsBytes(); // 2 * 128 * 128
    for (int i = 0; i < 2; ++i) {
      var reader = rawBytes.buffer.asFloat32List(
          i * IMAGE_HEIGHT * IMAGE_WIDTH, IMAGE_HEIGHT * IMAGE_WIDTH ~/ 4);
      for (int ch = 0; ch < IMAGE_HEIGHT ~/ 2; ++ch) {
        for (int cw = 0; cw < IMAGE_WIDTH ~/ 2; ++cw) {
          input[0][i][ch][cw] = reader[ch * IMAGE_HEIGHT ~/ 2 + cw];
        }
      }
    }
    return input;
  }
从张量到图片
在读取字节流时,readTensor方法读出张量后,会创建新线程交由decode方法运行模型获得输出output。
  static void decode(List<Object> options) async {
    SendPort sendPort = options[0] as SendPort;
    List<dynamic> input = options[1] as List<dynamic>;
    Interpreter decoderInterpreter = Interpreter.fromAddress(options[2] as int);

    var output = <int, Object>{};
    output[0] = getDecodeOutputTensor();
    output[1] = getDecodeOutputTensor();
    await _decode(decoderInterpreter, input, output, 1);

    var rawImage = image_utils.Image(width: 256, height: 256);
    for (int ch = 0; ch < IMAGE_HEIGHT; ++ch) {
      for (int cw = 0; cw < IMAGE_WIDTH; ++cw) {
        double c = (output[1]! as List<dynamic>)[0][0][ch][cw] * 255.0;
        rawImage.setPixelRgb(cw, ch, c, c, c);
      }
    }

    sendPort.send(rawImage.buffer);
  }
既然已经得到张量,我们就可以根据我们需要的方式构造一个image_utils.Image出来,例如在本项目中需要将输出作为亮度(也就是输出一个灰度图),只需要将归一化的值恢复到0-255,再根据灰度图的定义,将该值作为RGB值构造一个图片即可。最后将该图片以字节流形式发送回正在等待的主线程。然后直接调用Image.fromBytes()恢复该图片即可。
        receivePort.listen((message) {
          // message: Uint8List
          var rawImage = image_utils.Image.fromBytes(
              width: 256, height: 256, bytes: message);

          setState(() {
            selectedImage = Image.memory(image_utils.encodePng(rawImage));
            benchmarkText = "Done!";
          });
        });
至此完整的图片->张量->字节流->张量->图片 转化流程已经全部实现。
4. 编译tflite
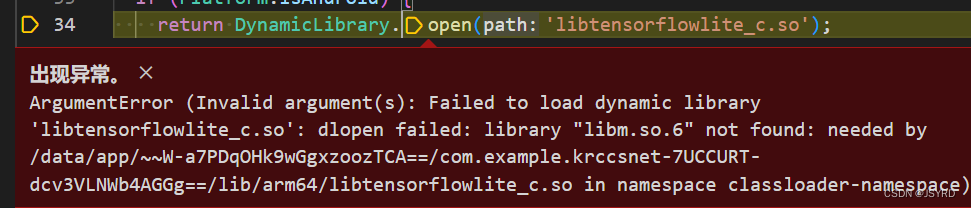
在运行时报错:

E/tflite ( 6951): Didn't find op for builtin opcode 'TRANSPOSE' versior '6'. An older version of this builtin might be supported. Are you using an old TFLite binary with a newer model?
E/tflite ( 6951): Registration failed.
E/flutter( 6951): [ERROR.flutter/runtime/dart_vm_initializer.cc(41)] Unhandled Exception:Invalid angument(s): Unable to create interpreter.
简单搜索后得知是插件使用的tflite版本过低:

事实上,在插件介绍页,有提到使用插件的Initial setup:
(Important) Initial setup : Add dynamic libraries to your app
Android
Place the script install.sh (Linux/Mac) or install.bat (Windows) at the root of your project.
Execute
sh install.sh(Linux) /install.bat(Windows) at the root of your project to automatically download and place binaries at appropriate folders.Note: The binaries installed will not include support for
GpuDelegateV2andNnApiDelegatehoweverInterpreterOptions().useNnApiForAndroidcan still be used.Use
sh install.sh -d(Linux) orinstall.bat -d(Windows) instead if you wish to use theseGpuDelegateV2andNnApiDelegate.These scripts install pre-built binaries based on latest stable tensorflow release. For info about using other tensorflow versions follow instructions in wiki.
查看install.sh/install.bat内容,发现事实上是从https://github.com/am15h/tflite_flutter_plugin/releases 下载动态链接库文件:
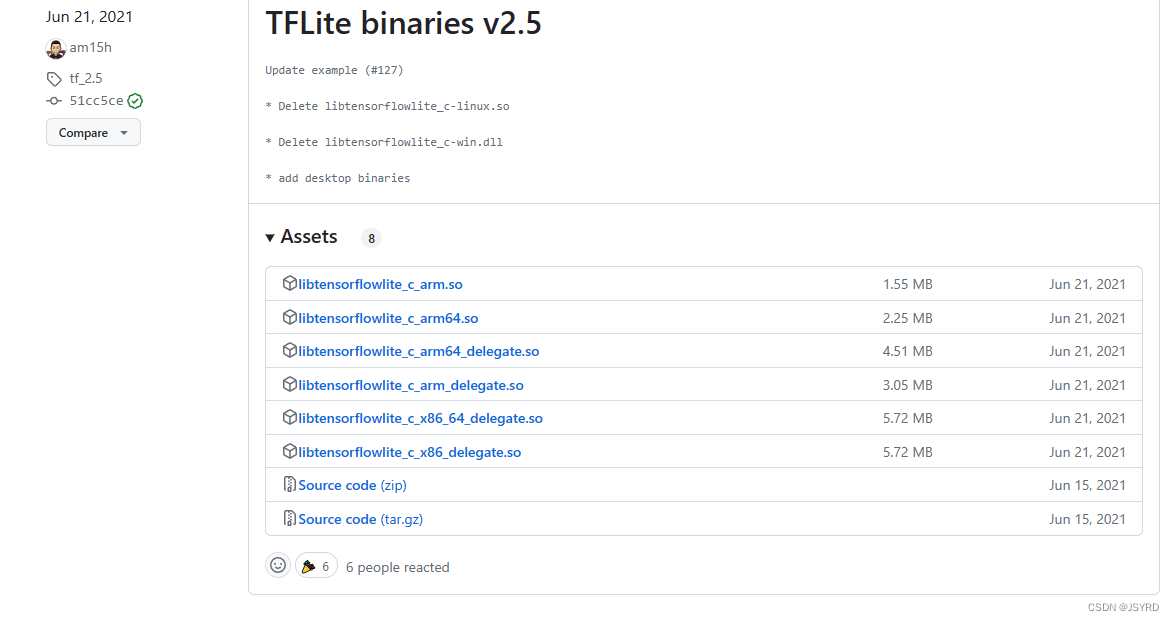
可以看到确实很久没有更新了,但是结合插件特性所言以及给定的提示:
- You can choose to use any TensorFlow version by building binaries locally.
- These scripts install pre-built binaries based on latest stable tensorflow release. For info about using other tensorflow versions follow instructions in wiki.
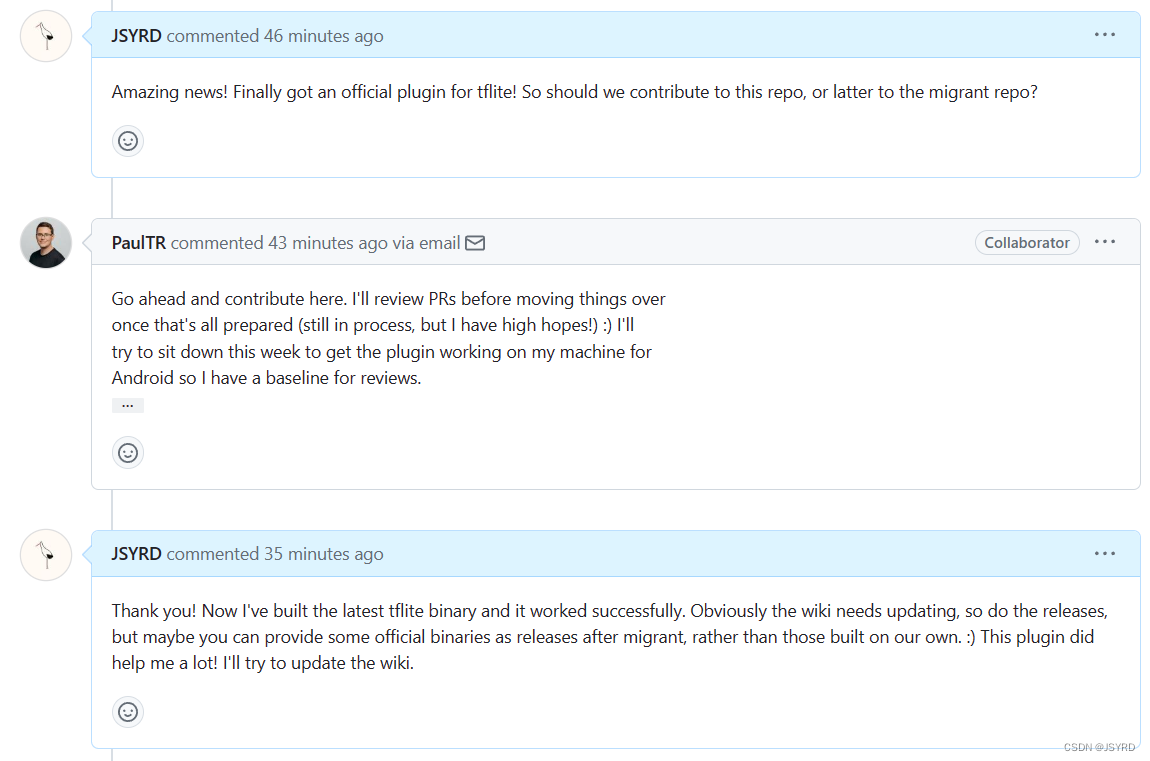
我们需要编译一版新的tflite出来才能正常运行。
上面的instructions in wiki里面给的链接挂了,我们可以直接去tf官网找到指南:
Build TensorFlow Lite for ARM boards
首先尝试构建针对ARM的版本,编译完成后将得到的二进制文件替换掉/android/app/src/main/jniLibs/*/libtensorflowlite_c.so

但是运行时报错,说明还是要构建针对Android的版本。
直接按照 Build TensorFlow Lite for Android 不使用Docker设置构建环境开始。
环境搭建
首先Bazel有版本要求,需要5.3.0版本。
在 Ubuntu 上安装 Bazel 可以根据这个文档安装。
接着需要克隆tf源代码:
$ git clone https://github.com/tensorflow/tensorflow.git tensorflow_src
然后需要准备NDK和Android SDK。这里需要注意NDK和Android SDK都是有版本要求的。例如我一开始下载了最新的NDK r25c,配置时会提示:
WARNING: The NDK version in /home/subwoy/temp/tfliteCompile/android-ndk-r25c is 25, which is not supported by Bazel (officially supported versions: [19, 20, 21]). Please use another version. Compiling Android targets may result in confusing errors.
所以我们需要下载NDK[19-21]版本,同时对应的也要下载对应支持的SDK(例如30)。
NDK下载
Unsupported Downloads · android/ndk Wiki (github.com)
从这里可以下载到NDK21旧版本。这里我下载了支持的最新的r21e。下载后解压。
SDK下载
我们使用官方的sdkmanager工具来下载SDK:
Download Android Studio & App Tools - Android Developers 去官网向下拉,找到Command line tools only:
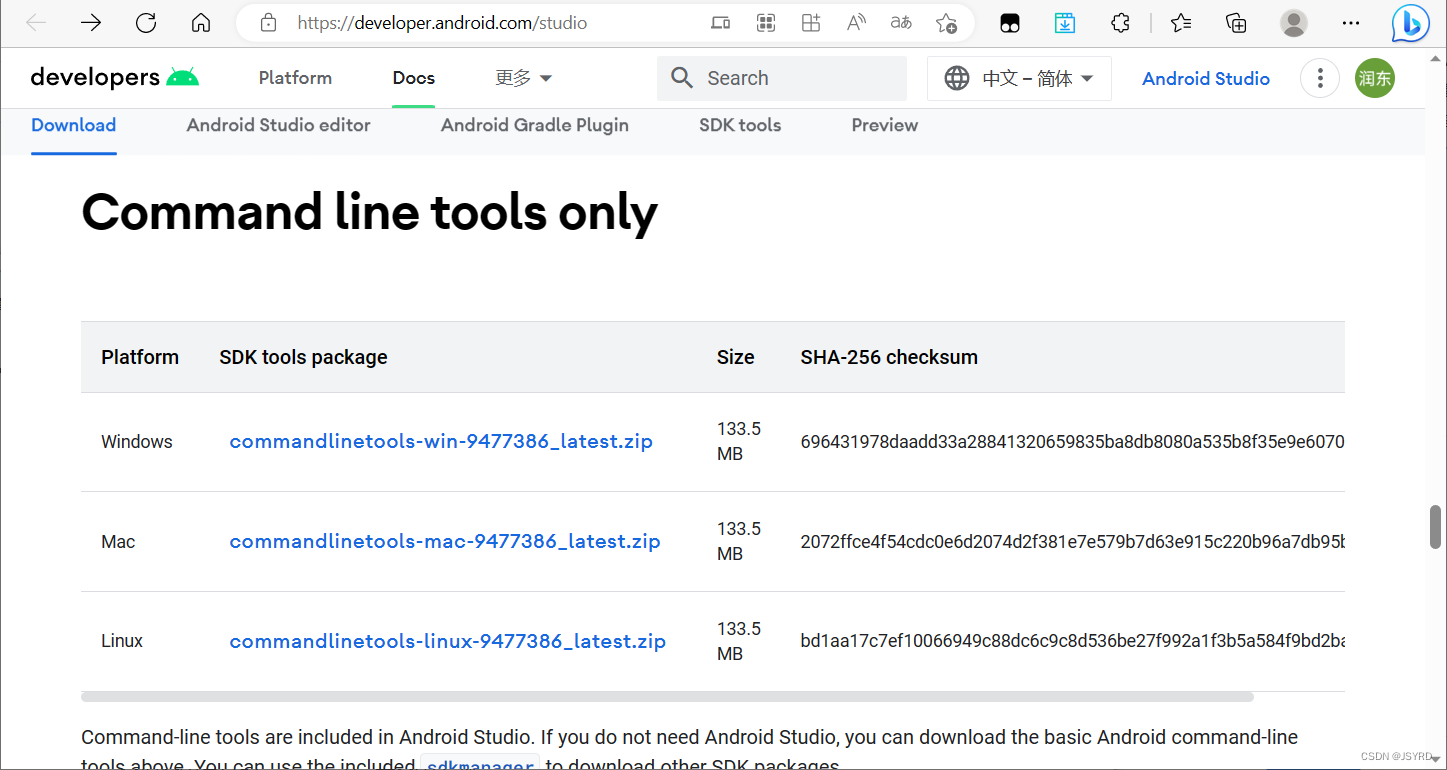
下载后解压,在/bin下就可以找到sdkmanager了。由于我们是临时使用,并没有配置环境变量,所以在使用sdkmanager时需要带上--sdk_root=xxx来指定你要把sdk下载到哪个路径。例如我放在~/temp/tfliteCompile/android-sdk
首先查看可以下载哪些版本:
$ ./sdkmanager --list --sdk_root=~/temp/tfliteCompile/android-sdk
同样这里我直接下载最新支持的SDK30和build-tools:
$ ./sdkmanager "build-tools;30.0.3" "platforms;android-30"
配置bazel编译环境
进入到tf源码路径,执行./configure进行配置:
subwoy@DESKTOP-ENVI0R2:~/temp/tfliteCompile/tensorflow_src$ ./configure
You have bazel 5.3.0 installed.
Please specify the location of python. [Default is /usr/bin/python3]:


Found possible Python library paths:
  /usr/lib/python3/dist-packages
  /usr/local/lib/python3.8/dist-packages
Please input the desired Python library path to use.  Default is [/usr/lib/python3/dist-packages]

Do you wish to build TensorFlow with ROCm support? [y/N]: N
No ROCm support will be enabled for TensorFlow.

Do you wish to build TensorFlow with CUDA support? [y/N]: N
No CUDA support will be enabled for TensorFlow.

Do you wish to download a fresh release of clang? (Experimental) [y/N]: N
Clang will not be downloaded.

Please specify optimization flags to use during compilation when bazel option "--config=opt" is specified [Default is -Wno-sign-compare]: --cxxopt=--std=c++11 --config=android_arm


Would you like to interactively configure ./WORKSPACE for Android builds? [y/N]: y
Searching for NDK and SDK installations.

Please specify the home path of the Android NDK to use. [Default is /home/subwoy/Android/Sdk/ndk-bundle]: /home/subwoy/temp/tfliteCompile/android-sdk


The path /home/subwoy/temp/tfliteCompile/android-sdk or its child file "source.properties" does not exist.
Please specify the home path of the Android NDK to use. [Default is /home/subwoy/Android/Sdk/ndk-bundle]: /home/subwoy/temp/tfliteCompile/android-ndk


The path /home/subwoy/temp/tfliteCompile/android-ndk or its child file "source.properties" does not exist.
Please specify the home path of the Android NDK to use. [Default is /home/subwoy/Android/Sdk/ndk-bundle]: /home/subwoy/temp/tfliteCompile/android-ndk-r21e


Please specify the (min) Android NDK API level to use. [Available levels: ['16', '17', '18', '19', '21', '22', '23', '24', '26', '27', '28', '29', '30']] [Default is 26]: 30


Please specify the home path of the Android SDK to use. [Default is /home/subwoy/Android/Sdk]: /home/subwoy/temp/tfliteCompile/android-sdk


Please specify the Android SDK API level to use. [Available levels: ['30']] [Default is 30]:


Please specify an Android build tools version to use. [Available versions: ['30.0.3']] [Default is 30.0.3]:


Preconfigured Bazel build configs. You can use any of the below by adding "--config=<>" to your build command. See .bazelrc for more details.
        --config=mkl            # Build with MKL support.
        --config=mkl_aarch64    # Build with oneDNN and Compute Library for the Arm Architecture (ACL).
        --config=monolithic     # Config for mostly static monolithic build.
        --config=numa           # Build with NUMA support.
        --config=dynamic_kernels        # (Experimental) Build kernels into separate shared objects.
        --config=v1             # Build with TensorFlow 1 API instead of TF 2 API.
Preconfigured Bazel build configs to DISABLE default on features:
        --config=nogcp          # Disable GCP support.
        --config=nonccl         # Disable NVIDIA NCCL support.
Configuration finished
配置完成后就可以尝试开始编译了。有几种方式,例如可以根据插件仓库wiki中的方式直接:
$ bazel build -c opt --cxxopt=--std=c++11 --config=android_arm64 //tensorflow/lite/c:tensorflowlite_c
来仅编译arm64版本的二进制文件。也可以按照tf教程编译一个aar出来:
$ bazel build -c opt --fat_apk_cpu=x86,x86_64,arm64-v8a,armeabi-v7a \
  --host_crosstool_top=@bazel_tools//tools/cpp:toolchain \
  //tensorflow/lite/java:tensorflow-lite
然后将aar解压,将里面得到的动态链接库改名替换放在你的项目中就可以了。
5. 后记
这个插件的作者退网一年了,联系不上,所以仓库很久没有更新。最近tf团队注意到了此事,并且正在尝试转移仓库。以后应该会持续更新并且修复bug。
By JSYRD


 2037
2037


 被折叠的 条评论
为什么被折叠?
被折叠的 条评论
为什么被折叠?
 到【灌水乐园】发言


