


部署拓扑图和介绍参考:
https://blog.csdn.net/qq_50247813/article/details/137799157?spm=1001.2014.3001.5502
官网高可用集群部署参考: https://kubernetes.io/zh-cn/docs/setup/production-environment/tools/kubeadm/high-availability/
开始部署,集群模式为堆叠
主机信息
master节点最低配置要求2c2g
k8s-master-01	192.168.44.189		CentOS Linux release 7.9.2009 (Core)
k8s-master-02	192.168.44.190		CentOS Linux release 7.9.2009 (Core)
k8s-master-03	192.168.44.191		CentOS Linux release 7.9.2009 (Core)
k8s-node-01		192.168.44.192		CentOS Linux release 7.9.2009 (Core)
VIP				192.168.44.200		keepalived虚拟出来的IP地址
容器运行时: containerd
转发模式: iptables
负载均衡:keepalived + haproxy
一、 配置主机环境
- 设置主机名
# 分别在每台主机执行
hostnamectl set-hostname k8s-master-01
hostnamectl set-hostname k8s-master-02
hostnamectl set-hostname k8s-master-03
hostnamectl set-hostname k8s-node-01
- 添加hosts本地解析
# 每台都执行
cat >> /etc/hosts << EOF
192.168.44.189  k8s-master-01
192.168.44.190  k8s-master-02
192.168.44.191  k8s-master-03
192.168.44.192  k8s-node-01
EOF
- 关闭防火墙、selinux、swap分区
# 每台都执行
systemctl disable firewalld --now
setenforce 0
sed -i 's/SELINUX=enforcing/SELINUX=disabled/g' /etc/selinux/config
swapoff -a
sed -i "s/^[^#]*swap*/#&/g" /etc/fstab
- 配置时间同步
# 每台都执行
yum -y install chrony
systemctl enable chronyd --now
二、开始安装容器运行时
安装和配置先决条件
- 转发 IPv4 并让 iptables 看到桥接流量
# 每台都执行
cat <<EOF | sudo tee /etc/modules-load.d/k8s.conf
overlay
br_netfilter
EOF
sudo modprobe overlay
sudo modprobe br_netfilter
# 设置所需的 sysctl 参数,参数在重新启动后保持不变
cat <<EOF | sudo tee /etc/sysctl.d/k8s.conf
net.bridge.bridge-nf-call-iptables  = 1
net.bridge.bridge-nf-call-ip6tables = 1
net.ipv4.ip_forward                 = 1
EOF
# 应用 sysctl 参数而不重新启动
sudo sysctl --system
- 通过运行以下指令确认 br_netfilter 和 overlay 模块被加载:
# 每台都执行
lsmod | grep br_netfilter
lsmod | grep overlay
效果
[root@k8s-master-01 ~]# lsmod | grep br_netfilter
br_netfilter           22256  0
bridge                151336  1 br_netfilter
- 通过运行以下指令确认 net.bridge.bridge-nf-call-iptables、net.bridge.bridge-nf-call-ip6tables 和 net.ipv4.ip_forward 系统变量在你的 sysctl 配置中被设置为 1
# 每台都执行
sysctl net.bridge.bridge-nf-call-iptables net.bridge.bridge-nf-call-ip6tables net.ipv4.ip_forward
效果
[root@k8s-master-01 ~]# sysctl net.bridge.bridge-nf-call-iptables net.bridge.bridge-nf-call-ip6tables net.ipv4.ip_forward
net.bridge.bridge-nf-call-iptables = 1
net.bridge.bridge-nf-call-ip6tables = 1
net.ipv4.ip_forward = 1
开始安装containerd容器运行时
https://github.com/containerd/containerd/blob/main/docs/getting-started.md#advanced-topics 官网安装指南
通常,您还必须 从其官方网站安装runc和CNI 插件。
- 安装containerd
安装包路径:https://github.com/containerd/containerd/releases
没有科学上网的话很慢,可以到我的网盘获取:链接:https://pan.baidu.com/s/1QakzbfaHM4bbyZ2MjRdIhQ
提取码:afh0
# 每台执行,如果网络不行,就到我的网盘下载上传的服务器
wget https://github.com/containerd/containerd/releases/download/v1.7.15/containerd-1.7.15-linux-amd64.tar.gz
tar Cxzvf /usr/local containerd-1.7.15-linux-amd64.tar.gz
-
配置systemd 服务单元
 # 每台都执行
 mkdir -p  /usr/local/lib/systemd/system/
vim /usr/local/lib/systemd/system/containerd.service
# Copyright The containerd Authors.
#
# Licensed under the Apache License, Version 2.0 (the "License");
# you may not use this file except in compliance with the License.
# You may obtain a copy of the License at
#
#     http://www.apache.org/licenses/LICENSE-2.0
#
# Unless required by applicable law or agreed to in writing, software
# distributed under the License is distributed on an "AS IS" BASIS,
# WITHOUT WARRANTIES OR CONDITIONS OF ANY KIND, either express or implied.
# See the License for the specific language governing permissions and
# limitations under the License.

[Unit]
Description=containerd container runtime
Documentation=https://containerd.io
After=network.target local-fs.target

[Service]
ExecStartPre=-/sbin/modprobe overlay
ExecStart=/usr/local/bin/containerd

Type=notify
Delegate=yes
KillMode=process
Restart=always
RestartSec=5

# Having non-zero Limit*s causes performance problems due to accounting overhead
# in the kernel. We recommend using cgroups to do container-local accounting.
LimitNPROC=infinity
LimitCORE=infinity

# Comment TasksMax if your systemd version does not supports it.
# Only systemd 226 and above support this version.
TasksMax=infinity
OOMScoreAdjust=-999

[Install]
WantedBy=multi-user.target
-
重启加systemd配置,并启动containerd
# 每台都执行 systemctl daemon-reload systemctl enable containerd --now -
安装runc
下载地址:https://github.com/opencontainers/runc/releases
# 每台都执行,如果下载速度很慢,我的网盘里面也有 wget https://github.com/opencontainers/runc/releases/download/v1.1.12/runc.amd64 install -m 755 runc.amd64 /usr/local/sbin/runc -
安装CNI插件
下载地址: https://github.com/containernetworking/plugins/releases
# 每台执行 wget https://github.com/containernetworking/plugins/releases/download/v1.4.1/cni-plugins-linux-amd64-v1.4.1.tgz mkdir -p /opt/cni/bin tar Cxzvf /opt/cni/bin cni-plugins-linux-amd64-v1.4.1.tgz -
修改containerd cgroup为 systemd
containerd 使用位于 的配置文件
/etc/containerd/config.toml来指定守护进程级别选项。
使用二进制安装目录默认是没有,是需要自己手动创建。
默认配置可以通过 生成containerd config default > /etc/containerd/config.toml
# 每台执行
mkdir  /etc/containerd/
containerd config default > /etc/containerd/config.toml
[root@k8s-master-01 ~]# vim /etc/containerd/config.toml
          [plugins."io.containerd.grpc.v1.cri".containerd.runtimes.runc.options]
            BinaryName = ""
            CriuImagePath = ""
            CriuPath = ""
            CriuWorkPath = ""
            IoGid = 0
            IoUid = 0
            NoNewKeyring = false
            NoPivotRoot = false
            Root = ""
            ShimCgroup = ""
            SystemdCgroup = true			# 将flase 修改为 true
- 设置sandbox_image 镜像
默认配置为:`sandbox_image = “registry.k8s.io/pause:3.8”
必须修改为你后面拉取pause镜像一致的版本和地址,后面将使用阿里云的镜像,所以这里可以提前写好。
[root@k8s-master ~]# vim /etc/containerd/config.toml
 sandbox_image = "registry.aliyuncs.com/google_containers/pause:3.9"
-
重启containerd使配置生效
# 每台执行
systemctl restart containerd
三、 安装k8s
这里使用阿里云的yum源进行安装目录最新的版本为1.28
- 配置yum源
# 每台执行
cat >  /etc/yum.repos.d/kubernetes.repo << EOF
[kubernetes]
name=Kubernetes
baseurl=http://mirrors.aliyun.com/kubernetes/yum/repos/kubernetes-el7-x86_64
enabled=1
gpgcheck=0
repo_gpgcheck=0
gpgkey=http://mirrors.aliyun.com/kubernetes/yum/doc/yum-key.gpg
	http://mirrors.aliyun.com/kubernetes/yum/doc/rpm-package-key.gpg
EOF
- 安装
# 每台执行
 yum -y install kubeadm kubectl kubelet --disableexcludes=kubernetes
- 启动kubelet
# 每台执行
 systemctl enable kubelet --now
- 配置crictl工具环境变量
# 每台执行
export CONTAINER_RUNTIME_ENDPOINT=unix:///run/containerd/containerd.sock
export IMAGE_SERVICE_ENDPOINT=unix:///run/containerd/containerd.sock
四、使用keepalived + haproxy配置负载均衡
官方参考文档: https://github.com/kubernetes/kubeadm/blob/main/docs/ha-considerations.md#options-for-software-load-balancing
原理:
将 API Server 实例置于负载均衡器后面并在新集群--control-plane-endpoint运行时使用该选项来实现更高的可用性
就是使用keepalived 的VIP加上 haproxy的代理端口实现负载。
keepalived配置
不涉及工作节点,只需要再控制平面执行即可
-
安装keepalived
# 每台都执行 yum -y install keepalived -
修改配置文件
a. 先将原先的配置文件备份# 每台都执行 cd /etc/keepalived mv keepalived.conf keepalived.conf.defaultb. 修改 /etc/keepalived/keepalived.conf 配置文件
使用k8s-master-01 作为keepalived master 节点,不熟悉keepalived可以先去熟悉一下。
使用 192.168.44.200 作为VIP,VIP必须和其他节点属于同一个子网。
keepalived官网: https://www.keepalived.org/manpage.html
k8s官网keepalived配置参考: https://github.com/kubernetes/kubeadm/blob/main/docs/ha-considerations.md#options-for-software-load-balancing# k8s-master-01 ! /etc/keepalived/keepalived.conf ! Configuration File for keepalived global_defs { router_id k8s-master-01 } vrrp_script check_apiserver { script "/etc/keepalived/check_apiserver.sh" interval 3 weight -2 fall 10 rise 2 } vrrp_instance VI_1 { state MASTER interface ens33 virtual_router_id 51 priority 101 authentication { auth_type PASS auth_pass k8s-cluster } virtual_ipaddress { 192.168.44.200 } track_script { check_apiserver } }# k8s-master-02 ! /etc/keepalived/keepalived.conf ! Configuration File for keepalived global_defs { router_id k8s-master-02 } vrrp_script check_apiserver { script "/etc/keepalived/check_apiserver.sh" interval 3 weight -2 fall 10 rise 2 } vrrp_instance VI_1 { state BACKUP interface ens33 virtual_router_id 51 priority 100 authentication { auth_type PASS auth_pass k8s-cluster } virtual_ipaddress { 192.168.44.200 } track_script { check_apiserver } }# k8s-master-03 ! /etc/keepalived/keepalived.conf ! Configuration File for keepalived global_defs { router_id k8s-master-03 } vrrp_script check_apiserver { script "/etc/keepalived/check_apiserver.sh" interval 3 weight -2 fall 10 rise 2 } vrrp_instance VI_1 { state BACKUP interface ens33 virtual_router_id 51 priority 100 authentication { auth_type PASS auth_pass k8s-cluster } virtual_ipaddress { 192.168.44.200 } track_script { check_apiserver } } -
启动keepalived,并检查master节点上是否产生VIP
systemctl enable keepalived --now效果:
[root@localhost keepalived]# hostname -I 192.168.44.189 192.168.44.200 -
配置心跳检测脚本
# 这个脚本所有控制平面都要配置 cat /etc/keepalived/check_apiserver.sh#!/bin/sh errorExit() { echo "*** $*" 1>&2 exit 1 } curl --silent --max-time 2 --insecure https://localhost:8443/ -o /dev/null || errorExit "Error GET https://localhost:8443/" if ip addr | grep -q 192.168.44.200; then curl --silent --max-time 2 --insecure https://192.168.44.200:8443/ -o /dev/null || errorExit "Error GET https://192.168.44.200:8443/" fi192.168.44.200这个IP是VIP,8443这个端口为haproxy的前置端口,代理到kube-apiserver的6443端口,细节在后面haproxy中配置。
haproxy配置
配置参考: https://github.com/kubernetes/kubeadm/blob/main/docs/ha-considerations.md#haproxy-configuration
-
安装haproxy
# 所有控制平面执行 yum -y install haproxy -
修改配置文件
先将默认配置文件备份cd /etc/haproxy/ mv haproxy.cfg haproxy.cfg.default# 所有控制平面都要配置 cat /etc/haproxy/haproxy.cfg# /etc/haproxy/haproxy.cfg #--------------------------------------------------------------------- # Global settings #--------------------------------------------------------------------- global log /dev/log local0 log /dev/log local1 notice daemon #--------------------------------------------------------------------- # common defaults that all the 'listen' and 'backend' sections will # use if not designated in their block #--------------------------------------------------------------------- defaults mode http log global option httplog option dontlognull option http-server-close option forwardfor except 127.0.0.0/8 option redispatch retries 1 timeout http-request 10s timeout queue 20s timeout connect 5s timeout client 20s timeout server 20s timeout http-keep-alive 10s timeout check 10s #--------------------------------------------------------------------- # apiserver frontend which proxys to the control plane nodes #--------------------------------------------------------------------- frontend apiserver bind *:8443 mode tcp option tcplog default_backend apiserverbackend #--------------------------------------------------------------------- # round robin balancing for apiserver #--------------------------------------------------------------------- backend apiserverbackend option httpchk GET /healthz http-check expect status 200 mode tcp option ssl-hello-chk balance roundrobin server k8s-master-01 192.168.44.189:6443 check server k8s-master-02 192.168.44.190:6443 check server k8s-master-03 192.168.44.191:6443 check配置介绍,绑定本地的
8443端口,将访问到 8443端口转发到 本地的6443端口,负载方式使用轮询。 -
启动服务
# 控制平面都执行
systemctl enable haproxy --now
五、初始化k8s集群
阅读一下官网文档:https://kubernetes.io/zh-cn/docs/setup/production-environment/tools/kubeadm/high-availability/#%E4%BD%BF%E7%94%A8%E5%A0%86%E6%8E%A7%E5%88%B6%E5%B9%B3%E9%9D%A2%E5%92%8C-etcd-%E8%8A%82%E7%82%B9
- 先拉取镜像
# 每个控制平面都要执行
kubeadm config images pull --image-repository registry.aliyuncs.com/google_containers --kubernetes-version v1.28.2
- 使用kubeadm初始化集群
# 在vip所在的控制平面执行
kubeadm init \
  --apiserver-advertise-address=192.168.44.200 \
  --image-repository registry.aliyuncs.com/google_containers \
  --kubernetes-version v1.28.2 \
  --service-cidr=10.96.0.0/12 \
  --pod-network-cidr=10.244.0.0/16 \
  --control-plane-endpoint 192.168.44.200:8443 \
  --upload-certs
参数介绍:
--apiserver-advertise-address			集群宣告地址
--image-repository						镜像下载地址
--kubernetes-version 				    声明k8s版本
--service-cidr							service地址	范围
--pod-network-cidr						pod地址范围,需要和网络插件地址范围一致
--control-plane-endpoint				负载均衡器的地址和端口
--upload-certs							将在所有控制平面实例之间的共享证书上传到集群
集群成功初始化效果
Your Kubernetes control-plane has initialized successfully!

To start using your cluster, you need to run the following as a regular user:

  mkdir -p $HOME/.kube
  sudo cp -i /etc/kubernetes/admin.conf $HOME/.kube/config
  sudo chown $(id -u):$(id -g) $HOME/.kube/config

Alternatively, if you are the root user, you can run:

  export KUBECONFIG=/etc/kubernetes/admin.conf

You should now deploy a pod network to the cluster.
Run "kubectl apply -f [podnetwork].yaml" with one of the options listed at:
  https://kubernetes.io/docs/concepts/cluster-administration/addons/

You can now join any number of the control-plane node running the following command on each as root:

  kubeadm join 192.168.44.200:8443 --token ihjqkz.ra110gvs8kc1dn67 \
	--discovery-token-ca-cert-hash sha256:aa85859f3b81ef0c680dbba32a6950af8277f18a4833a9326e154f73a8476dd3 \
	--control-plane --certificate-key de4ec0d6b4d445eec7caec9caf7a9c3c4be87719a4a295462489728c57246084

Please note that the certificate-key gives access to cluster sensitive data, keep it secret!
As a safeguard, uploaded-certs will be deleted in two hours; If necessary, you can use
"kubeadm init phase upload-certs --upload-certs" to reload certs afterward.

Then you can join any number of worker nodes by running the following on each as root:

kubeadm join 192.168.44.200:8443 --token ihjqkz.ra110gvs8kc1dn67 \
	--discovery-token-ca-cert-hash sha256:aa85859f3b81ef0c680dbba32a6950af8277f18a4833a9326e154f73a8476dd3
控制平面加入集群指令:
kubeadm join 192.168.44.200:8443 --token ihjqkz.ra110gvs8kc1dn67 \
	--discovery-token-ca-cert-hash sha256:aa85859f3b81ef0c680dbba32a6950af8277f18a4833a9326e154f73a8476dd3 \
	--control-plane --certificate-key de4ec0d6b4d445eec7caec9caf7a9c3c4be87719a4a295462489728c57246084
工作节点加入集群指令:
kubeadm join 192.168.44.200:8443 --token ihjqkz.ra110gvs8kc1dn67 \
	--discovery-token-ca-cert-hash sha256:aa85859f3b81ef0c680dbba32a6950af8277f18a4833a9326e154f73a8476dd3
- 将其他控制平面主机加入到k8s集群
You can now join any number of the control-plane node running the following command on each as root:
以root的身份将其他控制平面加入到集群
# 其他两台控制平面执行
kubeadm join 192.168.44.200:8443 --token ihjqkz.ra110gvs8kc1dn67 \
	--discovery-token-ca-cert-hash sha256:aa85859f3b81ef0c680dbba32a6950af8277f18a4833a9326e154f73a8476dd3 \
	--control-plane --certificate-key de4ec0d6b4d445eec7caec9caf7a9c3c4be87719a4a295462489728c57246084
效果:
This node has joined the cluster and a new control plane instance was created:

* Certificate signing request was sent to apiserver and approval was received.
* The Kubelet was informed of the new secure connection details.
* Control plane label and taint were applied to the new node.
* The Kubernetes control plane instances scaled up.
* A new etcd member was added to the local/stacked etcd cluster.

To start administering your cluster from this node, you need to run the following as a regular user:

	mkdir -p $HOME/.kube
	sudo cp -i /etc/kubernetes/admin.conf $HOME/.kube/config
	sudo chown $(id -u):$(id -g) $HOME/.kube/config

Run 'kubectl get nodes' to see this node join the cluster.
-
配置证书环境变量
# 永久生效需要添加上 /etc/profile 文件 # 所有控制平面执行 export KUBECONFIG=/etc/kubernetes/admin.conf -
查看node节点状态,查看所有pod
kubectl get node效果:
[root@k8s-master-01 keepalived]# kubectl get node NAME STATUS ROLES AGE VERSION k8s-master-01 NotReady control-plane 13m v1.28.2 k8s-master-02 NotReady control-plane 6m50s v1.28.2 k8s-master-03 NotReady control-plane 5m20s v1.28.2STATUS:NotReadynode状态未准备,是因为还没有安装网络插件kubectl get pod -A -o wide效果:
[root@k8s-master-01 keepalived]# kubectl get pod -A -o wide NAMESPACE NAME READY STATUS RESTARTS AGE IP NODE NOMINATED NODE READINESS GATES kube-system coredns-66f779496c-cqm2q 0/1 Pending 0 15m <none> <none> <none> <none> kube-system coredns-66f779496c-wgjlc 0/1 Pending 0 15m <none> <none> <none> <none> kube-system etcd-k8s-master-01 1/1 Running 0 15m 192.168.44.189 k8s-master-01 <none> <none> kube-system etcd-k8s-master-02 1/1 Running 0 9m9s 192.168.44.190 k8s-master-02 <none> <none> kube-system etcd-k8s-master-03 1/1 Running 0 7m43s 192.168.44.191 k8s-master-03 <none> <none> kube-system kube-apiserver-k8s-master-01 1/1 Running 0 15m 192.168.44.189 k8s-master-01 <none> <none> kube-system kube-apiserver-k8s-master-02 1/1 Running 0 9m10s 192.168.44.190 k8s-master-02 <none> <none> kube-system kube-apiserver-k8s-master-03 1/1 Running 0 7m43s 192.168.44.191 k8s-master-03 <none> <none> kube-system kube-controller-manager-k8s-master-01 1/1 Running 0 15m 192.168.44.189 k8s-master-01 <none> <none> kube-system kube-controller-manager-k8s-master-02 1/1 Running 1 9m6s 192.168.44.190 k8s-master-02 <none> <none> kube-system kube-controller-manager-k8s-master-03 1/1 Running 0 7m43s 192.168.44.191 k8s-master-03 <none> <none> kube-system kube-proxy-qx2dv 1/1 Running 0 9m14s 192.168.44.190 k8s-master-02 <none> <none> kube-system kube-proxy-z7h4w 1/1 Running 0 7m44s 192.168.44.191 k8s-master-03 <none> <none> kube-system kube-proxy-zc65r 1/1 Running 0 15m 192.168.44.189 k8s-master-01 <none> <none> kube-system kube-scheduler-k8s-master-01 1/1 Running 0 15m 192.168.44.189 k8s-master-01 <none> <none> kube-system kube-scheduler-k8s-master-02 1/1 Running 1 9m9s 192.168.44.190 k8s-master-02 <none> <none> kube-system kube-scheduler-k8s-master-03 1/1 Running 0 7m43s 192.168.44.191 k8s-master-03 <none> <none>corednsPod未就绪,也是因为没有安装网路插件 -
删除控制平面污点(可选)
默认情况下,出于安全原因,你的集群不会在控制平面节点上调度 Pod。 如果你希望能够在单机 Kubernetes 集群等控制平面节点上调度 Pod,请运行:
kubectl taint nodes --all node-role.kubernetes.io/control-plane-a. 查看污点
[root@k8s-master-01 ~]# kubectl describe node k8s-master-01 | grep -i taint Taints: node-role.kubernetes.io/control-plane:NoSchedule- k8s-master-01 你的控制平面节点的名称
- node-role.kubernetes.io/control-plane:NoSchedule : Kubeadm 应用在控制平面节点上的污点, 用来限制启动 Pod,并且只允许特定 Pod 可调度到这些节点上。
阅读官网污点介绍: https://kubernetes.io/zh-cn/docs/reference/labels-annotations-taints/#node-role-kubernetes-io-control-plane-taint
b. 删除污点
-
删除指定节点的污点
kubectl taint nodes <node-name> node-role.kubernetes.io/control-plane:NoSchedule- -
删除所有节点的污点
kubectl taint nodes --all node-role.kubernetes.io/control-plane:NoSchedule-
六、 安装扩展插件
插件列表(不保证完全):https://kubernetes.io/zh-cn/docs/concepts/cluster-administration/addons/#networking-and-network-policy
安装网络插件
-
安装网络插件
使用Flannel作为 Kubernetes 的 overlay 网络提供者Flannel官网手册:
https://github.com/flannel-io/flannel#deploying-flannel-manually# 在任意k8s控制平面执行,要求版本 Kubernetes v1.17+ ,pod默认网络范围: 10.244.0.0/16 kubectl apply -f https://github.com/flannel-io/flannel/releases/latest/download/kube-flannel.yml效果:
[root@k8s-master-02 opt]# kubectl -n kube-flannel get all NAME READY STATUS RESTARTS AGE pod/kube-flannel-ds-8rw96 1/1 Running 0 63s pod/kube-flannel-ds-hft47 1/1 Running 0 63s pod/kube-flannel-ds-qkxww 1/1 Running 0 63s NAME DESIRED CURRENT READY UP-TO-DATE AVAILABLE NODE SELECTOR AGE daemonset.apps/kube-flannel-ds 3 3 3 3 3 <none> 63s -
查看node状态
[root@k8s-master-02 opt]# kubectl get node NAME STATUS ROLES AGE VERSION k8s-master-01 Ready control-plane 30m v1.28.2 k8s-master-02 Ready control-plane 23m v1.28.2 k8s-master-03 Ready control-plane 22m v1.28.2 -
查看
coredns[root@k8s-master-02 opt]# kubectl get pod -A NAMESPACE NAME READY STATUS RESTARTS AGE kube-flannel kube-flannel-ds-8rw96 1/1 Running 0 3m6s kube-flannel kube-flannel-ds-hft47 1/1 Running 0 3m6s kube-flannel kube-flannel-ds-qkxww 1/1 Running 0 3m6s kube-system coredns-66f779496c-cqm2q 1/1 Running 0 30m kube-system coredns-66f779496c-wgjlc 1/1 Running 0 30m kube-system etcd-k8s-master-01 1/1 Running 0 30m kube-system etcd-k8s-master-02 1/1 Running 0 24m kube-system etcd-k8s-master-03 1/1 Running 0 22m kube-system kube-apiserver-k8s-master-01 1/1 Running 0 30m kube-system kube-apiserver-k8s-master-02 1/1 Running 0 24m kube-system kube-apiserver-k8s-master-03 1/1 Running 0 22m kube-system kube-controller-manager-k8s-master-01 1/1 Running 0 30m kube-system kube-controller-manager-k8s-master-02 1/1 Running 1 24m kube-system kube-controller-manager-k8s-master-03 1/1 Running 0 22m kube-system kube-proxy-qx2dv 1/1 Running 0 24m kube-system kube-proxy-z7h4w 1/1 Running 0 22m kube-system kube-proxy-zc65r 1/1 Running 0 30m kube-system kube-scheduler-k8s-master-01 1/1 Running 0 30m kube-system kube-scheduler-k8s-master-02 1/1 Running 1 24m kube-system kube-scheduler-k8s-master-03 1/1 Running 0 22 -
将coredns分发到其他节点
于集群节点通常是按顺序初始化的,CoreDNS Pod 很可能都运行在第一个控制面节点上。 为了提供更高的可用性,请在加入至少一个新节点后使用
kubectl -n kube-system rollout restart deployment coredns命令,重新平衡这些 CoreDNS Pod。# 在任意控制平面执行 kubectl -n kube-system rollout restart deployment coredns
安装Dashboard插件(可选)
k8s官网部署Dashboard手册:https://kubernetes.io/zh-cn/docs/tasks/access-application-cluster/web-ui-dashboard/,这个有点旧了是2017年的。
最新的Dashboard地址:https://github.com/kubernetes/dashboard#kubernetes-dashboard,已经不采用yaml清单部署了,而是使用helm包管理器部署。本文还是使用yaml清单部署
-
下载 Dashboard yaml文件,修改Service访问方式
地址: https://raw.githubusercontent.com/kubernetes/dashboard/v2.7.0/aio/deploy/recommended.yaml
修改地方如下:kind: Service apiVersion: v1 metadata: labels: k8s-app: kubernetes-dashboard name: kubernetes-dashboard namespace: kubernetes-dashboard spec: type: NodePort # 类型选择NodePort ports: - port: 443 targetPort: 8443 nodePort: 30007 # 指定端口(可选) selector: k8s-app: kubernetes-dashboard -
根据recommended.yaml资源清单创建
kubectl apply -f recommended.yamla. 查看根据recommended.yaml资源清单创建的所有资源对象
[root@k8s-master-01 ~]# kubectl -n kubernetes-dashboard get all
NAME                                             READY   STATUS    RESTARTS   AGE
pod/dashboard-metrics-scraper-5657497c4c-jn2rz   1/1     Running   0          87s
pod/kubernetes-dashboard-78f87ddfc-pqcgx         1/1     Running   0          87s

NAME                                TYPE        CLUSTER-IP      EXTERNAL-IP   PORT(S)         AGE
service/dashboard-metrics-scraper   ClusterIP   10.101.31.148   <none>        8000/TCP        87s
service/kubernetes-dashboard        NodePort    10.98.217.157   <none>        443:30007/TCP   87s

NAME                                        READY   UP-TO-DATE   AVAILABLE   AGE
deployment.apps/dashboard-metrics-scraper   1/1     1            1           87s
deployment.apps/kubernetes-dashboard        1/1     1            1           87s

NAME                                                   DESIRED   CURRENT   READY   AGE
replicaset.apps/dashboard-metrics-scraper-5657497c4c   1         1         1       87s
replicaset.apps/kubernetes-dashboard-78f87ddfc         1         1         1       87s
b. 查看访问地址
[root@k8s-master-01 ~]# kubectl -n kubernetes-dashboard get svc
NAME                        TYPE        CLUSTER-IP      EXTERNAL-IP   PORT(S)         AGE
dashboard-metrics-scraper   ClusterIP   10.101.31.148   <none>        8000/TCP        4m22s
kubernetes-dashboard        NodePort    10.98.217.157   <none>        443:30007/TCP   4m22s
c. 访问测试
访问必须加上https
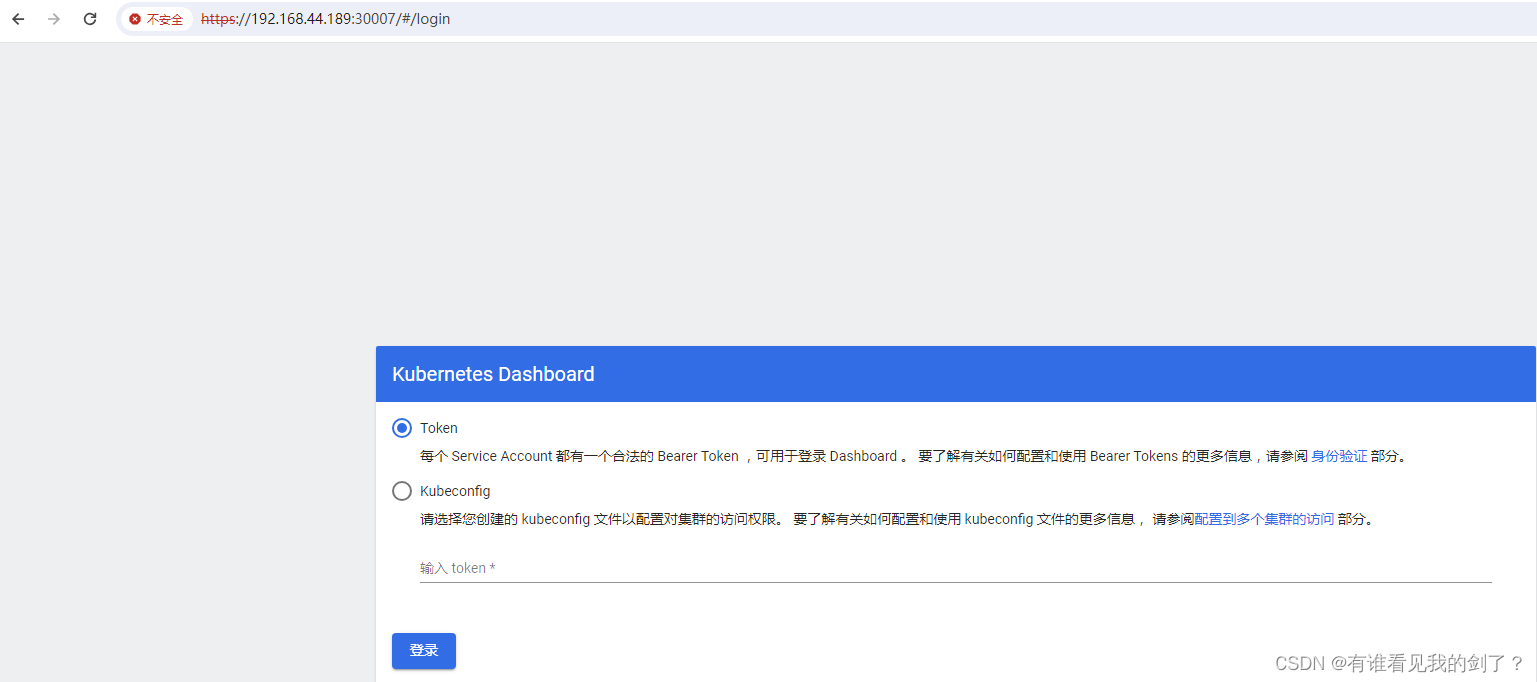
-
获取登录dashboard Token
Kubeconfig 不支持外部访问
在创建
recommended.yaml资源清单中的资源对象时已经创建的dashboard 服务账号,并已经绑定了集群角色。
a. 查看dashboard命令空间中创建的服务账号,和绑定的角色。
在资源清单中代码# 创建账号 apiVersion: v1 kind: ServiceAccount metadata: labels: k8s-app: kubernetes-dashboard name: kubernetes-dashboard # 账号名称 namespace: kubernetes-dashboard --- # 绑定角色 apiVersion: rbac.authorization.k8s.io/v1 kind: ClusterRoleBinding metadata: name: kubernetes-dashboard roleRef: apiGroup: rbac.authorization.k8s.io kind: ClusterRole name: kubernetes-dashboard # 角色 subjects: - kind: ServiceAccount name: kubernetes-dashboard namespace: kubernetes-dashboard在控制台查看账号和绑定角色
[root@k8s-master-01 ~]# kubectl -n kubernetes-dashboard get ServiceAccount
NAME                   SECRETS   AGE
default                0         87m
kubernetes-dashboard   0         87m
[root@k8s-master-01 ~]# kubectl -n kubernetes-dashboard get ClusterRoleBinding | grep kubernetes-dashboard
kubernetes-dashboard                                   ClusterRole/kubernetes-dashboard                                                   88m
b. 获取kubernetes-dashboard用户的token
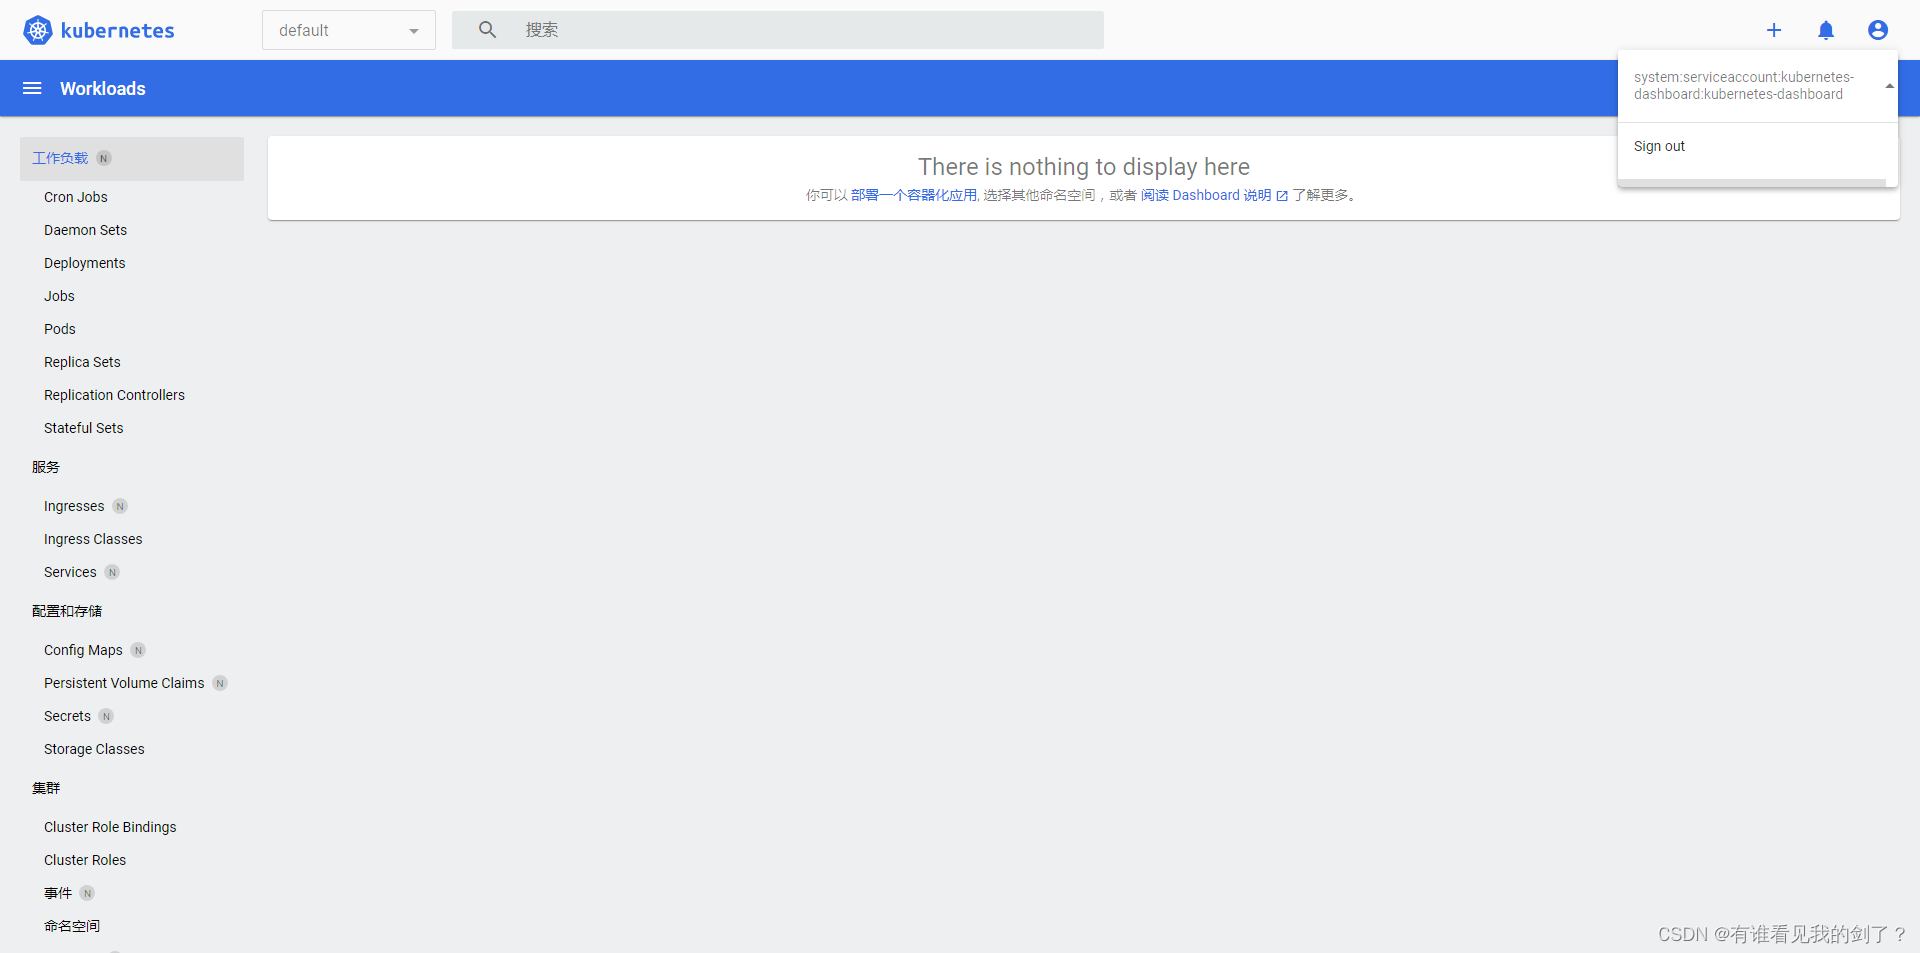
[root@k8s-master-01 ~]# kubectl -n kubernetes-dashboard create token kubernetes-dashboard
eyJhbGciOiJSUzI1NiIsImtpZCI6IlpzSzZQNjRQTUk3LXJSWXloOGpmY00xdGplSnFHZ0N3Y0xIYXRTNlhqWW8ifQ.eyJhdWQiOlsiaHR0cHM6Ly9rdWJlcm5ldGVzLmRlZmF1bHQuc3ZjLmNsdXN0ZXIubG9jYWwiXSwiZXhwIjoxNzEzMzM2NzEyLCJpYXQiOjE3MTMzMzMxMTIsImlzcyI6Imh0dHBzOi8va3ViZXJuZXRlcy5kZWZhdWx0LnN2Yy5jbHVzdGVyLmxvY2FsIiwia3ViZXJuZXRlcy5pbyI6eyJuYW1lc3BhY2UiOiJrdWJlcm5ldGVzLWRhc2hib2FyZCIsInNlcnZpY2VhY2NvdW50Ijp7Im5hbWUiOiJrdWJlcm5ldGVzLWRhc2hib2FyZCIsInVpZCI6IjhmNTZhYjI2LTEyNWQtNDY0NS05ZTI2LWQ3ZGU3MGZkYjk1YyJ9fSwibmJmIjoxNzEzMzMzMTEyLCJzdWIiOiJzeXN0ZW06c2VydmljZWFjY291bnQ6a3ViZXJuZXRlcy1kYXNoYm9hcmQ6a3ViZXJuZXRlcy1kYXNoYm9hcmQifQ.NY0o6LIfzYRYLJ8FkDclGGaii7J-Wcngq5eD1Lxn0j4GcpGMPrdvy7TQGn4Q2sI1hb1dCCga7rwD_Vtu5hRG4LStRTr4L4OOonv2p0A6BmSh2xQpQIMlWELq4I51IXO6wNyoEnpt5msqdiiK2HJyljitOQb9N5s7Q4Bcimg6cpaQQFWRSQtBG9BkxHGrcmSHU8cvw7Ii5EYPACQBpc7dMsdc4GJQMJFfFvEDPBPKuiT4rFe7HRLLHKAKFPUA_fNRmXc18ZvQ849C-4On9LQ0CZSwoso0HrV8UXiHw9yLmJYh632hGO1D75FAKuz_hAFrGWxo8v8TDP_gk3mCu1wGJw
c. 使用dashboard 账号的token进行登录
-
创建admin用户: dashboard-admin
如何创建用户并绑定角色参考官网文档: https://github.com/kubernetes/dashboard/blob/master/docs/user/access-control/creating-sample-user.md
a. 编写dashboard-adminuser.yaml清单
# 创建账号
apiVersion: v1
kind: ServiceAccount
metadata:
  name: dashboard-admin
  namespace: kubernetes-dashboard
---

# 绑定集群管理员角色
apiVersion: rbac.authorization.k8s.io/v1
kind: ClusterRoleBinding
metadata:
  name: dashboard-admin
roleRef:
  apiGroup: rbac.authorization.k8s.io
  kind: ClusterRole
  name: cluster-admin
subjects:
- kind: ServiceAccount
  name: dashboard-admin
  namespace: kubernetes-dashboard
---
# 使用token长期有效
apiVersion: v1
kind: Secret
metadata:
  name: dashboard-admin
  namespace: kubernetes-dashboard
  annotations:
    kubernetes.io/service-account.name: "dashboard-admin"
type: kubernetes.io/service-account-token
b. 创建资源对象
kubectl apply -f dashboard-adminuser.yamlc. 查看账号和授权角色
[root@k8s-master-01 ~]# kubectl -n kubernetes-dashboard get ServiceAccount
NAME                   SECRETS   AGE
dashboard-admin        0         78s
default                0         99m
kubernetes-dashboard   0         99m
[root@k8s-master-01 ~]# kubectl -n kubernetes-dashboard get ClusterRoleBinding | grep dashboard-admin
dashboard-admin                                        ClusterRole/cluster-admin                                                          94s
d. 获取Secret中保存的token
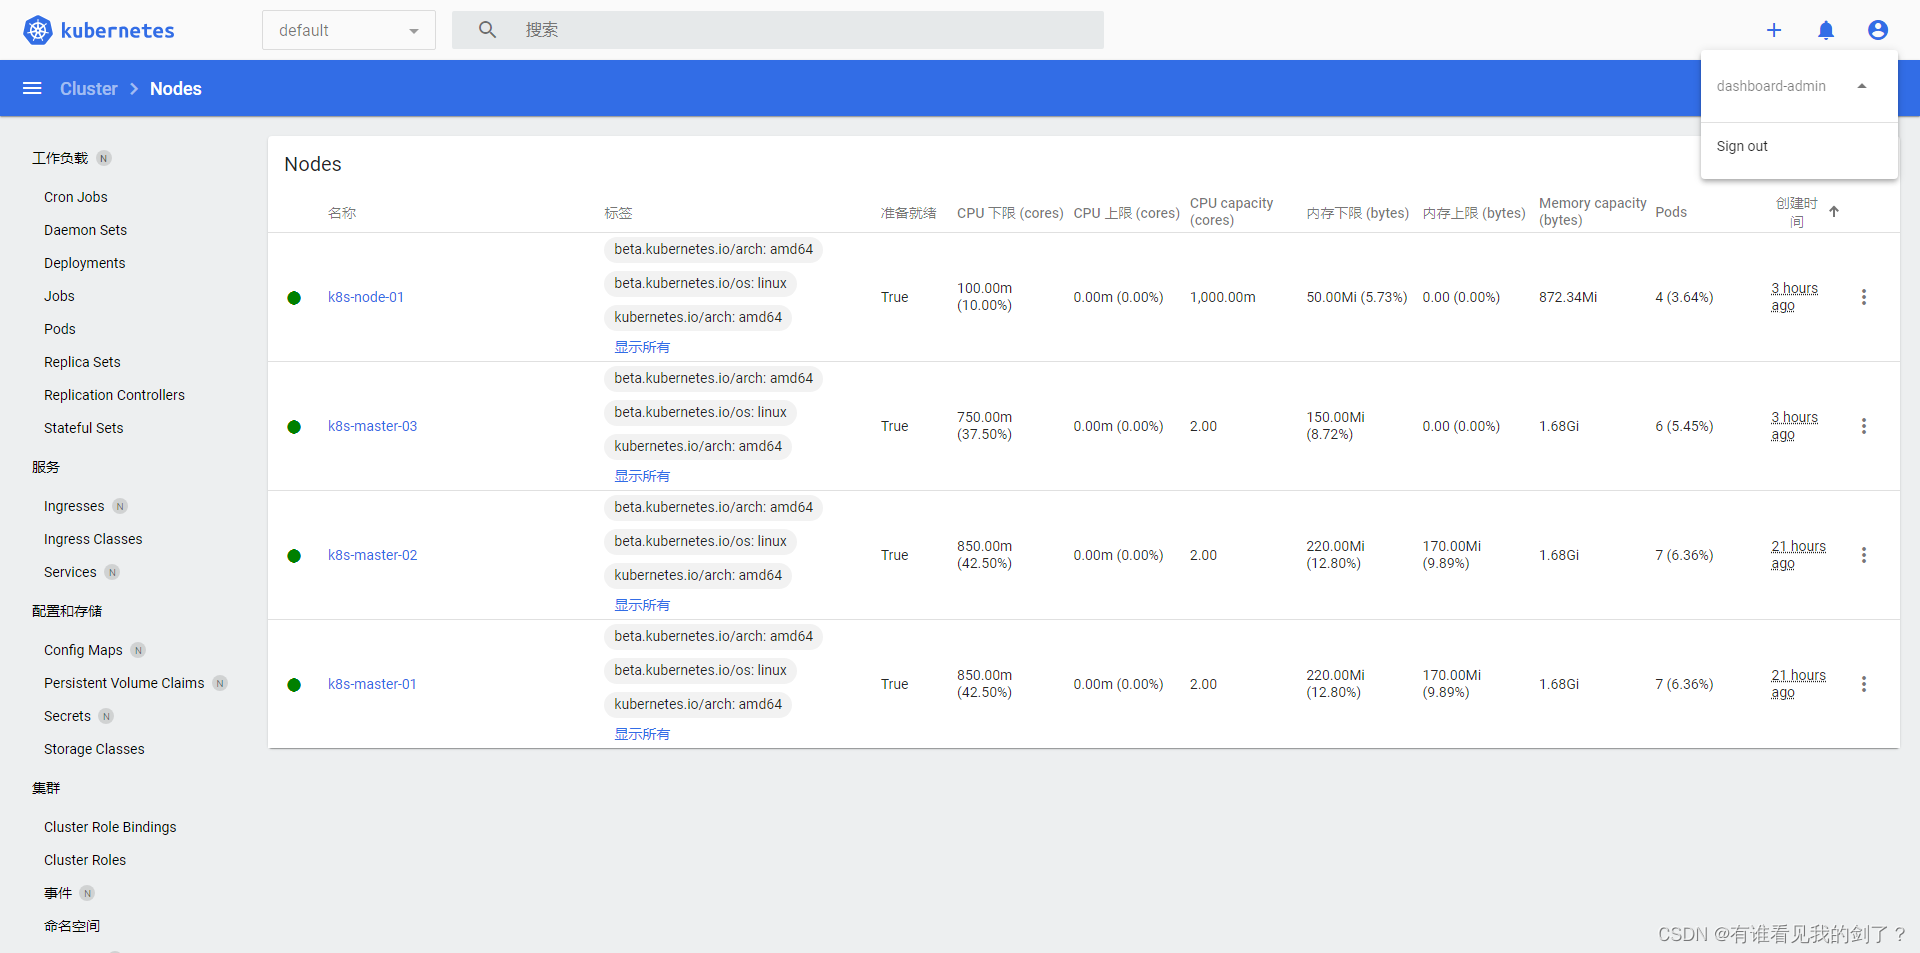
[root@k8s-master-01 ~]# kubectl get secret dashboard-admin -n kubernetes-dashboard -o jsonpath={".data.token"} | base64 -d
eyJhbGciOiJSUzI1NiIsImtpZCI6IlpzSzZQNjRQTUk3LXJSWXloOGpmY00xdGplSnFHZ0N3Y0xIYXRTNlhqWW8ifQ.eyJpc3MiOiJrdWJlcm5ldGVzL3NlcnZpY2VhY2NvdW50Iiwia3ViZXJuZXRlcy5pby9zZXJ2aWNlYWNjb3VudC9uYW1lc3BhY2UiOiJrdWJlcm5ldGVzLWRhc2hib2FyZCIsImt1YmVybmV0ZXMuaW8vc2VydmljZWFjY291bnQvc2VjcmV0Lm5hbWUiOiJkYXNoYm9hcmQtYWRtaW4iLCJrdWJlcm5ldGVzLmlvL3NlcnZpY2VhY2NvdW50L3NlcnZpY2UtYWNjb3VudC5uYW1lIjoiZGFzaGJvYXJkLWFkbWluIiwia3ViZXJuZXRlcy5pby9zZXJ2aWNlYWNjb3VudC9zZXJ2aWNlLWFjY291bnQudWlkIjoiNDNlMDZkNzQtYWRjMy00NGUyLWEyMDktZDg1MWNmZjAxYTRlIiwic3ViIjoic3lzdGVtOnNlcnZpY2VhY2NvdW50Omt1YmVybmV0ZXMtZGFzaGJvYXJkOmRhc2hib2FyZC1hZG1pbiJ9.J3wxAHstnNx41fj8_i_QQyczom0Qa_D2LqextoWm48CagQAdtX_w1g3cXu5DZk8ybG4rP1xmnOgSr50K4eWhuoSWId0jmp5qD6__Vh2LISS1k3d9yjxhYg6427-fVC0asNavkl4iya2vYZzl2-urpnNLOSaVQWtbuxrcbCJRLp0PASGsRKoGZuDmf-gRpboE_F03ODRhIk2Zs6aLvruZcDDkULpXRdXx-z6wUqpDEnmXDIEmLCpoY0b3O_kYO8X8OeZUSdkrRZ3ARcoi-bTiEy9rU7Kk_XvqEYIy_xm5RhbnvbCtrG4emTIevxTUl9_sEL4INRMgsjI6sWzgP8pFeg
e. 使用dashboard-admin账号token登录
七、加入工作节点
-
获取加入工作节点的token
在初始化工作节点的时候就已经有了,如果忘记了,可以重新获取加入节点的token。
a. 打印加入工作节点的代码kubeadm token create --print-join-commandb. 打印加入控制平面的代码
第一步获取新的证书密码kubeadm init phase upload-certs --upload-certs第二步打印加入工作节点的代码
kubeadm token create --print-join-command第三步修改为加入控制平面的代码
kubeadm join 192.168.44.200:8443 --token ihjqkz.ra110gvs8kc1dn67 \
	--discovery-token-ca-cert-hash sha256:aa85859f3b81ef0c680dbba32a6950af8277f18a4833a9326e154f73a8476dd3 \
	--control-plane --certificate-key de4ec0d6b4d445eec7caec9caf7a9c3c4be87719a4a295462489728c57246084
主要是在后面声明了控制平面证书密钥
--control-plane --certificate-key de4ec0d6b4d445eec7caec9caf7a9c3c4be87719a4a295462489728c57246084de4ec0d6b4d445eec7caec9caf7a9c3c4be87719a4a295462489728c57246084,使用kubeadm init phase upload-certs --upload-certs创建的证书密钥 -
在控制平面查看节点信息
[root@k8s-master-01 ~]# kubectl get node
NAME            STATUS   ROLES           AGE     VERSION
k8s-master-01   Ready    control-plane   17h     v1.28.2
k8s-master-02   Ready    control-plane   17h     v1.28.2
k8s-master-03   Ready    control-plane   7m28s   v1.28.2
k8s-node-01     Ready    <none>          7s      v1.28.2


 1686
1686


 被折叠的 条评论
为什么被折叠?
被折叠的 条评论
为什么被折叠?
 到【灌水乐园】发言


