


使用vite来创建vue3+TS的项目
使用vite创建项目,并选择带ts的版本
npm create vite@latest my-vue-ts-app -- --template vue-ts
参考链接:TypeScript with Composition API | Vue.js
vue3配合ts中,还需要额外安装一个vscode插件:Typescript Vue Plugin
ref函数标注类型
通过泛型指定value的值类型:
- 如果是简单值,该类型可以省略,利用类型推导就可以。
- 如果是复杂类型,指定泛型
示例
// 1. 通过泛型指定value的值类型,如果是简单值,该类型可以省略
const money = ref<number>(10)

const money = ref(10)


// 2. 复杂类型,推荐指定泛型
type Todo = {
  id: number
  name: string
  done: boolean
}
const list = ref<Todo[]>([])
练习
对如下数据,用ref来定义类型。
[{id:'1000', name: '鞋子', price: 200}]reactive函数类型
通过泛型参数的形式增加类型
<script setup lang="ts">
    import {
        reactive
    } from 'vue'

    type Person {
        name: string
        age: number | string
    }
    const p = reactive <Person> ({
        name: 'ifer',
        age: 18,
    })
</script>

<template>
    <div>
        <p>name: {{ p.name }}</p>
        <p>age: {{ p.age }}</p>
    </div>
</template>
computed函数类型
- 利用 TS 类型推导的能力(推荐)。
import { ref, computed } from 'vue'

const count = ref(100);
const doubleCount = computed(() => count.value * 2);- 通过泛型可以指定 computed 计算属性的类型。
import { ref, computed } from 'vue'
const count = ref(100);

const doubleMoney = computed<string>(() => (count.value * 2).toFixed(2));
defineProps
目标
掌握defineProps如何配合ts使用
之前
父传子,把props传递给子组件内部使用。可以通过defineProps来接收
defineProps配合vue默认语法进行类型校验(运行时声明)
<script setup>
// 运行时声明
const props = defineProps({
  money: {
    type: Number,
    required: true
  },
  car: {
    type: String,
    default: '小黄车'
  }
})
</script>
配合TS使用
- 类型校验
defineProps配合ts的泛型定义props,这样更直接
// 使用ts的泛型指令props类型
const props = defineProps<{ money: number, car?: string}>()- props可以通过解构来指定默认值
<script lang="ts" setup>
// 使用ts的泛型指令props类型
const { money, car = '小黄车' } = defineProps<{
  money: number
  car?: string
}>()
</script>
注意:
如果提供的默认值需要在模板中渲染,需要额外添加配置
// vite.config.js
export default {
  plugins: [
    vue({
      reactivityTransform: true
    })
  ]
}
defineEmits
目标
掌握defineEmit如何配合ts使用
在子传父的背景下,使用defineEmits
- defineEmits配合运行时声明(简单)
<script lang="ts" setup>
const emit = defineEmits(['change', 'update'])
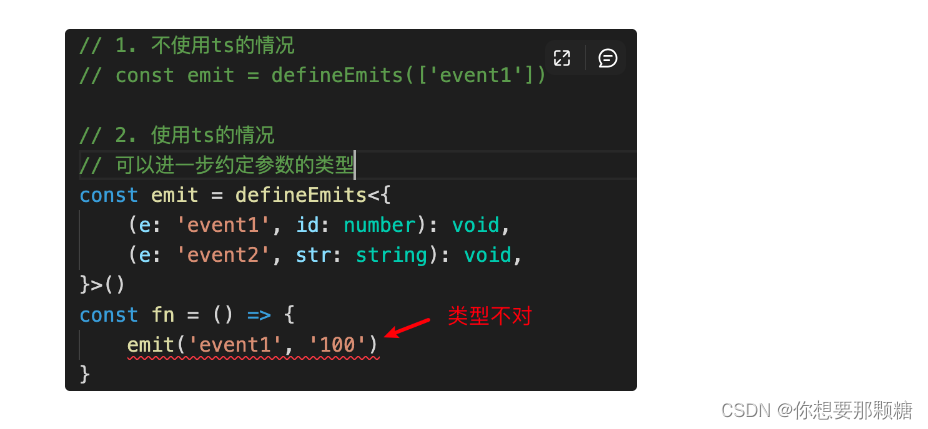
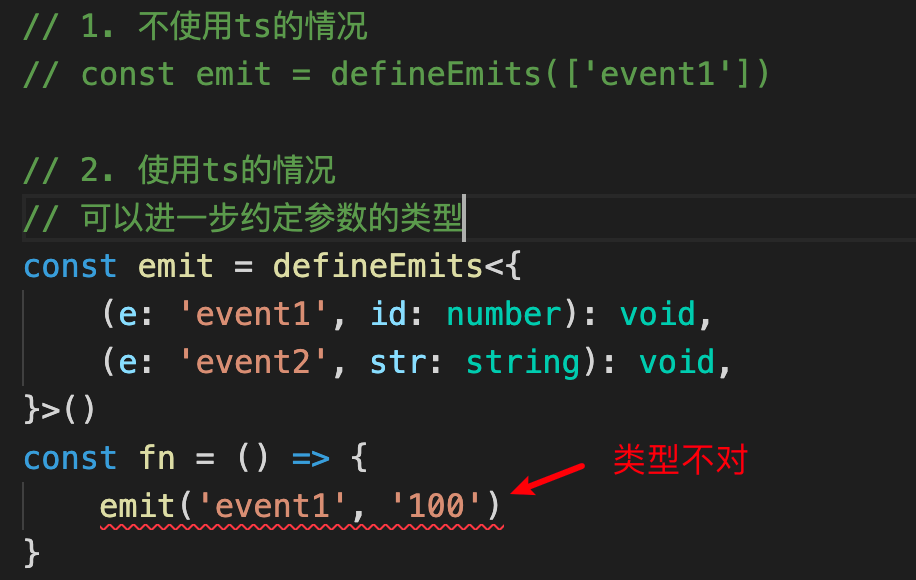
</script>- defineEmits配合ts 类型声明,可以实现更细粒度的校验
const emit = defineEmits<{
  (e: 'changeMoney', money: number): void
  (e: 'changeCar', car: string): void
}>()
事件处理
目标
掌握事件处理函数配合typescript如何使用
基本示例
不写任何类型,会报错,但是可以跑起来


做法
- 在template中,明确传入指定$event
- 在回调函数中指定参数的类型
const move = (e: MouseEvent) => {
  // 此时,写e. 就会有对应的提示
  mouse.value.x = e.pageX
  mouse.value.y = e.pageY
}

<h1 @mousemove="move($event)">根组件</h1>
模板引用Ref
目标
掌握ref操作DOM时如何配合Typescript使用
问题
<script setup lang="ts">
  const h1Ref = ref(null)
  const getElement = () => {
    console.log(h1Ref.value.innerHTML) // 这里会报错
  }
</script>

<tempalte>
  <div><h1 ref="h1Ref">在获取dom时通过泛型指定类型</h1></div>
</template>
上面的代码中,第4行会报错: 它认为h1Ref.value上没有innerHTML这个属性
ref用于获取页面中元素时,有两个状态:
- 初始转态 Null
- 绑定后的状态
改进
联合类型
const imgRef = ref<HTMLImageElement | null>(null)

onMounted(() => {
  console.log(imgRef.value!.src)
})
技巧:如何查看一个DOM对象的类型:通过控制台进行查看
document.createElement('img').__proto__ref 操作组件
App.vue
<script setup lang="ts">
    import {
        ref
    } from 'vue'
    import Child from './Child.vue'
    // 通过内置的泛型工具 InstanceType 可以获取构造函数类型的实例类型
    const childCmp = ref < InstanceType < typeof Child > | null > (null)

    const handleClick = () => {
        childCmp.value?.logHello()
    }
</script>
<template>
    <section>
        <h3>App</h3>
        <button @click="handleClick">click</button>
        <hr />
        <Child ref="childCmp" />
    </section>
</template>
Child.vue
<script setup lang="ts">
    const logHello = () => {
        console.log('🤣')
    }
    defineExpose({
        logHello,
    })
</script>
<template>
    <div>Child</div>
</template>
可选链操作符
目标:掌握 JS 中的提供的可选链操作符语法。
可选链操作符( ?. )允许读取位于连接对象链深处的属性的值,而不必明确验证链中的每个引用是否有效,参考文档。
const nestedProp = obj.first?.second
// 等价于
let temp = obj.first
let nestedProp = temp === null || temp === undefined ? undefined : temp.second
// 旧写法
if (obj.fn) {
obj.fn()
}
obj.fn && obj.fn()
// 可选链
obj.fn?.()非空断言
目标:掌握 TS 中的非空断言的使用语法。
- 如果我们明确的知道对象的属性一定不会为空,那么可以使用非空断言
!。
// 告诉 TS, 明确的指定 obj 不可能为空
const nestedProp = obj!.second

// 表示 document.querySelector('div') 不可能为空
console.log(document.querySelector('div')!.innerHTML)- 注意:非空断言一定要确保有该属性才能使用,不然使用非空断言会导致 Bug。
TypeScript类型声明文件
背景
今天几乎所有的 JavaScript 应用都会引入许多第三方库来完成任务需求。
这些第三方库不管是否是用 TS 编写的,最终都要编译成 JS 代码,才能发布给开发者使用。
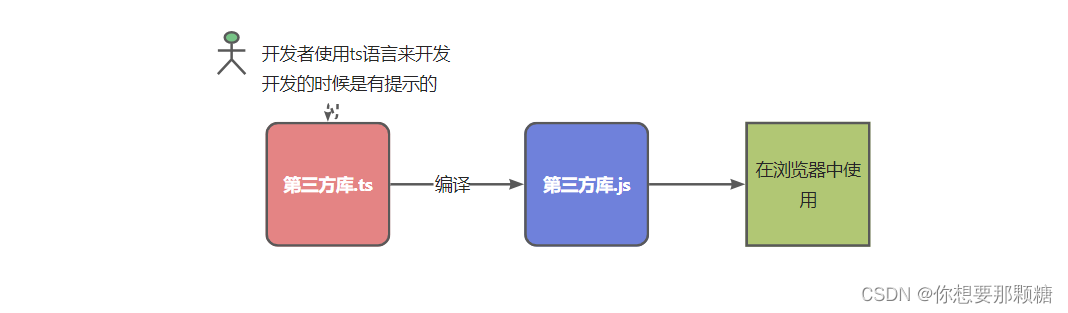
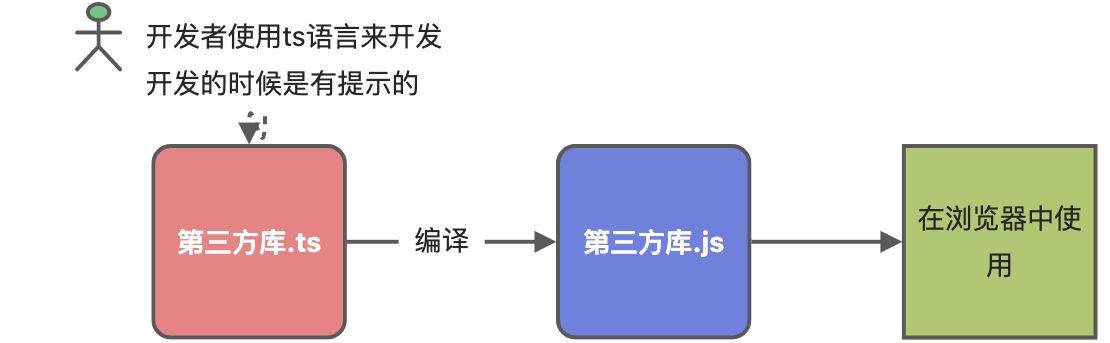
我们知道是 TS 提供了类型,才有了代码提示和类型保护等机制。
但在项目开发中使用第三方库时,你会发现它们几乎都有相应的 TS 类型,这些类型是怎么来的呢? 类型声明文件
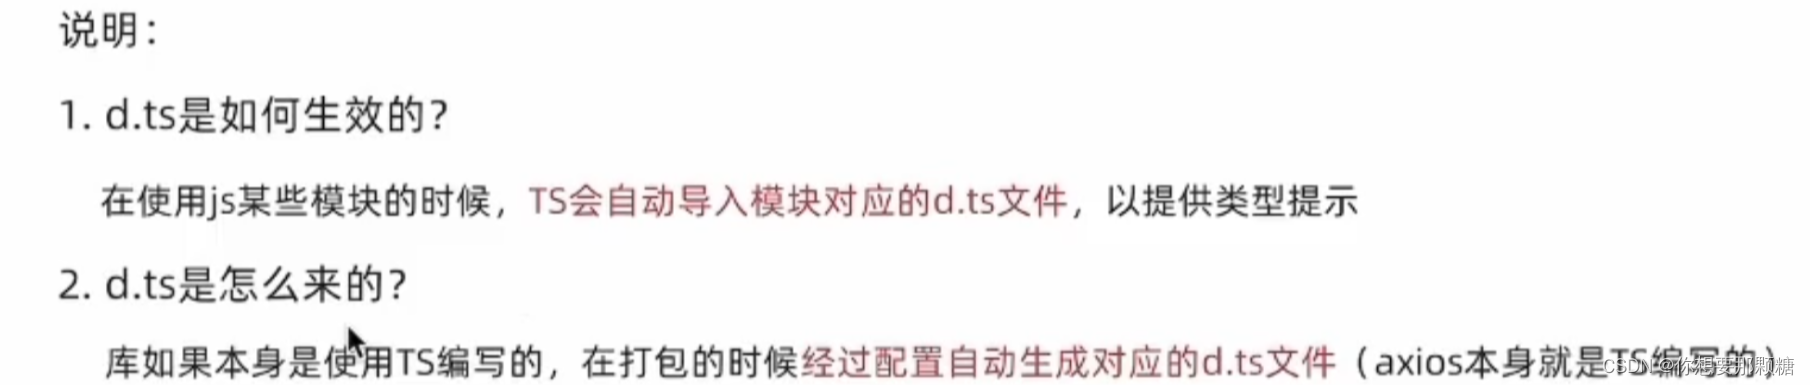
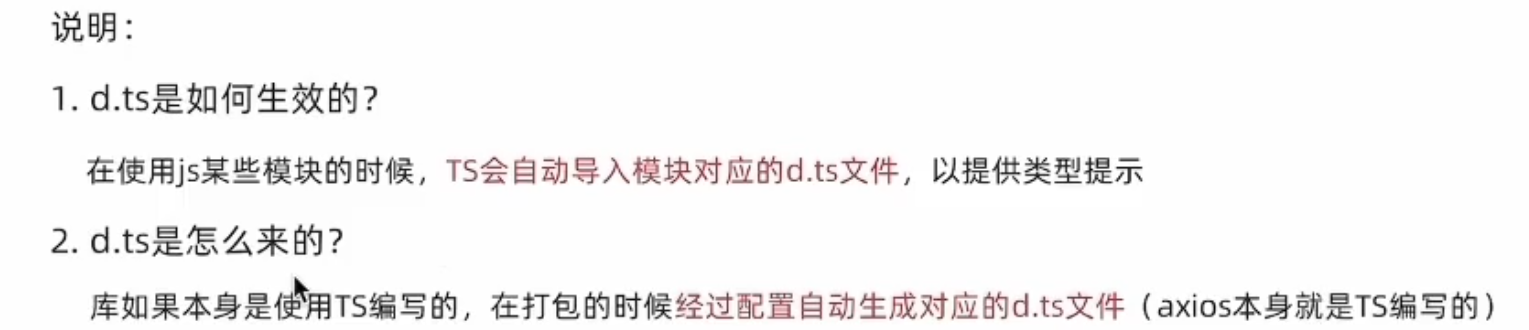
类型声明文件
用来为已存在的 JS 库提供类型信息
TS 中有两种文件类型:
1 .ts 文件
2 .d.ts 文件
.ts 文件:
既包含类型信息又可执行代码
-
- 可以被编译为 .js 文件,然后,执行代码
- 用途:编写程序代码的地方
.d.ts 文件:
只包含类型信息的类型声明文件- 不会生成 .js 文件,仅用于提供类型信息,在.d.ts文件中不允许出现可执行的代码,只用于提供类型
- 第三方的声明文件(需要安装),一般会跟随第三方包一起安装,支持ts的,都会自带;
- 用途:为 JS 提供类型信息
总结
.ts 是 implementation(代码实现文件);.d.ts 是 declaration(类型声明文件)
如果要为 JS 库提供类型信息,要使用 .d.ts 文件
内置类型声明文件
TS 为 JS 运行时可用的所有标准化内置 API 都提供了声明文件
比如,在使用数组时,数组所有方法都会有相应的代码提示以及类型信息:
const strs = ['a', 'b', 'c']
// 鼠标放在 forEach 上查看类型
strs.forEach
实际上这都是 TS 提供的内置类型声明文件,可以通过 Ctrl + 鼠标左键(Mac:Command + 鼠标左键)来查看内置类型声明文件内容
比如,查看 forEach 方法的类型声明,在 VSCode 中会自动跳转到 lib.es5.d.ts 类型声明文件中。当然,像 window、document 等 BOM、DOM API 也都有相应的类型声明(lib.dom.d.ts)
第三方库类型声明文件
目前,几乎所有常用的第三方库都有相应的类型声明文件
第三方库的类型声明文件有两种存在形式:1 库自带类型声明文件 2 由 TS官方给它写的(DefinitelyTyped 提供)。
- 库自带类型声明文件:比如,axios
-
- 查看
node_modules/axios目录
- 查看
解释:这种情况下,正常导入该库,TS 就会自动加载库自己的类型声明文件,以提供该库的类型声明。
- 由 DefinitelyTyped 提供
- DefinitelyTyped 是一个 github 仓库,用来提供高质量 TypeScript 类型声明
- DefinitelyTyped 链接
- 可以通过 npm/yarn 来下载该仓库提供的 TS 类型声明包,这些包的名称格式为:
@types/* - 比如,@types/react、@types/lodash 等
- 说明:在实际项目开发时,如果你使用的第三方库没有自带的声明文件,VSCode 会给出明确的提示
import _ from 'lodash'

// 在 VSCode 中,查看 'lodash' 前面的提示- 解释:当安装
@types/*类型声明包后,TS 也会自动加载该类声明包,以提供该库的类型声明 - 补充:TS 官方文档提供了一个页面,可以来查询 @types/* 库
- @types/* 库
类型声明-自定义的文件
如下两种场景需要提供类型声明文件
- 项目内共享类型
- 为已有 JS 文件提供类型声明
项目内共享类型
文件目录:
a.ts
b.ts
文件内容:

改进
将公共的类型定义提取出来,写在index.d.ts文件中
index.d.ts
a.ts
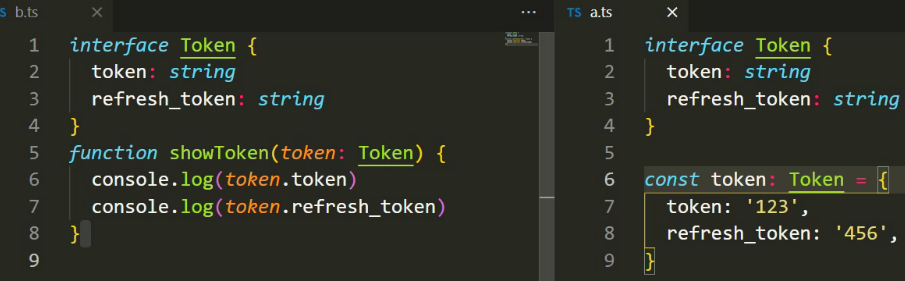
b.ts定义接口,并导出
export interface Token {
  token: string
  refresh_token: string
}
a.js
导入接口并使用
import type { Token } from './index' // 必须省略.d.ts

function showToken(token: Token)
小结
- 如果多个 .ts 文件中都用到同一个类型,此时可以创建 .d.ts 文件提供该类型声明
- 步骤:
-
- 创建 index.d.ts 类型声明文件。
- 创建需要共享的类型,并使用 export 导出(TS 中的类型也可以使用 import/export 实现模块化功能)。
- 在需要使用共享类型的 .ts 文件中,通过 import 导入即可(.d.ts 后缀导入时,直接省略)。
类型声明-自定义的文件-为已有 JS 文件提供类型声明
背景
有一个ts项目,用到了.js文件,此时项目中ts和js同时存在,且不想将.js改成.ts
demo.ts
utils/index.js
utils/index.js
let songName = '痴心绝对'

function add(x, y) {
  return x + y
}

const fomartPoint = point => {
  console.log('当前坐标:', point)
}

export { add, songName }
demo.ts
import { add } from './utils' // 这里可以使用,但是,没有提示。修改一下配置文件,让当前项目支持.js文件的引入
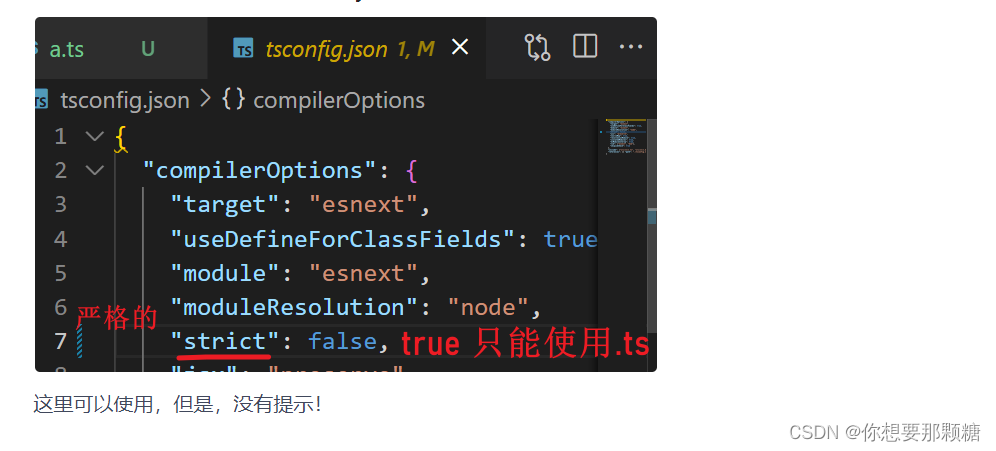
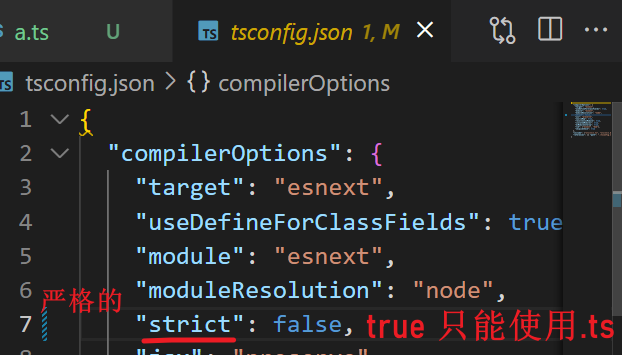
这里可以使用,但是,没有提示!
如何基于现有的.js提供声明文件?
思路:编写同名的.d.ts文件
demo.ts
utils/index.js
utils/index.d.ts // 这里是重点
定义类型声明文件
- 它的作用是提供声明,不需要提供逻辑代码;
- declare 关键字:用于类型声明,为其他地方(比如,.js 文件)已存在的变量声明类型,而不是创建一个新的变量。
-
- 对于 type、interface 等这些明确就是 TS 类型的(只能在 TS 中使用的),可以省略 declare 关键字。
- 对于 let、function 等具有双重含义(在 JS、TS 中都能用),应该使用 declare 关键字,明确指定此处用于类型声明。
declare let add: string

declare function add (x :number, y: number) : number

export {
  songName, add
}
Axios与Typescript
问题
缺少提示
const getChannel = async () => {

  const res = await axios.get('http://geek.itheima.net/v1_0/channels')
  console.log(res.data.data.channels)
}

getChannel()
解决
type ChannelRes = {
  data: {channels: {id: number, name: string} []},
  message: string
}
const getChannel = async () => {

  const res = await axios.get<ChannelRes>('http://geek.itheima.net/v1_0/channels')
  console.log(res.data.data.channels)
}

getChannel()
综合练习-整体介绍
参考代码
wh76: 这一共有15个字vue-hr-76 - Gitee.com
运行效果

接口说明
- 获取频道列表
http://geek.itheima.net/v1_0/channels
- 获取频道新闻
http://geek.itheima.net/v1_0/articles?channel_id=频道id×tamp=时间戳
例如:
http://geek.itheima.net/v1_0/articles?channel_id=0×tamp=1657361711251
综合练习-pinia环境搭建
安装 pinia -> 配置pinia -> 使用pinia
安装 pinia
npm i pinia
配置pinia
整体目录结构
src
├── components
│   ├── Channels.vue
│   └── NewsList.vue     # 具体的业务组件中,使用pinia
├── store
│   ├── Channel.ts   # 某个独立的模块
│   └── NewsList.ts
└── main.ts          # createPinia并use
use pinia
在main.ts中use pinia
import { createApp } from 'vue'
import App from './App.vue'

// 固定套路,使用pinia
import { createPinia } from 'pinia'
const pinia = createPinia()

createApp(App).use(pinia).mount('#app')
分别定义模块
channel.ts模块
import { defineStore} from 'pinia'
import { ref } from 'vue'

export default defineStore('channel', () => {

    const name = ref('小花')
    return {
        name  // 测试数据,后面会删掉
    }
})
使用模块
在具体的业务组件内
<script setup lang="ts">
import useChannelStore from '../store/channel'
const channelStore = useChannelStore()
</script>

<template>
  在视图中使用
  {{channelStore.name}}
</template>
综合练习-获取频道数据
思路
- 在pinia中,定义action发请求回来数据
- 在组件中派发action
在channel模块中补充action
import { defineStore} from 'pinia'
import { ref } from 'vue'
import axios from 'axios'
export default  defineStore('channel', () => {

    const channels = ref<Channel[]>([])

    const getChannels = async () => {
        const res = await axios.get('http://geek.itheima.net/v1_0/channels')
        channels.value = res.data.data.channels
    }
    return {
        getChannels,
        channels
    }
})
在组件中派发action
import useChannelStore from '../store/channel'
const channelStore = useChannelStore()

channelStore.getChannels()
综合练习-频道显示
获取频道-补充类型信息
types/data.d.ts
import { defineStore } from 'pinia'
import axios from 'axios'
// 约定频道列表的结构
type Channel = {id: number, name: string}
export default  defineStore('channel', () => {

    const channels = ref<Channel[]>([])

    const getChannels = async () => {
        const res = await axios.get<{data: {channels: Channel[]}}>('http://geek.itheima.net/v1_0/channels')
        channels.value = res.data.data.channels
    }
    return {
        getChannels,
        channels
    }
})
从pinia中取出值并显示在页面上
<script lang="ts" setup>
import useChannelStore from '../store/channel'
const channelStore = useChannelStore()

channelStore.getChannels()
</script>

<template>
<ul class="catagtory">
  <li v-for="item in channels.channels" :key="item.id">{{item.name}}</li>
  </ul>
</template>

<style scoed lang="less"></style>
综合练习-频道高亮效果
在pinia中补充一个值,来记录当前选中的频道
import { defineStore} from 'pinia'
import { ref } from 'vue'
import axios from 'axios'
type Channel = {id: number, name: string}
export default  defineStore('channel', () => {

    const channels = ref<Channel[]>([])
    const curIdx = ref(0)
    const setCurIdx = (idx: number) => {
        curIdx.value = idx
    }

    const getChannels = async () => {
        const res = await axios.get<{data: {channels: Channel[]}}>('http://geek.itheima.net/v1_0/channels')
        channels.value = res.data.data.channels
    }
    return {
        getChannels,
        curIdx,
        setCurIdx,
        channels  // 测试数据,后面会删掉
    }
})
在视图中更新
<script lang="ts" setup>
import useChannelStore from '../store/channel'
const channelStore = useChannelStore()

channelStore.getChannels()
</script>

<template>
  <ul class="catagtory">
    <li
    :class="{select: idx === channelStore.curIdx}"
    v-for="(item,idx) in channelStore.channels"
    @click="channelStore.setCurIdx(idx)"
    :key="item.id">{{item.name}}</li>
  </ul>
</template>

<style scoed lang="less"></style>
综合练习-文章列表数据获取
定义数据类型
// 约定频道列表的结构
export type Channels = {id: number, name: string}[]

// 约定返回值的结构
export type ChannelsRes = {
    data: {
        channels: Channels,
        message: string
    }
}
定义action
import { defineStore} from 'pinia'
import axios from 'axios'
import { ref } from 'vue';
// 约定新闻列表的结构
type NewsItem = {
art_id: string;
title: string;
aut_id: string;
comm_count: number;
pubdate: string;
aut_name: string;
is_top: number;
cover: {
type: number;
images: string[]
};
}
// 约定返回值的结构
type NewsRes = {
data: {
results: NewsItem[],
message: string
}
}
export default defineStore('newList', () => {
const list = ref<NewsItem[]>( [])
// 获取新闻列表
const getNews = async (channelId: number=0) => {
const res = await axios.get<NewsRes>('http://geek.itheima.net/v1_0/articles?channel_id='+channelId+'×tamp='+Date.now())
// console.log(res.data.data.channels)
list.value = res.data.data.results
}
return {
list, getNews
}
})<script lang="ts" setup>
import useNewsListStore from '../store/newsList'
const newsStore = useNewsListStore()
</script>
<template>
<div className="list">
<div className="article_item" v-for="item in newsStore.list" :key="item.art_id">
<h3 className="van-ellipsis">{{item.title}}</h3>
<div className="img_box">
<img
:src="item.cover.images ? item.cover.images[0] : 'http://geek.itheima.net/resources/images/11.jpg'"
className="w100"
alt=""
/>
</div>
<div className="info_box">
<span>{{item.aut_name}}</span>
<span>{{item.comm_count}}评论</span>
<span>{{item.pubdate}}</span>
</div>
</div>
</div>
</template>
<style scoed lang="less"></style>更新文章
在组件内,通过watcher来调用action
<script lang="ts" setup>
  import { watch } from 'vue';
  import useNewsListStore from '../store/newsList'
  const  newsStore = useNewsListStore()
  import useChannelStore from '../store/channel'
  const  channelStore = useChannelStore()

  watch(() => channelStore.curId, () => {
    newsStore.getNews(channelStore.curId)
  })

</script>

<template>
<div className="list">
  <div className="article_item" v-for="item in newsStore.list" :key="item.art_id">
    <h3 className="van-ellipsis">{{item.title}}</h3>
    <div className="img_box">
      <img
           :src="item.cover.images ? item.cover.images[0] : 'http://geek.itheima.net/resources/images/11.jpg'"
           className="w100"
           alt=""
           />
  </div>
    <div className="info_box">
      <span>{{item.aut_name}}</span>
      <span>{{item.comm_count}}评论</span>
      <span>{{item.pubdate}}</span>
  </div>
  </div>
  </div>
</template>

<style scoed lang="less"></style>
改进store
src
├── components
│   ├── Channels.vue
│   └── NewsList.vue     # 具体的业务组件中,使用pinia
├── store
│   ├── index.ts         # 导入全部的模块,并导出
│   └── modules
│       ├── channel.ts   # 某个独立的模块
│       └── newsList.ts
└── main.ts              # createPinia并use
整体导出
import useChannelStore from './modules/channel'
import useNewsListStore from './modules/newsList'

export default function useStore () {
  return {
    channelStore: useChannelStore()
    newsListStore: useNewsListStore()
  }
}


 2052
2052


 被折叠的 条评论
为什么被折叠?
被折叠的 条评论
为什么被折叠?
 到【灌水乐园】发言


