


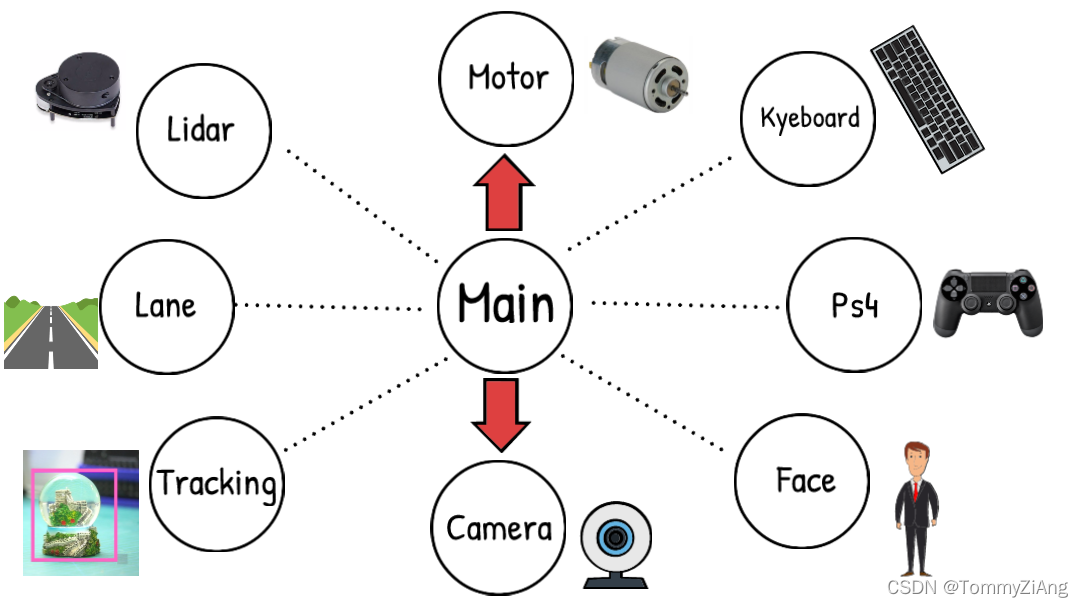
The Concept of Lane Detection
The idea is to find the path using color detection or edge detector and then getting the curve using summation of pixels in the y direction(直线) draw a histogram(柱状图). We can split the task into 5 different steps. This includes Thresholding(阈值转换法), Warping(变形) , Histogram, Averaging, and Displaying. Since we have been creating modules .so far, we are going to create a module for lane detection as well. This way we don’t need to put all the code in one script instead we can have separate python files that each perform their separate tasks. So for this project we will have a Main Script that will be connected to our Motor Module and the Lane Detection Module. Since the Lane Detection code will take up some space we will separate all the functions into a Utilities file keeping the main Module neat and clean.
Importing Libraries
Even though we will run the code on Raspberry pi, we are going to write the code on a PC in Pycharm. This way the coding process is much easier. All we need is a video or image to find the results and later we can simply tune the code once we run it on raspberry pi.
We will import the opencv library along with numpy. If you are not sure how to install this in raspberry pi you can follow this tutorial. Utlis is the file that we will create as a container for all our functions so that we can keep the main code tidy.
import cv2
import numpy as np
import utlis
Since we are creating a module and we want to run it as a standalone script as well we will add the if statement to check the file name. If this is the main module that was run then we will grab frame from our video and call the main function. In this case we will call the main function ‘getLaneCurve’ since that is what we are interested in.
if __name__ == '__main__':
    cap = cv2.VideoCapture('vid.mp4')
    while True:
        _, img = cap.read() # GET THE IMAGE
        img = cv2.resize(img,(640,480)) # RESIZE
        getLaneCurve(img)
        cv2.waitKey(1)
Getting the Curve
First we will create a getLaneCurve function and then apply some thresholding to our image.
def getLaneCurve(img):
    imgThres = utlis.thresholding(img)
STEP 1 – Thresholding
Now the idea here is to get the path using either Color or Edge Detection. In our case we are using regular A4 White paper as path, therefore we can simply use the color detection to find the path. We will write the Thresholding function in the Utilities file.
def thresholding(img):
    hsv = cv2.cvtColor(img,cv2.COLOR_BGR2HSV)
    lowerWhite = np.array([85, 0, 0])
    upperWhite = np.array([179, 160, 255])
    maskedWhite= cv2.inRange(hsv,lowerWhite,upperWhite)
    return maskedWhite
Here we are simply converting our image to HSV color space and then applying a range of color to find. This color could be found using the color picker script below.
Color Picker Script
import cv2
import numpy as np

frameWidth = 640
frameHeight = 480
cap = cv2.VideoCapture(1)
cap.set(3, frameWidth)
cap.set(4, frameHeight)


def empty(a):
    pass

cv2.namedWindow("HSV")
cv2.resizeWindow("HSV", 640, 240)
cv2.createTrackbar("HUE Min", "HSV", 0, 179, empty)
cv2.createTrackbar("HUE Max", "HSV", 179, 179, empty)
cv2.createTrackbar("SAT Min", "HSV", 0, 255, empty)
cv2.createTrackbar("SAT Max", "HSV", 255, 255, empty)
cv2.createTrackbar("VALUE Min", "HSV", 0, 255, empty)
cv2.createTrackbar("VALUE Max", "HSV", 255, 255, empty)

cap = cv2.VideoCapture('vid1.mp4')
frameCounter = 0

while True:
    frameCounter +=1
    if cap.get(cv2.CAP_PROP_FRAME_COUNT) ==frameCounter:
        cap.set(cv2.CAP_PROP_POS_FRAMES,0)
        frameCounter=0

    _, img = cap.read()
    imgHsv = cv2.cvtColor(img, cv2.COLOR_BGR2HSV)

    h_min = cv2.getTrackbarPos("HUE Min", "HSV")
    h_max = cv2.getTrackbarPos("HUE Max", "HSV")
    s_min = cv2.getTrackbarPos("SAT Min", "HSV")
    s_max = cv2.getTrackbarPos("SAT Max", "HSV")
    v_min = cv2.getTrackbarPos("VALUE Min", "HSV")
    v_max = cv2.getTrackbarPos("VALUE Max", "HSV")
    print(h_min)

    lower = np.array([h_min, s_min, v_min])
    upper = np.array([h_max, s_max, v_max])
    mask = cv2.inRange(imgHsv, lower, upper)
    result = cv2.bitwise_and(img, img, mask=mask)

    mask = cv2.cvtColor(mask, cv2.COLOR_GRAY2BGR)
    hStack = np.hstack([img, mask, result])
    cv2.imshow('Horizontal Stacking', hStack)
    if cv2.waitKey(1) and 0xFF == ord('q'):
        break

cap.release()
cv2.destroyAllWindows()
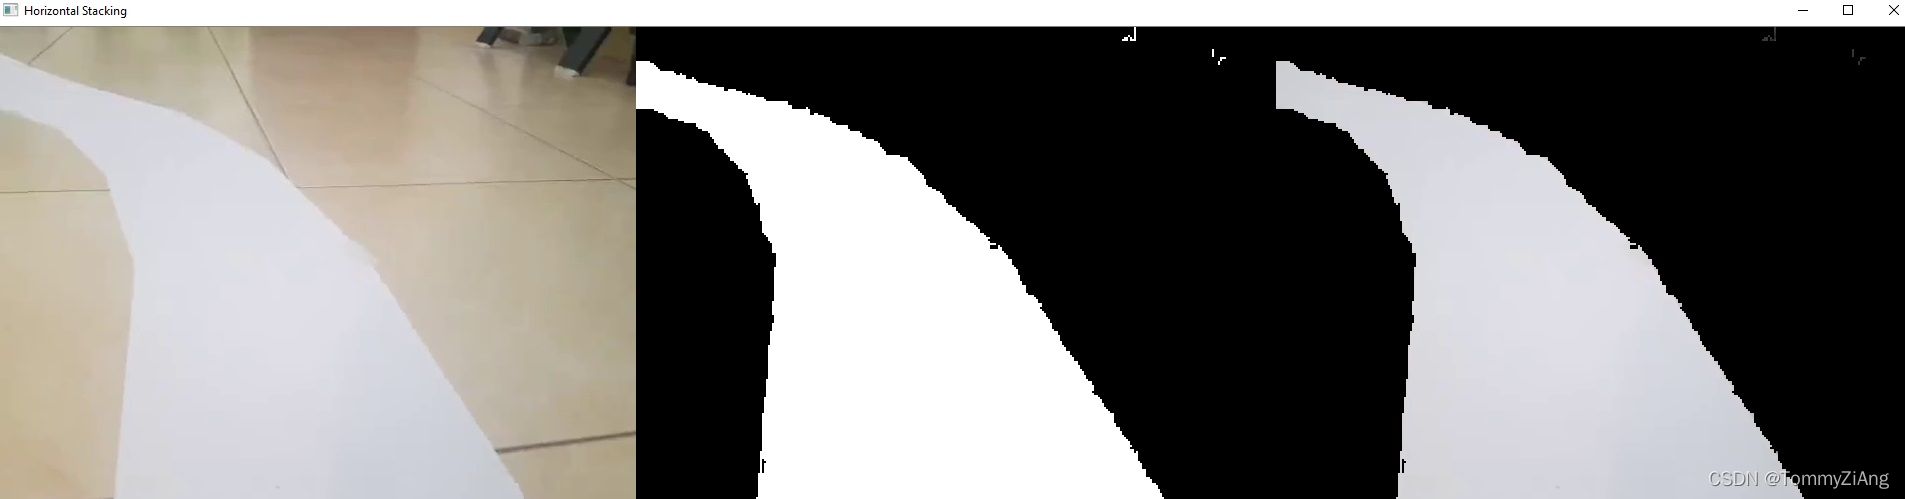
This is gives us the range of values that we need to use to find our white paper path. We will not go in the details of the script or the color detection part since we have covered this in previous tutorial.
Warping
We don’t want to process the whole image because we just want to know the curve on the path right now and not a few seconds ahead. So we can simply crop our image, but this is not enough since we want to look at the road as if we were watching from the top . This is known as a bird eye view and it is important because it will allow us to easily find the curve. To warp the image we need to define the initial points. These points we can determine manually. So to make this process easier we could use track bars to experiment with different values. The idea is to get a rectangle shape when the road is straight.
We can create two functions for the trackbars. One that initializes the trackbars and the second that get the current value from them.
def nothing(a):
    pass
def initializeTrackbars(intialTracbarVals,wT=480, hT=240):
    cv2.namedWindow("Trackbars")
    cv2.resizeWindow("Trackbars", 360, 240)
    cv2.createTrackbar("Width Top", "Trackbars", intialTracbarVals[0],wT//2, nothing)
    cv2.createTrackbar("Height Top", "Trackbars", intialTracbarVals[1], hT, nothing)
    cv2.createTrackbar("Width Bottom", "Trackbars", intialTracbarVals[2],wT//2, nothing)
    cv2.createTrackbar("Height Bottom", "Trackbars", intialTracbarVals[3], hT, nothing)
def valTrackbars(wT=480, hT=240):
    widthTop = cv2.getTrackbarPos("Width Top", "Trackbars")
    heightTop = cv2.getTrackbarPos("Height Top", "Trackbars")
    widthBottom = cv2.getTrackbarPos("Width Bottom", "Trackbars")
    heightBottom = cv2.getTrackbarPos("Height Bottom", "Trackbars")
    points = np.float32([(widthTop, heightTop), (wT-widthTop, heightTop),
                      (widthBottom , heightBottom ), (wT-widthBottom, heightBottom)])
    return points
Now we can call the initialize function at the start of the code and the valTrackbar in the while loop just before warping the image. Since both functions are written in the utlis file we will write ‘utlis.’ before calling them.
intialTracbarVals = [110,208,0,480]
utlis.initializeTrackbars(intialTracbarVals)
points = utlis.valTrackbars()
Now we will write our warping function that will allow us to get the bird eyes view using the four points that we just tuned.
def warpImg (img,points,w,h,inv=False):
    pts1 = np.float32(points)
    pts2 = np.float32([[0,0],[w,0],[0,h],[w,h]])
    if inv:
        matrix = cv2.getPerspectiveTransform(pts2,pts1)
    else:
        matrix = cv2.getPerspectiveTransform(pts1,pts2)
    imgWarp = cv2.warpPerspective(img,matrix,(w,h))
    return imgWarp
Here we are getting the transformation matrix based on the input points and then warping the image using the ‘warpPrespective’ function. Since we will also need to apply inverse Warping later on, we will
 最低0.47元/天 解锁文章


 2259
2259


 被折叠的 条评论
为什么被折叠?
被折叠的 条评论
为什么被折叠?
 到【灌水乐园】发言


