


1参考链接mirrors / xyxiao001 / vue-cropper · GitCode
1、先安装插件
npm install vue-cropper
npm install vue-cropper --save-dev
yarn add vue-cropper
2、使用,在组件中引入插件
import {VueCropper} from 'vue-cropper' 3、封装vuecropper,既可以在其他组件中使用
<template>
<div class="wrapper">
<div class="model" v-show="model" @click="model = false">
<div class="model-show">
<img :src="modelSrc" alt="">
</div>
</div>
<div class="content">
<div class="show-info">
<div class="test">
<vueCropper
ref="cropper"
:img="option.img"
:outputSize="option.outputSize"
:outputType="option.outputType"
:info="option.info"
:canScale="option.canScale"
:autoCrop="option.autoCrop"
:autoCropWidth="option.autoCropWidth"
:autoCropHeight="option.autoCropHeight"
:fixedBox="option.fixedBox"
:fixed="option.fixed"
:fixedNumber="option.fixedNumber"
:canMove="option.canMove"
:canMoveBox="option.canMoveBox"
:original="option.original"
:centerBox="option.centerBox"
:infoTrue="option.infoTrue"
:full="option.full"
:enlarge="option.enlarge"
:mode="option.mode"
></vueCropper>
</div>
<label class="btn" for="upload2">上传</label>
<input type="file" id="upload2" style="position:absolute; clip:rect(0 0 0 0);"
accept="image/png, image/jpeg, image/gif, image/jpg" @change="uploadImg($event,2)">
<button @click="finish()" class="btn">裁剪</button>
<button @click="downLoad()" class="btn">下载</button>
<button @click="ok()" class="btn">确定</button>
</div>
</div>
</div>
</template>
<script>
import {VueCropper} from 'vue-cropper'
export default {
components: {
VueCropper,
},
data() {
return {
model: false,
modelSrc: '',
crap: false,
previews: {},
form: {
head: ''
},
option: {
img: '', // 裁剪图片的地址 url 地址, base64, blob
outputSize: 1, // 裁剪生成图片的质量
outputType: 'jpeg', // 裁剪生成图片的格式 jpeg, png, webp
info: true, // 裁剪框的大小信息
canScale: false, // 图片是否允许滚轮缩放
autoCrop: true, // 是否默认生成截图框
autoCropWidth: 345, // 默认生成截图框宽度
autoCropHeight: 245, // 默认生成截图框高度
fixedBox: false, // 固定截图框大小 不允许改变
fixed: true, // 是否开启截图框宽高固定比例
fixedNumber: [1, 1], // 截图框的宽高比例 [ 宽度 , 高度 ]
canMove: true, // 上传图片是否可以移动
canMoveBox: true, // 截图框能否拖动
original: false, // 上传图片按照原始比例渲染
centerBox: true, // 截图框是否被限制在图片里面
infoTrue: true, // true 为展示真实输出图片宽高 false 展示看到的截图框宽高
full: true, // 是否输出原图比例的截图
enlarge: '1', // 图片根据截图框输出比例倍数
mode: 'contain' // 图片默认渲染方式 contain , cover, 100px, 100% auto
},
downImg: '#'
}
},
created() {
this.init(this.option)
},
methods: {
//初始化
init(obj) {
if (obj.img) {
this.option.img = obj.img
}
//裁剪生成图片的质量
if (obj.outputSize) {
this.option.outputSize = obj.outputSize
} else {
this.option.outputSize = 1
}
//裁剪生成图片的格式
if (obj.outputType) {
this.option.outputType = obj.outputType
} else {
this.option.outputType = 'jpeg'
}
//裁剪框的大小信息
if (obj.info) {
this.option.info = obj.info
} else {
this.option.info = true
}
//图片是否允许滚轮缩放
if (obj.canScale) {
this.option.canScale = obj.canScale
} else {
this.option.canScale = false
}
//是否默认生成截图框
if (obj.autoCrop) {
this.option.autoCrop = obj.autoCrop
} else {
this.option.autoCrop = true
}
//默认生成截图框宽度
if (obj.autoCropWidth) {
this.option.autoCropWidth = obj.autoCropWidth
} else {
this.option.autoCropWidth = 375
}
//默认生成截图框高度
if (obj.autoCropHeight) {
this.option.autoCropHeight = obj.autoCropHeight
} else {
this.option.autoCropHeight = 245
}
//固定截图框大小 不允许改变
if (obj.fixedBox) {
this.option.fixedBox = obj.fixedBox
} else {
this.option.fixedBox = false
}
//是否开启截图框宽高固定比例
if (obj.fixed) {
this.option.fixed = obj.fixed
} else {
this.option.fixed = true
}
//截图框的宽高比例
if (obj.fixedNumber) {
this.option.fixedNumber = obj.fixedNumber
} else {
this.option.fixedNumber = [this.option.autoCropWidth, this.option.autoCropHeight]
}
//上传图片是否可以移动
if (obj.canMove) {
this.option.canMove = obj.canMove
} else {
this.option.canMove = true
}
//截图框能否拖动
if (obj.canMoveBox) {
this.option.canMoveBox = obj.canMoveBox
} else {
this.option.canMoveBox = true
}
//上传图片按照原始比例渲染
if (obj.original) {
this.option.original = obj.original
} else {
this.option.original = false
}
//截图框是否被限制在图片里面
if (obj.centerBox) {
this.option.centerBox = obj.centerBox
} else {
this.option.centerBox = true
}
//true 为展示真实输出图片宽高 false 展示看到的截图框宽高
if (obj.infoTrue) {
this.option.infoTrue = obj.infoTrue
} else {
this.option.infoTrue = true
}
//是否输出原图比例的截图
if (obj.full) {
this.option.full = obj.full
} else {
this.option.full = true
}
//图片根据截图框输出比例倍数
if (obj.enlarge) {
this.option.enlarge = obj.enlarge
} else {
this.option.enlarge = '1'
}
//图片默认渲染方式
if (obj.mode) {
this.option.mode = obj.mode
} else {
this.option.mode = 'contain'
}
if (obj.success) {
this.success = obj.success
} else {
this.success = () => {
}
}
},
//裁剪
finish() {
this.$refs.cropper.getCropData((data) => {
this.modelSrc = data
this.model = false;
//裁剪后的图片显示
this.option.img = this.modelSrc;
})
},
//下载
downLoad() {
if (this.modelSrc == '') {
console.log('请先选择图片!')
return
}
let url = this.modelSrc
fetch(url).then(res => res.blob()).then(blob => {//将链接字符地址转换成blob地址
const aLink = document.createElement('a')
aLink.href = URL.createObjectURL(blob)
aLink.download = Date.now() + '.jpg'
document.body.appendChild(aLink)
aLink.click()
aLink.remove()
})
},
ok() {
this.$refs.cropper.getCropBlob(data => {
// 这里data数据为Blob类型,blobToDataURI方法转换成base64
this.blobToDataURI(data, function (res) {
console.log('base64格式:', res)
})
})
},
//上传图片
uploadImg(e, num) {
this.option.img = ''
var file = e.target.files[0]
if (!/\.(gif|jpg|jpeg|png|bmp|GIF|JPG|PNG)$/.test(e.target.value)) {
alert('图片类型必须是.gif,jpeg,jpg,png,bmp中的一种')
return false
}
var reader = new FileReader()
reader.onload = (e) => {
let data = e.target.result
if (typeof e.target.result === 'object') {
// 把Array Buffer转化为blob 如果是base64不需要
data = window.URL.createObjectURL(new Blob([e.target.result]))
} else {
data = e.target.result
}
if (num === 1) {
this.option.img = data
} else if (num === 2) {
this.option.img = data
}
}
// 转化为blob
reader.readAsArrayBuffer(file)
},
//url转base64
blobToDataURI(blob, callback) {
var reader = new FileReader();
reader.readAsDataURL(blob);
reader.onload = function (e) {
callback(e.target.result);
}
}
},
}
</script>
<style>
* {
margin: 0;
padding: 0;
}
.content {
margin: auto;
max-width: 585px;
margin-bottom: 100px;
}
.test-button {
display: flex;
flex-wrap: wrap;
}
.btn {
display: inline-block;
line-height: 1;
white-space: nowrap;
cursor: pointer;
background: #fff;
border: 1px solid #c0ccda;
color: #1f2d3d;
text-align: center;
box-sizing: border-box;
outline: none;
margin: 20px 10px 0px 0px;
padding: 9px 15px;
font-size: 14px;
border-radius: 4px;
color: #fff;
background-color: #50bfff;
border-color: #50bfff;
transition: all .2s ease;
text-decoration: none;
user-select: none;
}
.des {
line-height: 30px;
}
code.language-html {
padding: 10px 20px;
margin: 10px 0px;
display: block;
background-color: #333;
color: #fff;
overflow-x: auto;
font-family: Consolas, Monaco, Droid, Sans, Mono, Source, Code, Pro, Menlo, Lucida, Sans, Type, Writer, Ubuntu, Mono;
border-radius: 5px;
white-space: pre;
}
.show-info {
margin-bottom: 50px;
}
.show-info h2 {
line-height: 50px;
}
.test {
height: 285px;
}
.model {
position: fixed;
z-index: 10;
width: 100vw;
height: 100vh;
overflow: auto;
top: 0;
left: 0;
background: rgba(0, 0, 0, 0.8);
}
.model-show {
display: flex;
justify-content: center;
align-items: center;
width: 100vw;
height: 100vh;
}
.model img {
display: block;
margin: auto;
max-width: 80%;
user-select: none;
background-position: 0px 0px, 10px 10px;
background-size: 20px 20px;
background-image: linear-gradient(45deg, #eee 25%, transparent 25%, transparent 75%, #eee 75%, #eee 100%), linear-gradient(45deg, #eee 25%, white 25%, white 75%, #eee 75%, #eee 100%);
}
.c-item {
display: block;
padding: 10px 0;
user-select: none;
}
@keyframes slide {
0% {
background-position: 0 0;
}
100% {
background-position: -100% 0;
}
}
@media screen and (max-width: 1000px) {
.content {
max-width: 90%;
margin: auto;
}
.test {
height: 400px;
}
}
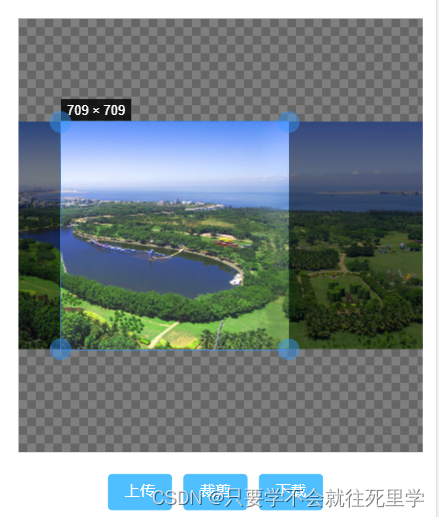
</style>4、效果图,具体看看自己的业务需求。


 1万+
1万+


 被折叠的 条评论
为什么被折叠?
被折叠的 条评论
为什么被折叠?
 到【灌水乐园】发言


