


在我们的工作中,在很多场景下都需要用到小票打印功能。经过不断地踩坑不断地尝试,最终终于实现了想要的效果。最终效果是这样的:
图1:
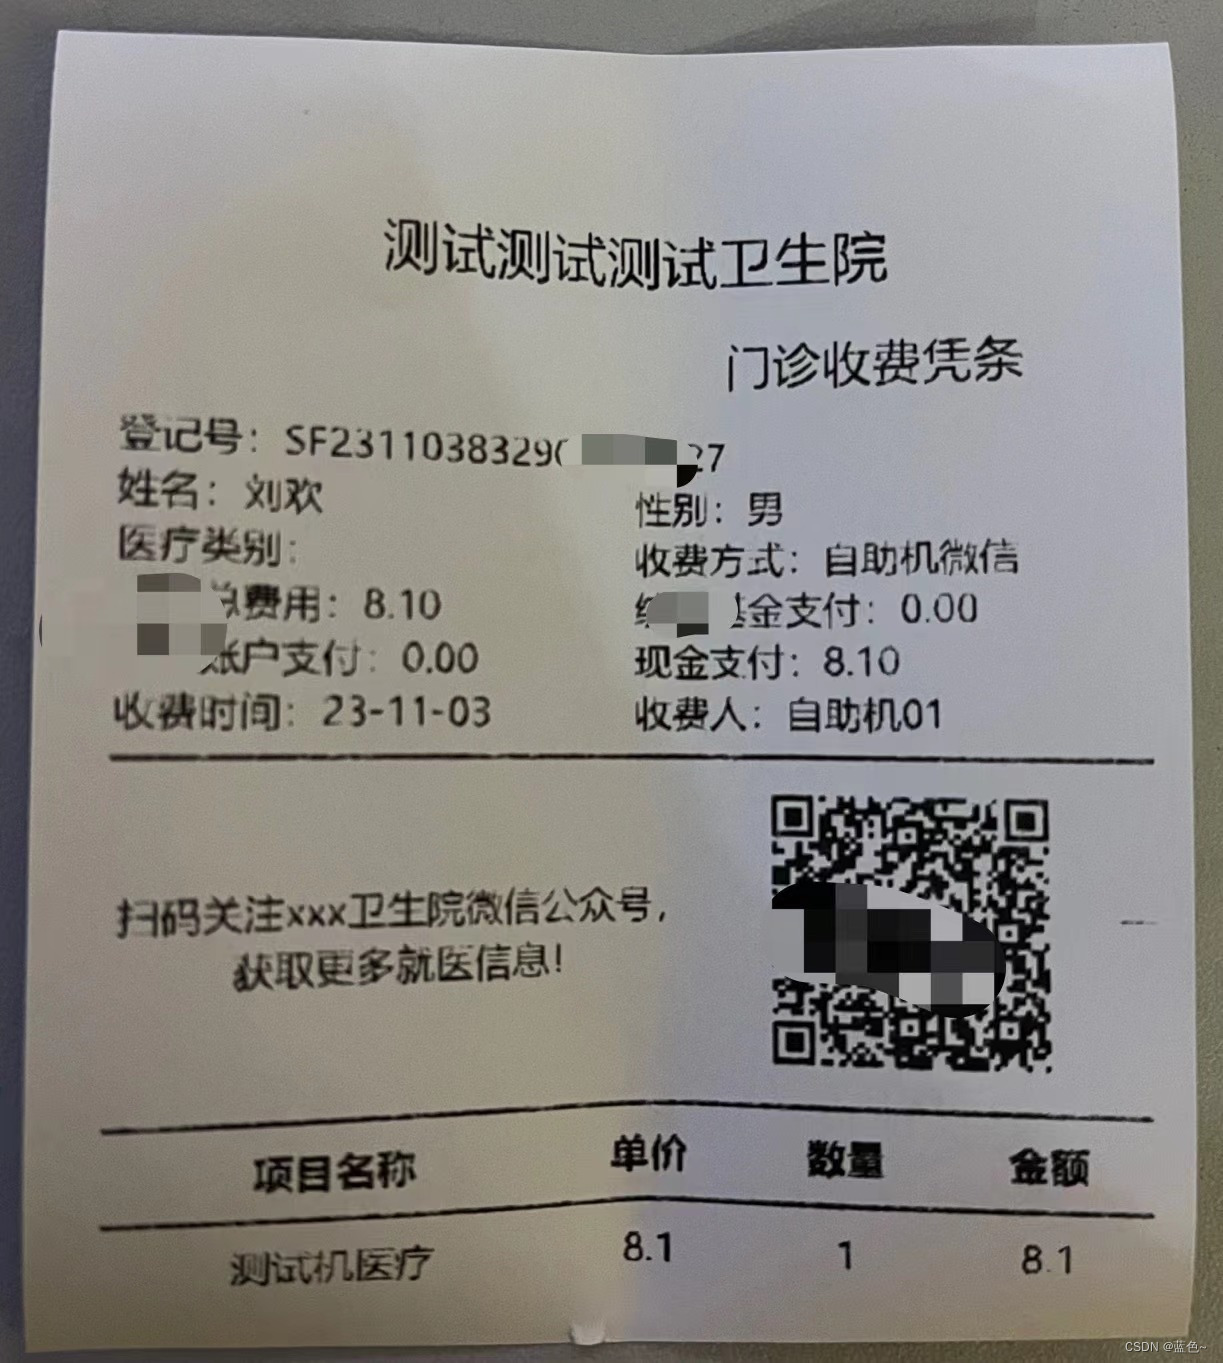
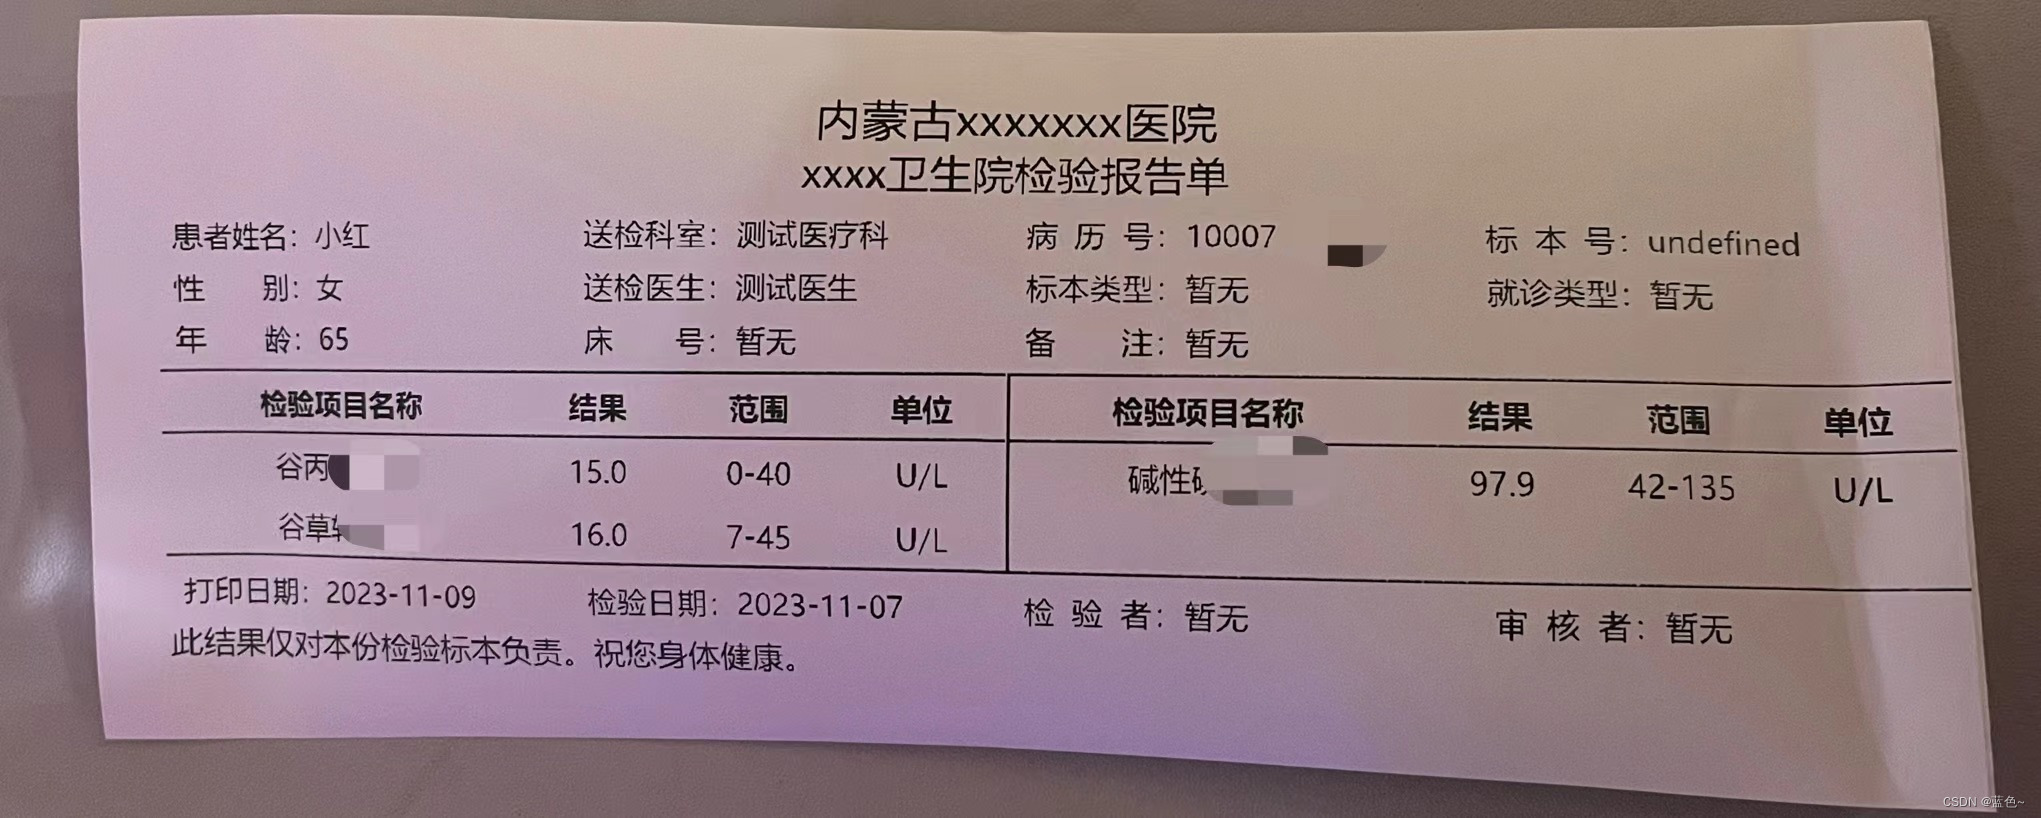
图2:
当然你也可以按照你自己需要的效果进行排版,从而实现自己想要的效果。下边就是具体的实现思路和部分代码, 话不多说直接上代码:
首先在渲染进程中,需要打印的页面数据发送到主进程:
// 测试数据
const dataDemo = {
        type: "report",
        data: {
            age: 65,
            department_id: "测试医疗科",
            doctor_name: "测试医生",
            gender: "女",
            items: [{ name: "谷丙转氨酶", result: "15.0", unit: "U/L", standard: "0-40" }, { name: "谷草转氨酶", result: "16.0", unit: "U/L", standard: "7-45" }, { name: "碱性磷酸酶", result: "97.9", unit: "U/L", standard: "42-135" }],
            patient_name: "小红",
            report_Id: 123456,
            report_code: "1000770030",
            report_name: "血清",
            report_time: "2023-11-07 00:00:00",
            unitId: "150102157",
            unitName: "测试测试测试卫生院"
        }
}

const res = ipcRenderer.sendSync("printerInfoSync", dataPrint);
console.log("返回结果:", res);
在主进程中添加监听打印事件:
这块实现的内容就是首先将渲染进程传入的数据进行格式处理,生成打印数据同时配置打印机参数。然后在打印工具类中创建打印窗口接收打印参数并配置,将传入的数据发送到打印页面中渲染,渲染完成之后向打印窗口发送消息,打印窗口接收到消息,然后打印。
register():生成打印配置参数和打印数据的处理。
printUtils(): 打印的工具函数。
// 监听打印页面发送消息
ipcMain.on('printerInfoSync', async(event, arg) => {
        console.info('接到消息', event, arg);
        // mainWindow.webContents.getPrintersAsync().then(res=>{
        //     console.log('获取打印机列表', res)
        // }).catch((err) => {
        //     console.log('err', err)
        // })
        const res = await printUtils(register(arg))
        event.returnValue = res //{ type: 'success' }
        console.log('已打印', data);
})
printUtils.js
import { BrowserWindow, ipcMain } from 'electron';
import path from "path";


export function printUtils(data) {
    return new Promise(async (resolvePrint, rejectPrint) => {
        const { printOption: options, resultData: dataList } = data

        let subMainWindow = new BrowserWindow({
            show: options.preview,
            webPreferences: {
                nodeIntegration: true,        // For electron >= 4.0.0
                contextIsolation: false,
                webSecurity: false,
                enableRemoteModule: true
            }
        });

        function renderPrintDocument(window, data) {
            return new Promise(async (resolve, reject) => {
                ipcMain.on('load-ok', (event, res) => {
                    //在这里可以添加打印的判断条件等......
                    setTimeout(() => {
                        resolve({ message: 'page-rendered', ...res });
                    }, 500)
                })
            })
        }


        // If the subMainWindow is closed, reset the `subMainWindow` var to null
        subMainWindow.on('closed', () => {
            subMainWindow = null;
        });
        // 加载打印的html文件
        const isPrdEnv = process.env.NODE_ENV === 'production'
        const staticPath = isPrdEnv ? './static' : '../../../static'
        const url = `${path.resolve(__dirname, `${staticPath}/print.html`)}`
        subMainWindow.loadFile(url);

        subMainWindow.webContents.on('did-finish-load', async (res) => {
            let data = []
            return renderPrintDocument(subMainWindow, data)
                .then(async (result) => {
                    // let width = Math.ceil((result.width) * 264.5833);
                    let height = Math.ceil((result.height + 60) * 264.5833);
                    console.info('height', result, height);
                    if (!options.preview) {
                        subMainWindow.webContents.print({
                            silent: options.silent,
                            margins: {
                                marginType: 'none'
                            },
                            printBackground: false,
                            deviceName: options.printerName,
                            copies: 1,
                            }, (success) => {

                            if (success) {
                                resolvePrint({type: 'success'})
                            }
                            subMainWindow.close();
                        })
                    }
                })
                .catch(err => console.warn(33, err))
        })
    })

}
之后需要准备一个打印页面print.html
<!--
  ~ Copyright (c) 2023. Author Hubert Formin <2399270194@qq.com>
  -->
<!DOCTYPE html>
<html lang="en">

<head>
  <meta charset="UTF-8">
  <title>Print preview</title>
  <style>
    @page {
      size: auto;
    }
    html {
      background-color: #ffffff;
      margin: 0px;
    }
    body {
      margin-left: 8mm;
    }
    body,
    html {
      font-size: 10px;
    }
    table {
      width: 100%;
      border-collapse: collapse;
    }
    table th,
    table td {
      text-align: center;
      padding: 5px;
    }
    .overT {
      overflow: hidden;
      text-overflow: ellipsis;
      white-space: nowrap;
    }
    table th {
      border-bottom: 1px solid #000;
      border-top: 1px solid #000;
    }
    ul,
    li {
      list-style: none;
    }
  </style>
</head>

<body>
  <section id="main"></section>

  <script src="./utils.js"></script>
  <script type="module">
    const { ipcRenderer } = require('electron')
    window.onload = () => {
      ipcRenderer.on('webview-print-render', (event, info) => {
        // 执行渲染
        const main = document.getElementById('main')
        createEle(info.html).then(res => {
          main.appendChild(res)
          ipcRenderer.send('load-ok', { width: document.body.clientWidth, height: document.body.clientHeight })
          ipcRenderer.sendToHost('did-finish-load')
        })
      })
    }

  </script>
</body>
</html>
本次记录完毕~


 3587
3587

 被折叠的 条评论
为什么被折叠?
被折叠的 条评论
为什么被折叠?
 到【灌水乐园】发言


