


 该文章描述了如何在Android中使用RecyclerView和自定义Adapter实现点击列表项后展开子项的效果。通过创建FoldAdapter,定义两种类型的ViewHolder(父项和子项),并在onBindViewHolder和onClick事件中处理数据和视图的更新。数据结构包含一个ParentBean和ChildBean,两者都实现了ITyple接口以返回其类型。
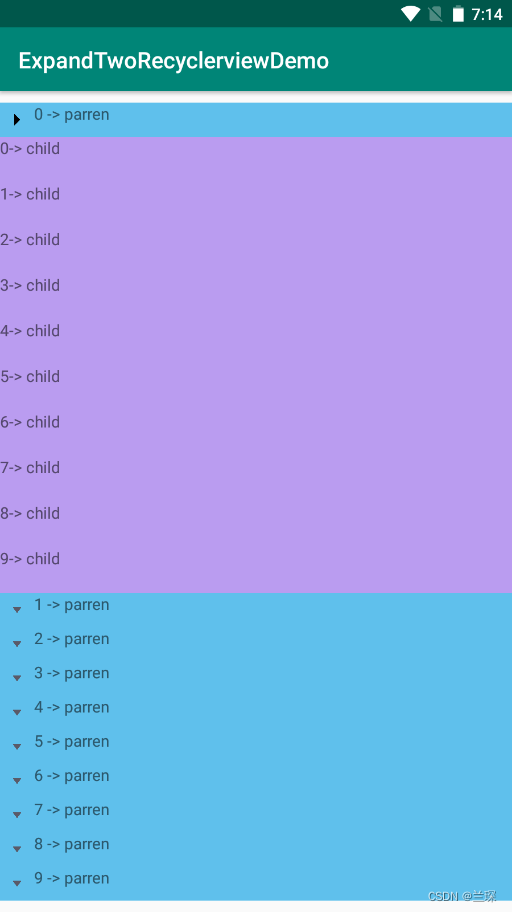
实现效果描述:
1、点击recyclerview中item,列表下方出现其他样式的item,作为子item,如下所示
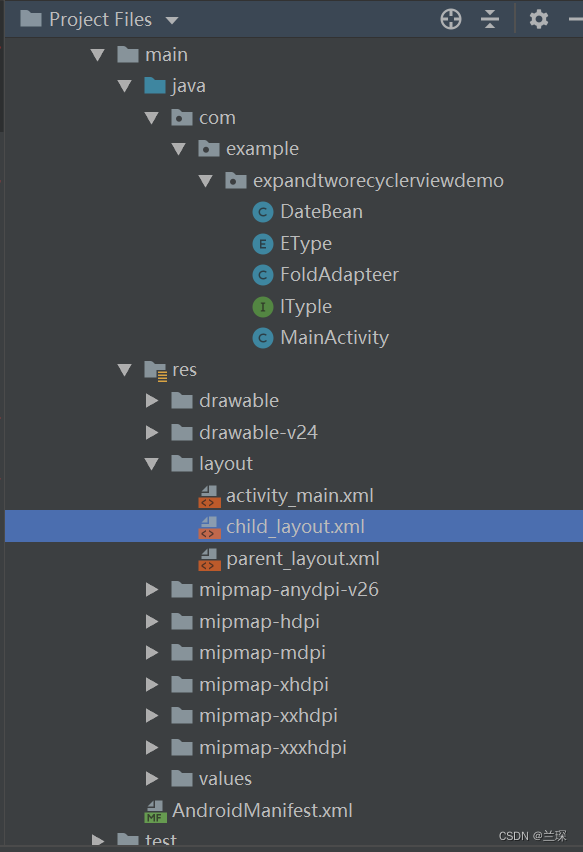
所需要的java文件和xml文件有:
1、创建FoldAdapteradapter, 在FoldAdapter中,定义两种不同的类型,分别对应父item和子item,对于不同布局的item,需要设置两种不同的viewHoder进行设置。
2、在onCreateViewHolder进行对于布局的绑定
3、在onBindViewHoder中进行数据的操作
4、在getItemViewType返回对应的类型
5、在getItemCount中返回对应的大小
FoldAdapter:
package com.example.expandtworecyclerviewdemo;

import android.content.Context;
import android.util.Log;
import android.view.LayoutInflater;
import android.view.View;
import android.view.ViewGroup;
import android.widget.ImageView;
import android.widget.TextView;

import androidx.annotation.NonNull;
import androidx.recyclerview.widget.RecyclerView;

import org.w3c.dom.Text;

import java.util.ArrayList;
import java.util.List;
import java.util.PropertyResourceBundle;
import java.util.zip.Inflater;

public class FoldAdapteer extends RecyclerView.Adapter<RecyclerView.ViewHolder> {

    private static final int PARENT_TYPE = 0X0000;
    private static final int CHILD_TYPE = 0X0001;
    private Context mContext;
    private List<ITyple> dataList = new ArrayList<>();

    public FoldAdapteer(Context context){
        mContext = context;
    }

    public void setData(List<ITyple> iTyples){
        //对于list的数据不能简单的是等于的操作
        this.dataList.clear();
        this.dataList.addAll(iTyples);
        notifyDataSetChanged();
    }

    @Override
    public int getItemViewType(int position) {
        if (dataList.get(position).getTyple() == EType.PARENT_TYPE) {
            return PARENT_TYPE;
        }
        if (dataList.get(position).getTyple() == EType.CHILD_TYPE){
            return CHILD_TYPE;
        }
        return super.getItemViewType(position);
    }

    @NonNull
    @Override
    public RecyclerView.ViewHolder onCreateViewHolder(@NonNull ViewGroup parent, int viewType) {
        if (viewType == PARENT_TYPE){
            View mView = LayoutInflater.from(mContext).inflate(R.layout.parent_layout, parent, false);
            return new ParentHoder(mView);
        }else if (viewType == CHILD_TYPE){
            View mView = LayoutInflater.from(mContext).inflate(R.layout.child_layout, parent, false);
            return new ChildHoder(mView);
        }

        return null;
    }

       @Override
    public void onBindViewHolder(@NonNull final RecyclerView.ViewHolder holder, final int position) {
        if (holder instanceof ParentHoder){
            ParentHoder parentHoder = (ParentHoder)holder;
            final DateBean.ParentBean parentBean = (DateBean.ParentBean) dataList.get(position);
            parentHoder.itemView.setOnClickListener(new View.OnClickListener() {
                @Override
                public void onClick(View view) {
                    Log.d("lucky", "onClick: " + parentBean);
                    if (parentBean.isExpand()){
                        closeParent(position, parentBean);
                        ((ParentHoder) holder).mImage.setImageResource(R.drawable.icon_parent_down);
                    }else {
                        openParent(position, parentBean);
                        ((ParentHoder) holder).mImage.setImageResource(R.drawable.icon_parent_right);
                    }
                    parentBean.setExpand(!parentBean.isExpand());
                }
            });
            DateBean.ParentBean bindata = (DateBean.ParentBean) dataList.get(position);
            ((ParentHoder) holder).mImage.setImageResource(R.drawable.icon_parent_down);
            ((ParentHoder) holder).text.setText(bindata.getTextParent());
        }else if (holder instanceof ChildHoder){
            DateBean.ChildBean childBean = (DateBean.ChildBean)dataList.get(position);
            ((ChildHoder) holder).text.setText(childBean.getTextChild());
        }

    }


    private void openParent(int position , DateBean.ParentBean parentBean) {
        Log.d("lucky", "openParent: "  + dataList.get(position));
      //  DateBean.ParentBean parentBean = (DateBean.ParentBean)dataList.get(position);
        List<DateBean.ChildBean> child = parentBean.getChildBeans();
        dataList.addAll(position+1, child);
  //      notifyDataSetChanged();
       notifyItemRangeInserted(position+1, child.size());
       notifyItemRangeChanged(position+1, child.size());
//     //   notifyItemChanged(position);
    }

    private void closeParent(int position, DateBean.ParentBean parentBean) {
        // = (DateBean.ParentBean)dataList.get(position);
        List<DateBean.ChildBean> child = parentBean.getChildBeans();

        dataList.removeAll(child);
        notifyItemRangeRemoved(0,child.size());
        notifyDataSetChanged();
    //   notifyItemRangeInserted(position+1, child.size());
   //     notifyItemRangeChanged(position+1, child.size());
    }

    @Override
    public int getItemCount() {
        return dataList.size();
    }
    private static class ParentHoder extends RecyclerView.ViewHolder {
        private TextView text;
        private ImageView mImage;
        public ParentHoder(@NonNull View itemView) {
            super(itemView);
            text = itemView.findViewById(R.id.parent_id);
            mImage = itemView.findViewById(R.id.paren_image);

        }
    }

    private static class ChildHoder extends RecyclerView.ViewHolder{
        private TextView text;
        public ChildHoder(@NonNull View itemView) {
            super(itemView);
            text = itemView.findViewById(R.id.child_id);
        }
    }
}
DataBean
package com.example.expandtworecyclerviewdemo;

import android.widget.TextView;

import java.util.List;

public class DateBean {

    private List<ParentBean> parentBean;

    public List<ParentBean> getParentBean() {
        return parentBean;
    }

    public void setParentBean(List<ParentBean> parentBean) {
        this.parentBean = parentBean;
    }

    public static class ParentBean implements ITyple {
        private List<ChildBean> childBeans;
        private boolean isExpand = false;
        private String textParent;

        public String getTextParent() {
            return textParent;
        }

        public void setTextParent(String textParent) {
            this.textParent = textParent;
        }

        public boolean isExpand() {
            return isExpand;
        }

        public void setExpand(boolean expand) {
            isExpand = expand;
        }

        public List<ChildBean> getChildBeans() {
            return childBeans;
        }

        public void setChildBeans(List<ChildBean> childBeans) {
            this.childBeans = childBeans;
        }

        @Override
        public EType getTyple() {
            return EType.PARENT_TYPE;
        }
    }

    public static class ChildBean implements ITyple{
        private String textChild;

        public String getTextChild() {
            return textChild;
        }

        public void setTextChild(String textChild) {
            this.textChild = textChild;
        }

        @Override
        public EType getTyple() {
            return EType.CHILD_TYPE;
        }
    }
}
接口的作用,是为了使得ParentBean和ChildBean实现接口,从而返回对应的类型,执行相关的操作。
在写代码过程中,有个点可能会比较疑问,为什么在adapter中有泛型为IType的集合?
因为这样的话,根据不同的类型执行后获取的数据,可通过强制装换获取存在的数据为身为子类的ParenBean和ChildBean。
接口IType
package com.example.expandtworecyclerviewdemo;

public interface ITyple {

    EType getTyple();
}
列举不同的数据,枚举是默认从0开始计数。
枚举EType
package com.example.expandtworecyclerviewdemo;

public enum EType {
    PARENT_TYPE,
    CHILD_TYPE
}
MainActivity
package com.example.expandtworecyclerviewdemo;
import androidx.appcompat.app.AppCompatActivity;
import androidx.recyclerview.widget.LinearLayoutManager;
import androidx.recyclerview.widget.RecyclerView;
import android.os.Bundle;
import android.widget.Adapter;

import java.util.ArrayList;
import java.util.List;

public class MainActivity extends AppCompatActivity {
    List<ITyple> iTyples = new ArrayList<>();
    @Override
    protected void onCreate(Bundle savedInstanceState) {
        super.onCreate(savedInstanceState);
        //绑定对应的layout文件
        this.setContentView(R.layout.activity_main);
        RecyclerView mRecyclerView = this.findViewById(R.id.recyclerview);
        //加载recycler中的布局,缺少会报错
        RecyclerView.LayoutManager layoutManager = new LinearLayoutManager(this);
        FoldAdapteer recyclerAdapter = new FoldAdapteer(this);
        mRecyclerView.setLayoutManager(layoutManager);
        mRecyclerView.setAdapter(recyclerAdapter);

			//数据的输入
      for (int i= 0; i< 10 ; i++){
            DateBean.ParentBean parentBean = new DateBean.ParentBean();
            List<DateBean.ChildBean> childBean = new ArrayList<>();
            parentBean.setTextParent(i + " -> parren ");
            for (int j =0 ; j< 10 ; j++){
                DateBean.ChildBean childBean1 = new DateBean.ChildBean();
                childBean1.setTextChild(j + "-> child");
                childBean.add(childBean1);
            }
            parentBean.setChildBeans(childBean);
            iTyples.add(parentBean);
        }

        //数据传送到FolderAdapter中
        recyclerAdapter.setData(iTyples);
    }
}
main_xml
<?xml version="1.0" encoding="utf-8"?>
<androidx.constraintlayout.widget.ConstraintLayout xmlns:android="http://schemas.android.com/apk/res/android"
    xmlns:app="http://schemas.android.com/apk/res-auto"
    xmlns:tools="http://schemas.android.com/tools"
    android:layout_width="match_parent"
    android:layout_height="match_parent"
    tools:context=".MainActivity">

    <androidx.recyclerview.widget.RecyclerView
        android:id="@+id/recyclerview"
        android:layout_width="match_parent"
        android:layout_height="wrap_content"
        app:layout_constraintBottom_toBottomOf="parent"
        app:layout_constraintLeft_toLeftOf="parent"
        app:layout_constraintRight_toRightOf="parent"
        app:layout_constraintTop_toTopOf="parent" />

</androidx.constraintlayout.widget.ConstraintLayout>
parent_layout
<?xml version="1.0" encoding="utf-8"?>
<LinearLayout
    android:layout_width="match_parent"
    android:layout_height="wrap_content"
    android:orientation="horizontal"
    android:background="#5FC0EC"
    xmlns:android="http://schemas.android.com/apk/res/android"
    >
    <ImageView
        android:id="@+id/paren_image"
        android:layout_width="30dp"
        android:layout_height="12dp"
        android:layout_gravity="center"
       />
    <TextView
        android:id="@+id/parent_id"
        android:layout_width="match_parent"
        android:layout_height="30dp"
       />
</LinearLayout>
child_layout
<?xml version="1.0" encoding="utf-8"?>
<TextView xmlns:android="http://schemas.android.com/apk/res/android"
    android:id="@+id/child_id"
    android:layout_width="match_parent"
    android:layout_height="40dp"
    android:background="#BA9CF0">
</TextView>
三级标题确实是一样的处理方式,就是在childData中再加一个list放数据,然后在adapter进行点击处理的效果。


 389
389

 被折叠的 条评论
为什么被折叠?
被折叠的 条评论
为什么被折叠?
 到【灌水乐园】发言


