


这里给大家介绍如何在SpringBoot项目中实现文件上传功能!
1.创建SpringBoot项目
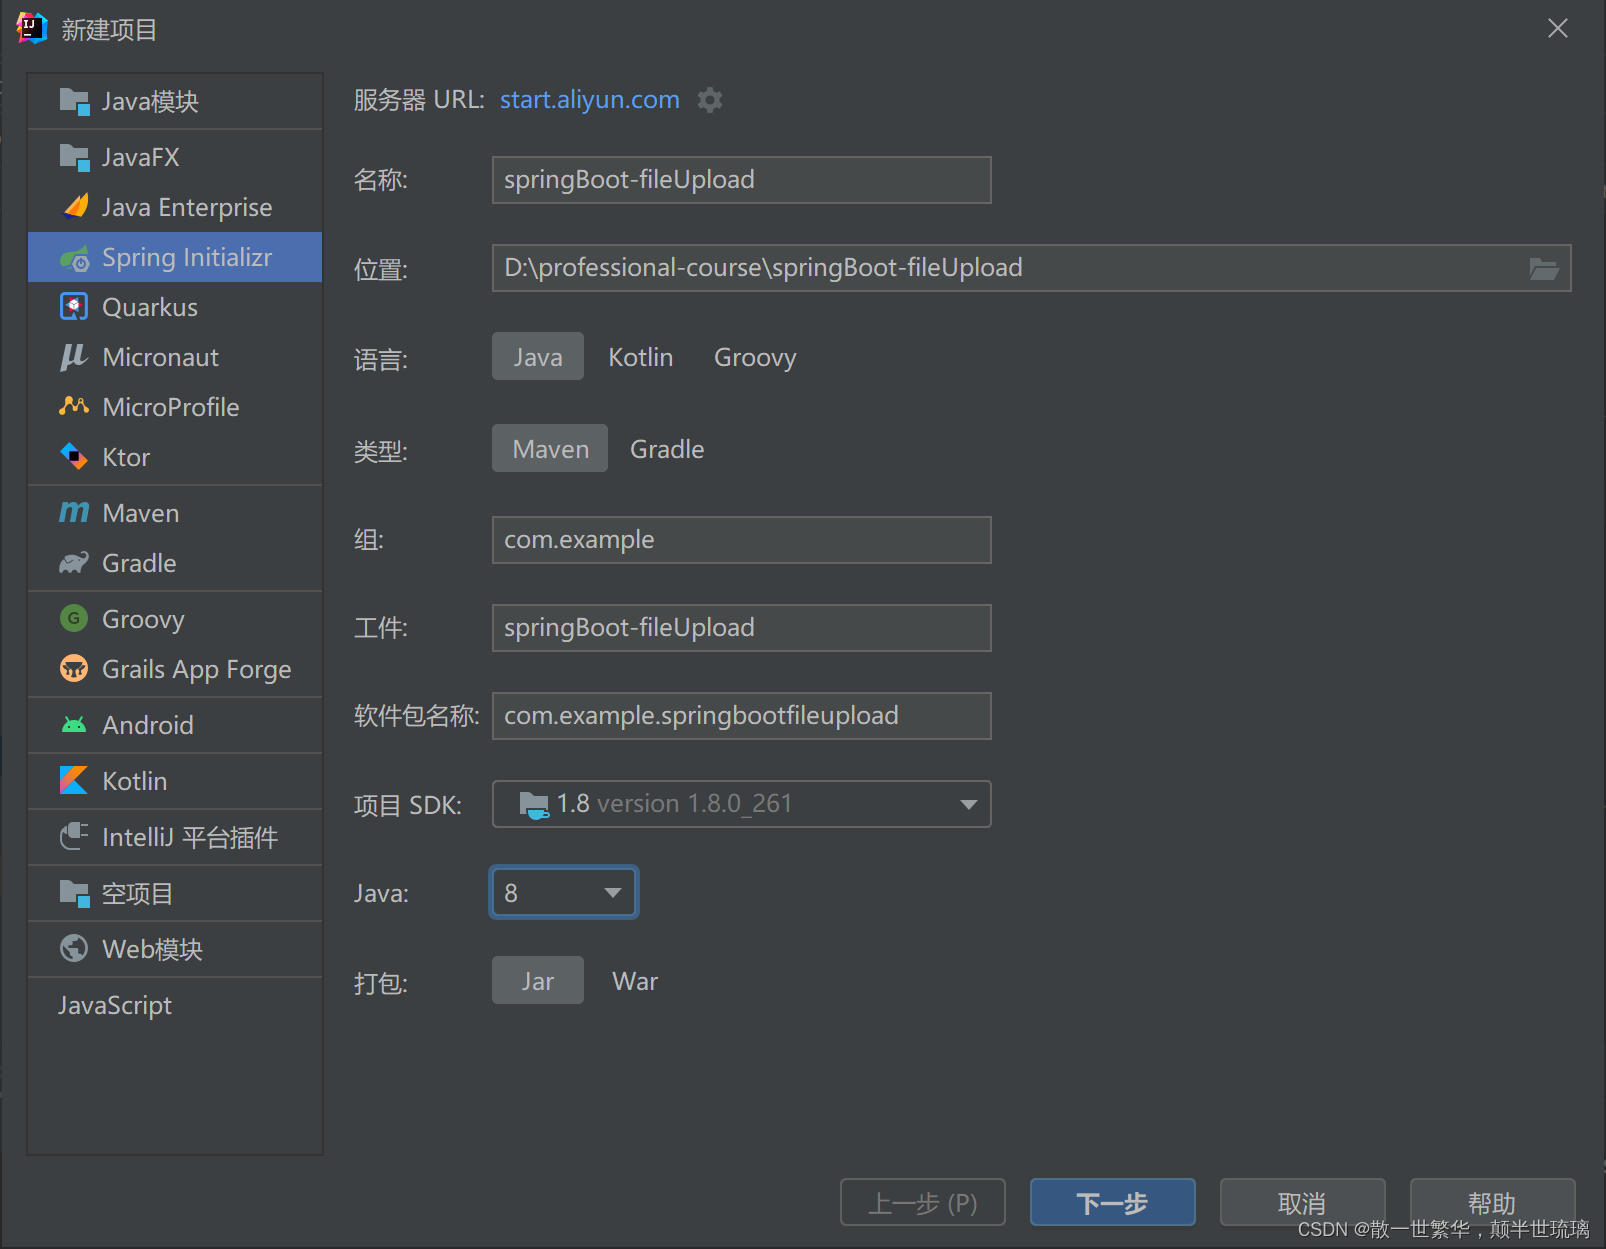
打开IDEA,点击文件,选择新建项目,点击Spring Initializr,然后根据自己的需求设置项目名称,位置以及JDK。这里需要注意,服务器的URL最好设置为阿里云服务器,这样可以使得项目加载地更快。
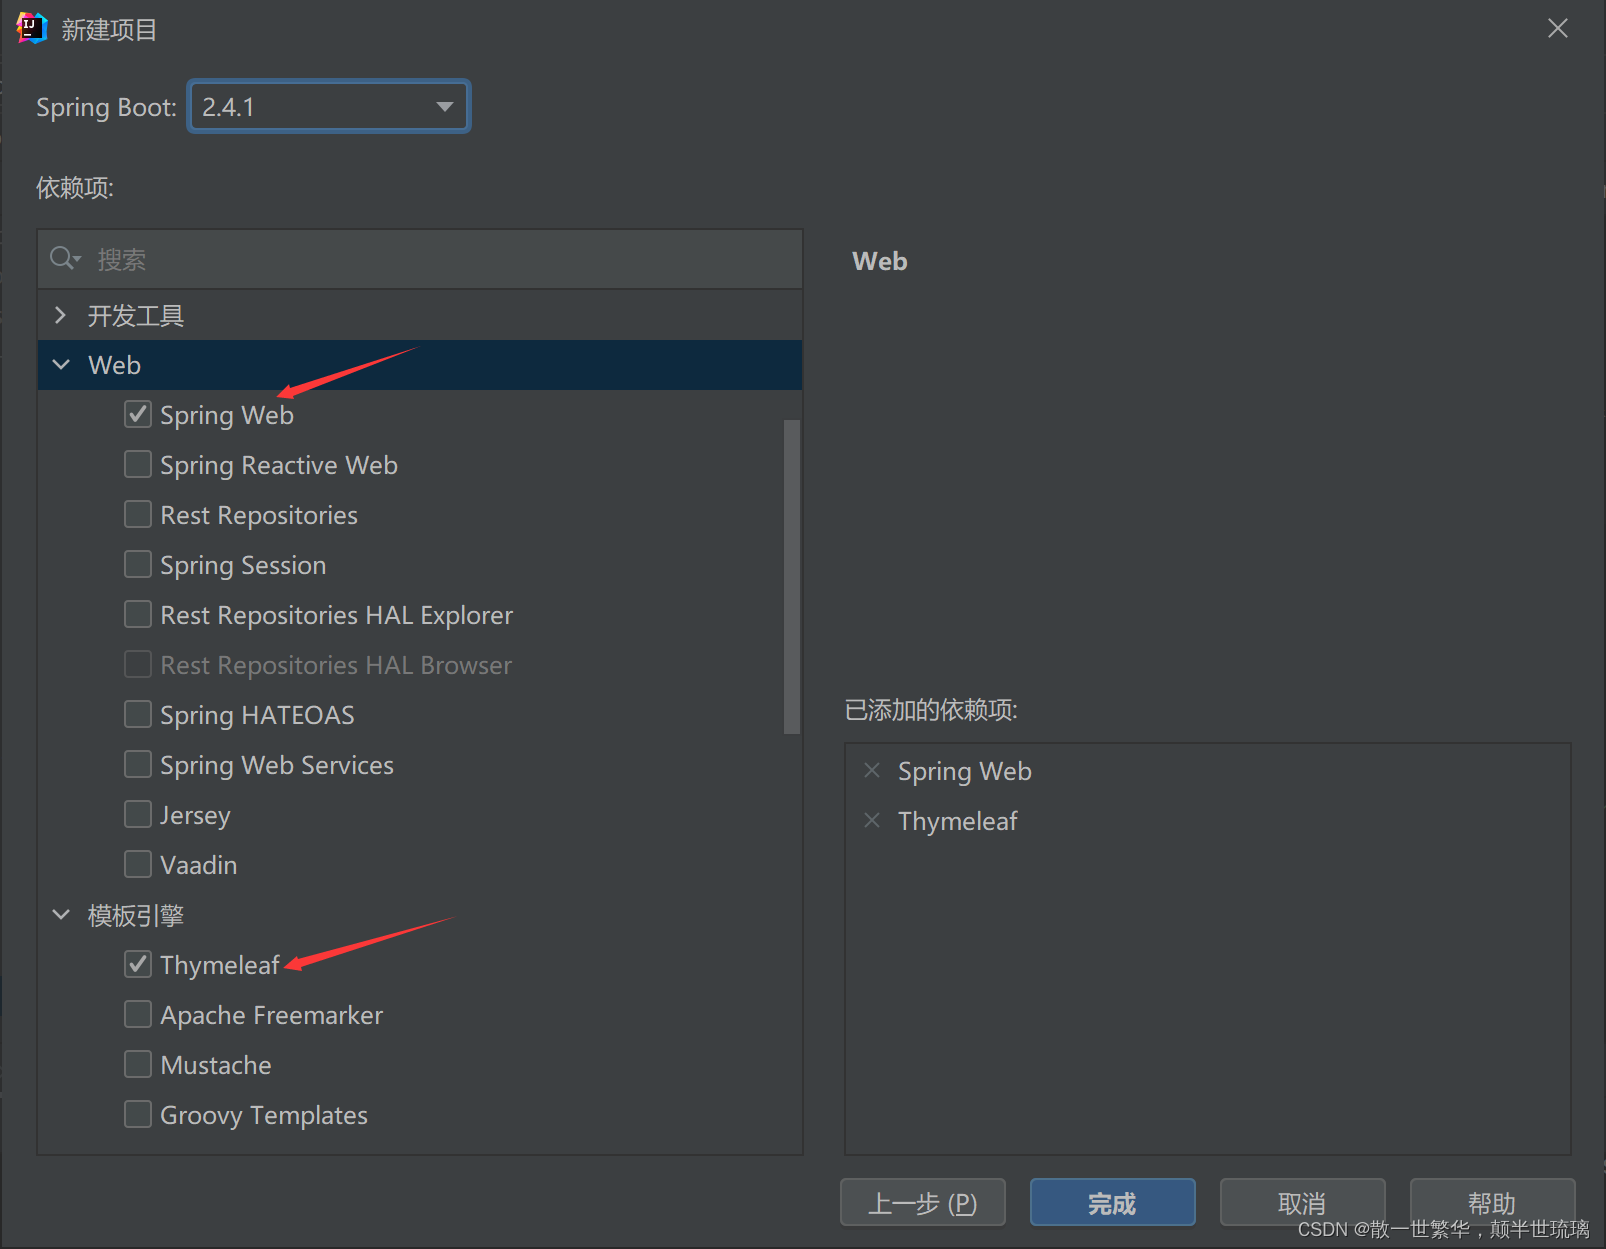
点击下一步后,勾选Spring Web依赖与Thymeleaf模板引擎后点击完成即可。
2.修改application.properties配置文件
因为SpringBoot项目中默认文件的最大上传大小为1MB,而1MB的上传容量无法满足我们开发工程中的文件上传需求,因此我们需要修改配置文件。
# 设置上传文件的大小为10MB
spring.servlet.multipart.max-file-size=10MB
3.编写控制器UserController类
这里需要注意的是,使用MultipartFile类来处理接受前端上传的文件,通过它可以获取文件的名称,类型,大小等等信息。
package com.xing.springbootfileupload.controller;
import org.springframework.stereotype.Controller;
import org.springframework.web.bind.annotation.RequestMapping;
import org.springframework.web.bind.annotation.ResponseBody;
import org.springframework.web.multipart.MultipartFile;
import java.io.File;
import java.io.IOException;
@Controller
public class UserController {
@RequestMapping("/")
public String welcome(){
return "index";
}//这里相当于设置欢迎页
@RequestMapping("/upload")
@ResponseBody
public String upload(String name, MultipartFile phone) throws IOException {//实现文件上传
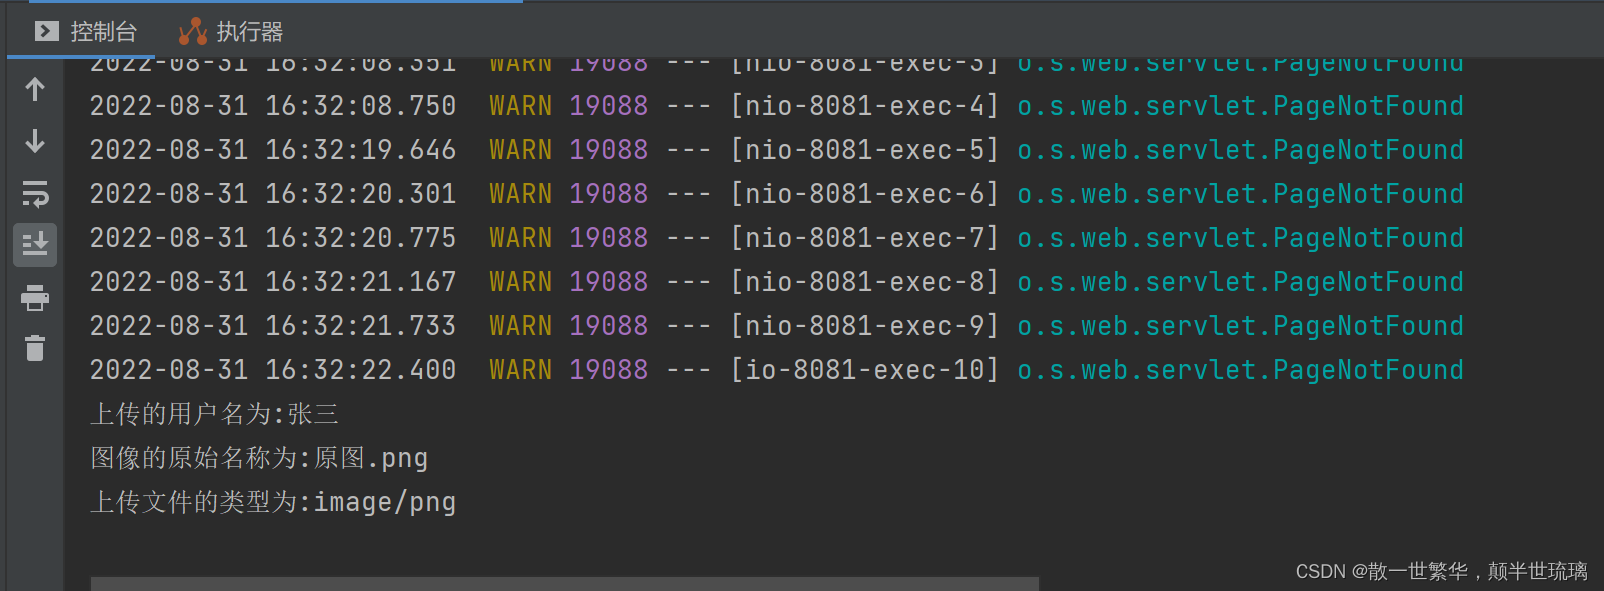
System.out.println("上传的用户名为:"+name);
System.out.println("图像的原始名称为:"+phone.getOriginalFilename());
System.out.println("上传文件的类型为:"+phone.getContentType());
saveFile(phone);
return "文件上传成功";
}
public void saveFile(MultipartFile phone) throws IOException {//将文件保存到本地
String dir="这里写自己要保存图片的绝对路径";//建议这里写resources目录的绝对路径
File path=new File(dir+"/upload/");
if(!path.exists()){//如果当前目录不存在
path.mkdir();
}
File file=new File(dir+"/upload/"+phone.getOriginalFilename());
phone.transferTo(file);//将此图像保存到file本地
}
}
4.编写前端页面index.html
编写表单的时候要注意,我们一定要写enctype=“multipart/form-data” 来控制文件的编码,否则文件会上传失败!
<!DOCTYPE html>
<html lang="en" xmlns:th="http://www.thymeleaf.org">
<head>
    <meta charset="UTF-8">
    <title>欢迎页</title>
</head>
<body>
<h1>请自行上传用户名与图像</h1>
<hr>
<form enctype="multipart/form-data" method="post" th:action="@{/upload}">
    <p>用户名:<input type="text" name="name"></p>
    <p>用户名:<input type="file" name="phone"></p>
    <input type="submit" value="上传">
</form>
</body>
</html>
5.效果展示
直接运行SpringBoot启动类,运行结果如下所示:
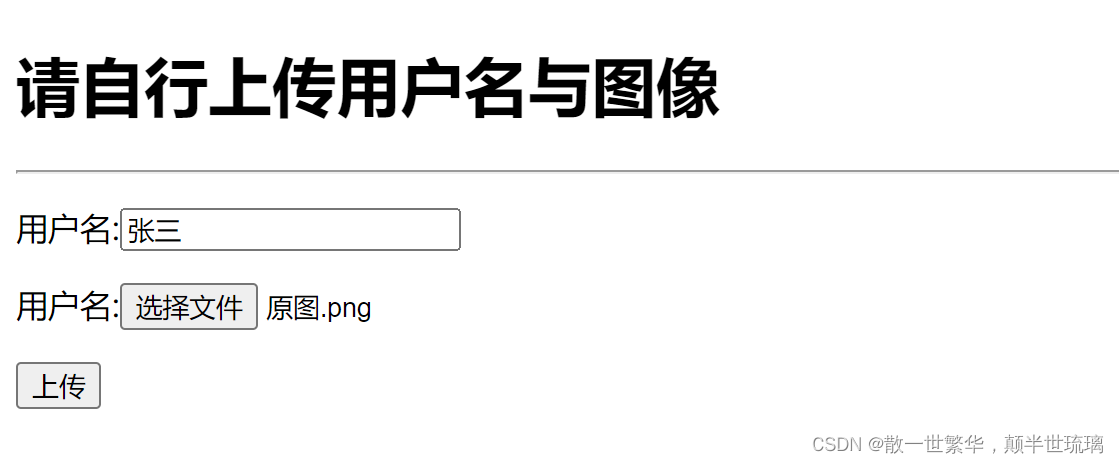
选择合适的用户名与图片文件后,点击上传即可看见浏览器显示上传成功!

并且可以在后台看见上传文件的相关信息。


 2万+
2万+


 被折叠的 条评论
为什么被折叠?
被折叠的 条评论
为什么被折叠?
 到【灌水乐园】发言


