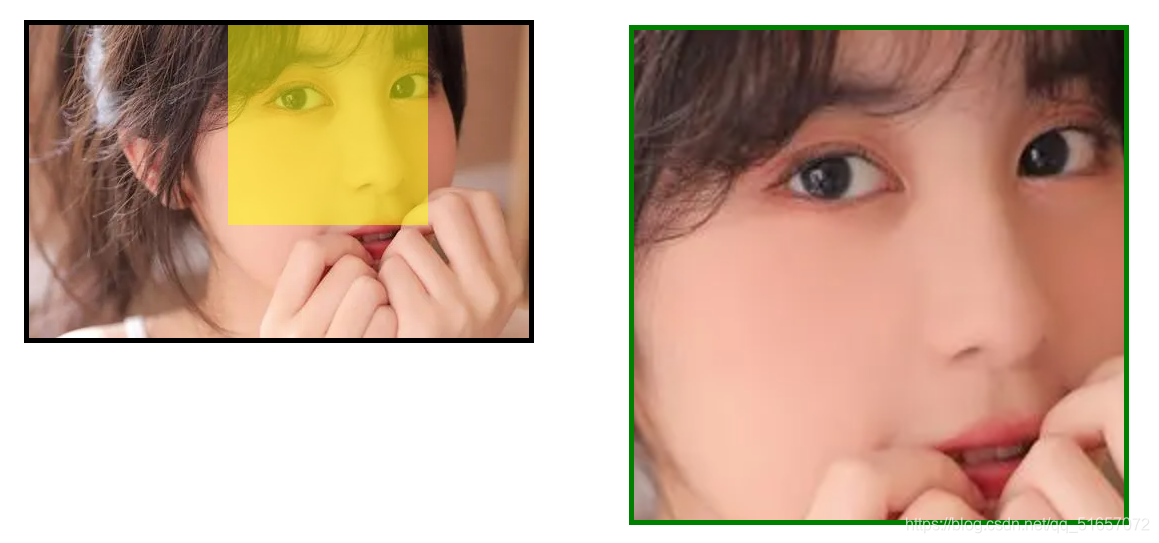
js原生实现淘宝放大镜功能

复制以下代码,直接跑就行啦

效果图如下

<!DOCTYPE html>
<html lang="en">
<head>
    <meta charset="UTF-8">
    <meta http-equiv="X-UA-Compatible" content="IE=edge">
    <meta name="viewport" content="width=device-width, initial-scale=1.0">
    <title>Document</title>
    <style>
        * {
            margin: 0;
            padding: 0;
            box-sizing: border-box;
        }
        .boxOne {
            position:relative;
            width: 510px;
            height: 323px;
            border:5px solid #000000;
            margin: 100px 0 0 100px;
        }
        .boxTwo {
            display: none;
            position: absolute;
            top: 0;
            left: 0;
            width: 200px;
            height: 200px;
            background-color: yellow;
            opacity: .5;
            cursor: move;

        }
        .boxThree {
            display: none;
            position:absolute;
            top: 0;
            left: 600px;
            width: 500px;
            height: 500px;
            border: 5px solid green;
            overflow: hidden;
        }
        .boxThree .bigImg {
            width:1000px;
            height:626px;
            position:absolute;
            top: 0;
            left: 0;
        }
    </style>
</head>
<body>
    <div class="boxOne">
        <img class="smallImg" src="https://img1.baidu.com/it/u=954496120,1621506021&fm=26&fmt=auto&gp=0.jpg" alt="">
        <div class="boxTwo"> </div>
        <div class="boxThree">
            <img class="bigImg" src="https://img1.baidu.com/it/u=954496120,1621506021&fm=26&fmt=auto&gp=0.jpg" alt="">
        </div>
    </div>

    <script>
        
        window.onload = function () {
            var boxOne = document.querySelector('.boxOne');
            var boxTwo = document.querySelector('.boxTwo');
            var boxThree = document.querySelector('.boxThree');
            var smallImg = document.querySelector('.smallImg');
            var bigImg = document.querySelector('.bigImg');
            boxOne.onmouseover = function () {
                boxTwo.style.display = 'block';
                boxThree.style.display = 'block';

            }
            boxOne.onmouseout = function () {
                boxTwo.style.display = 'none';
                boxThree.style.display = 'none';
            }
            boxOne.onmousemove = function (e) {
                //鼠标在boxOne里面的坐标 = 鼠标在页面的坐标 - 当前盒子(.boxOne)到父盒子的距离
                var x = e.pageX - this.offsetLeft;
                var y = e.pageY - this.offsetTop;
                //让鼠标在boxTwo这个盒子内中间 = x/y - boxTwo盒子的二分之一
                var boxTwoX = x - boxTwo.offsetWidth / 2;
                var boxTwoY = y - boxTwo.offsetHeight / 2;
                //boxTwo的最大移动距离 = boxOne的宽度/高度 - boxTwo的宽度/高度    10是两个边框5px
                var boxTwoMaxX = boxOne.offsetWidth - boxTwo.offsetWidth - 10;
                var boxTwoMaxY = boxOne.offsetHeight - boxTwo.offsetHeight - 10;
                //如果boxTwoX(鼠标的坐标为0 的话,boxTwo盒子的宽度/高度会出现在盒子外面)  当boxTwoX小于0,就等于0 
                //如果boxTwoX(鼠标的坐标超出最大移动距离的话,boxTwo盒子的宽度/高度会出现在盒子外面)  当boxTwoX大于最大移动距离,就等于他
                if (boxTwoX <= 0) {
                    boxTwoX = 0;
                }else if (boxTwoX >= boxTwoMaxX) {
                    boxTwoX = boxTwoMaxX
                }
                if (boxTwoY <= 0) {
                    boxTwoY = 0;
                }else if (boxTwoY >= boxTwoMaxY) {
                    boxTwoY = boxTwoMaxY
                }
                //最后把值赋给绝对定位的boxTwo
                boxTwo.style.left = boxTwoX + 'px';
                boxTwo.style.top = boxTwoY + 'px';
                //相对于右边的boxThree盒子的操作
                var bigImgMaxX = boxThree.offsetWidth - bigImg.offsetWidth - 10;
                var bigImgMaxY = boxThree.offsetHeight - bigImg.offsetHeight - 10;
                //右边boxThree的img移动距离 = boxTwo的移动距离 * boxThree的img最大移动距离 / boxTwo最大移动距离
                var bigImgX = boxTwoX * bigImgMaxX / boxTwoMaxX;
                var bigImgY = boxTwoY * bigImgMaxY / boxTwoMaxY;
                bigImg.style.left = bigImgX + 'px';
                bigImg.style.top = bigImgY + 'px';
            }
        }
    </script>
</body>
</html>

  • 0
    点赞
  • 0
    收藏
    觉得还不错? 一键收藏
  • 2
    评论
好的,以下是一个简单的原生JS实现放大镜功能的代码: HTML: ``` <div class="container"> <img src="image.jpg" alt="product image" id="product-image"> <div class="magnifier"></div> </div> ``` CSS: ``` .container { position: relative; } .magnifier { position: absolute; width: 200px; height: 200px; border: 1px solid #ccc; display: none; pointer-events: none; background-repeat: no-repeat; background-size: 400px 400px; background-position: 0 0; } ``` JS: ``` const container = document.querySelector('.container'); const magnifier = document.querySelector('.magnifier'); const productImage = document.querySelector('#product-image'); container.addEventListener('mousemove', e => { const containerRect = container.getBoundingClientRect(); const x = e.clientX - containerRect.left; const y = e.clientY - containerRect.top; const magnifierSize = 200; const imageWidth = productImage.width; const imageHeight = productImage.height; const ratioX = imageWidth / containerRect.width; const ratioY = imageHeight / containerRect.height; const bgPosX = -x * ratioX + magnifierSize / 2; const bgPosY = -y * ratioY + magnifierSize / 2; magnifier.style.display = 'block'; magnifier.style.left = `${x - magnifierSize / 2}px`; magnifier.style.top = `${y - magnifierSize / 2}px`; magnifier.style.backgroundImage = `url(${productImage.src})`; magnifier.style.backgroundPosition = `${bgPosX}px ${bgPosY}px`; }); container.addEventListener('mouseleave', () => { magnifier.style.display = 'none'; }); ``` 这段代码会在鼠标移动到图片上时,显示一个放大镜,并在放大镜内显示鼠标所在位置的图片放大后的部分。当鼠标移开图片时,放大镜会隐藏。
评论 2
添加红包

请填写红包祝福语或标题

红包个数最小为10个

红包金额最低5元

当前余额3.43前往充值 >
需支付:10.00
成就一亿技术人!
领取后你会自动成为博主和红包主的粉丝 规则
hope_wisdom
发出的红包
实付
使用余额支付
点击重新获取
扫码支付
钱包余额 0

抵扣说明:

1.余额是钱包充值的虚拟货币,按照1:1的比例进行支付金额的抵扣。
2.余额无法直接购买下载,可以购买VIP、付费专栏及课程。

余额充值