


什么是AOP
AOP:全称是Aspect Oriented Programming即:面向切面```编程。
简单的说它就是把我们程序重复的代码抽取出来,在需要执行的时候,使用动态代理的技术,在不修改源码的基础上,对我们的已有方法进行增强和保护。
eg:
创建接口
public interface CustomerService {
    void save();
    void update();
}
创建实现类,实现两个方法
public class CustomerServiceImpl implements CustomerService {
    public void save() {
        System.out.println("保存了");
    }

    public void update() {
        System.out.println("修改了");
    }
}
创建切面类
public class MyAspect {

    /**
     * 通知方法
     */
     public void writeLog(JoinPoint jp){
        System.out.println("前置通知");
        System.out.println("代理对象类型"+jp.getThis().getClass());
        System.out.println("拦截方法的名称"+jp.getSignature().getName());
        System.out.println("拦截方法的参数列表"+Arrays.asList(jp.getArgs()));
    }
    }
创建applicationContext.xml文件,进行配置
<?xml version="1.0" encoding="UTF-8"?>
<beans xmlns="http://www.springframework.org/schema/beans"
       xmlns:p="http://www.springframework.org/schema/p"
       xmlns:aop="http://www.springframework.org/schema/aop"
       xmlns:xsi="http://www.w3.org/2001/XMLSchema-instance"
       xmlns:context="http://www.springframework.org/schema/context"
       xsi:schemaLocation="http://www.springframework.org/schema/beans
        http://www.springframework.org/schema/beans/spring-beans.xsd
        http://www.springframework.org/schema/aop
        http://www.springframework.org/schema/aop/spring-aop.xsd http://www.springframework.org/schema/context https://www.springframework.org/schema/context/spring-context.xsd">


    <!-- 基于AspectJ的spring的AOP编写之XML方式 -->
    <!-- 1.创建目标对象 -->
    <bean id="customerService" class="edu.xja.service.impl.CustomerServiceImpl"/>

    <!-- 2.创建切面类对象 -->
    <bean id="myAspect" class="edu.xja.aspect.MyAspect"/>

    <!-- 3.配置AOP切面 -->
    <aop:config>
        <!-- 切面 = 切入点+通知 -->
        <aop:aspect ref="myAspect">
            <!--
                aop:pointcut:代表切入点配置
                expression:这里配置切入点表达式,用于声明哪些方法需要被拦截
             -->
            <aop:pointcut expression="execution(public void edu.xja.service.impl.CustomerServiceImpl.*())" id="pt"/>
            <!--
               aop:before: 代表前置通知(后面会详细介绍各种不同类型的通知的用法)
               writeLog: 该方法为MyAspect类中的writeLog方法
               pointcut-ref: 代表引用一个切入点
            -->
            <aop:before method="writeLog" pointcut-ref="pt"/>
        </aop:aspect>
    </aop:config>

</beans>
测试类
@SpringJUnitConfig
@ContextConfiguration("classpath:applicationContext.xml")
class CustomerServiceImplTest {
    @Autowired
    private CustomerService customerService;
    @Test
    public void test(){
        customerService.save();
        customerService.update();
    }
}
结果
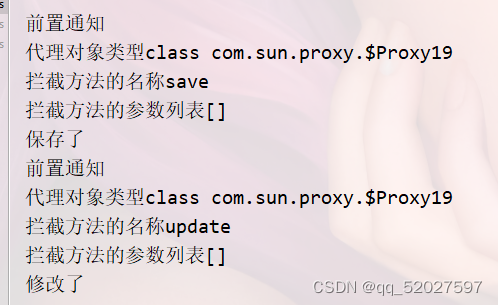
配置xml文件往往是比较麻烦的,在ioc中,我们也已经舍去xml文件,改用注释更为简单,在aop中我们仍然可以使用注解来代替xml文件的配置
改变后的切面
//将此类定义为切面
@Aspect
//将此类装入bean管理器
@Component
public class MyAspect {

    /**
     * 通知方法
     */
    public void writeLog(JoinPoint jp){
        System.out.println("前置通知");
        System.out.println("代理对象类型"+jp.getThis().getClass());
        System.out.println("拦截方法的名称"+jp.getSignature().getName());
        System.out.println("拦截方法的参数列表"+Arrays.asList(jp.getArgs()));
    }
    @After("execution(public void edu.xja.service.impl.CustomerServiceImpl.*())")
    //最终通知,无论有没有异常都会执行,<aop:after method="after" pointcut-ref="pt"/>
    public void end(JoinPoint jp){
        System.out.println("最终通知");
        System.out.println("代理对象类型"+jp.getThis().getClass());
        System.out.println("拦截方法的名称"+jp.getSignature().getName());
        System.out.println("拦截方法的参数列表"+Arrays.asList(jp.getArgs()));
    }
    //异常通知<aop:after-throwing method="afterThrowing" throwing="e" pointcut-ref="pt"></aop:after-throwing>
   @AfterThrowing("execution(public void edu.xja.service.impl.CustomerServiceImpl.*())")
    public void exception(JoinPoint jp){
        System.out.println("异常通知");
        System.out.println("代理对象类型"+jp.getThis().getClass());
        System.out.println("拦截方法的名称"+jp.getSignature().getName());
        System.out.println("拦截方法的参数列表"+Arrays.asList(jp.getArgs()));
    }
    //方法执行后执行,报异常不会执行<aop:after-returning method="afterReturning" returning="money" pointcut-ref="pt"></aop:after-returning>
@AfterReturning("execution(public void edu.xja.service.impl.CustomerServiceImpl.*())")
    public void after(){
    System.out.println("异常通知");
    }
//执行方法前后都执行<aop:around method="around" pointcut-ref="myPointcut2"/>
@Around(value = "execution(public * edu.xja.service.impl.CustomerServiceImpl.*(..))")
    public void around(ProceedingJoinPoint pjp){
    System.out.println("start");
    try {
        pjp.proceed();
    } catch (Throwable throwable) {
        throwable.printStackTrace();
    }
    System.out.println("over");
}


}
不用xml配置后,我们新生成一个类,将它用于配置
//将该类作为spring配置文件的标志
@Configuration
//扫描包,将包下面有Component等四个注解的类装载进容器
@ComponentScan(basePackages = {"edu.xja"})
//开启Aop注解功能
@EnableAspectJAutoProxy
public class SpringConfig {
}
测试类中,将原来读取xml文件改为新配置类的class文件
再在原来的CustomerServicesImpl上添加@Services注解
@ContextConfiguration(classes = SpringConfig.class)
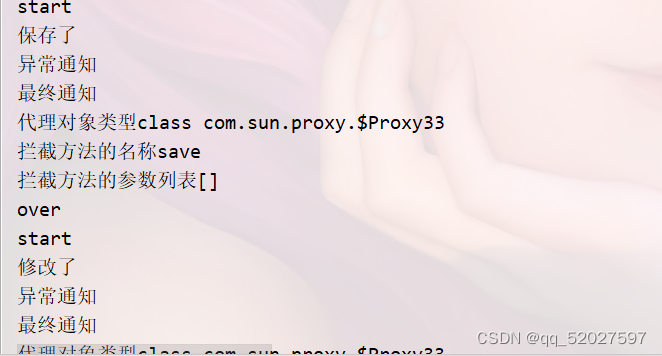
结果:


 1万+
1万+


 被折叠的 条评论
为什么被折叠?
被折叠的 条评论
为什么被折叠?
 到【灌水乐园】发言


