


7.1 了解 Thymeleaf
我们知道,如果 是 Java 的程序员。想要在 WEB 应用里写 页面,那么首选 肯定是 JSP!jsp 虽然是一个老旧的技术,但是 这并不影响它的强大。我们可以很轻松的 在 jsp 的页面上 实现数据交互、绑定、显示。并且 JSP 还支持写 Java 的代码。
但是!!!SpringBoot 的项目,默认的 jar 包形式,却不支持 jsp。因为是 jar 包嘛。然后嵌套 Tomcat。所以不支持也很正常。
那么如果 不支持 JSP,我们要是用 纯静态页面的方式 去 写前端 可能会给我们的开发 点来很大的不便捷。这个时候 SpringBoot 大力推荐我们使用 学习成本极低,功能强大的 Thymeleaf 模板引擎。
Thymeleaf 模板引擎:是 Daniel Fernández 的西班牙软件工程师创建,现在由一群很棒的人开发和维护。
那么什么是模板引擎呢?
答:JSP 其实就是个模板引擎。模板引擎(这里特指用于Web开发的模板引擎)是为了使用户界面与业务数据(内容)分离而产生的,它可以生成特定格式的文档,用于网站的模板引擎就会生成一个标准的HTML文档。说人话就是 可以根据我这个 规则模板写一个文件,然后我们根据 这个文件 去生成 标准的 HTML 静态文件。
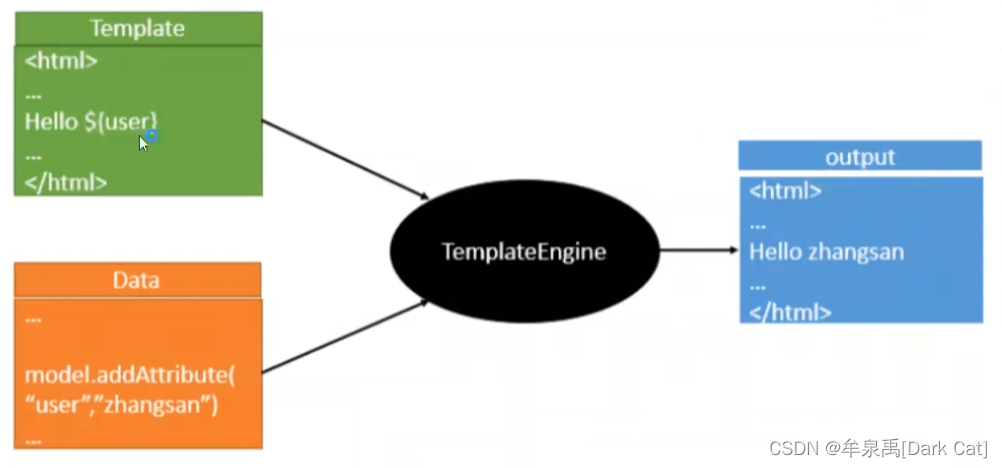
在 生成正常页面之前,肯定 要 经历 模板引擎的处理和渲染。这里主要是处理 数据 和 你写的 那个 模板文件。
7.2 初次使用 Thymeleaf
		<dependency>
			<groupId>org.springframework.boot</groupId>
			<artifactId>spring-boot-starter-thymeleaf</artifactId>
		</dependency>
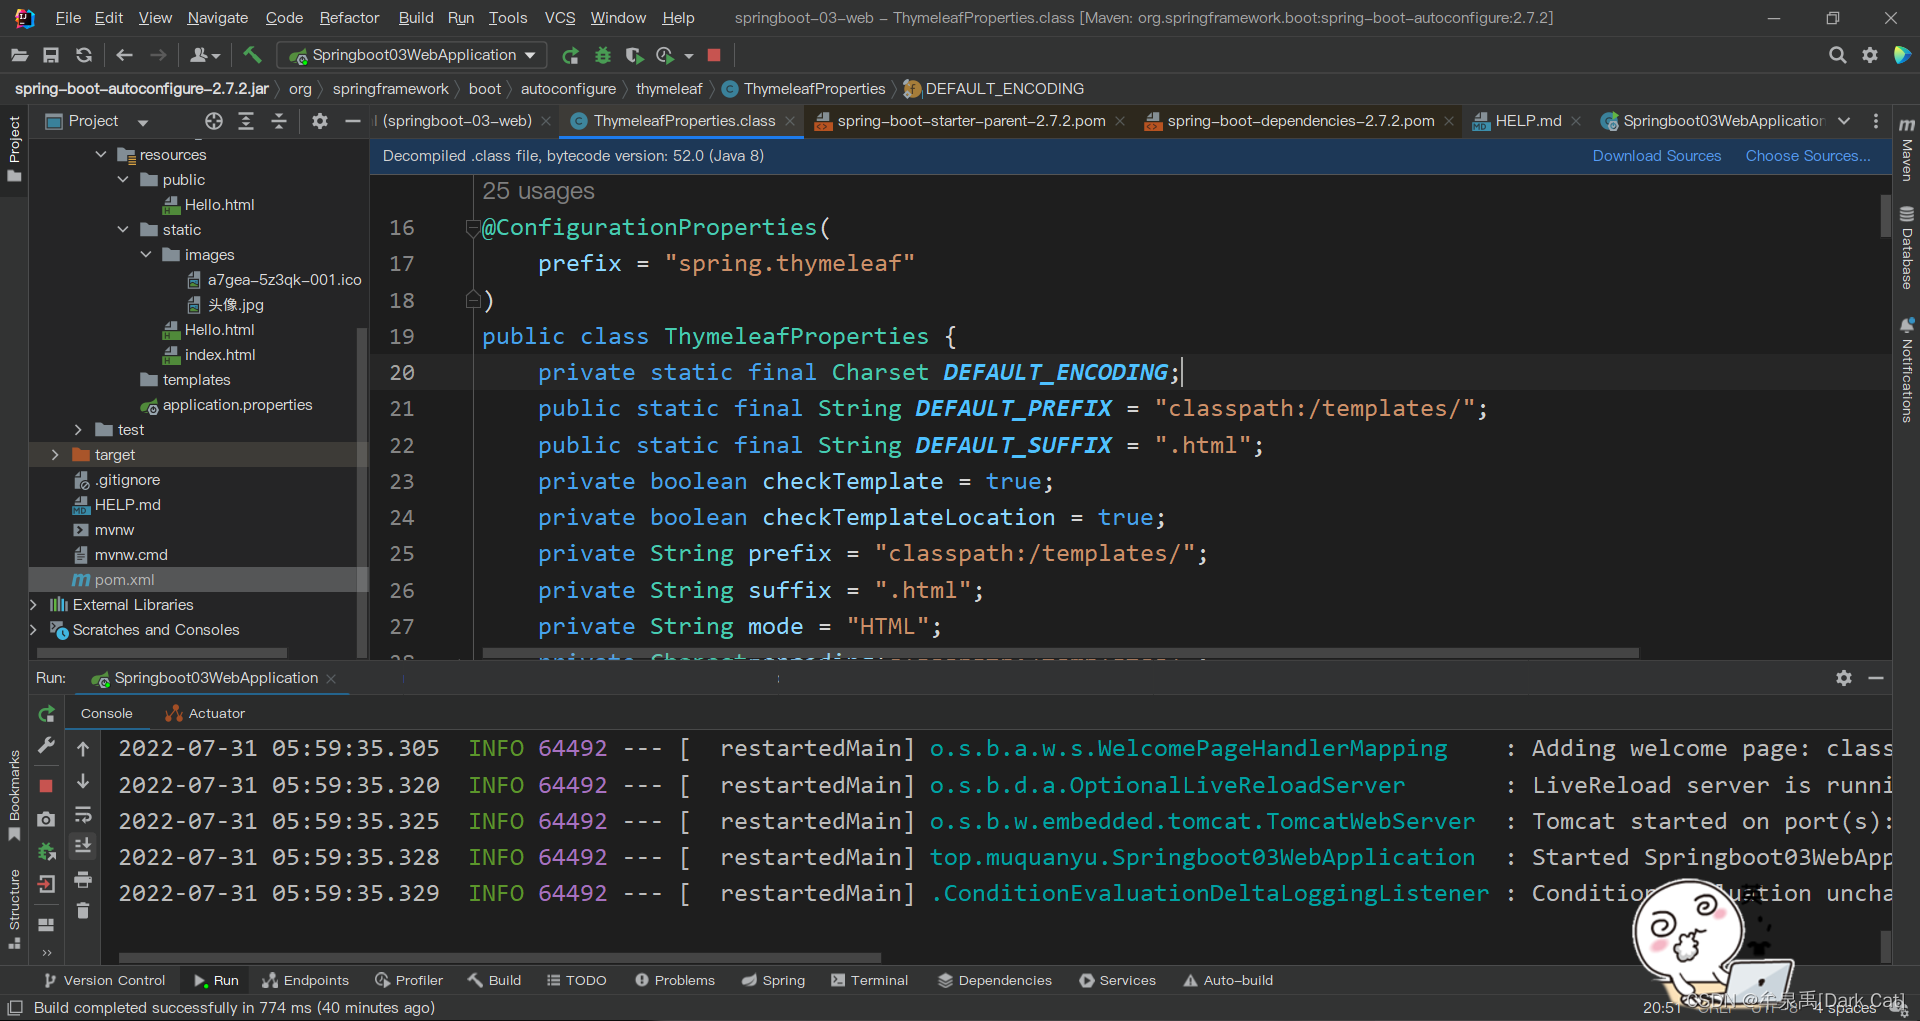
我们要导入的 东西,肯定 都有 Properties 类。要不然没法 通过配置 操作。
你会发现 很有趣的地方,Thymeleaf 的这个地方可以自定义后缀,而现在的 后缀 居然是 .html 。
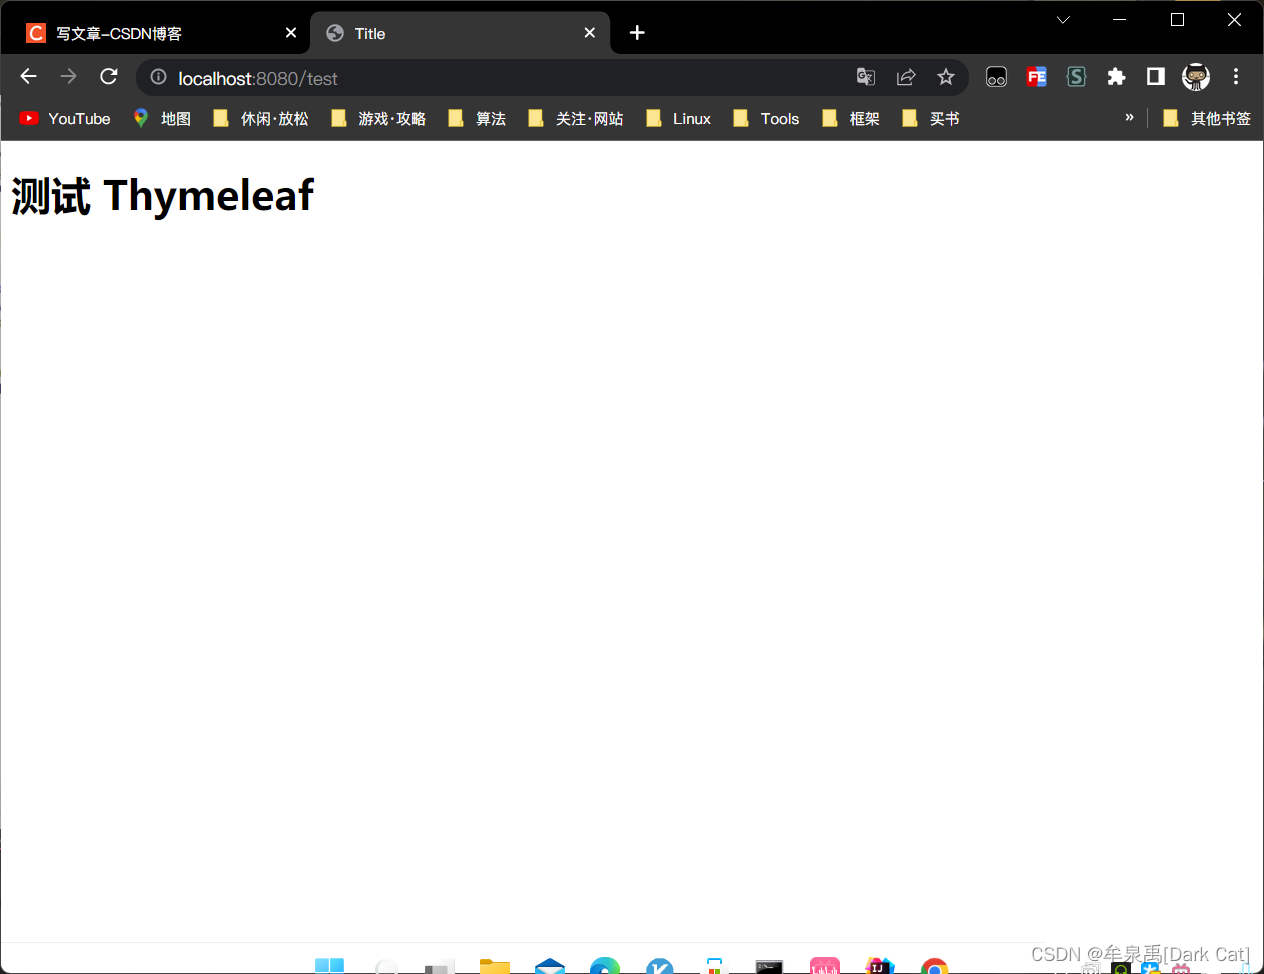
- 简单的写一个 Controller 和 test.html 测试一下。
package top.muquanyu.controller;

import org.springframework.stereotype.Controller;
import org.springframework.web.bind.annotation.RequestBody;
import org.springframework.web.bind.annotation.RequestMapping;
import org.springframework.web.bind.annotation.ResponseBody;
import org.springframework.web.bind.annotation.RestController;

@Controller
public class HelloController {
    @RequestMapping("test")
    public String test(){
        return "test";
    }
}

7.3 Thymeleaf 的语法
- 导入 xmlns 约束
<html xmlns:th="http://www.thymeleaf.org">
- 表达式
- 如果是变量:
${...} - 如果是选择的表达式:
*{...} - 如果是一个消息:
#{...} - 如果是一个 URL 链接:
@{...} - 如果是 Fragment :
~{...}
[[${...}]] 是可以直接写在 标签之间的。
th:属性名:这是 Thymeleaf 的绑定。只有绑定的 属性名 才能 受到 th 的影响,才会生效。
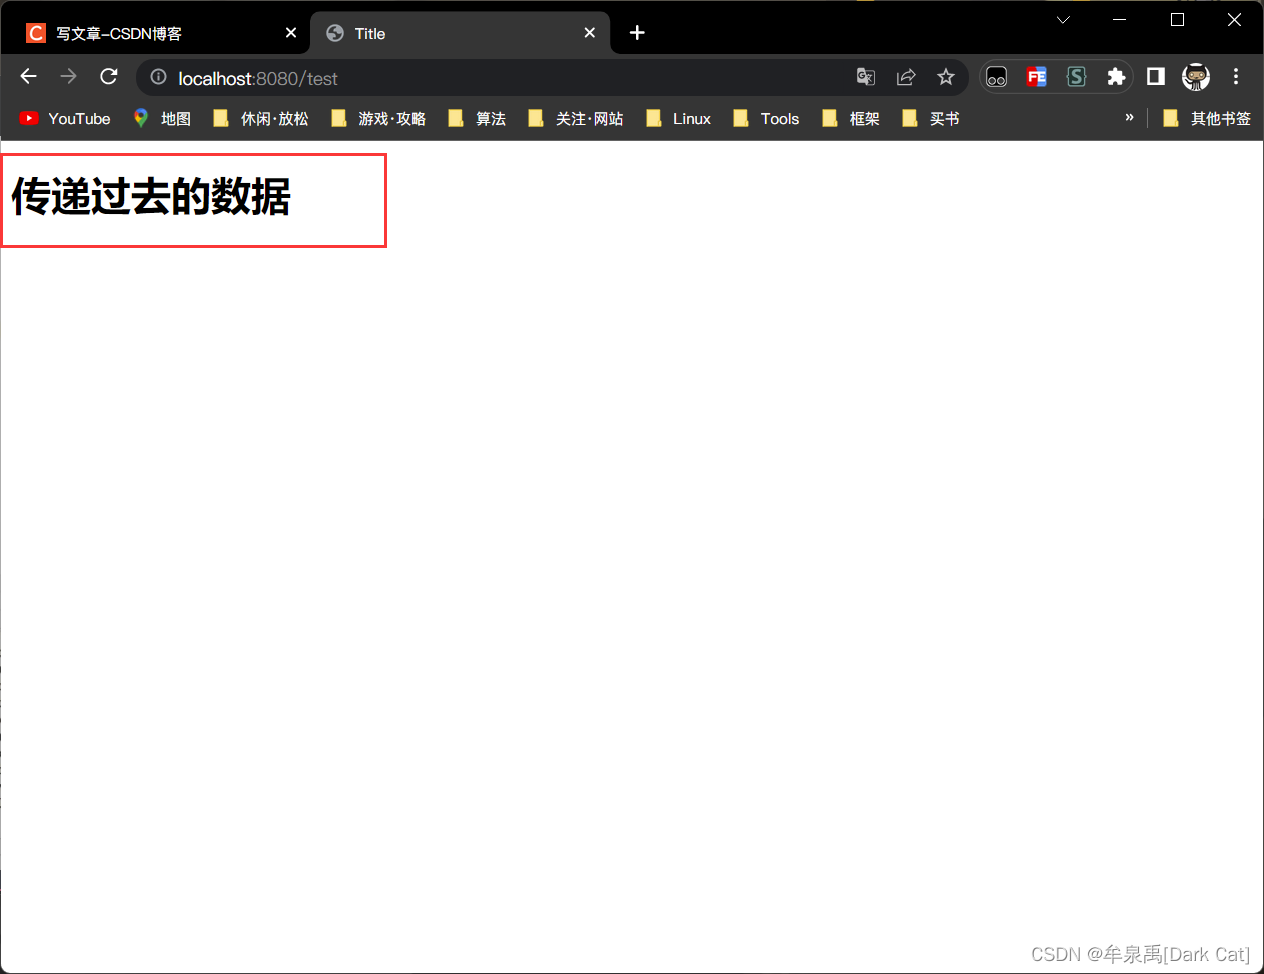
    @RequestMapping("test")
    public String test(Model model){
        model.addAttribute("msg","传递过去的数据");
        return "test";
    }
<!DOCTYPE html>
<html xmlns:th="http://www.thymeleaf.org">
<head>
    <meta charset="UTF-8">
    <title>Title</title>
</head>
<body>
<h1 th:text="${msg}">测试 Thymeleaf</h1>
</body>
</html>
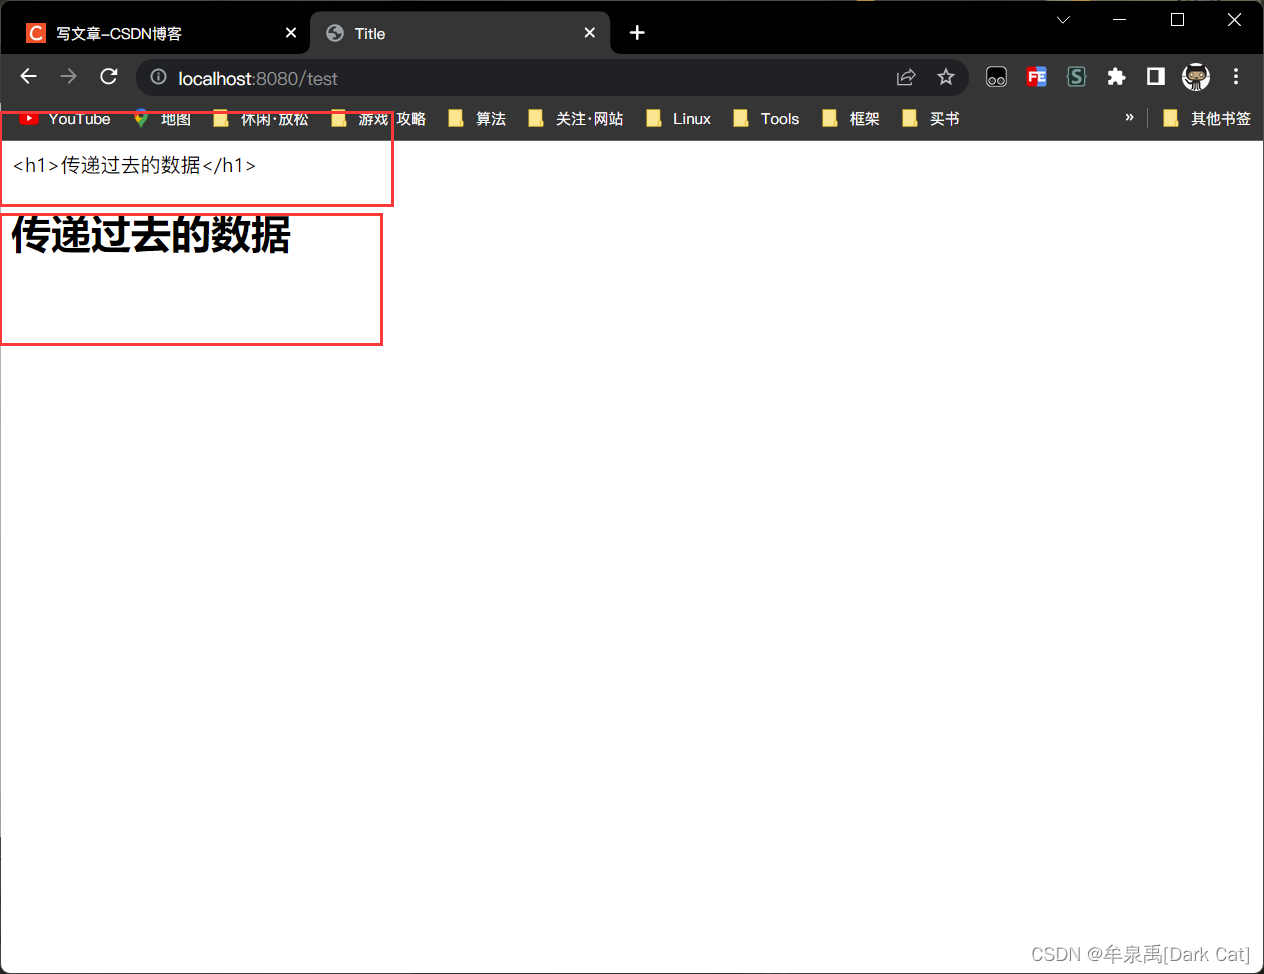
注意:这些表达式里面的内容,是默认 不支持 html 转义的,也就是说 你提供的这个内容 是 一个 html 内容,那么它是不会进行转义的。
如果要想 把 这个内容转义的话。就必须 在属性名的前面 加一个 u
    @RequestMapping("test")
    public String test(Model model){
        model.addAttribute("msg","<h1>传递过去的数据</h1>");
        return "test";
    }
<!DOCTYPE html>
<html xmlns:th="http://www.thymeleaf.org">
<head>
    <meta charset="UTF-8">
    <title>Title</title>
</head>
<body>
<div th:text="${msg}">测试 Thymeleaf</div>
<div th:utext="${msg}">测试 Thymeleaf</div>
</body>
</html>
3. 流程控制
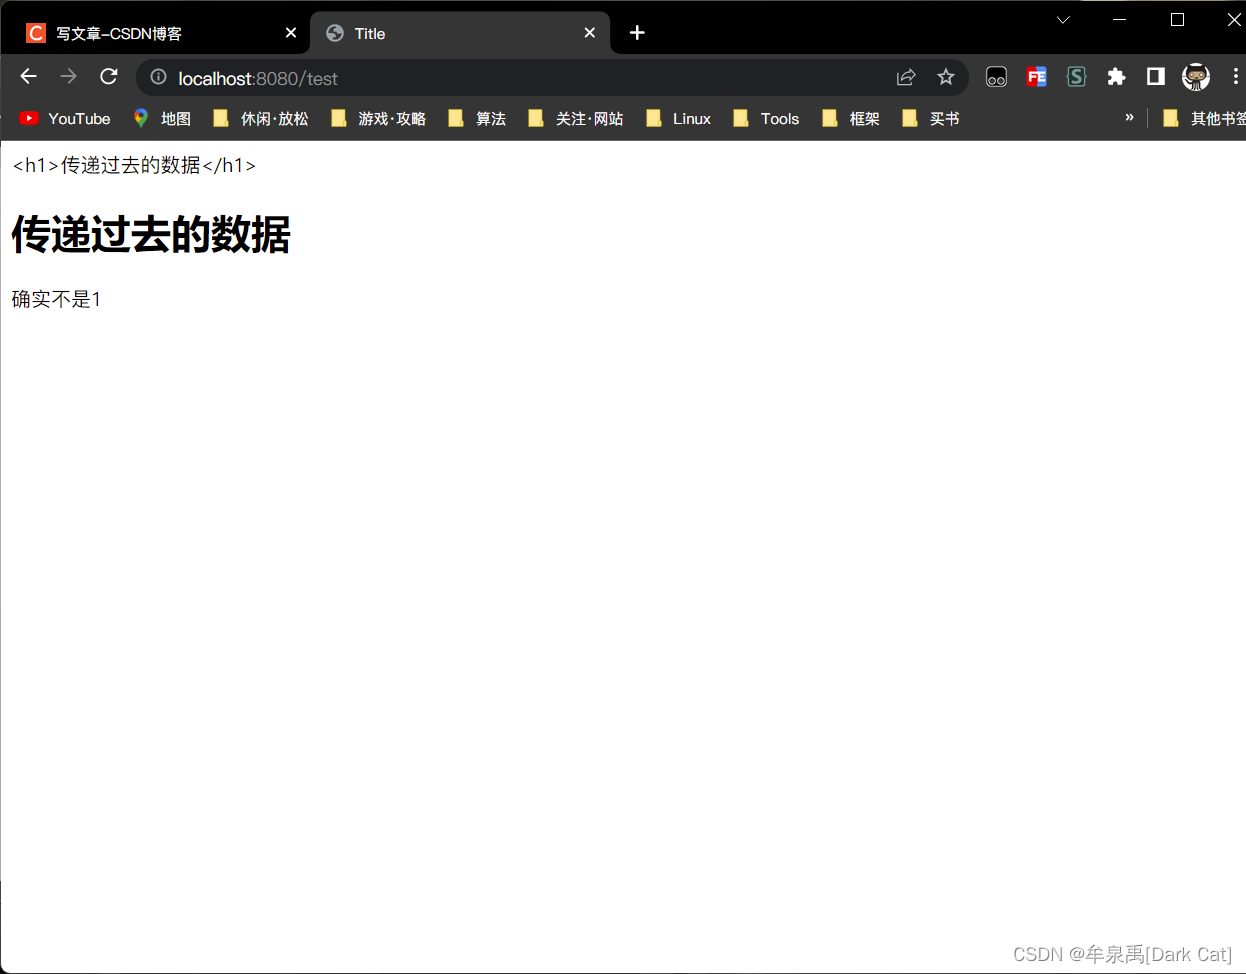
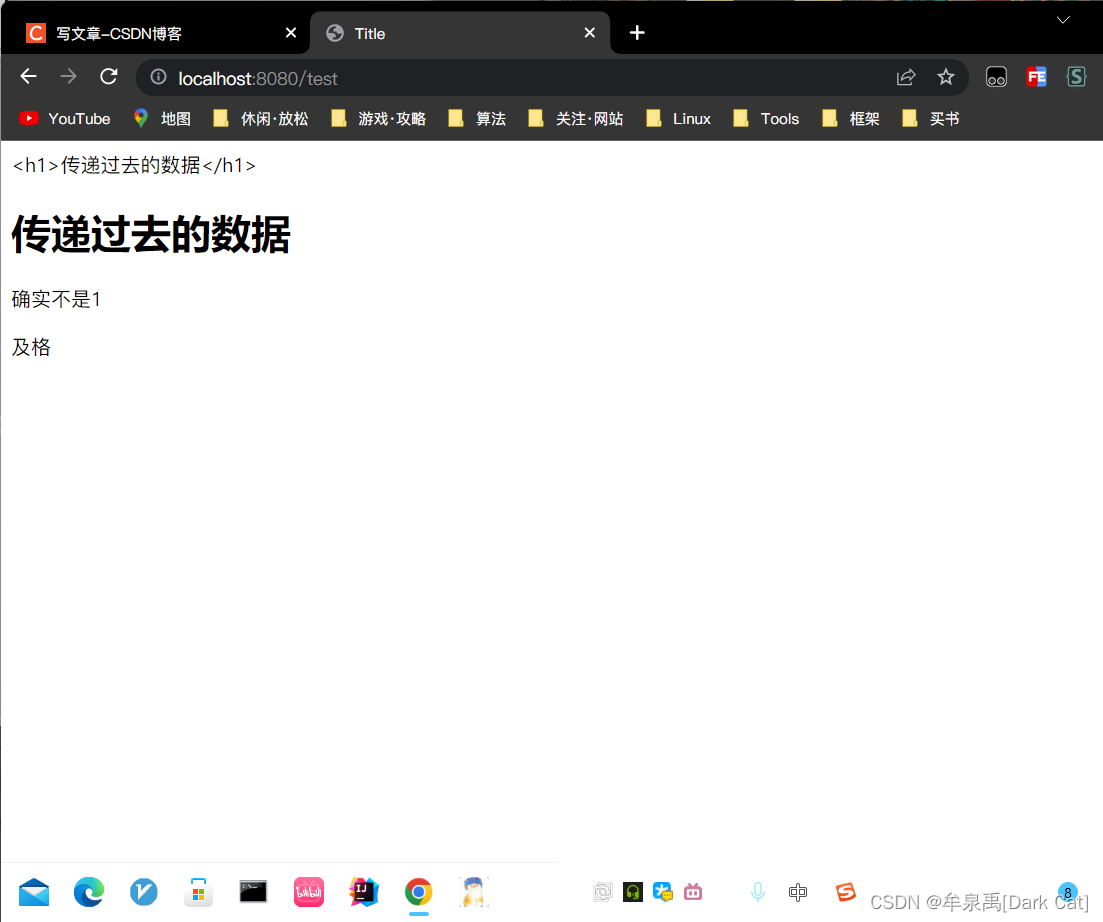
    @RequestMapping("test")
    public String test(Model model){
        model.addAttribute("msg","<h1>传递过去的数据</h1>");
        model.addAttribute("users", Arrays.asList("A","B","C"));
        model.addAttribute("word","2");
        model.addAttribute("grade","61");

        return "test";
    }
- 判断语句
th:if:判断 条件是否成立,如果成立 则 该标签 成立,渲染出来!
th:unless:判断 条件是否成立,如果不成立 则 该标签 成立,渲染出来!
切记:th:if 和 th:unless 没有 成对对应关系!所以这两个 东西 配合使用的时候,一定要 标明 条件!!!
支持 not 表达式 这种形式。代表的是 如果 不。
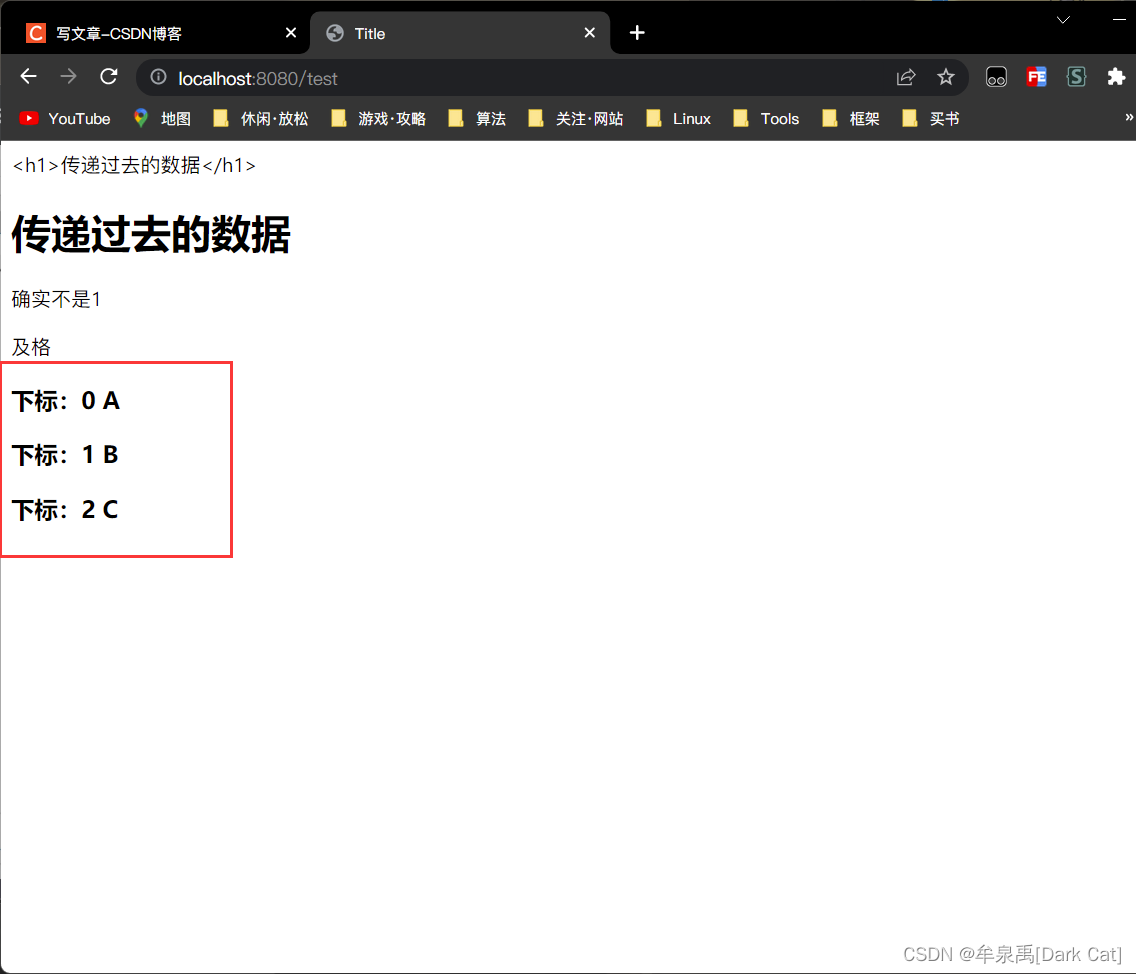
<div th:if="${word} == 1">确实是1</div>
<div th:unless="${word} == 1">确实不是1</div>
th:switch="待匹配的表达式":提供一个 待匹配的表达式,配合着 th:case 使用。
<div th:switch="${grade/10}">
    <p th:case="6">及格</p>
    <p th:case="8">优秀</p>
    <p th:case="9">起飞</p>
    <p th:case="10">超神</p>
    <p th:case="*">不及格</p>
</div>
- 循环语句
th:each="{{元素,item:${users}}}"
第二个 参数 item 是 封装了 user 的 一些属性的对象。这个对象可以拿到 对应的 下标啥的。
<div th:each="user, item:${users}">
    <h3>下标:[[${item.index}]] [[${user}]]</h3>
</div>


 924
924


 被折叠的 条评论
为什么被折叠?
被折叠的 条评论
为什么被折叠?
 到【灌水乐园】发言


