


目录
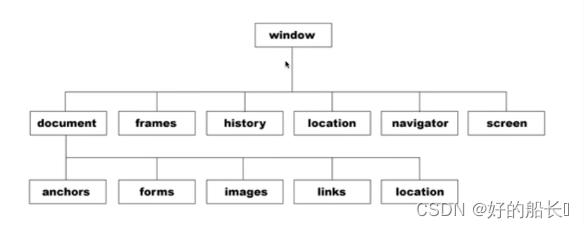
认识BOM
BOM定义
BOM: browser object model (浏览器规则)
Bom 就是浏览器的对象 【模型】,我们如何操控这个对象模型?
系统对话框涉及到的方法
window 方法 (一般情况下window可以省略)
alert(); 弹出警告框
所有的属性和方法和变量前面都可以跟一个window
<script>
       alert("hello");
        window.alert("world");

        function show(){
            alert("hello world");
        }
        window.show();//hello world
        show();    //hello world
    </script>
confirm( ) 弹出一个待确定和取消的提示框
返回值:如果点击确定,返回true
如果点击取消,返回false
    var res = confirm("你确定要离开么?");
        alert(res);
prompt( ) 弹出一个带输入框的提示框
参数:
第一个参数:面板上显示的内容
第二个参数:输入框里面的默认(可以不传入)
返回值:点击确定,返回输入框的内容
点击取消,返回null
     var res = prompt("请输入内容",100);
        alert(res);
open方法
- 第一个参数:跳转的url( ) (可以打开多个相同的窗口)
- 第二个参数:字符串,给打开的窗口起个名字 (再次打开窗口仍然为第一次打开的窗口)
- 第三个参数:一串特殊含义的字符串,可以控制打开窗口的属性
<script>

        function btnClick(){
            //window.open();
            open("https://baidu.com","xxx",'width=400,height=400,top=200,left=200');
        }
</script>

<body>
    <button onclick = "btnClick()">打开窗口</button>
</body>
窗口特征(有些属性在浏览器中可能不兼容,火狐包容度最高)
| channelmode = yes | no | 1 | 0 | 是否使用剧院模式显示窗口,默认为no |
| directories = yes | no | 1 | 0 | 是否添加目录按钮。默认为yes |
| fullscreen = yes | no | 1 | 0 | 是否使用全屏模式显示浏览器。默认是no。处于全屏模式的窗口必须同时处于剧院模式 |
| height = pixels | 窗口文档显示区域的高度,以像素计 |
| left = pixels | 窗口的x坐标。以像素计 |
| location = yes | no | 1 | 0 | 是否显示地址字段。默认是yes |
| menubar = yes | no | 1 | 0 | 是否显示菜单栏。默认是yes |
| resizable = yes | no | 1 | 0 | 窗口是否可调节尺寸。默认是yes |
| scrollbars = yes | no | 1 | 0 | 是否显示滚动条,默认是yes |
| status = yes | no | 1 | 0 | 是否添加状态栏,默认是yes |
| titlebar = yes | no | 1 | 0 | 是否显示标题栏。默认是yes |
| toolbar = yes | no | 1 | 0 | 是否显示浏览器的工具栏。默认是yes |
| top = yes | no | 1 | 0 | 窗口的y坐标 |
| width = pixels | 窗口的文档显示区的宽度。以像素计。 |
history对象
window.history 掌管的是当前窗口(注意不是浏览器)历史记录(只要加载url不一样就会产生历史记录)
属性:history.length 输出当前窗口历史记录的条数
方法:
history.back( ) 返回上一条历史记录
history.forward( ) 前进到下一条历史记录
history.go( )
参数: 0 刷新当前页面
正整数 前进n条记录
负整数 后退n条记录
<body>
    <button onclick="alert(history.length)">获取历史记录的条数</button>
    <button onclick="history.back()">back</button>
    <button onclick="history.forward()">forward</button>
    <button onclick="history.go(2)">go</button>  <!-- 正数:往前跳n个页面;负数:往后跳n个页面;前提:页面存在 -->
</body>
location对象
url:统一资源定位符 协议:// IP(域名) / :端口号 / 路径 /?查询字符串 #锚点
<script>
        /* url:统一资源定位符

        协议:// IP(域名)  / :端口号 / 路径 /?查询字符串 #锚点
        */

        /* 需要安装服务器才能显示
           location.protocol  file:本地磁盘文件访问
                              http:
                              https:(证书认证协议)
        */
        alert(location.protocol);

       /* location.hostname  主机名  IP(在全球范围内找到你当前网络的地址)
                                    域名  IP的别称
       */
        alert(location.hostname);

        /* location.port    端口号(默认隐藏的)
           【注】是当前电脑中使用网络的软件,随机给他分配一个编号    0 ~ 65535
           hostname:port   可以直接定位到当前使用网络的程序
           小细节:浏览器   8080
                   http    80
                   https   443


            location.pathname  路径
            location.search    查询字符串(前后端交互)

            location.hash      锚点

         */
         alert(location.search);
         alert(location.hash);

    </script>
location对象方法
window.location === window.document.location;
location 地址栏(输入url的地方)
属性:
方法:
location.assign(url) 【注】在当前窗口跳转带这个url
location.replace(url) 【注】在当前窗口替换成新的url
location.reload() 【注】刷新窗前窗口
location.reload(true) 不经过浏览器缓存强制从服务器重载
<body>
    <button onclick="location.assign('https://www.baidu.com')">assign</button> <!-- 单双引号交替使用;会有历史记录,可以前进和后退 -->
    <button onclick="location.replace('https://www.baidu.com')">replace</button><!-- 不产生历史记录,不可以后退 -->
    <button onclick="location.reload()">reload</button><!--  -->
</body>
认识DOM
DOM
document object model(文档对象模型) 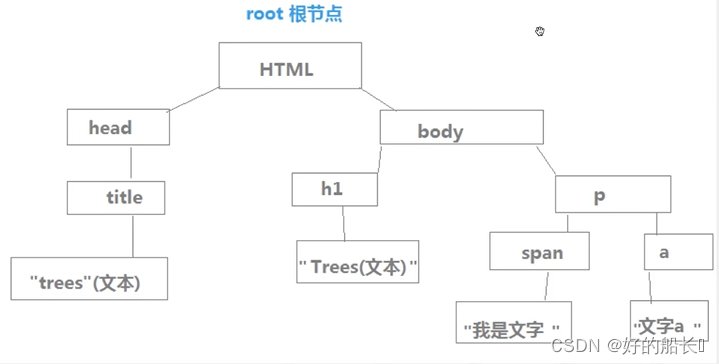
- 节点类型:
- 元素节点 <div></div>
- 属性节点 id = " div1 "
- 文本节点 div文本
- 元素节点的获取
- document.getElementById(id)
- 功能:通过id获取符合元件的元素. (id必须是唯一的)
- 返回值:就是符合条件的一个节点
- document.getElementById(id)
<!DOCTYPE html>
<html lang="en">
<head>
    <meta charset="UTF-8">
    <meta http-equiv="X-UA-Compatible" content="IE=edge">
    <meta name="viewport" content="width=device-width, initial-scale=1.0">
    <title>Document</title>
    <!-- <script>
        var oDiv = document.getElementById("div1");
        alert(oDiv);    //null;原因:代码是按顺序执行
    </script> -->
    <!-- <script>
        //解决方案二
        window.onload = function(){
         //写在这里的代码,是整个页面加载完成以后执行
         var oDiv = document.getElementById("div1");
        alert(oDiv);  //[object HTMLDivElement]
        }
    </script> -->
    <script>
        window.onload = function(){
         var oDiv = document.getElementById("div1");
         /* 获取行间属性的值 */
            alert(oDiv.id);     //div1
            alert(oDiv.title); //hello
            /* 不能直接.class;原因是其为一个关键字
                访问行间class  通过className访问
            */
            alert(oDiv.className);  //box

         /* 设置行间属性的值,在网页内检查代码框可以看见被修改 */
            oDiv.id = "div2";
            oDiv.title = "world";
            oDiv.className = "box4";

            /* 想要获取行间属性的样式 */
            alert(oDiv.style);          //[object CSSStyleDeclaration]
            alert(oDiv.style.width);    //300px
            alert(oDiv.style.height);   //300px
            /* 如果css样式带‘-’,将‘-’去掉,从第二个单词开始首字母大写 */
            alert(oDiv.style.backgroundColor);      //red

        /* 修改宽高和背景颜色 */
            oDiv.style.backgroundColor = "blue";
        }
    </script>
</head>
<body>
    <!-- 行间样式写在标签内的通过Js中的获取行间样式属性方法可以访问到,但如果将样式写在css中,用该方法不能获取属性值 -->
    <div id="div1" title="hello" class="box" style="width: 300px; height: 300px; background-color: red;">div文本</div>
</body>
<!-- 解决方案一:放在boay下面
<script>
    var oDiv = document.getElementById("div1");
    alert(oDiv);  //[object HTMLDivElement]
</script> -->
</html>
获取元素节点
- node.getElementsByTagName(标签名);
- 功能:从node节点开始,通过标签名获取符合条件的元素节点
- node.getElementsByClassName(class名字) IE8以下不兼容
- 功能:通过class名字获取符合条件的元素节点
- document.getElemrntsByName(name属性的值,只能在全局查找)
- 功能:通过name属性的值获取符合条件的元素节点
- 【注】一般使用在表单元素里
- 【注】node可以是任意节点,想要获取全局,使用document,document代表整个页面所有标签,但返回的都是伪数组
<!DOCTYPE html>
<html lang="en">
<head>
    <meta charset="UTF-8">
    <meta http-equiv="X-UA-Compatible" content="IE=edge">
    <meta name="viewport" content="width=device-width, initial-scale=1.0">
    <title>Document</title>
    <script>
       window.onload = function(){
            var aLis1 = document.getElementsByTagName("li");
            // alert(aLis1); //[object HTMLCollection],返回的是个对象,使用起来和数组类似,一般情况,把这种叫做伪数组/类数组(人为命名,官方没有这种概念).
            alert(aLis1.length); //10
       }
        window.onload = function(){
           var oOl = document.getElementById("ol1");
           var aLis2 = oOl.getElementsByTagName("li");
          //获取ol下的li节点
          alert(aLis2.length);   //4
          for(var i = 0; i < aLis2.length; i++){
              aLis2[i].style.backgroundColor = "red";
          }


          var nodes1 = document.getElementsByClassName("box");
          alert(nodes1.length);  //5
          for(var i = 0; i < nodes1.length; i++){
              nodes1[i].style.backgroundColor = "red";
          }


          var oUl = document.getElementById("ul1");
          var nodes2 = oUl.getElementsByClassName("box");
          alert(nodes2.length);  //3
          for(var i = 0; i < nodes2.length; i++){
              nodes2[i].style.backgroundColor = "red";
          }


          var nodes3 = document.getElementsByName("hello");
          alert(nodes3.length);   //3
          for(var i = 0; i < nodes3.length; i++){
              nodes3[i].style.backgroundColor = "red";
          }
        }
    </script>
</head>
<body>
    <ul id="ul1">
        <li>111</li>
        <li class="box">111</li>
        <li>111</li>
        <li>111</li>
        <li class="box">111</li>
        <li name="hello">111</li>
        <div class="box" name="hello">div</div>
    </ul>
    <input type="text" name="hello"/>
    <span name="hello">span</span>
    <ol id="ol1">
        <li>222</li>
        <li class="box">222</li>
        <li class="box">222</li>
        <li>222</li>
    </ol>
</body>
</html>- document.querySelector( )
- 返回值:一个元素节点,找到符合条件的第一个元素节点
- document.querySelectorAll( )
- 返回值:返回值是一个伪数组
- 参数:字符串 CSS选择器格式字符串
<script>
        window.onload = function(){
            /* document.querySelector:符合条件的第一个节点 */
            //id = ol1
            var node = document.querySelector("#ol1"); //调用格式使用css格式
            node.style.backgroundColor = "red";

            //tagName = "li"
            var node1 = document.querySelector("li");   //第一个元素节点
            node1.style.backgroundColor = "yellow";

            //class = box
            var node2 = document.querySelector(".box"); //调用格式使用css格式
            node2.style.backgroundColor = "purple";

            //获取ol下第一个 class = box
            var node3 = document.querySelector("ol .box"); //调用格式使用css格式,注意空格
            node3.style.backgroundColor = "black";

            //name = hello
            var node4 = document.querySelector("[name = hello]"); //调用格式使用css格式
            node4.style.backgroundColor = "pink";

            /* document.querySelectorAll:符合条件的所有节点 */
            // var nodes = document.querySelectorAll("ol .box");    //返回的是伪数组
            // alert(nodes.length);
            // for(var i = 0; i < nodes.length; i++){
            //     nodes[i].style.backgroundColor = "blue";
            // }
        }
    </script>
</head>
<body>
    <ul id="ul1">
        <li>111</li>
        <li class="box">111</li>
        <li>111</li>
        <li>111</li>
        <li class="box">111</li>
        <li name="hello">111</li>
        <div class="box" name="hello">div</div>
    </ul>
    <input type="text" name="hello"/>
    <span name="hello">span</span>
    <ol id="ol1">
        <li>222</li>
        <li class="box">222</li>
        <li class="box">222</li>
        <li>222</li>
    </ol>
</body>
自定义byClassName方法
<script>
        /*
            node.getElementsByClassName();
         */
         function elementsByClassName(node,classStr){
             //1、获取node这个节点下所有的子节点
             var nodes = node.getElementsByTagName("*");
             var arr = [];  //存放符合条件的节点
             for(var i = 0; i < nodes.length; i++){
                 if(nodes[i].className === classStr){
                     arr.push(nodes[i]);
                 }
                return arr;
             }

             window.onload = function(){
                 var oL = document.getElementById("ol1");
                 var nodes = elementsByClassName(oL,"box");
                 alert(nodes.length);
                 for(var i = 0; i < nodes.length; i++){
                     nodes[i].style.backgroundColor = "red";
                 }
             }

         }
    </script>
</head>
<body>
    <ul id="ul1">
        <li>111</li>
        <li class="box">111</li>
        <li>111</li>
        <li>111</li>
        <li class="box">111</li>
        <li name="hello">111</li>
        <div class="box" name="hello">div</div>
    </ul>
    <input type="text" name="hello"/>
    <span name="hello">span</span>
    <ol id="ol1">
        <li>222</li>
        <li class="box">222</li>
        <li class="box">222</li>
        <li>222</li>
    </ol>
</body>
获取当前有效样式
<script>
        window.onload = function(){
            var oDiv = document.getElementById("div1");
            /*
                通过 .style.xxx的方式只能访问内联的css样式。
                权重最高的css样式才能生效
            */
            // alert(oDiv.style.width);            //200px
            // alert(oDiv.style.backgroundColor);  //red
            // alert(oDiv.style.height);           //无输出

            /*
                获取当前的有效样式:
                    系统提供了两个方法(不同浏览器):
            */
            // alert(oDiv.currentStyle['height']);     //IE兼容
            // alert(getComputedStyle(oDiv)["height"]);    //300px,火狐、谷歌兼容

            // alert(getStyle(oDiv,"height"));   //300px

            /*
                设置样式
                  .style.xxx方式设置css样式
            */
            var oBtn = document.getElementById("btn1");
            oBtn.onclick = function(){
                oDiv.style.backgroundColor = "orange";
                oDiv.style.height = "500px";
            }
        }
        //跨浏览器的兼容
        function getStyle(node,cssStyle){
            return node.currentStyle ? node.currentStyle[cssStyle] : getComputedStyle(node)[cssStyle];
        }
    </script>
</head>
<body>
    <div id="div1" style="width: 200px; background-color: red;" class="box"></div>
    <button id="btn1">修改样式</button>
</body>
改变字体颜色和大小案例
<!DOCTYPE html>
<html lang="en">
<head>
    <meta charset="UTF-8">
    <meta http-equiv="X-UA-Compatible" content="IE=edge">
    <meta name="viewport" content="width=device-width, initial-scale=1.0">
    <title>Document</title>
    <style>
        #div1{width: 400px; height: 200px; background-color: white; border: 1px solid black; margin: 100px auto; text-align: center; line-height: 200px; font-size: 18px;}
    </style>
    <script>
        //跨浏览器的兼容
        function getStyle(node,cssStyle){
            return node.currentStyle ? node.currentStyle[cssStyle] : getComputedStyle(node)[cssStyle];
        }
        /*
            写一个定时器,每一秒修改一次div文本颜色和文字大小,
            最开始这个文字是默认大小,大小开始增大,当增大了6次以后,
            文字大小开始缩小,缩小6次,文字再开始增大。
        */
       /*
        颜色随机:
            rgba(255,255,255,0);

            parseInt(Math.random() * 256)
       */

       function randomColor(){
           var str = "rgba(" + parseInt(Math.random() * 256) + "," + parseInt(Math.random() * 256) + "," + parseInt(Math.random() * 256) + "," + parseInt(Math.random() * 256) + ")";
           return str;
       }
    //    alert(randomColor());

        window.onload = function(){
            var oDiv = document.getElementById("div1");
            var speed = 5;  //每一次变化的大小
            var count = 0;  //计数
            setInterval(function(){
                oDiv.style.color = randomColor();

                //1、将字体上一次的字体大小取出
                var iCur = parseInt(getStyle(oDiv,'fontSize'));
                // alert(iCur);

                //2、变化字体大小,重新赋值回去
                oDiv.style.fontSize = (iCur + speed) + "px";

                count++;
                if(count % 6 == 0){
                    speed *= -1;
                }
            }, 1000);
        }
    </script>
</head>
<body>
    <div id="div1">
        div文本
    </div>
</body>
</html>
attribute和元素节点属性
setAttribute
getAttribute
removeAttribute
window.onload = function(){
            var oDiv = document.getElementById("div1");

            alert(oDiv.id); //div1
            alert(oDiv.title);  //hello
            alert(oDiv.name);   //undefined

            /*
            区别:
                1、class的访问
                2、支持自定义属性
                3、
            */
            alert(oDiv.getAttribute("id")); //div1
            alert(oDiv.getAttribute("title"));  //hello

            alert(oDiv.className);  //box
            alert(oDiv.getAttribute("class"));  //box

            alert(oDiv.xxx);   //undefined
            alert(oDiv.getAttribute("xxx"));   //yyy

            oDiv.className = 'box4';
            oDiv.zzz = 'ooo';   //添加成功,但行间显示不了
            alert(oDiv.zzz);    //000

            oDiv.setAttribute("class",'box5');
            oDiv.setAttribute("zzz",'ooo');

            oDiv.className = '';    //只是用空字符串替换了
            oDiv.removeAttribute("title");  //真正的删除

}![]()
![]()
![]()
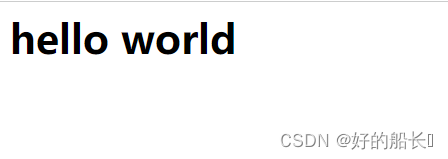
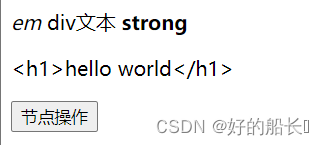
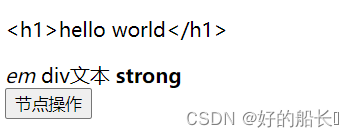
innerHTML 获取标签间内容 会解析标签
innerText 获取标签间纯文本 不会解析标签,设置纯文本
outerHTML 从外标签开始到外标签结束 会解析标签
   <script>
        window.onload = function(){
            var oDiv = document.getElementById("div1");
            alert(oDiv.innerHTML);

            //赋值
            oDiv.innerHTML = "<h1>hello world</h1>";  /* 解析标签间的内容 */

            alert(oDiv.innerText);  //div文本em文本strong文本

            alert(oDiv.outerHTML);  //<div id="div1">div文本<em>em文本</em><strong>strong文本</strong></div>

            oDiv.outerHTML = "<h1>hello world </h1>";

        }
    </script>
<body>
    <div id="div1">div文本<em>em文本</em><strong>strong文本</strong></div>
</body>
获取子节点
childNodes 访问当前节点下所有的子节点
firstChild 访问子节点中的首位
lastChild 访问子节点中的最后一位
nextSibling 访问当前节点兄弟节点中的下一个节点
previousSibling 访问当前节点兄弟节点中的上一个节点
【注】上述这些属性都包含文本节点
【注】上下方法功能一致,但下述方法只获取子节点中的元素节点(IE8以下不兼容)
children
firstElementChild
lastElementChild
nextElementSibling
previousElementSibling
nodeType nodeName nodeValue
元素节点 1 标签名 null
属性节点 2 属性名 属性值
文本节点 3 #text 文本内容
        /*
                nodeType            nodeName            nodeValue
        元素节点   1                 标签名               null
        属性节点   2                 属性名               属性值
        文本节点   3                 #text               文本内容
        */
        window.onload = function(){
            var oDiv = document.getElementById("div1");
            alert(oDiv.childNodes.length);  //3
            alert(oDiv.childNodes[0]);  //[object HTMLElement]
            alert(oDiv.childNodes[1]);  //[object Text]; 文本节点  文本节点通过元素节点的子节点获取
            alert(oDiv.childNodes[2]);  //[object HTMLElement]

            alert(oDiv.childNodes[0].nodeType); //1 元素节点
            alert(oDiv.childNodes[1].nodeType); //3 文本节点
            alert(oDiv.childNodes[2].nodeType); //1 元素节点

            alert(oDiv.childNodes[0].nodeName); //EM
            alert(oDiv.childNodes[1].nodeValue);//div文本
            alert(oDiv.childNodes[2].nodeValue);//null

            alert(oDiv.firstChild.nodeName); //EM
            alert(oDiv.lastChild.nodeName); //STRONG
        }
空格、回车、换行 看不见,但是字符
<script>
        window.onload = function(){
            var oDiv = document.getElementById("div1");
            alert(oDiv.childNodes.length);  //5
            for(var i = 0; i < oDiv.childNodes.length; i++){
                alert(oDiv.childNodes[i].nodeType);//3,1,3,1,3
            }
        }
</script>
<body>
    <div id="div1">
        <em>em文本</em>
        div文本
        <strong>strong文本</strong>
    </div>
</body>
<script>
window.onload = function(){
var oDiv = document.getElementById("div1");
alert(oDiv.childNodes.length); //5
for(var i = 0; i < oDiv.childNodes.length; i++){
alert(oDiv.childNodes[i].nodeType);//3,1,3,1,3
}
alert(oDiv.children.length);//2
alert(oDiv.firstElementChild.nodeName);//EM
alert(oDiv.lastElementChild.nodeName);//STRONG
alert(oDiv.firstElementChild.nextSibling.nodeValue);//div文本
alert(oDiv.firstElementChild.nextElementSibling.nodeName);//STRONG
}
</script>
<body>
<div id="div1">
<em>em文本</em>
div文本
<strong>strong文本</strong>
</div>
</body>属性节点attributes
attributes:获取当前元素节点上的所有的属性的节点
<script>
        /*
            集合:
                1、无序
                2、不重复
        */
        window.onload = function(){
            var oDiv = document.getElementById("div1");
            // alert(oDiv.attributes);//[object NamedNodeMap] 属性节点集合对象

            //获取其中的某一个属性节点
            //title = hello
            alert(oDiv.attributes.getNamedItem("title"));   //[object Attr]
            alert(oDiv.attributes.getNamedItem("title").nodeName);//title
            alert(oDiv.attributes.getNamedItem("title").nodeType);//2
            alert(oDiv.attributes.getNamedItem("title").nodeValue);//hello

            /* 简化版 */
            alert(oDiv.attributes["title"].nodeName);
            alert(oDiv.attributes["title"].nodeType);
            alert(oDiv.attributes["title"].nodeValue);
        }
    </script>
<body>
    <div id="div1" title="hello" class="box">div文本</div>
</body>
DOM的节点操作
- document.write( ) 会覆盖页面原有内容
<script>
window.onload = function(){
var oBtn = document.getElementById("btn1");
oBtn.onclick = function(){
document.write("<h1>hello world</h1>");
}
}
</script>
<body>
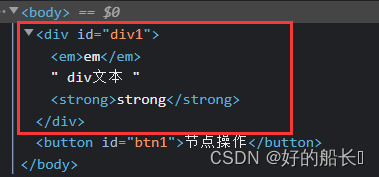
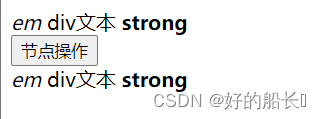
<div id="div1">
<em>em</em>
div文本
<strong>strong</strong>
</div>
<button id="btn1">节点操作</button>
</body>
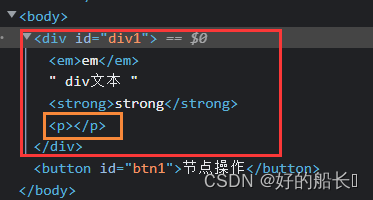
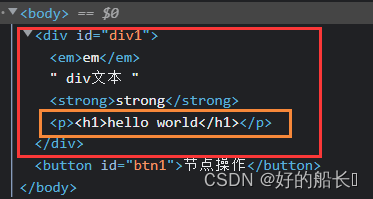
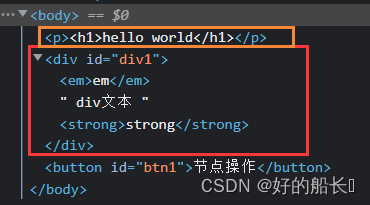
- creatElement( )
格式:document.creatElement( )
参数:标签名
返回值:创建好的这个节点
- appendChild( )
格式:node1.appendChild(node2);
功能:将node2节点插入到node1节点子节点的末尾
<script>
        window.onload = function(){
            var oBtn = document.getElementById("btn1");
            var oDiv = document.getElementById("div1");
            oBtn.onclick = function(){
                var oP = document.createElement("p");
                oDiv.appendChild(oP);
            }
        }
    </script>
<body>
    <div id="div1">
        <em>em</em>
        div文本
        <strong>strong</strong>
    </div>
    <button id="btn1">节点操作</button>
</body>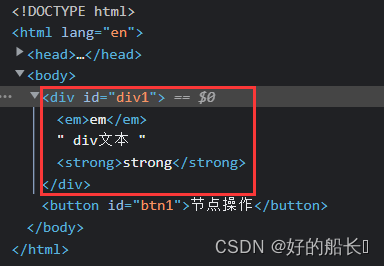
- creatTextNode( )
格式:document.creatTextNode(文本);
功能:创建文本节点(纯文本)
<script>
        window.onload = function(){
            var oBtn = document.getElementById("btn1");
            var oDiv = document.getElementById("div1");
            oBtn.onclick = function(){
                var oP = document.createElement("p");
                var oTxt = document.createTextNode("<h1>hello world</h1>");

                oP.appendChild(oTxt);
                oDiv.appendChild(oP);
            }
        }
    </script>

<body>
    <div id="div1">
        <em>em</em>
        div文本
        <strong>strong</strong>
    </div>
    <button id="btn1">节点操作</button>
</body> 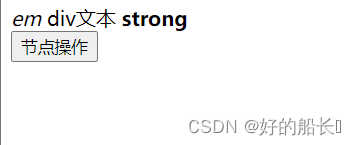
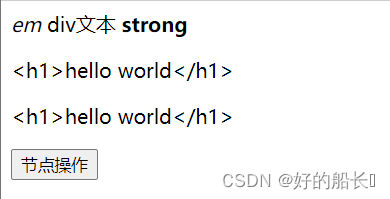

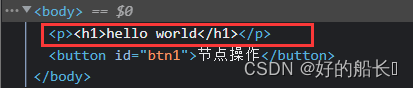
- insertBefore( )
格式:box1.parentNode.insertBefore(box2,box1);
功能:将box2添加到box1的前面
<script>
        window.onload = function(){
            var oBtn = document.getElementById("btn1");
            var oDiv = document.getElementById("div1");
            oBtn.onclick = function(){
                var oP = document.createElement("p");
                var oTxt = document.createTextNode("<h1>hello world</h1>");

                oP.appendChild(oTxt);

                //将oP节点插入到oDiv节点的前面
                document.body.insertBefore(oP,oDiv);
            }
        }
    </script>

<body>
    <div id="div1">
        <em>em</em>
        div文本
        <strong>strong</strong>
    </div>
    <button id="btn1">节点操作</button>
</body> 
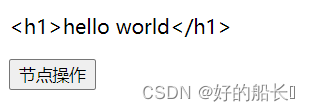
- replaceChild( )
格式:box1.parentNode.replaceChild(box2,box1);
功能:用box2节点将box1节点替换掉
<script>
        window.onload = function(){
            var oBtn = document.getElementById("btn1");
            var oDiv = document.getElementById("div1");
            oBtn.onclick = function(){
                var oP = document.createElement("p");
                var oTxt = document.createTextNode("<h1>hello world</h1>");

                oP.appendChild(oTxt);

                //用oP节点,将oDiv节点替换掉
                document.body.replaceChild(oP,oDiv);
            }
        }
    </script>

<body>
    <div id="div1">
        <em>em</em>
        div文本
        <strong>strong</strong>
    </div>
    <button id="btn1">节点操作</button>
</body>
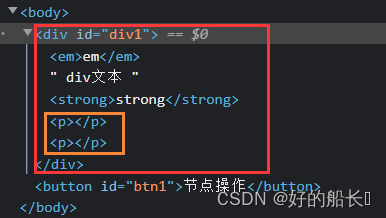
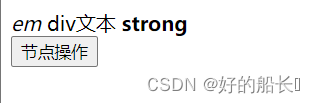
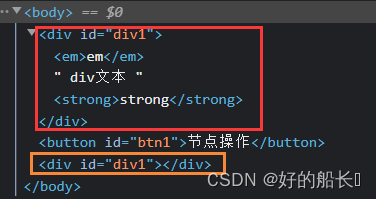
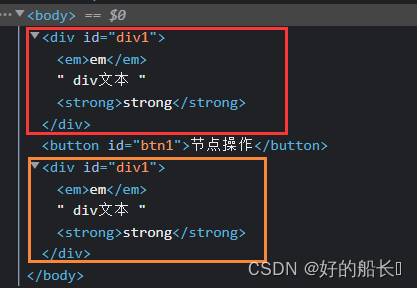
- cloneNode( )
格式1:node.cloneNode( ); 【注】标签内的嵌套标签没有被克隆
格式2:node.cloneNode(true); 克隆节点本身和子节点
返回值:克隆出来的新节点
格式1:
    <script>
        window.onload = function(){
            var oBtn = document.getElementById("btn1");
            var oDiv = document.getElementById("div1");
            oBtn.onclick = function(){
                var newNode = oDiv.cloneNode();
                document.body.appendChild(newNode,oDiv);
            }
        }
    </script>

<body>
    <div id="div1">
        <em>em</em>
        div文本
        <strong>strong</strong>
    </div>
    <button id="btn1">节点操作</button>
</body>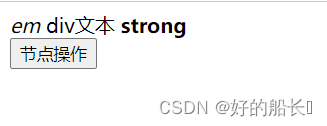
格式2:
 <script>
        window.onload = function(){
            var oBtn = document.getElementById("btn1");
            var oDiv = document.getElementById("div1");
            oBtn.onclick = function(){
                var newNode = oDiv.cloneNode(true);
                document.body.appendChild(newNode,oDiv);
            }
        }
    </script>

<body>
    <div id="div1">
        <em>em</em>
        div文本
        <strong>strong</strong>
    </div>
    <button id="btn1">节点操作</button>
</body>
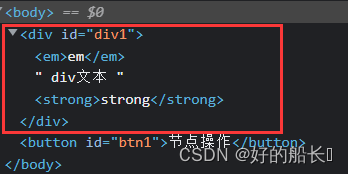
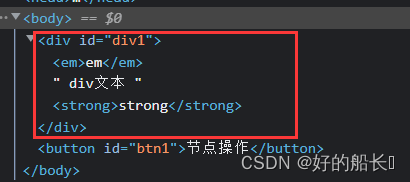
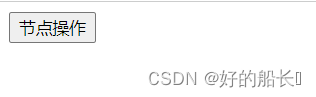
- removeChild( )
格式:box.parentNode.removeChild( box );
功能:将box节点从页面上删除
<script>
        window.onload = function(){
            var oBtn = document.getElementById("btn1");
            var oDiv = document.getElementById("div1");
            oBtn.onclick = function(){
                //删除div节点
                document.body.removeChild(oDiv);
            }
        }
    </script>
<body>
    <div id="div1">
        <em>em</em>
        div文本
        <strong>strong</strong>
    </div>
    <button id="btn1">节点操作</button>
</body>

节点操作案例
<!DOCTYPE html>
<html lang="en">
<head>
    <meta charset="UTF-8">
    <meta http-equiv="X-UA-Compatible" content="IE=edge">
    <meta name="viewport" content="width=device-width, initial-scale=1.0">
    <title>Document</title>
    <style>
        #div1{width: 400px; height: 100px; background-color: orange;}
        #div2{width: 400px; height: 500px; background-color: peachpuff;}
        #input1{width: 300px; height: 30px; font-size: 18px; margin: 5px 10px;}
        #div1 button{width: 100px; height: 30px; font-size: 18px; background-color: black; color: white; margin: 15px 10px;}
        #div2 div{border-bottom: 1px dashed gray; padding: 2px; position: relative;}
        #div2 div button{position: absolute; right: 0px;}
    </style>
    <script src="tool.js"></script>
    <script>
        window.onload = function(){
            var oDiv1 = document.getElementById("div1");
            var oDiv2 = document.getElementById("div2");
            var oInput = document.getElementById("input1");

            //获取div1下面所有的button
            var aBtns = oDiv1.getElementsByTagName("button");

            //分别给三个按钮添加不同的点击函数
            aBtns[0].onclick = function(){
                if(!oInput.value){
                    alert("输入的内容不得为空");
                }else{
                    //获取到输入框的内容,创建节点添加到页面上
                    var newDiv = document.createElement("div");
                    var oTxt = document.createTextNode(oInput.value);
                    newDiv.appendChild(oTxt);
                    newDiv.style.backgroundColor = randomColor();

                    oDiv2.appendChild(newDiv);
                    oInput.value = '';
                }
            }

            aBtns[1].onclick = function(){
                //删除最后一个节点
                oDiv2.removeChild(oDiv2.lastChild);
            }

            aBtns[2].onclick = function(){
                //拷贝最后一个节点,再添加到页面上
                var newNode = oDiv2.lastChild.cloneNode(true);
                oDiv2.appendChild(newNode);
            }
        }
    </script>
</head>
<body>
    <div id="div1">
        <input type="text" id="input1" placeholder="输入内容"> <br/>
        <button>增加</button>
        <button>删除</button>
        <button>拷贝</button>
    </div>
    <div id="div2">
        <!-- <div>xxx <button>x</button> </div>
        <div>xxx <button>x</button> </div>
        <div>xxx <button>x</button> </div> -->
    </div>
</body>
</html>
this和快速找到当前点击按钮下标
<script>
         window.onload = function(){
             var aBtns = document.getElementsByTagName("button");
             for(var i = 0; i < aBtns.length; i++){
                 aBtns[i].onclick = function(){
                     alert(i);  //点击每一个按钮,弹出来的i的值都为3;原因:代码先执行结束,才有你的点击事件,此时i的值已经被赋为3了,所以不论点击哪一个按钮,i的值都是3
                 }
             }
             alert("循环结束,i = " + i);
         }
    </script>
<body>
    <button>按钮1</button>
    <button>按钮2</button>
    <button>按钮3</button>
this关键字
概念:只要封装函数,任何一个函数系统都会内置一个叫做 this的变量
this变量存储的是地址,是当前函数主任的地址。
【注】this永远指向当前函数的主人。函数的主任要通过当前上下文判断
this类似于现实生活中,用到的“我”。
<script>
        var person = {
            username:"钢铁侠",
            sex:"男",
            show: function(){
                alert(person.username); //钢铁侠
                alert(this.username);   //钢铁侠
            }
        };

        //给对象添加方法
        person.xxx = function(){

        }

        // person.show();

        //全局函数下,没有主人,默认为window
        function show(){
            alert(this);
        }
        // show(); //[object Window]
        // window.show();//[object Window]

        window.onload = function(){
            var oBtn = document.getElementById("btn1");
            oBtn.onclick = function(){
                alert(this);
            }
        }

    </script>

<body>
    <button id="btn1">按钮</button>
</body>
修改版快速找到按钮下标:
<script>
         window.onload = function(){
             var aBtns = document.getElementsByTagName("button");
             for(var i = 0; i < aBtns.length; i++){
                 //给每一个按钮添加一个自定义属性
                 aBtns[i].index = i;
                 aBtns[i].onclick = function(){
                   alert(this.index);
                }
             }
             alert("循环结束,i = " + i);
         }
    </script>

<body>
    <button>按钮1</button>
    <!-- index = 0  onclick = func -->
    <button>按钮2</button>
    <!-- index = 1  onclick = func -->
    <button>按钮3</button>
    <!-- index = 2  onclick = func -->
</body>
选项卡
<!DOCTYPE html>
<html lang="en">
<head>
    <meta charset="UTF-8">
    <meta http-equiv="X-UA-Compatible" content="IE=edge">
    <meta name="viewport" content="width=device-width, initial-scale=1.0">
    <title>Document</title>
    <style>
        #div1 button{width: 100px; height: 30px; background-color: gray; color: white; font-size: 18px;}
        #div1 .active{background-color: orange; color: blue;}
        #div1 div{width: 340px; height: 300px; border: 1px solid black; display: none;}
    </style>
    <script>
        window.onload = function(){
            var oDiv1 = document.getElementById("div1");
            var aBtns = oDiv1.getElementsByTagName("button");
            var aDivs = oDiv1.getElementsByTagName("div");

            //给每一个按钮添加点击
            for(var i = 0; i < aBtns.length; i++){
                aBtns[i].index = i;
                aBtns[i].onclick = function(){
                    //取消所有按钮的样式(不知道去前一个显示样式的按钮是哪一个按钮)
                    for(var j = 0; j < aBtns.length; j++){
                        aBtns[j].className = '';
                        aDivs[j].style.display = 'none';
                    }
                    aDivs[this.index].style.display = 'block';
                    this.className = 'active';
                }
            }
        }
    </script>
</head>
<body>
    <div id="div1">
        <button class="active">HTML5</button>
        <button>Python</button>
        <button>Java</button>
        <div style="display: block;">HTML5是Web中核心语言HTML的规范,用户使用任何手段进行网页浏览时看到的内容原本都是HTML格式的。在浏览器中通过一些技术处理将其转换成了课识别的信息。HTML5在从前HTML4.01的基础上进行了一定的改进,虽然技术人员再开发过程中可能不会将这些新技术投入应用,但是对于该种技术的新特性网站开发技术人员是必须要有所了解的。</div>
        <div>Python是一种计算机程序设计语言。是一种面向对象的动态类型语言,最初被设计用于编写自动化脚本(shell),随着版本的不断更新和语言新功能的添加,越来越多被用于独立的、大型项目的开发。</div>
        <div>Java是一门面向对象编程语言,不仅吸收了C++语言的各种优点,还摒弃了C++里难以理解的多继承、指针等概念。因此Java语言具有功能强大和简单易用两个特征。Java语言作为静态面向对象编程语言的代表,极好的实现了面向对象理论,允许程序员以优雅的思维方式进行复杂的编程</div>

    </div>
</body>
</html>
offset系列方法
- offsetWidth、offsetHeight
<style>
        #div1{width: 100px; height: 100px; background-color: red; border: 1px solid black; padding: 8px; margin: 20px;}
    </style>
    <script>
        window.onload = function(){
            var oDiv1 = document.getElementById("div1");
            // alert(getStyle(oDiv1,"width")); //width这个属性的值 100px

            alert(oDiv1.offsetWidth);//直接拿到的数字,没有px;会受border和padding的影响,但与margin无关
        }

        /* 跨浏览器兼容 */
        function getStyle(node,cssStyle){
            return node.currentStyle ? node.currentStyle : getComputedStyle(node)[cssStyle];
        }
    </script>
<body>
    <div id="div1"></div>
</body>- offsetLeft、offsetTop:计算眼睛能看到的实际距离第一个有定位的父节点的距离
<style>
        *{margin: 0px; padding: 0px;}
        #div1{margin: 30px; width: 200px; height: 200px; background-color: orange; position: relative;}
        #div2{margin: 20px; width: 100px; height: 100px; background-color: gray;}
    </style>
    <script>
        /* 跨浏览器兼容 */
        function getStyle(node,cssStyle){
            return node.currentStyle ? node.currentStyle : getComputedStyle(node)[cssStyle];
        }

        window.onload = function(){
            var oDiv2 = document.getElementById("div2");
            // alert(getStyle(oDiv2,"left"));//auto

            // alert(oDiv2.offsetLeft);//50,没给div1设置position时
            alert(oDiv2.offsetLeft);//20
        }
    </script>
<body>
    <div id="div1">
        <div id="div2"></div>
    </div>
</body>
文档碎片
 /* 创建10w个检点,添加到页面上 */
        window.onload = function(){
            console.time("test1");
            //test1: 60.427978515625 ms
            for(var i = 0; i < 100000; i++){
                var newDiv = document.createElement("div");
                document.body.appendChild(newDiv);
            }
            console.timeEnd("test1");

            /* 先创建好10w个节点,将10W个节点插入到一个节点上,最后将这1个节点添加到页面上 */

            //test2: 53.89404296875 ms    文档碎片操作
            console.time("test2");
            var node = document.createElement("div");
            for(var i = 0; i < 100000; i++){
                var newDiv = document.createElement("div");
                node.appendChild(newDiv);
            }
            document.body.appendChild(node);
            console.timeEnd("test2");
        }
数组和对象的遍历方法
数组遍历:
for循环
for...in
forEach
        var arr = [10, 20, 30, 40,50];
        for(var i = 0; i < arr.length; i++){
            document.write("for," + i + "," + arr[i] + "<br/>");
        }

        for(var i in arr){
            document.write("forin," + i + "," + arr[i] + "<br/>");
        }

        arr.forEach(function(item, index, arr){
            document.write("forEach," + index + "," + item + "<br/>");
        });
对象遍历
for...in
        var person = {
            username:"钢铁侠",
            age: 18,
            sex: "男"
        };

        for(var i in person){
            //i   是当前遍历到的属性
            document.write("对象遍历:" + i + "," + person[i] + "<br/>");
        }


 1518
1518


 被折叠的 条评论
为什么被折叠?
被折叠的 条评论
为什么被折叠?
 到【灌水乐园】发言


