


Springboot详细总结
- 前言
- 一、Springboot用法?
- 二、Springboot里Spring的使用
- 二、Springboot里Springmvc也就是Web层的运用
- 1.静态资源和网页存放
- 2.Springboot里Springmvc的操作
- 3.Springboot中请求路径源码
- 4.Springboot中controller的传参
前言
之前SSM简单的学习并且总结了一下,能用SSM做些简单的项目,现在来认真学Springboot
提示:以下是本篇文章正文内容,下面案例可供参考
一、Springboot用法?
1.maven配置
<?xml version="1.0" encoding="UTF-8"?>
<project xmlns="http://maven.apache.org/POM/4.0.0"
         xmlns:xsi="http://www.w3.org/2001/XMLSchema-instance"
         xsi:schemaLocation="http://maven.apache.org/POM/4.0.0 http://maven.apache.org/xsd/maven-4.0.0.xsd">
    <modelVersion>4.0.0</modelVersion>

    <groupId>com.example</groupId>
    <artifactId>SuDemo</artifactId>
    <version>1.0-SNAPSHOT</version>
    <name>SuDemo</name>
    <packaging>war</packaging>

    <parent>
        <groupId>org.springframework.boot</groupId>
        <artifactId>spring-boot-starter-parent</artifactId>
        <version>2.3.4.RELEASE</version>
    </parent>

    <!--    <properties>-->
    <!--        <mysql.version>5.1.43</mysql.version>-->
    <!--    </properties>-->


    <dependencies>
        <dependency>
            <groupId>org.springframework.boot</groupId>
            <artifactId>spring-boot-starter-web</artifactId>
        </dependency>

        <dependency>
            <groupId>org.projectlombok</groupId>
            <artifactId>lombok</artifactId>
        </dependency>

        <dependency>
            <groupId>org.springframework.boot</groupId>
            <artifactId>spring-boot-devtools</artifactId>
            <optional>true</optional>
        </dependency>
        <!--        <dependency>-->
        <!--            <groupId>org.springframework.boot</groupId>-->
        <!--            <artifactId>spring-boot-starter-batch</artifactId>-->
        <!--        </dependency>-->
        <!--        <dependency>-->
        <!--            <groupId>mysql</groupId>-->
        <!--            <artifactId>mysql-connector-java</artifactId>-->
        <!--        </dependency>-->

    </dependencies>


    <build>
        <plugins>
            <plugin>
                <groupId>org.springframework.boot</groupId>
                <artifactId>spring-boot-maven-plugin</artifactId>
            </plugin>
        </plugins>
    </build>


</project>
二、Springboot里Spring的使用
1.@SpringBootApplication
Springboot启动不需要配置tomcat,但是有一个主函数去自动配置所有SSM需要的配置包括tomcat
@SpringBootApplication这个注解写到主函数里面,可以自动配置SSM的所有注解,在这个类里面写上public static void main(String[] args) { SpringApplication.run(MainApplication.class,args);}就可以启动服务了。但是他的扫描只能扫描同级或者下级的注解,如果想自定义需要用到
@SpringBootApplication(scanBasePackages=“com.example”)来自定义扫描路径
/**
 * 主程序类
 * @SpringBootApplication:这是一个SpringBoot应用
 */
@SpringBootApplication()
public class MainApplication {

    public static void main(String[] args) {
        SpringApplication.run(MainApplication.class,args);
    }
}
2.@Restcontroller
@Restcontroller是@controller和@Restbody的结合,他可以让mvc返回一个json数据。
@RestController
public class controllerTest {
    @RequestMapping("/hello")
    public String hello()
    {
        return "ww";
    }
}
3.@Configuration
@Configuration是告诉Springboot这是一个配置类,一般可以和@Bean使用,作为一个Spring里面的bean,里面有一个 proxyBeanMethods属性,默认为true,如果proxyBeanMethods是false,每次获取的bean都不一样,可能里面的值都是cat,但是他们不是同一个东西。
@Configuration(proxyBeanMethods = false) ,一般如果用false可以加快运行速度。
@Configuration
public class User {
    public String user;
    public String key;

    public String getUser() {
        return user;
    }

    public void setUser(String user) {
        this.user = user;
    }

    public String getKey() {
        return key;
    }

    public void setKey(String key) {
        this.key = key;
    }

    @Override
    public String toString() {
        return "User{" +
                "user='" + user + '\'' +
                ", key='" + key + '\'' +
                '}';
    }
}
4.@import可以用来导入包
和import包效果一样
@Import({User.class, DBHelper.class})
5.@ConditonnalOnBean和@ConditonnalOnMissingBean
在Springboot源码中有一段是这样的,有个函数功能是配置dispacherServerlet,他用@ConditonnalOnBean注解给函数,如果用户自己配置了,则将用户配置的信息某些固定值改为dispacherServerlet里需要的固定值。在另一个函数写上@ConditonnalOnMissingBean,判断如果用户没有配置,就自己把他配置上。
@ConditonnalOnBean和@ConditonnalOnMissingBean里面有个name属性。比如前一个是如果容器里面有name=tom,则执行下面的操作,后一个是容器里面没有,就执行下面操作
@ConditionalOnMissingBean(name = “tom”)
6.@ImportResource可以导入xml文件
@ImportResource("classpath:beans.xml")
7.@ConfigurationProperties()
在bean类用@ConfigurationProperties(prefix = “mycar”),将Properties里mycar属性读出来,在测试类中定义Car对象并用@Autowired自动注入,此时Properties文件里面的mycar数据就到Car对象里了。
@ConfigurationProperties(prefix = "mycar")
8.Lombok简化Spring的Bean开发
第一步导入依赖
        <dependency>
            <groupId>org.projectlombok</groupId>
            <artifactId>lombok</artifactId>
        </dependency>
第二步安装插件
idea中file-settings-plugins里搜索安装lombok插件
简化Bean类的方法
@Data 自动生成getter和setter方法
@NoArgsConstructor 自动生成无参构造函数
@AllArgsConstructor 生成全参构造函数
@ToString 生成toString方法
@Slf4j 自动配置日志文件(Spring原生的日志文件配置相当复杂)
9.application.properties和application.yml是Springboot里面修改配置,如连接数据库,修改端口号,存放数据等的工具
java代码读取application.properties数据
在Bean里面
@ToString
@Data
@Component
@ConfigurationProperties(prefix = "mycar")
public class Car {

    private String brand;
    private Integer price;
}

在controller里面
@RestController
public class HelloController {

    @Autowired
    Car car;

    @RequestMapping("/Car")
    public Car car(){

        String brand= person.getbrand();
        String price= person.getprice();
        System.out.println(brand+price);
        return car;
    }
}
mycar.brand=YD
mycar.price=100000
java代码读取application.yml数据,包含String,String数组,Map,list,map和list类型的数据
在Bean里面
@ConfigurationProperties(prefix = "person")
@Component
@ToString
@Data
public class Person {
    private String userName;
    private Boolean boss;
    private Date birth;
    private Integer age;
    private Pet pet;
    private String[] interests;
    private List<String> animal;
    private Map<String, Object> score;
    private Set<Double> salarys;
    private Map<String, List<Pet>> allPets;
}

在Controller里面
@RestController
public class HelloController {

    @Autowired
    Person person;

    @RequestMapping("/person")
    public Person person(){

        String userName = person.getUserName();
        System.out.println(userName);
        return person;
    }
}
person:
#  单引号会将 \n作为字符串输出   双引号会将\n 作为换行输出
#  双引号不会转义,单引号会转义
  boss: true
  birth: 2019/12/9
  age: 18
#  interests: [篮球,足球]
  interests:
    - 篮球
    - 足球
    - 18
  animal: [阿猫,阿狗]
#  score:
#    english: 80
#    math: 90
  score: {english:80,math:90}
  salarys:
    - 9999.98
    - 9999.99
  pet:
    name: 阿狗
    weight: 99.99
  allPets:
    sick:
      - {name: 阿狗,weight: 99.99}
      - name: 阿猫
        weight: 88.88
      - name: 阿虫
        weight: 77.77
    health:
      - {name: 阿花,weight: 199.99}
      - {name: 阿明,weight: 199.99}
  user-name: zhangsan
如果yml文件在idea里没有提示,在maven中加上依赖
        <dependency>
            <groupId>org.springframework.boot</groupId>
            <artifactId>spring-boot-configuration-processor</artifactId>
            <optional>true</optional>
        </dependency>


 <build>
        <plugins>
            <plugin>
                <groupId>org.springframework.boot</groupId>
                <artifactId>spring-boot-maven-plugin</artifactId>
                <configuration>
                    <excludes>
                        <exclude>
                            <groupId>org.springframework.boot</groupId>
                            <artifactId>spring-boot-configuration-processor</artifactId>
                        </exclude>
                    </excludes>
                </configuration>
            </plugin>
        </plugins>
    </build>
二、Springboot里Springmvc也就是Web层的运用
1.静态资源和网页存放
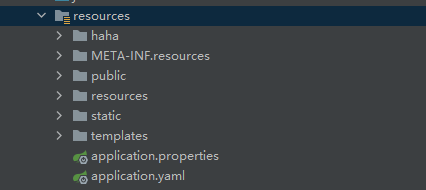
存放在resources目录下,其中META-INF.resources和resources和public和static可以存放css js png等网页的静态资源,并且直接访问就行,templates一般存放网页页面。
1.1 假如我有bug.html和bug.jpg,当我们访问bug时,他就可能会出一些异常,所以我们静态资源一般会加一些前缀,比如resources/bug.jpg,在yml文件里配置下面这几句就可以实现了。
spring:
  mvc:
    static-path-pattern: /resources/**
1.2 自定义静态资源路径
  resources:
    static-locations: [classpath:/haha/]
此时我们可以将静态资源放到haha这个路径下。
1.3 yml里静态资源的控制
add-mappings表示是否能访问静态资源,默认是true
cache表示缓存时间
  resources:
    static-locations: [classpath:/haha/]
    add-mappings: true
    cache:
      period: 11000
2.Springboot里Springmvc的操作
2.1 get查询 post增加 put修改 delete删除操作
<form action="/user" method="get">
    <input value="REST-GET 提交" type="submit"/>
</form>
<form action="/user" method="post">
    <input value="REST-POST 提交" type="submit"/>
</form>
<form action="/user" method="post">
    <input name="_method" type="hidden" value="delete"/>
    <input name="_m" type="hidden" value="delete"/>
    <input value="REST-DELETE 提交" type="submit"/>
</form>
<form action="/user" method="post">
    <input name="_method" type="hidden" value="PUT"/>
    <input value="REST-PUT 提交" type="submit"/>
</form>
//    @RequestMapping(value = "/user",method = RequestMethod.GET)
    @GetMapping("/user")
    public String getUser(){

        return "GET-张三";
    }


//    @RequestMapping(value = "/user",method = RequestMethod.POST)
    @PostMapping("/user")
    public String saveUser(){
        return "POST-张三";
    }


//    @RequestMapping(value = "/user",method = RequestMethod.PUT)
    @PutMapping("/user")
    public String putUser(){

        return "PUT-张三";
    }

    @DeleteMapping("/user")
//    @RequestMapping(value = "/user",method = RequestMethod.DELETE)
    public String deleteUser(){
        return "DELETE-张三";
    }

    //扩展点:如何把 _method 这个名字换成我们自己喜欢的
2.2 不使用_method,修改为自己喜欢的名字
  @Bean
    public HiddenHttpMethodFilter hiddenHttpMethodFilter(){
        HiddenHttpMethodFilter methodFilter = new HiddenHttpMethodFilter();
        methodFilter.setMethodParam("_m");
        return methodFilter;
    }
<form action="/user" method="post">
    <input name="_m" type="hidden" value="delete"/>
    <input value="REST-DELETE 提交" type="submit"/>
</form>
2.3 不使用页面交互,用postman发请求,我们返回json数据
enable表示开启表单rest功能
 mvc:
    hiddenmethod:
      filter:
        enabled: true
    contentnegotiation:
      favor-parameter: true
3.Springboot中请求路径源码
先判断是否为异步请求,再用getHandler找到是哪个controller的方法,再通过handlerMappings返回页面。
● 请求进来,挨个尝试所有的HandlerMapping看是否有请求信息。
○ 如果有就找到这个请求对应的handler
○ 如果没有就是下一个 HandlerMapping
protected void doDispatch(HttpServletRequest request, HttpServletResponse response) throws Exception {
    HttpServletRequest processedRequest = request;
    HandlerExecutionChain mappedHandler = null;
    boolean multipartRequestParsed = false;

    WebAsyncManager asyncManager = WebAsyncUtils.getAsyncManager(request);

    try {
      ModelAndView mv = null;
      Exception dispatchException = null;

      try {
        processedRequest = checkMultipart(request);
        multipartRequestParsed = (processedRequest != request);

        // 找到当前请求使用哪个Handler(Controller的方法)处理
        mappedHandler = getHandler(processedRequest);

                //HandlerMapping:处理器映射。/xxx->>xxxx
4.Springboot中controller的传参
1.和SpringMVC基本一致,具体查看SpringMVC @PathVariable @RequestHeader @CookieValue等的使用
2. @RequestBody可以用来获取表单数据,并储存
其中content的值为username=张三&password=aa
@PostMapping("/save")
    public Map postMethod(@RequestBody String content){
        Map<String,Object> map = new HashMap<>();
        map.put("content",content);
        return map;
    }
3.@RequestAttribute可以获取request域中的数据
    @GetMapping("/params")
    public String testParam(Map<String,Object> map,
                            Model model,
                            HttpServletRequest request,
                            HttpServletResponse response){
        map.put("hello","world666");
        model.addAttribute("world","hello666");
        request.setAttribute("message","HelloWorld");

        Cookie cookie = new Cookie("c1","v1");
        response.addCookie(cookie);
        return "forward:/success";
    }


    @ResponseBody
    @GetMapping("/success")
    public Map success(@RequestAttribute(value = "msg",required = false) String msg,
                       @RequestAttribute(value = "code",required = false)Integer code,
                       HttpServletRequest request){
        Object msg1 = request.getAttribute("msg");

        Map<String,Object> map = new HashMap<>();
        Object hello = request.getAttribute("hello");
        Object world = request.getAttribute("world");
        Object message = request.getAttribute("message");

        map.put("reqMethod_msg",msg1);
        map.put("annotation_msg",msg);
        map.put("hello",hello);
        map.put("world",world);
        map.put("message",message);

        return map;

    }
4.矩阵变量
1、语法: 请求路径:/cars/sell;low=34;brand=byd,audi,yd
2、SpringBoot默认是禁用了矩阵变量的功能
手动开启:原理。对于路径的处理。UrlPathHelper进行解析。
UrlPathHelper里的方法removeSemicolonContent默认是true,作用是移除分号内容
如果改成false就能支持矩阵变量的
3、矩阵变量必须有url路径变量才能被解析
路径为/cars/sell;low=34;brand=byd,audi,yd
表示/cars/sell,其中path就是sell,后面low和brand为绑定的矩阵变量,用;隔开,list集合用,隔开
  @GetMapping("/cars/{path}")
    public Map carsSell(@MatrixVariable("low") Integer low,
                        @MatrixVariable("brand") List<String> brand,
                        @PathVariable("path") String path){
        Map<String,Object> map = new HashMap<>();

        map.put("low",low);
        map.put("brand",brand);
        map.put("path",path);
        return map;
    }
2.矩阵变量中pathVar的用法
@MatrixVariable(value = “name”,pathVar = “path1”)作用
访问地址为http://localhost:8080/car/price=34;name=byd/price=21;name=as
结果为{“bossprice”:21.0,“bossname”:“as”,“price”:34.0,“name”:“byd”}
@RestController
public class controllerTest {

    @GetMapping("/car/{path}/{path1}")
    public HashMap hello(@MatrixVariable(value = "name",pathVar = "path") String pathname,
                        @MatrixVariable(value = "price",pathVar = "path") float pathprice,
                        @MatrixVariable(value = "name",pathVar = "path1") String path1name,
                         @MatrixVariable(value = "price",pathVar = "path1") float path1price)
    {
        HashMap<String,Object> map  = new HashMap<String,Object>();
        map.put("name",pathname);
        map.put("price",pathprice);
        map.put("bossname",path1name);
        map.put("bossprice",path1price);
        return map;
    }
}
3.Springboot传参源码分析
5.网页页面和serverlet传值
1.serverlet给网页传值
map.put
model.addAttribute
request.setAttribute
用forward;/地址 可以直接将数据传到地址页面去
 @GetMapping("/params")
    public String testParam(Map<String,Object> map,
                            Model model,
                            HttpServletRequest request,
                            HttpServletResponse response){
        map.put("hello","world666");
        model.addAttribute("world","hello666");
        request.setAttribute("message","HelloWorld");

        Cookie cookie = new Cookie("c1","v1");
        response.addCookie(cookie);
        return "forward:/success";
    }


    @ResponseBody
    @GetMapping("/success")
    public Map success(@RequestAttribute(value = "msg",required = false) String msg,
                       @RequestAttribute(value = "code",required = false)Integer code,
                       HttpServletRequest request){
        Object msg1 = request.getAttribute("msg");

        Map<String,Object> map = new HashMap<>();
        Object hello = request.getAttribute("hello");
        Object world = request.getAttribute("world");
        Object message = request.getAttribute("message");

        map.put("reqMethod_msg",msg1);
        map.put("annotation_msg",msg);
        map.put("hello",hello);
        map.put("world",world);
        map.put("message",message);

        return map;

    }
2.问 Springboot传值map源码 model源码
3.表单传值封装到对象中
  @PostMapping("/saveuser")
    public Person saveuser(Person person){

        return person;
    }
<form action="/saveuser" method="post">
    姓名: <input name="userName" value="zhangsan"/> <br/>
    年龄: <input name="age" value="18"/> <br/>
    生日: <input name="birth" value="2019/12/10"/> <br/>
<!--    宠物姓名:<input name="pet.name" value="阿猫"/><br/>-->
<!--    宠物年龄:<input name="pet.age" value="5"/>-->
    宠物: <input name="pet" value="啊猫,3"/>
    <input type="submit" value="保存"/>
</form>
6.thymeleaf用法
1.变量取值 ${…} 获取请求域、session域、对象等值
选择变量 *{…} 获取上下文对象值
消息 #{…} 获取国际化等值
链接 @{…} 生成链接
片段表达式 ~{…} jsp:include 作用,引入公共页面片段
2、字面量
文本值: ‘one text’ , ‘Another one!’ ,…数字: 0 , 34 , 3.0 , 12.3 ,…布尔值: true , false
空值: null
变量: one,two,… 变量不能有空格
3、文本操作
字符串拼接: +
变量替换: |The name is ${name}|
4、数学运算
运算符: + , - , * , / , %
5、布尔运算
运算符: and , or
一元运算: ! , not
6、比较运算
比较: > , < , >= , <= ( gt , lt , ge , le )等式: == , != ( eq , ne )
7、条件运算
If-then: (if) ? (then)
If-then-else: (if) ? (then) : (else)
Default: (value) ?: (defaultvalue)
8、设置属性值-th:attr
设置单个值
<form action="subscribe.html" th:attr="action=@{/subscribe}">
  <fieldset>
    <input type="text" name="email" />
    <input type="submit" value="Subscribe!" th:attr="value=#{subscribe.submit}"/>
  </fieldset>
</form>
设置多个值
<img src="../../images/gtvglogo.png" th:attr="src=@{/images/gtvglogo.png},title=#{logo},alt=#{logo}" />
9.迭代,比如有list集合要把他全部循环显示
<tr th:each="prod : ${prods}">
        <td th:text="${prod.name}">Onions</td>
        <td th:text="${prod.price}">2.41</td>
        <td th:text="${prod.inStock}? #{true} : #{false}">yes</td>
</tr>
<tr th:each="prod,iterStat : ${prods}" th:class="${iterStat.odd}? 'odd'">
  <td th:text="${prod.name}">Onions</td>
  <td th:text="${prod.price}">2.41</td>
  <td th:text="${prod.inStock}? #{true} : #{false}">yes</td>
</tr>
10、条件运算
<a href="comments.html"
th:href="@{/product/comments(prodId=${prod.id})}"
th:if="${not #lists.isEmpty(prod.comments)}">view</a>
<div th:switch="${user.role}">
  <p th:case="'admin'">User is an administrator</p>
  <p th:case="#{roles.manager}">User is a manager</p>
  <p th:case="*">User is some other thing</p>
</div>
关于thymeleaf的用法还有很多需要一步一步的去学习。
2.thymeleaf依赖
       <dependency>
            <groupId>org.springframework.boot</groupId>
            <artifactId>spring-boot-starter-thymeleaf</artifactId>
            <version>2.3.4.RELEASE</version>
        </dependency>
并且Springboot用autoconfiguration自动把所有配置配好,我们只需要直接用就行了
自动配置只支持html,并且templates下存放页面
	public static final String DEFAULT_PREFIX = "classpath:/templates/";

	public static final String DEFAULT_SUFFIX = ".html";  //xxx.html
3.thymeleaf抽取共同的
比如我两个html页面都引用了同一个CSS和JS文件,可以将他们抽取出来共用
<head th:fragment="commonheader">
    <!--common-->
    <link href="css/style.css" th:href="@{/css/style.css}" rel="stylesheet">
    <link href="css/style-responsive.css" th:href="@{/css/style-responsive.css}" rel="stylesheet">


    <!-- HTML5 shim and Respond.js IE8 support of HTML5 elements and media queries -->
    <!--[if lt IE 9]>
    <script src="js/html5shiv.js" th:src="@{/js/html5shiv.js}"></script>
    <script src="js/respond.min.js" th:src="@{/js/respond.min.js}"></script>
    <![endif]-->
</head>
th:insert
replace
include三种抽取方式
下面的common为模板的前缀,我模板名叫common.html,所以前缀是common
  <div th:insert="common:: commonheader"> </div>
    <div th:replace="common :: commonheader"> </div>
      <div th:include="common :: commonheader"> </div>
7.Springboot拦截器用法
1.我们创建一个interceptor类,如果session为空,就给request域中赋值,再请求转发到登录页面,如果session正确,就不拦截
public class LoginInterceptor implements HandlerInterceptor {

    /**
     * 目标方法执行之前
     * @param request
     * @param response
     * @param handler
     * @return
     * @throws Exception
     */
    @Override
    public boolean preHandle(HttpServletRequest request, HttpServletResponse response, Object handler) throws Exception {

        String requestURI = request.getRequestURI();
        log.info("preHandle拦截的请求路径是{}",requestURI);

        //登录检查逻辑
        HttpSession session = request.getSession();

        Object loginUser = session.getAttribute("loginUser");

        if(loginUser != null){
            //放行
            return true;
        }

        //拦截住。未登录。跳转到登录页
        request.setAttribute("msg","请先登录");
//        re.sendRedirect("/");
        request.getRequestDispatcher("/").forward(request,response);
        return false;
    }

    /**
     * 目标方法执行完成以后
     * @param request
     * @param response
     * @param handler
     * @param modelAndView
     * @throws Exception
     */
    @Override
    public void postHandle(HttpServletRequest request, HttpServletResponse response, Object handler, ModelAndView modelAndView) throws Exception {
        log.info("postHandle执行{}",modelAndView);
    }

    /**
     * 页面渲染以后
     * @param request
     * @param response
     * @param handler
     * @param ex
     * @throws Exception
     */
    @Override
    public void afterCompletion(HttpServletRequest request, HttpServletResponse response, Object handler, Exception ex) throws Exception {
        log.info("afterCompletion执行异常{}",ex);
    }
}
2、关于Springboot中拦截器配置,自定义选择拦截什么
也可以直接继承webMvcConfigurer,其中new interceptor()的interceptor是自己创建的拦截器,addPathPatterns表示拦截什么,一般为/**拦截所有excludePathPatterns表示不拦截什么,我这边login页是登录页,css等是文件夹,css/**表示不拦截css文件夹下所有文件.
@Configuration(proxyBeanMethods = false)
public class WebConfig {
    @Bean
    public WebMvcConfigurer webMvcConfigurer() {
        return new WebMvcConfigurer() {
            @Override
            public void addInterceptors(InterceptorRegistry registry)
            {
                registry.addInterceptor(new interceptor())
                        .addPathPatterns("/**")  //所有请求都被拦截包括静态资源
                        .excludePathPatterns("/","/login","/css/**","/fonts/**","/images/**","/js/**,/lib/**"); //放行的请求
            }
        };
    }
}
3,文件上传
文件上传和springmvc差不多
    @PostMapping("/upload")
    public String upload(@RequestParam("email") String email,
                         @RequestParam("username") String username,
                         @RequestPart("headerImg") MultipartFile headerImg,
                         @RequestPart("photos") MultipartFile[] photos) throws IOException {

        log.info("上传的信息:email={},username={},headerImg={},photos={}",
                email,username,headerImg.getSize(),photos.length);

        if(!headerImg.isEmpty()){
            //保存到文件服务器,OSS服务器
            String originalFilename = headerImg.getOriginalFilename();
            headerImg.transferTo(new File("H:\\cache\\"+originalFilename));
        }

        if(photos.length > 0){
            for (MultipartFile photo : photos) {
                if(!photo.isEmpty()){
                    String originalFilename = photo.getOriginalFilename();
                    photo.transferTo(new File("H:\\cache\\"+originalFilename));
                }
            }
        }


        return "main";
    }
    <div class="panel-body">
                        <form role="form" th:action="@{/upload}" method="post" enctype="multipart/form-data">
                            <div class="form-group">
                                <label for="exampleInputEmail1">邮箱</label>
                                <input type="email" name="email" class="form-control" id="exampleInputEmail1" placeholder="Enter email">
                            </div>
                            <div class="form-group">
                                <label for="exampleInputPassword1">名字</label>
                                <input type="text" name="username" class="form-control" id="exampleInputPassword1" placeholder="Password">
                            </div>
                            <div class="form-group">
                                <label for="exampleInputFile">头像</label>
                                <input type="file" name="headerImg" id="exampleInputFile">
                            </div>
                            <div class="form-group">
                                <label for="exampleInputFile">生活照</label>
                                <input type="file" name="photos" multiple>
                            </div>
                            <div class="checkbox">
                                <label>
                                    <input type="checkbox"> Check me out
                                </label>
                            </div>
                            <button type="submit" class="btn btn-primary">提交</button>
                        </form>

                    </div>
8.Springboot mybatis用法
1.Mapper Service controller
mapper代码
@Mapper
public interface PermissionMapper {

    @Select("select * from permission where aname=#{aname}")
    public List<permission> ReturnPermissionListByLogin(String aname);
}
service代码
@Service
public class PermissionService {
    @Autowired
    private PermissionMapper permissionMapper;

    public List<permission> ReturnPermissionListByLogin(String aname)
    {
        return permissionMapper.ReturnPermissionListByLogin(aname);
    }

}
主启动类
@SpringBootApplication()
@MapperScan("com.example.SuDemo.mapper")
public class MainApplication {

    public static void main(String[] args) {
        SpringApplication.run(MainApplication.class,args);
    }
}
controller代码
@Controller
public class controller {

    @Autowired
    PermissionService permissionService;
    }
2.xml配置
application.yml
mybatis:
  type-aliases-package: com.example.mycloud.pojo
  config-locations: classpath:mybatis/mybatis-config.xml
  mapper-locations: classpath:mybatis/mapper/*.xml
mybatis.xml
<?xml version="1.0" encoding="UTF-8" ?>
<!DOCTYPE mapper PUBLIC "-//mybatis.org//DTD Mapper 3.0//EN" "http://mybatis.org/dtd/mybatis-3-mapper.dtd" >

<mapper namespace="com.example.dao.DeptDao">

    <select id="queryAll11" resultType="Integer" parameterType="long">
        select count(*) from t_user
    </select>
    <select id="queryAll" resultType="com.examaple.pojo.Dept" parameterType="long">
        select * from t_user
    </select>
    <select id="selectByUser" resultType="com.examaple.pojo.Dept" parameterType="long">
        select * from t_user where `user`=#{user2}
    </select>
</mapper>
mybatis-config.xml
<?xml version="1.0" encoding="UTF-8"?>
<!DOCTYPE configuration PUBLIC "-//mybatis.org//DTD Config 3.0//EN"
        "http://mybatis.org/dtd/mybatis-3-config.dtd">
<configuration>
<settings>
    <setting name="cacheEnabled" value="true"></setting>
</settings>
    <typeAliases>
        <!--定义别名,避免写全限定类名-->
        <typeAlias alias="Integer" type="java.lang.Integer" />
        <typeAlias alias="Long" type="java.lang.Long" />
        <typeAlias alias="HashMap" type="java.util.HashMap" />
        <typeAlias alias="LinkedHashMap" type="java.util.LinkedHashMap" />
        <typeAlias alias="ArrayList" type="java.util.ArrayList" />
        <typeAlias alias="LinkedList" type="java.util.LinkedList" />
    </typeAliases>
</configuration>
Dao层
import com.examaple.pojo.Dept;
import org.apache.ibatis.annotations.Mapper;
import org.apache.ibatis.annotations.Param;
import org.springframework.stereotype.Repository;

import java.util.List;

@Mapper
@Repository
public interface DeptDao {
    public boolean addDept(Dept dept);
    public Dept selectByUser(String user2);
    public List<Dept> queryAll();
    public Integer queryAll11();
}
service层·有两个方法,一个接口一个实现
接口
import com.examaple.pojo.Dept;
import org.apache.ibatis.annotations.Param;

import java.util.List;

public interface DeptService {
    public boolean addDept(Dept dept);
    public Dept selectByUser(String user2);
    public List<Dept> queryAll();
    public Integer queryAll11();
}
实现
import com.examaple.pojo.Dept;
import com.example.dao.DeptDao;
import org.apache.ibatis.annotations.Param;
import org.springframework.beans.factory.annotation.Autowired;
import org.springframework.stereotype.Service;

import java.util.List;

@Service
public class DeptServiceImpl implements DeptService {
    @Autowired
    private DeptDao deptDao;

    @Override
    public boolean addDept(Dept dept) {
        return deptDao.addDept(dept);
    }

    @Override
    public Dept selectByUser(String user2) {
        return deptDao.selectByUser(user2);
    }

    @Override
    public List<Dept> queryAll() {
        return deptDao.queryAll();
    }

    @Override
    public Integer queryAll11() {
        return deptDao.queryAll11();
    }
}
controller层
@RestController
public class DeptController {
    @Autowired
    private DeptService deptService;
9.springboot集成redis用法
1.application.properties
#Redis服务器地址
spring.redis.host=localhost
#Redis服务器连接端口
spring.redis.port=6379
#Redis数据库索引(默认为0)
spring.redis.database= 0
#连接超时时间(毫秒)
spring.redis.timeout=1800000
#连接池最大连接数(使用负值表示没有限制)
spring.redis.lettuce.pool.max-active=20
#最大阻塞等待时间(负数表示没限制)
spring.redis.lettuce.pool.max-wait=-1
#连接池中的最大空闲连接
spring.redis.lettuce.pool.max-idle=5
#连接池中的最小空闲连接
spring.redis.lettuce.pool.min-idle=0
2.maven依赖
        <!-- spring2.X集成redis所需common-pool2-->
        <dependency>
            <groupId>org.apache.commons</groupId>
            <artifactId>commons-pool2</artifactId>
        </dependency>

        <dependency>
            <groupId>org.springframework.boot</groupId>
            <artifactId>spring-boot-starter-data-redis</artifactId>
            <exclusions>
                <!-- 排除lettuce包,springboot2.x后默认使用lettuce-->
                <exclusion>
                    <groupId>io.lettuce</groupId>
                    <artifactId>lettuce-core</artifactId>
                </exclusion>
            </exclusions>
        </dependency>
3.controller
    @Autowired
    RedisTemplate redisTemplate;


 3678
3678


 被折叠的 条评论
为什么被折叠?
被折叠的 条评论
为什么被折叠?
 到【灌水乐园】发言


