


vue前端上传图像
上传图片
使用上传图片的upload组件
      <el-form-item label="设备图像">
        <el-upload
        //设置class样式
          class="avatar-uploader"
          //绑定上传路径
          :action="uploadUrl"
          //携带token值
          :headers="tokenInfo"
          :show-file-list="false"
          //成功了触发handleAvatarSuccess方法
          :on-success="handleAvatarSuccess"
          //之后触发beforeAvatarUpload方法
          :before-upload="beforeAvatarUpload"
        >
          <img
          //显示图片
            v-if="this.dataForm.image"
            :src="this.dataForm.image"
            class="avatar"
          />
          //如果没图片就显示icon
          <i v-else class="el-icon-plus avatar-uploader-icon"></i>
        </el-upload>
      </el-form-item>
    handleAvatarSuccess(res, file) {
      // 在控制台输出服务器响应的内容
      console.log(res);
      // 使用浏览器的URL API创建一个表示文件对象的URL,并将其赋值给当前上下文的imageUrl属性
      // 在前端使用这个URL来显示上传的头像
      this.imageUrl = URL.createObjectURL(file.raw);
      // 正在更新一个表单数据对象,以包含新上传的头像的UR
      this.dataForm.image = res.url;
    },
    // beforeAvatarUpload:自定义函数
    // file:待上传的文件
    beforeAvatarUpload(file) {
      // 创建一个常量isJPG,检查传入file的类型,isJPG为true,否则为false
      const isJPG = file.type === "image/jpeg";
      // 创建一个常量isPNG,检查传入file的类型,isPNG为true,否则为false
      const isPNG = file.type === "image/png";
      // 创建一个常量isLt2M,检查传入文件大小是否夏雄安与2mb 字节转换为mb(兆字节)
      const isLt2M = file.size / 1024 / 1024 < 2;
      // 如果上传文件不是jpg或png
      if (!(isJPG || isPNG)) {
        // 显示错误的提示信息,告诉用户'上传头像图片只能是 JPG 或者 png 格式!'
        this.$message.error("上传头像图片只能是 JPG 或者 png 格式!");
      }
      // 如果上传文件不小于2mb
      if (!isLt2M) {
        // 显示错误的提示信息,告诉用户'上传头像图片大小不能超过 2MB!'
        this.$message.error("上传头像图片大小不能超过 2MB!");
      }
      // 返回一个布尔值表示文件是否满足所有条件
      return (isJPG || isPNG) && isLt2M;
    },
data
data() {
    return {
    //数据库image字段存放图片的url
      dataForm: {
        image: "",
      },
      //传过来的路径不能直接使用,需要进行处理
      imageUrl: "",
      //上传方式oss以及路径触发方法
      uploadUrl: this.$http.adornUrl("/tain/warn/ossUpload"),
      //携带token值的方式
      tokenInfo: {
        token: this.$cookie.get("token"),
      },
    };
  },
上传之后将url存入数据库
init(id) {
      this.dataForm.id = id || 0;
      this.dialogVisible = true;
      this.$nextTick(() => {
        // 新增或修改判断成功弹出后执行查询方法
        this.$refs["dataForm"].resetFields();
        this.getDicts("chejian");
      });
      if (this.dataForm.id) {
        this.$http({
          url: this.$http.adornUrl(`/tain/record/info/${this.dataForm.id}`),
          method: "get",
        }).then(({ data }) => {
          if (data && data.code === 0) {
            // 将后端传过来的所有数据都绑定到表单
            this.dataForm = data.recordVo;
            // 判断严谨 有图片且非空 不为null 0
            if (this.dataForm.image&&this.dataForm.image.length!=0) {
              this.imageUrl = this.$http.adornUrl(this.dataForm.image);
            }
          }
        });
      }
    },
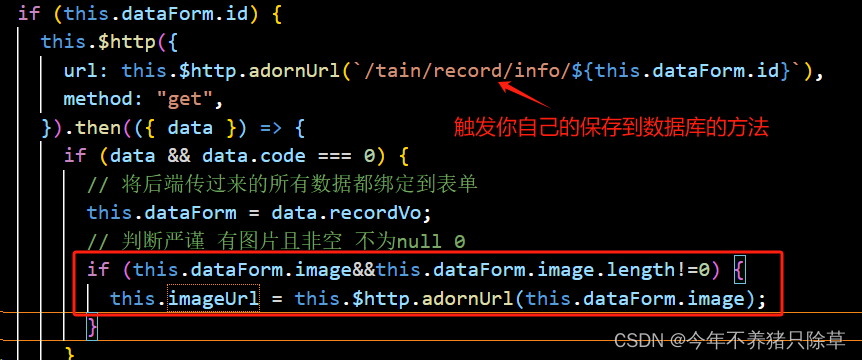
上面图片红框框出来的代码是对传过来的url进行处理最后显示为图片
style样式
  <style>
/* 应用于所有.avatar-uploader类中的.el-upload子元素 */
.avatar-uploader .el-upload {
  /* 边框样式 */
  border: 1px dashed #d9d9d9;
  /* 边框圆角 将四个角的半径都设置为6像素 */
  border-radius: 6px;
  /* 鼠标指针在元素上时的样式 手形图标 */
  cursor: pointer;
  /* 元素的定位类型 relative相对定位 */
  position: relative;
  /* 元素的内容处理在其边界之外的部分 设置为“隐藏” */
  overflow: hidden;
}
/* 定义了一个当鼠标悬停在.avatar-uploader .el-upload元素上时的样式 */
/* hover 鼠标悬停 */
.avatar-uploader .el-upload:hover {
  /* 边框颜色 */
  border-color: #409eff;
}
/* 规则将应用于所有带有.avatar-uploader-icon类的元素 */
.avatar-uploader-icon {
  /* 字体大小为28像素 */
  font-size: 28px;
  /* 元素的颜色 */
  color: #8c939d;
  /* 宽度 */
  width: 178px;
  /* 高度 */
  height: 178px;
  /* 内边距 垂直居中文本 */
  line-height: 178px;
  /* 文本在元素内居中对齐 */
  text-align: center;
}
.avatar {
  /* 宽度 */
  width: 178px;
  /* 高度 */
  height: 178px;
  /* 显示类型为块级元素 独占一行 宽度默认为父元素的100% */
  display: block;
}
</style>
最后再在列表上回显
使用卡槽进行一个图片的回显存放
      <el-table-column
        prop="image"
        header-align="center"
        align="center"
        label="设备图像"
      >
        <template slot-scope="scope">
          <img style="width: 100px; height: 100px" :src="scope.row.image">
        </template>

      </el-table-column>
后端oss上传
对oss上传不了解想要尝试的可以点击springboot+vue实现oss文件存储进行了解,或者用其他方式存储的,换个访问的地址即可
    @Autowired
    private AliOSSUtil aliOSSUtil;
    @Autowired
    private ITainRecordService iTainRecordService;
    //oss
    @PostMapping("/ossUpload")
    public R ossUpload(MultipartFile file) throws IOException {
        String url = aliOSSUtil.upload(file);  // 返回文件的上传路径,访问这个url即可下载
        return R.ok().put("url",url);
    }
上述为个人理解版图片上传并回显,如有错误请评论指正ᕕ(ᐛ)ᕗ


 1734
1734


 被折叠的 条评论
为什么被折叠?
被折叠的 条评论
为什么被折叠?
 到【灌水乐园】发言


