


1.css语法

2.选择器
元素选择器
<!DOCTYPE html>
<html>
<head>
<style>
p {
  text-align: center;
  color: red;
}
</style>
</head>
<body>

<p>每个段落都会受到样式的影响。</p>
<p id="para1">我也是!</p>
<p>还有我!</p>

</body>
</html>

id 选择器
<!DOCTYPE html>
<html>
<head>
<style>
#para1 {
  text-align: center;
  color: red;
}
</style>
</head>
<body>

<p id="para1">Hello World!</p>
<p>本段不受样式的影响。</p>

</body>
</html>

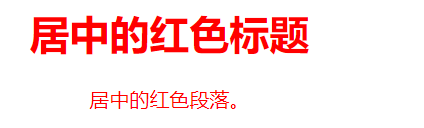
类选择器
<!DOCTYPE html>
<html>
<head>
<style>
.center {
  text-align: center;
  color: red;
}
</style>
</head>
<body>

<h1 class="center">居中的红色标题</h1>
<p class="center">居中的红色段落。</p>

</body>
</html>
通用选择器
<!DOCTYPE html>
<html>
<head>
<style>
* {
  text-align: center;
  color: blue;
}
</style>
</head>
<body>

<h1>Hello world!</h1>

<p>页面上的每个元素都会受到样式的影响。</p>
<p id="para1">我也是!</p>
<p>还有我!</p>

</body>
</html>

分组选择器
<!DOCTYPE html>
<html>
<head>
<style>
h1, h2, p {
  text-align: center;
  color: red;
}
</style>
</head>
<body>

<h1>Hello World!</h1>
<h2>更小的标题</h2>
<p>这是一个段落。</p>

</body>
</html>

3.样式优先级
- 行内样式(在 HTML 元素中)
- 外部和内部样式表(在 head 部分)
- 浏览器默认样式
4.背景
- background-color
<!DOCTYPE html>
<html>
<head>
<style>
div {
  background-color: green;
}

div.first {
  opacity: 0.1;
}

div.second {
  opacity: 0.3;
}

div.third {
  opacity: 0.6;
}
</style>
</head>
<body>

<h1>透明框</h1>

<p>当使用 opacity 属性为元素背景添加透明度时,其所有子元素也会变为透明。这可能会使完全透明的元素内的文本难以阅读:</p>

<div class="first">
  <h1>opacity 0.1</h1>
</div>

<div class="second">
  <h1>opacity 0.3</h1>
</div>

<div class="third">
  <h1>opacity 0.6</h1>
</div>

<div>
  <h1>opacity 1(默认)</h1>
</div>

</body>
</html>

background-image 属性指定用作元素背景的图像。
<!DOCTYPE html>
<html>
<head>
<style>
body {
  background-image: url("/i/paper.jpg");
}
</style>
</head>
<body>

<h1>Hello World!</h1>

<p>此页面以图像为背景!</p>

</body>
</html>

默认情况下,background-image 属性在水平和垂直方向上都重复图像。
如果上面的图像仅在水平方向重复 (background-repeat: repeat-x;),则背景看起来会更好:
如需垂直重复图像,请设置 background-repeat: repeat-y;
背景图像仅显示一次:
body {
  background-image: url("tree.png");
  background-repeat: no-repeat;
}
把背景图片放在右上角:
<!DOCTYPE html>
<html>
<head>
<style>
body {
  background-image: url("/i/photo/tree.png");
  background-repeat: no-repeat;
  background-position: right top;
  margin-right: 200px;
}
</style>
</head>
<body>

<h1>Hello World!</h1>
<p>W3School 不重复并设置位置的背景实例。</p>
<p>现在,背景图像仅显示一次,并且位置与文本分开。</p>
<p>在此例中,我们还在右侧添加了外边距,因此背景图片将永远不会干扰文本。</p>

</body>
</html>

background-attachment 属性指定背景图像是应该滚动还是固定的(不会随页面的其余部分一起滚动):
body {
  background-image: url("/i/photo/tree.png");
  background-repeat: no-repeat;
  background-position: right top;
  margin-right: 200px;
  background-attachment: fixed;
}
指定背景图像应随页面的其余部分一起滚动:
body {
  background-image: url("tree.png");
  background-repeat: no-repeat;
  background-position: right top;
  background-attachment: scroll;
}
4.边框
演示不同的边框样式:
p.dotted {border-style: dotted;}
p.dashed {border-style: dashed;}
p.solid {border-style: solid;}
p.double {border-style: double;}
p.groove {border-style: groove;}
p.ridge {border-style: ridge;}
p.inset {border-style: inset;}
p.outset {border-style: outset;}
p.none {border-style: none;}
p.hidden {border-style: hidden;}
p.mix {border-style: dotted dashed solid double;}

边框宽度
border-width: 5px;
border-width: 25px 10px 4px 35px; /* 上边框 25px,右边框 10px,下边框 4px,左边框 35px */
边框颜色
border-color: red green blue yellow; /* 上红、右绿、下蓝、左黄 */
border-color: #ff0000; /* 红色 */
边框各边
p {
  border-top-style: dotted;
  border-right-style: solid;
  border-bottom-style: dotted;
  border-left-style: solid;
}

圆形边框
<!DOCTYPE html>
<html>
<head>
<style>
p.normal {
  border: 2px solid red;
}

p.round1 {
  border: 2px solid red;
  border-radius: 5px;
}

p.round2 {
  border: 2px solid red;
  border-radius: 8px;
}

p.round3 {
  border: 2px solid red;
  border-radius: 12px;
}
</style>
</head>
<body>

<h1>border-radius 属性</h1>

<p>此属性用于为元素添加圆角:</p>

<p class="normal">普通边框</p>
<p class="round1">圆角边框</p>
<p class="round2">角更圆的边框</p>
<p class="round3">角最圆的边框</p>

</body>
</html>

外边距
p {
  margin-top: 100px;
  margin-bottom: 100px;
  margin-right: 150px;
  margin-left: 80px;
}
内边距
<!DOCTYPE html>
<html>
<head>
<style>
div {
  border: 1px solid black;
  background-color: lightblue;
  padding-top: 50px;
  padding-right: 30px;
  padding-bottom: 50px;
  padding-left: 80px;
}
</style>
</head>
<body>

<h1>使用单独的内边距属性</h1>

<div>这个 div 元素的上内边距是 50px,右内边距是 30px,下内边距是 50px,左内边距是 80px。</div>

</body>
</html>
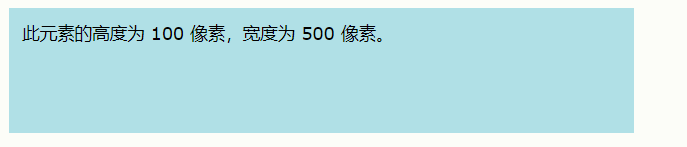
设置 <div> 元素的高度和宽度:
div {
  height: 200px;
  width: 50%;
  background-color: powderblue;
}
 5.文本
5.文本
对齐
<!DOCTYPE html>
<html>
<head>
<style>
h1 {
  text-align: center;
}

h2 {
  text-align: left;
}

h3 {
  text-align: right;
}
</style>
</head>
<body>

<h1>标题 1(居中对齐)</h1>
<h2>标题 2(左对齐)</h2>
<h3>标题 3(右对齐)</h3>

<p>上面的三个标题是居中、左和右对齐。</p>

</body>
</html>
 修饰
修饰
<!DOCTYPE html>
<html>
<head>
<style>
h1 {
  text-decoration: overline;
}

h2 {
  text-decoration: line-through;
}

h3 {
  text-decoration: underline;
}
</style>
</head>
<body>

<h1>This is heading 1</h1>
<h2>This is heading 2</h2>
<h3>This is heading 3</h3>

</body>
</html>

6.图标
<!DOCTYPE html>
<html>
<head>
<title>Font Awesome Icons</title>
<meta name="viewport" content="width=device-width, initial-scale=1">
<script src="https://kit.fontawesome.com/a076d05399.js"></script>
<!--Get your own code at fontawesome.com-->
</head>
<body>

<p>一些 Font Awesome 图标:</p>
<i class="fas fa-cloud"></i>
<i class="fas fa-heart"></i>
<i class="fas fa-car"></i>
<i class="fas fa-file"></i>
<i class="fas fa-bars"></i>

<p>有样式的 Font Awesome 图标(尺寸和颜色):</p>
<i class="fas fa-cloud" style="font-size:24px;"></i>
<i class="fas fa-cloud" style="font-size:36px;"></i>
<i class="fas fa-cloud" style="font-size:48px;color:red;"></i>
<i class="fas fa-cloud" style="font-size:60px;color:lightblue;"></i>

</body>
</html>


 256
256


 被折叠的 条评论
为什么被折叠?
被折叠的 条评论
为什么被折叠?
 到【灌水乐园】发言


