在写页面之前,我们首先要对所要实现的界面进行相应的分析,理清层次之后再写。
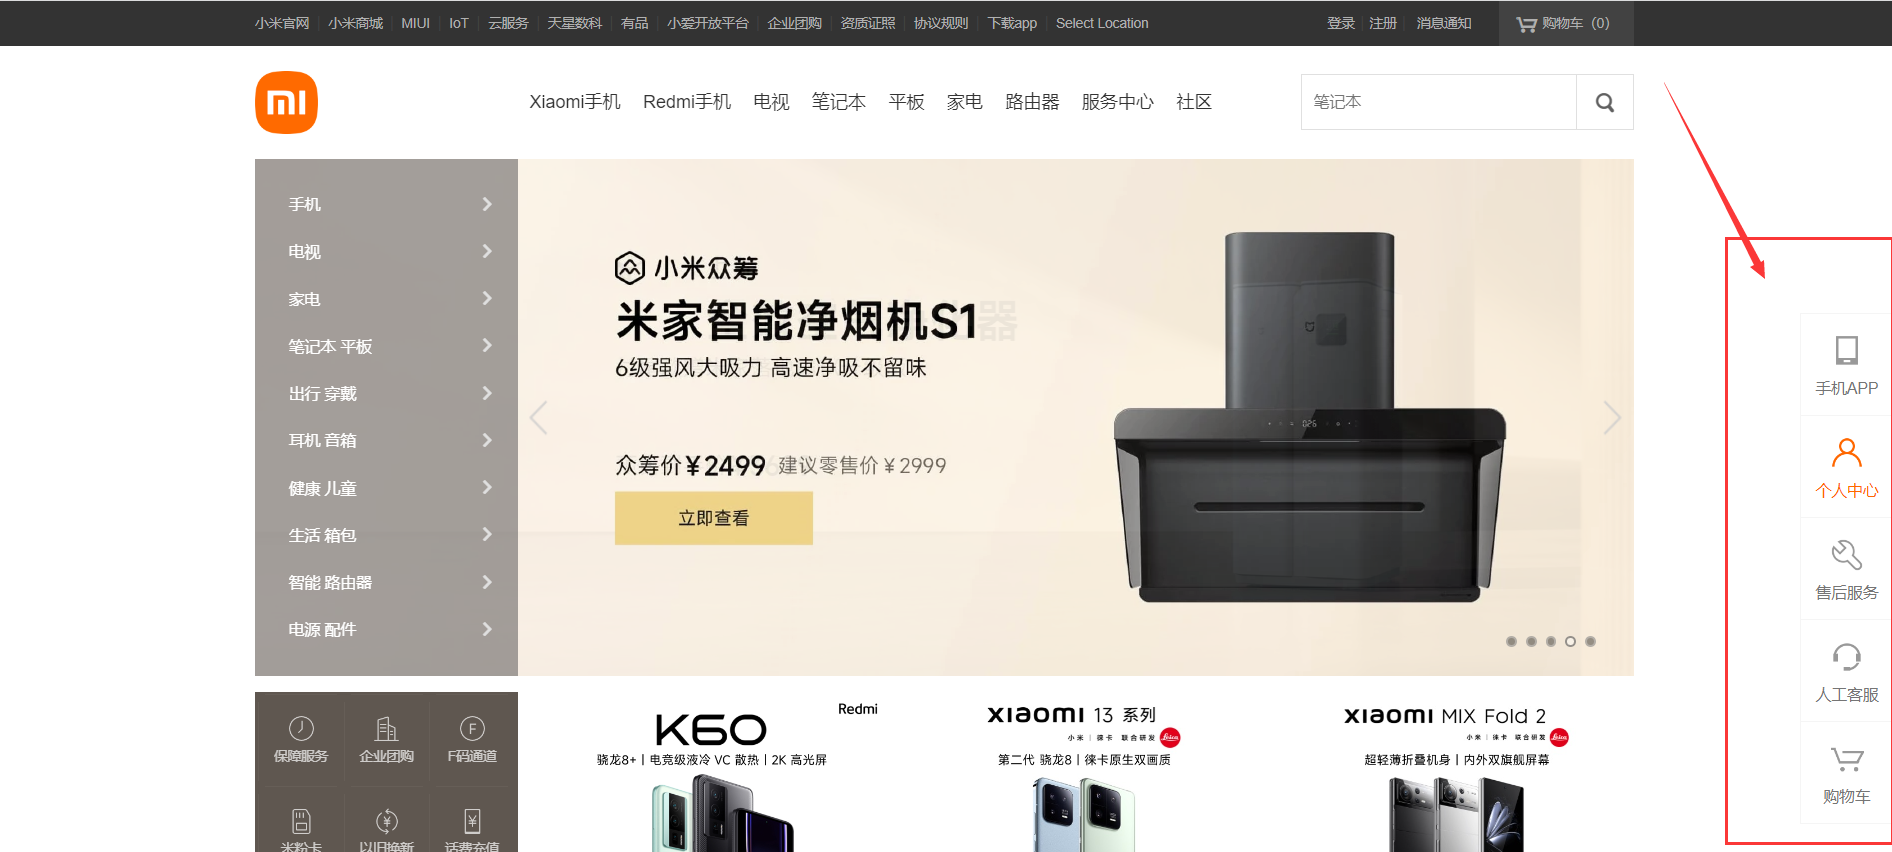
今天我们以小米官网为例,来进行这样悬浮框的实现。
第一步,我们要分析一下。
我们需要实现的功能:
滑动滚轮,悬浮框能够在页面上呈现,不变。
当鼠标点击的时候(悬停),悬浮框里的单个模块部分会变色。
思路:
先设一个大盒子(橙色),里面套入5个小盒子(浅绿色),每个浅绿色盒子相当于一个模块,所以每个盒子中会装有一个(为变色的图片)图片和一行字。对大盒子和小盒子进行设置宽高样式,利用左浮动,使之呈现出悬浮框的效果,最后利用定位,将其定位到界面的右侧。
<!-- 这是最外面橙色盒子 -->
<div class="xuanfukuang c">
<!-- 这是里面的浅绿色盒子 -->
<div class="border-big l">
<!-- 这是绿色盒子 -->
<div class="big-mid1">
<!-- 这是粉色盒子 -->
<div class="border-mid1"></div>
</div>
<!-- 这是图片下面的汉字 -->
<p>手机APP</p>
</div>
<div class="border-big l">
<div class="big-mid1">
<div class="border-mid2"></div>
</div>
<p>个人中心</p>
</div>
<div class="border-big l">
<div class="big-mid1">
<div class="border-mid3"></div>
</div>
<p>售后服务</p>
</div>
<div class="border-big l">
<div class="big-mid1">
<div class="border-mid4"></div>
</div>
<p>人工客服</p>
</div>
<div class="border-big l">
<div class="big-mid1">
<div class="border-mid5"></div>
</div>
<p>购物车</p>
</div>
/* 1、先设一个大边框,然后中间设5个小盒子,然后左浮动,将大边框定位 */
.xuanfukuang{
width: 84px;
height: 460px;
/* background: #fb9090; */
position: fixed;
top: 200px;
right: 0;
/*设置将字居中 */
text-align: center;
}
.border-big{
box-sizing: border-box;
padding-top: 20px;
width: 84px;
height: 92px;
/* background: #cefb90; */
border: 1px solid #d0cbcb;
}
.border-mid1{
/* 2、设置小盒子边框的高,不然背景图片显示不出来 */
height: 30px;
/* 3、设置背景图片 */
background-image: url(https://i8.mifile.cn/b2c-mimall-media/98a23aae70f25798192693f21c4d4039.png);
/*4、 设置背景图片不重复 */
background-repeat: no-repeat;
/*5、 设置背景图片的宽高 */
background-size: 30px 30px;
/* 6、将图片定位到小盒子的中间 */
background-position: 50%;
}
.border-mid2{
height: 30px;
background-image: url(https://i8.mifile.cn/b2c-mimall-media/55cad219421bee03a801775e7309b920.png);
background-repeat: no-repeat;
background-size: 30px 30px;
background-position: 50%;
}
.border-mid3{
height: 30px;
background-image: url(https://cdn.cnbj1.fds.api.mi-img.com/mi-mall/12eb0965ab33dc8e05870911b90f3f13.png);
background-repeat: no-repeat;
background-size: 30px 30px;
background-position: 50%;
}
.border-mid4{
height: 30px;
background-image: url(https://i8.mifile.cn/b2c-mimall-media/4f036ae4d45002b2a6fb6756cedebf02.png);
background-repeat: no-repeat;
background-size: 30px 30px;
background-position: 50%;
}
.border-mid5{
height: 30px;
background-image: url(https://i8.mifile.cn/b2c-mimall-media/d7db56d1d850113f016c95e289e36efa.png);
background-repeat: no-repeat;
background-size: 30px 30px;
background-position: 50%;
}
完成初始样式之后,接下来就是实现悬停变色的效果。
在粉色盒子中放入背景图片的样式(未变色的图片),在粉色盒子外面套一个绿色盒子,里面放入背景图片的样式(已变色的图片),然后利用hover 样式对大盒子进行设置颜色,这样会使鼠标悬停的时候,字会变色,然后用hover 和后代选择器,使得图片进行变色。
注意:在粉色盒子中要设置背景图片样式,如果在盒子中用img样式的话,后面悬停的效果实现不了。
.big-mid1{
/* border: 1px solid red; */
height: 30px;
background-repeat: no-repeat;
background-size: 30px 30px;
background-position: 50%;
}
/* 使背景图片变色 */
/* 选中大盒子时,里面的图片会变色,所以hover需要给到大盒子 ,利用后代选择器将需要变的背景图片放进去 */
.border-big:hover .border-mid1{
background-image: url(https://i8.mifile.cn/b2c-mimall-media/74c4fcb4475af8308e9a670db9c01fdf.png);
}
.border-big:hover .border-mid2{
background-image: url(https://i8.mifile.cn/b2c-mimall-media/41f858550f42eb1770b97faf219ae215.png);
}
.border-big:hover .border-mid3{
background-image: url(https://cdn.cnbj1.fds.api.mi-img.com/mi-mall/95fbf0081a06eec7be4d35e277faeca0.png);
}
.border-big:hover .border-mid4{
background-image: url(https://i8.mifile.cn/b2c-mimall-media/5e9f2b1b0da09ac3b3961378284ef2d4.png);
}
.border-big:hover .border-mid5{
background-image: url(https://i8.mifile.cn/b2c-mimall-media/692a6c3b0a93a24f74a29c0f9d68ec71.png);
}
/* 选中大盒子时,里面的字会变色,因为字是p标签,所以,当选中大盒子时会变色 */
.border-big:hover{
color: coral;
}
效果图: