


目录
vue组件学习
代码:
<!DOCTYPE html>
<head>
    <title>组件学习</title>
    <script src="../vue.js"></script>
</head>
<body>
    <!-- 一个页面可以有多个vue实例 -->
    <div id="app">
        <p>{{msg}}</p>
        <my-component name="父组件传值到子组件"></my-component>
        <my-component></my-component>
        <my-component></my-component>
    </div>
    <div id="tianjin">
        <p>{{str}}</p>
        <twice-component></twice-component>
    </div>
    <!-- template 模板 -->
    <!-- <template > 标签类比<style> -->
    <template id="temptest">
        <button v-on:click="count++">被单击{{count}}次  {{message}}</button>
    </template>

    <script>
        //组件只能通过函数来定义  在script里写全局组件
        Vue.component('my-component',{
            props:['name'],//传递
            data(){
                return{count:0,message:'改变前'}
            },
            template: '#temptest'
        })
        // 数据可以通过Vue实例也可呀通过函数定义
        var vm = new Vue({
            el:'#app',
            data:{
                msg:"数据"
            }
            // ,
            // data(){
            //     return{ msg:"data函数方式"}
            // }
        });
        var vm = new Vue({
            el:'#tianjin',
            data:{
                str:"第二个vue实例"
            },
            // 在实例里写局部的组件
            components:{
                //自动把驼峰名称转换为带-的。例如 组件twiceComponent 调用时是<twice-component>
                twiceComponent:{
                 data(){
                   return{ count:0}
                },
                    template: '<button v-on:click="count++">第二个vue实例被单击{{count}}次</button>'
                }
            }
        })
    </script>
</body>
运行结果如下

单击按钮会增加次数

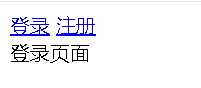
vue组件切换
代码如下:
<!DOCTYPE html>
<head>
    <title>组件切换</title>
    <script src="../vue.js"></script>
</head>
<body>
    <div id="app">
        <a href="#" @click.prevent="flag?flag:flag=!flag">登录</a>
        <a href="#" @click.prevent="flag?flag=!flag:flag">注册</a>
        <login v-if="flag"></login>
        <register v-else></register>
    </div>

    <script>
        Vue.component('login',{
            template: '<div>登录页面</div>',
        })
        Vue.component('register',{
            template: '<div>注册页面</div>',
            created(){

            }
        })
        var vm = new Vue({
            el:'#app',
            data:{
                flag:true
            },
            // 钩子函数
            beforeCreate(){

            },
            created(){

            },
            beforeMount(){

            },
            mounted(){

            },
            beforeUpdate(){

            },
            updated(){

            },
            beforeDestroy(){

            },
            destroyed(){

            }

        })
    </script>
</body>
运行结果为:
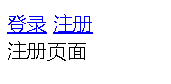
单击注册可变为
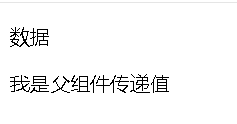
vue父组件传递子组件
<!DOCTYPE html>
<head>
    <title>父组件传递子组件</title>
    <script src="../vue.js"></script>
</head>
<body>
    <div id="app">
        <p>{{msg}}</p>
        <my-parent name="传递值"></my-parent>
    </div>

    <script>
        Vue.component('my-parent',{
            // props 选项传递数据
            props:['name'],
            template:'<div>我是父组件{{name}}</div>'
        })
        var vm = new Vue({
            el:'#app',
            data:{
                msg:"数据"
            }
        })
    </script>
</body>
运行结果为:
vue子组件向父组件传值
<!DOCTYPE html>
<head>
    <title>子组件向父组件传值</title>
    <script src="../vue.js"></script>
</head>
<body>
    <div id="app">
        <parent></parent>
    </div>

    <template id="child">
        <div>
            <button @click="click">Send</button>
            <input type="text" v-model="message">
        </div>
    </template>

    <script>

        // 父组件
        Vue.component('parent',{
            template:'<div><child @childfn="transContent"></child>'+'子组件传来的值: {{message}}</div>',
            data(){return {message: ''}},
            methods: {
                transContent(payload){
                        this.message = payload
                }}
            })

        // 子组件
        Vue.component('child',{
            template: '#child',
            data(){
                return {message: '子组件的消息'}
            },
            methods: {
                click(){
                    // $emit 方法就是触发事件,并把本值传过去
                    this.$emit('childfn', this.message);
                }
            }
        })
        var vm = new Vue({
            el:'#app',
            data:{
                msg:"数据"
            }
        })


    </script>
</body>
运行结果为:

输入框输入消息后点击Send按钮为:

生命周期
<!DOCTYPE html>
<head>
    <title>生命周期</title>
    <script src="../vue.js"></script>
</head>
<body>
    <div id="app">
        <div v-if="isShow" ref="div">test</div>
        <button @click="isShow=!isShow">更新</button>
    </div>

    <script>
        var vm = new Vue({
            el:'#app',
            data:{
                msg:"数据",
                isShow: false
            },
            // beforeCreate:统计一个Vue实例的耗时 与created方法 获取当前时间相减,就能得到实例创建的耗时。
            beforeCreate(){ //不常用
                console.log('实例创建之前')
                console.log(this.$data.msg)//this.$data.msg=this.msg  $data可以省略
            },
            //created:最常用就是请求后端接口,获取数据,将数据同步到data里
            created(){  //常用
                console.log('实例创建之后')
                console.log(this.msg)
            },
            beforeMount(){
                console.log('挂载之前')
                // 通过this.$el获取el的DOM元素
                console.log(this.$el.innerHTML)
            },
            mounted(){
                console.log('挂载之后')
                // 通过this.$el获取el的DOM元素
                console.log(this.$el.innerHTML)
            },
            beforeUpdate(){
                console.log('更新之前')
                console.log(this.isShow)
                console.log(this.$refs.div)
            },
            updated(){
                console.log('更新之后')
                console.log(this.isShow)
                console.log(this.$refs.div)

            },
            beforeDestroy(){
                console.log('销毁之前')
            },
            destroyed(){
                console.log('销毁之后')
            }

        })
    </script>
</body>
运行结果为:

点击更新后为:


 382
382


 被折叠的 条评论
为什么被折叠?
被折叠的 条评论
为什么被折叠?
 到【灌水乐园】发言


