


目录
2.1昵称设置
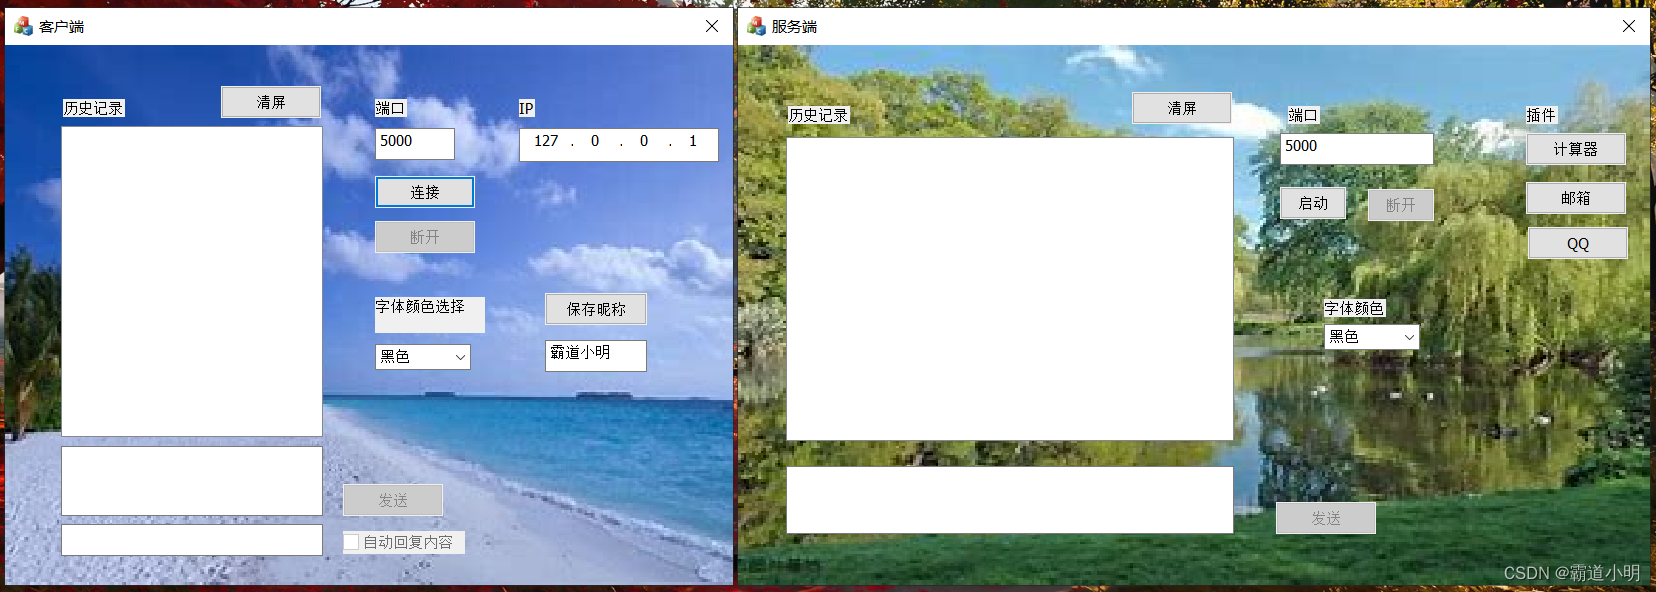
最终目标
配置昵称原理
1.启动客户端,就应该有个读取配置文件的操作,把昵称从配置文件里面读到控件
2.客户配置昵称,需要写入到配置文件
在昵称保存控件函数中
void CMFCChatClientDlg::OnBnClickedSavenameBtn()
{
	//获取文本框里的内容
	CString strName;
	GetDlgItemText(IDC_NAME_EDIT, strName);
	//判断昵称框是否为空
	if (strName.GetLength() <= 0) {
		MessageBox(_T("昵称不能为空!"));
		return;
	}
	//MB_OKCANCEL表示消息框是OK/CANCEL键,用户选择OK则进入if语句
	if (IDOK == AfxMessageBox(_T("是否修改昵称"), MB_OKCANCEL)) {
		//保存昵称
		//关于路径数组的定义,内置的260大小
		WCHAR strPath[MAX_PATH] = { 0 };
		//获取当前路径
		GetCurrentDirectoryW(MAX_PATH, strPath);

		//L"%s"也表示宽字节,如果是"%ls"发现无法输出全部内容
		TRACE(L"#####strPath= %s", strPath);

		CString strFilePath;
		//大写L表示宽字节,.ini表示配置文件
		strFilePath.Format(L"%ls//Test.ini", strPath);

		//在配置文件里写入一个字符串
		WritePrivateProfileStringW(_T("CLIENT"), _T("NAME"), strName, strFilePath);
		//WritePrivateProfileStringW(
		//	_In_opt_ LPCWSTR lpAppName,	项名
		//	_In_opt_ LPCWSTR lpKeyName,	键名
		//	_In_opt_ LPCWSTR lpString,
		//	_In_opt_ LPCWSTR lpFileName
		//);
	}

}
在初始化都画框函数中OnInitDlg
//从配置文件获取昵称
WCHAR strPath[MAX_PATH] = { 0 };
GetCurrentDirectoryW(MAX_PATH, strPath);
CString strFilePath;
strFilePath.Format(L"%ls//Test.ini", strPath);
//拿到昵称
WCHAR wszName[MAX_PATH] = { 0 };
DWORD dwNum = GetPrivateProfileStringW(_T("CLIENT"), _T("NAME"), NULL, wszName, MAX_PATH, strFilePath);
if (dwNum > 0) {
	//读到了
	//显示在昵称框
	GetDlgItem(IDC_NAME_EDIT)->SetWindowText(wszName);
}
else {
	//没有读到或者文件损坏了
	//先随便在文件写一个,再显示在昵称框
	WritePrivateProfileStringW(_T("CLIENT"), _T("NAME"), _T("客户端"), strFilePath);
	GetDlgItem(IDC_NAME_EDIT)->SetWindowText(_T("客户端"));
}
//GetPrivateProfileStringW(
//	_In_opt_ LPCWSTR lpAppName,	项名
//	_In_opt_ LPCWSTR lpKeyName,	键名
//	_In_opt_ LPCWSTR lpDefault,	默认值
//	_Out_writes_to_opt_(nSize, return +1) LPWSTR lpReturnedString,	一个Buff,将内容搞到buff里
//	_In_     DWORD nSize,
//	_In_opt_ LPCWSTR lpFileName
//);
2.2自动回复
在客户端的接收函数中,如果用户选择了自动发送消息,则将消息框中的内容发送给服务端,然后在历史消息框中显示该条消息
在客户端OnReceive函数中补充代码
//自动回复
//如果选中
if (((CButton*)dlg->GetDlgItem(IDC_AUTOSEND_RADIO))->GetCheck()) {
	//1.读编辑框的内容
	CString strAutoSendMsg;
	dlg->GetDlgItemText(IDC_AUTOSEND_RADIO, strAutoSendMsg);
	//2.封包+组格式
	CString strName;
	dlg->GetDlgItemTextW(IDC_NAME_EDIT, strName);
	//时间+昵称+[自动回复]+内容
	CString strMsg = strName + _T(":") + _T("[自动回复]") + strAutoSendMsg;
	char* szSendBuf = T2A(strMsg);
	//发送给服务端
	dlg->m_client->Send(szSendBuf, SEND_MAX_BUF, 0);
	//显示在列表框
	CString strShow;
	strShow = dlg->CatShowString(_T(""), strMsg);
	dlg->m_list.AddString(strShow);

}
补充自动回复的控件函数
//自动回复
void CMFCChatClientDlg::OnBnClickedAutosendRadio()
{
	if (((CButton*)GetDlgItem(IDC_AUTOSEND_RADIO))->GetCheck()) {
		TRACE("####选中");
		((CButton*)GetDlgItem(IDC_AUTOSEND_RADIO))->SetCheck(FALSE);
	}
	else {
		TRACE("#####为选中");
		((CButton*)GetDlgItem(IDC_AUTOSEND_RADIO))->SetCheck(TRUE);
	}
}
2.3清屏
只需要在对应控件函数下使用ResetControl函数即可
2.4按钮添加容错
在客户端或者服务端启动时,应将除连接控件外的一些按钮置灰,防止程序崩溃
GetDlgItem(IDC_SEND_BTN)->EnableWindow(FALSE);
//断开按钮置灰
GetDlgItem(IDC_DISCONNECT_BTN)->EnableWindow(FALSE);
//自动回复置灰
GetDlgItem(IDC_AUTOSEND_CHECK)->EnableWindow(FALSE);
//连接按钮可用
GetDlgItem(IDC_CONNECT_BTN)->EnableWindow(TRUE);
2.5断开连接

客户端
在断开控件函数里
void CMFCChatClientDlg::OnBnClickedDisconnectBtn()
{
	//1.控制控件

	GetDlgItem(IDC_SEND_BTN)->EnableWindow(FALSE);
	//断开按钮置灰
	GetDlgItem(IDC_DISCONNECT_BTN)->EnableWindow(FALSE);
	//自动回复置灰
	GetDlgItem(IDC_AUTOSEND_CHECK)->EnableWindow(FALSE);
	//连接按钮可用
	GetDlgItem(IDC_CONNECT_BTN)->EnableWindow(TRUE);

	//2.回收资源
	m_client->Close();
	if (m_client != NULL) {
		delete m_client;
		m_client = NULL;
	}

	//3.显示到列表框
	CString strShow;
	strShow = CatShowString(_T(""), _T("断开与服务器连接"));
	m_list.AddString(strShow);
	UpdateData(FALSE);
}
服务端
在断开控件函数里
void CMFCChartServerDlg::OnBnClickedStopBtn()
{
	//1.控制控件
	GetDlgItem(IDC_START_BTN)->EnableWindow(TRUE);
	GetDlgItem(IDC_STOP_BTN)->EnableWindow(FALSE);
	GetDlgItem(IDC_SEND_BTN)->EnableWindow(FALSE);

	//2.回收资源
	m_server->Close();
	if (m_server != NULL) {
		delete m_server;
		m_server = NULL;
	}
	if (m_chat != NULL) {
		delete m_chat;
		m_chat = NULL;
	}

	//3.显示在列表框
	CString strShow;
	strShow = CatShowString(_T(""), _T("服务器停止"));
	m_list.AddString(strShow);
	UpdateData(FALSE);

}
2.6改变字体颜色
为控件绑定成员变量,在初始化函数中添加颜色并设置默认选项
m_WordColorCombo.AddString(_T("黑色"));
m_WordColorCombo.AddString(_T("红色"));
m_WordColorCombo.AddString(_T("蓝色"));
m_WordColorCombo.AddString(_T("绿色"));
//设置当前选择为第0个
m_WordColorCombo.SetCurSel(0);
SetDlgItemText(IDC_COLOUR_COMBO, _T("黑色"));
设置控制颜色响应函数
HBRUSH CMFCChatClientDlg::OnCtlColor(CDC* pDC, CWnd* pWnd, UINT nCtlColor)
{
	HBRUSH hbr = CDialogEx::OnCtlColor(pDC, pWnd, nCtlColor);
	CString strColor;
	m_WordColorCombo.GetWindowTextW(strColor);
	//GetDlgCtrlID返回指向给定控件或子窗口的指针,不存在返回NULL
	if (IDC_LIST1 == pWnd->GetDlgCtrlID() || IDC_SENDMSG_EDIT == pWnd->GetDlgCtrlID()) {
		if (strColor == L"黑色") {
			pDC->SetTextColor(RGB(0, 0, 0));
		}
		else if (strColor == L"红色") {
			pDC->SetTextColor(RGB(255, 0, 0));
		}
		else if (strColor == L"绿色") {
			pDC->SetTextColor(RGB(0, 255, 255));
		}
		else if (strColor == L"蓝色") {
			pDC->SetTextColor(RGB(0, 0, 255));
		}
	}
	return hbr;
}
2.7对话框界面插入背景图
在OnPaint函数中
//确定目标区域→加载资源图片并且转换为内存设备→绘图
		//1.定义dc
		CPaintDC dc(this); // 用于绘制的设备上下文
		//2.确定绘制区域
		CRect rect;
		GetClientRect(&rect);	//拿到对话框区域
		//3.创建一个内存设备环境 创建兼容性dc
		CDC dcBmp;
		dcBmp.CreateCompatibleDC(&dcBmp);


		//4.载入资源图片
		CBitmap bmpBackGround;
		bmpBackGround.LoadBitmap(IDB_BITMAP);
		//5.将图片紫云啊载入到位图里面bBitMap位图
		BITMAP bBitmap;
		bmpBackGround.GetBitmap(&bBitmap);

		//6.将位图选入到临时的内存设备环境
		CBitmap* pbmpOld = dcBmp.SelectObject(&bmpBackGround);

		//7.开始绘制
		dc.StretchBlt(0, 0, rect.Width(), rect.Height(), &dcBmp, 0, 0, bBitmap.bmWidth, bBitmap.bmHeight, SRCCOPY);


 429
429


 被折叠的 条评论
为什么被折叠?
被折叠的 条评论
为什么被折叠?
 到【灌水乐园】发言


