


目录
 今日良言:努力到无能为力,拼命到感动自己

一般使用数组实现的固定大小的队列是不是无法重复利用?
答案是肯定的。
我们无论是队列插入数据,还是取数据都是通过下标来访问,一但将某一下标处的数据取出后,该下标处已经无法再次插入数据。所以说,我们能否想到如何利用一定的算法来实现固定大小的队列可以重复使用呢?
针对上述问题,这篇博客可以很好地解决这个问题。
首先我们来熟悉一下利用数组实现的固定数据的普通队列。
一、普通队列
![]() 1.思路实现
1.思路实现
首先我们需要清楚如何使用数组实现队列,首先我们需要一个数组,该数组有一定容量,通过队列“先进先出”的特性,设置一个下标front来指向队头元素,再设置一个下标rear来指向队尾元素,由此我们可以创建一个类 ArrayQueue 该类里面有四个私有属性,同时我们创建一个构造方法来初始化这个 ArrayQueue类, 如下图

这里将front和rear设置为-1,该队列所能容纳的数据取决于用户输入的数据个数。
创建好私有属性已经构造方法后,我们就可以实现基本功能了
判断队列是否空
思路:front代表队头元素下标的前一个下标,rear代表队尾下标,所有说判断队列是否为空的语句就是 front == rear 是否为真,如下图:
public boolean isEmpty() {
    return rear == front;
}
判断队列是否满
思路:rear代表的是队尾数据下标,所以说判断队列是否满的语句如下:
public boolean isFull() {
    return this.rear == this.maxSize-1;
}
入队列
思路:想要往队列中插入数据,首先需要知道该队列是否满了,所以说第一步需要判满,其次,我们设置的私有属性rear代表的是队尾数据的下标,但是我们设置的rear的初始值为-1 所以我们应当在插入数据之前先 ++rear,如下代码:
public void addQueue(int data) {
    // 判满
    if (this.isFull()) {
        System.out.println("队列已满,操作失败");
        return;
    }
    this.rear++;
    array[rear] = data;
}
出队列
思路: 在取队头数据之前,我们需要对队列进行判空操作,然后进行取数据操作,我们已经设置了front作为指向队头数据下标的前一个下标,所以在取数据之前需要让front++ 如下代码:
public int get() {
    if (this.isEmpty()) {
        throw new RuntimeException("队列已经空,操作失败");
    }
    front++;
    return array[front];
}
查看队头数据
思路:首先进行判空操作,然后再进行后续操作,但是需要注意的是,我们这里只是查看一下队头的数据,而非取数据,所以不需要对front的值进行操作,直接返回当前front+1下标的值即可:
public int peek() {
    if (isEmpty()) {
        throw new RuntimeException("队列一空,操作失败");
    }
    return array[front+1];
}
打印队列中数据
思路: front代表的是当前队列队头数据的前一个下标,rear代表的是当前队尾数据的下标,所以队列数据的个数就是front+1 到 rear之间的数据个数,如下代码:
public void show() {
    // 判空
    if (isEmpty()) {
        throw new RuntimeException("队列为空,无法打印数据");
    }
    for (int i = front+1; i <= rear; i++) {
        System.out.print(this.array[i] + " ");
    }
    System.out.println();
}
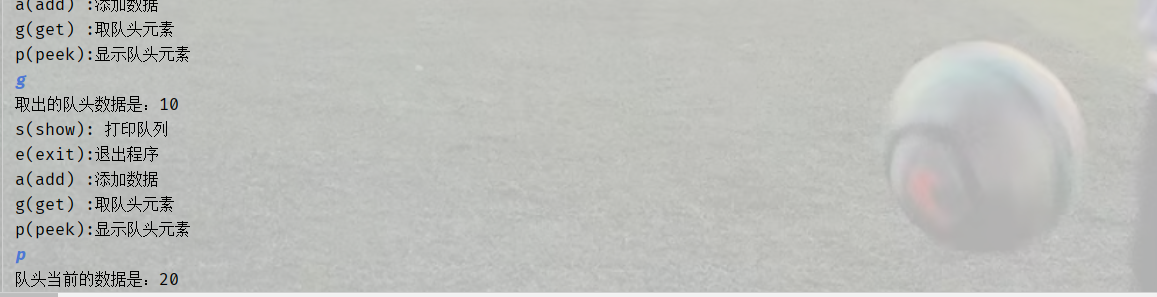
![]() 2.效果演示
2.效果演示
操作选择

添加数据:
成功
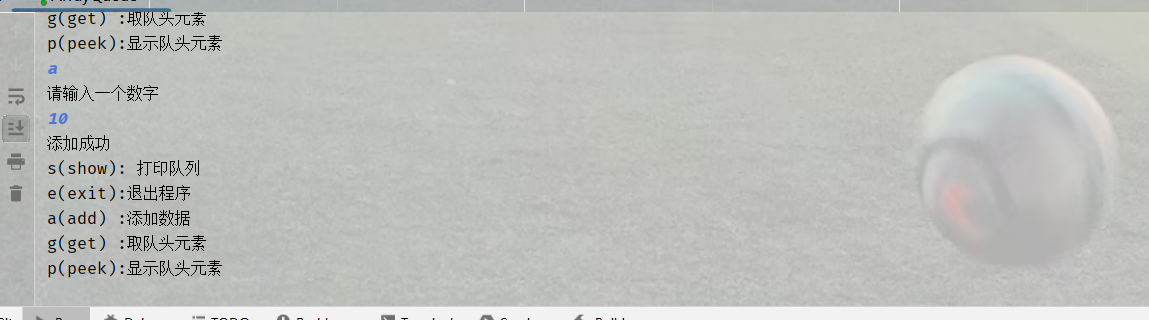
失败

打印数据

查看队头数据

取队头数据
![]() 3.完整代码
3.完整代码
package exercise;

import java.util.Scanner;
import java.util.WeakHashMap;

class Queue {
    private int maxSize; // 数组容量
    private int[] array; // 数组
    private int front; // 队头元素下标的前一个下标
    private int rear;// 队尾下标

    public Queue(int size) {
        this.maxSize = size;
        array = new int[this.maxSize];
        this.front = -1;
        this.rear = -1;
    }

    /**
     * 判断满
     */
    public boolean isFull() {
        return this.rear == this.maxSize - 1;
    }

    /**
     * 判空
     */
    public boolean isEmpty() {
        return rear == front;
    }

    /**
     * 添加元素
     */
    public void addQueue(int data) {
        // 判满
        if (this.isFull()) {
            System.out.println("队列已满,操作失败");
            return;
        }
        this.rear++;
        array[rear] = data;
        System.out.println("添加成功");
    }

    /**
     * 出队列
     */
    public int get() {
        if (this.isEmpty()) {
            throw new RuntimeException("队列已经空,操作失败");
        }
        front++;
        return array[front];
    }

    /**
     * 查看队头元素
     *
     * @return 返回对头元素
     */
    public int peek() {
        if (isEmpty()) {
            throw new RuntimeException("队列一空,操作失败");
        }
        return array[front + 1];
    }

    /**
     * 打印所有数据
     */
    public void show() {
        // 判空
        if (isEmpty()) {
            throw new RuntimeException("队列为空,无法打印数据");
        }
        for (int i = front+1; i <= rear; i++) {
            System.out.print(this.array[i] + " ");
        }
        System.out.println();
    }
}
public class ArrayQueue {
    public static void main(String[] args) {
        Queue queue = new Queue(4);
        Scanner scan = new Scanner(System.in);
        boolean loop = true;
        while (loop) {
            System.out.println("s(show): 打印队列");
            System.out.println("e(exit):退出程序");
            System.out.println("a(add) :添加数据");
            System.out.println("g(get) :取队头元素");
            System.out.println("p(peek):显示队头元素");
            char choice = scan.next().charAt(0);
            switch (choice) {
                case 's':
                    queue.show();
                    break;
                case 'a':
                    System.out.println("请输入一个数字");
                    int data = scan.nextInt();
                    queue.addQueue(data);
                    break;
                case 'g':
                    try{
                        int ret = queue.get();
                        System.out.println("取出的队头数据是:"+ret);
                    }catch(Exception e) {
                        e. printStackTrace();
                    }
                    break;
                case 'p':
                    try{
                        int ret = queue.peek();
                        System.out.println("队头当前的数据是:"+ret);
                    }catch(Exception e) {
                        e.printStackTrace();
                    }
                    break;
                case 'e':
                    scan.close();
                    System.out.println("退出程序");
                    loop = false;
                    break;
                default:
                    System.out.println("输入有误,请重新输入");
                    break;
            }
        }
    }
}
二、取模队列
![]() 1.实现思路:
1.实现思路:
我们先来分析一下,如何通过取模实现队列重复利用。
当我们往队列中添加数据时,队尾下标是需要取模的,因为队尾下标 <= 队列的有效数据的长度,当取数据时,如果将第一轮队列中的数据都取出后,还要取数据的话,此时也需要对队头数据的下标进行取模,所以说,我们需要对队头下标和队尾下标进行取模操作,然后我们再来分析一下,我们需要设置的字段和方法,其实和普通队列的私有属性相同,但是此时的构造方法与普通队列有些许差别,如下:
front表示当前队头数据的下标,rear表示队尾数据的下一个位置。接下来分析一下相关操作
判空操作
思路:判断front是否与rear相等即可
public boolean isEmpty() {
    return this.rear == this.front;
}
判满操作
思路:试想一下,此时的判满操作,还能是 rearr == maxSize-1 吗?
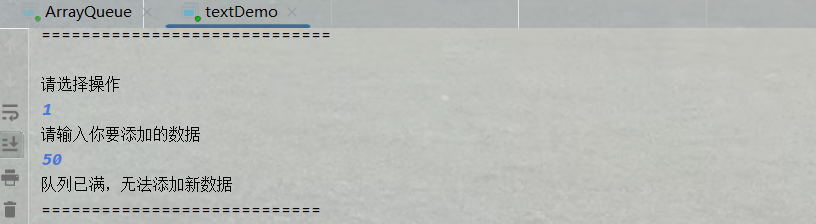
显而易见,当然不是。因为我们需要进行取模操作,所以说上面判满的语句我们需要重新分析一下,我们这里将数组最后一个下标留作缓冲区,也就是说,maxSize = 4的数组,我们最多一次性可以插入的有效数据为3个,这里我们用画图解释一下,如何实现判满操作,如下图:
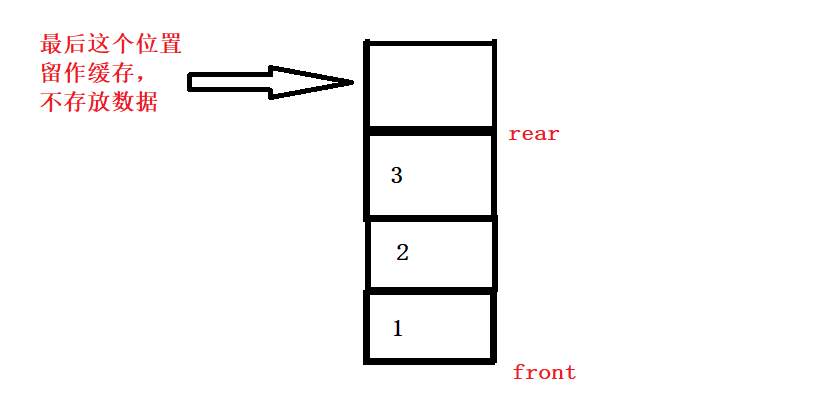
如上图:此时判满操作,我们可以尝试推导一下:此时rear的下标为3,front下标为0,队列长度为4,我们会发现一个关系: (rear+1)% maxSize == front ,我们将这个关系式当做判满语句,再次验证一下,如下图,如果取出front的数据,再插入一个数据后,该等式是否还成立:
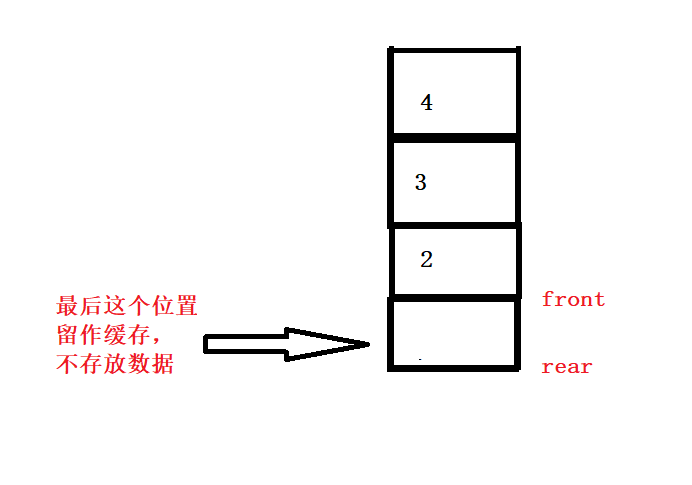
此时:rear下标为0 front下标为1 ,(rear+1)% maxsize == front 我们发现这个等式还是成立。所以说,该等式就是判满语句,如下代码:
public  boolean isFull() {
    return (this.rear + 1) % this.maxSize == this.front;
}
添加数据
思路:首先需要判满,然后我们进行插入操作,rear表示的是队尾数据的下一个位置的下标,所以直接将要插入数据直接插入rear位置即可,但是需要注意插入数据以后一定要注意,对于rear的操作需要取模,如下代码:
public void addQueue(int data) {
    // 先判满
    if (isFull()) {
        System.out.println("队列已满,无法添加新数据");
        return;
    }
    // 因为rear始终指向队列的下一个位置,所以直接添加到rear位置即可
    this.array[this.rear] = data;
    // 注意环形队列,rear的位置要取模
    rear = (rear + 1) % this.maxSize;
    System.out.println("添加成功");
}
取数据
思路:先判空,之后进行取数据操作。我们设置front初始值为0,所以说,取出的front下标处的值就是队头数据,但是如果直接返回的话,front位置不变,所以说,在返回队头数据之前,我们需要保存当前front下标的值,然后注意将front进行取模操作,如下代码:
public int getQueue() {
    // 判空
    if (isEmpty()) {
        throw new RuntimeException("队列为空,无法取数据");
    }
    /*
    front 下标处就是队列头
    但是取出去数据后要让front 后移 所以不能直接返回
     */
    int val = this.array[this.front];
    // 注意front不能越界,要取模
    this.front = (this.front + 1) % this.maxSize;
    return val;
}
查看队头数据
思路:当前front就是队头数据的下标,直接返回即可,注意判空
public int headQueuq() {
    if (isEmpty()) {
        throw new RuntimeException("队列为空");
    }
    return this.array[this.front];
}
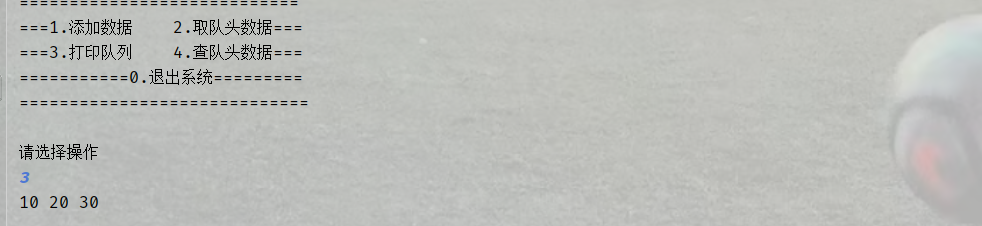
打印队列数据
思路:我们需要打印的是队列中有效数据,front代表队头数据,虽然rear对于我们而言是最后一个数据的后一个下标,但是rear进行取模操作后,它的下标可能会比front小,所以说,打印数据时,不能通过rear进行操作,我们可以先求出队列中有效数据的个数+front当前的下标,再减去front下标,这个范围内就是需要打印的数据,所以说我们首先需要求有效数据的个数,(rear-front+maxSize)% maxSize 就是有效数据的个数,如下代码:
public int size() {
    return (this.rear - this.front + this.maxSize) % this.maxSize;
}
当得到 有效数据个数时,我们就可以进行打印操作,如下代码:
public  void displayQueue() {
    // 判空
    if (isEmpty()) {
        System.out.println("队列为空");
        return;
    }
    /**
     * 打印有效元素的个数,所以我们要先知道有效元素共有多少个
     */
    for (int i = this.front; i < this.front +this.size(); i++) {
        System.out.print(this.array[i % this.maxSize] + " ");
    }
    System.out.println();
}
注意:这里 i 的下标也是需要进行取模操作的,因为i最大下标只能是3
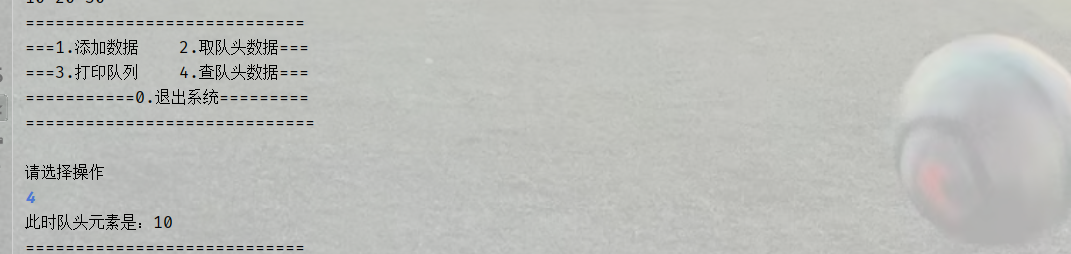
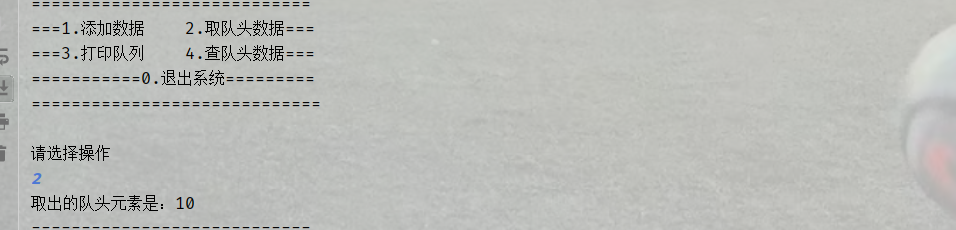
![]() 2.效果演示
2.效果演示
选择界面
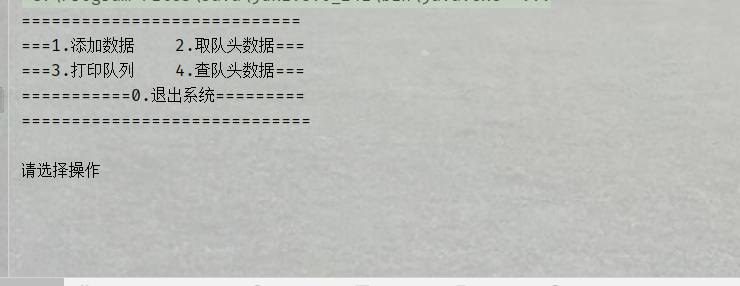
添加数据
成功

失败
打印数据
查看队头数据
取数据
![]() 3.代码
3.代码
import java.util.Scanner;
/**
* 创建环形队列
*/
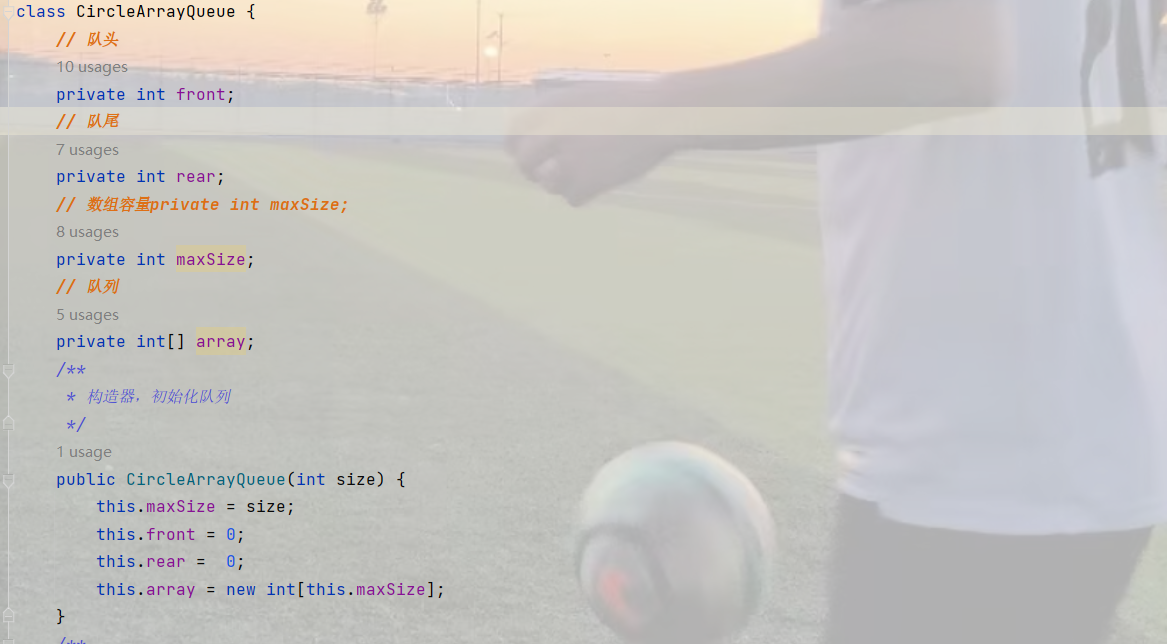
class CircleArrayQueue {
// 队头
private int front;
// 队尾
private int rear;
// 数组容量private int maxSize;
private int maxSize;
// 队列
private int[] array;
/**
* 构造器,初始化队列
*/
public CircleArrayQueue(int size) {
this.maxSize = size;
this.front = 0;
this.rear = 0;
this.array = new int[this.maxSize];
}
/**
* 判断队列满
*/
public boolean isFull() {
return (this.rear + 1) % this.maxSize == this.front;
}
/**
* 判断队空
*/
public boolean isEmpty() {
return this.rear == this.front;
}
/**
* 添加数据
*/
public void addQueue(int data) {
// 先判满
if (isFull()) {
System.out.println("队列已满,无法添加新数据");
return;
}
// 因为rear始终指向队列的下一个位置,所以直接添加到rear位置即可
this.array[this.rear] = data;
// 注意环形队列,rear的位置要取模
rear = (rear + 1) % this.maxSize;
System.out.println("添加成功");
}
/**
* 取队头元素
*/
public int getQueue() {
// 判空
if (isEmpty()) {
throw new RuntimeException("队列为空,无法取数据");
}
/*
front 下标处就是队列头
但是取出去数据后要让front 后移 所以不能直接返回
*/
int val = this.array[this.front];
// 注意front不能越界,要取模
this.front = (this.front + 1) % this.maxSize;
return val;
}
/**
* 打印所有队列数据
*/
public void displayQueue() {
// 判空
if (isEmpty()) {
System.out.println("队列为空");
return;
}
/**
* 打印有效元素的个数,所以我们要先知道有效元素共有多少个
*/
for (int i = this.front; i < this.front +this.size(); i++) {
System.out.print(this.array[i % this.maxSize] + " ");
}
System.out.println();
}
/**
* 有效元素数据的个数
*/
public int size() {
return (this.rear - this.front + this.maxSize) % this.maxSize;
}
/**
* 显示对头元素
*/
public int headQueuq() {
if (isEmpty()) {
throw new RuntimeException("队列为空");
}
return this.array[this.front];
}
}
public class textDemo {
public static void main(String[] args) {
CircleArrayQueue queue = new CircleArrayQueue(4);
Scanner scan = new Scanner(System.in);
boolean loop = true;
while (loop) {
// 提供一个菜单
int choice = menu();
switch (choice) {
case 1:
System.out.println("请输入你要添加的数据");
int data = scan.nextInt();
queue.addQueue(data);
break;
case 2:
try {
int getData = queue.getQueue();
System.out.println("取出的队头元素是:"+ getData);
} catch(Exception e) {
e.printStackTrace();
}
break;
case 3:
queue.displayQueue();
break;
case 4:
try {
int headData = queue.headQueuq();
System.out.println("此时队头元素是:"+ headData);
} catch(Exception e) {
e.printStackTrace();
}
break;
case 0:
System.out.println("退出程序!!!");
scan.close();
loop = false;
break;
default:
System.out.println("你的选择有误,请重新输入");
break;
}
}
}
public static int menu() {
System.out.println("============================");
System.out.println("===1.添加数据 2.取队头数据===");
System.out.println("===3.打印队列 4.查队头数据===");
System.out.println("===========0.退出系统=========");
System.out.println("=============================");
System.out.println();
System.out.println("请选择操作");
Scanner scan = new Scanner(System.in);
int choice = scan.nextInt();
return choice;
}
}


 4363
4363


 被折叠的 条评论
为什么被折叠?
被折叠的 条评论
为什么被折叠?
 到【灌水乐园】发言


