


目录
3.若mapper接口方法的参数有多个时,可以手动将这些参数放在一 个map中存储
解决2:在核心配置文件中引入标签(设置mybatis全局配置),再配置属性将下划线自动映射为驼峰
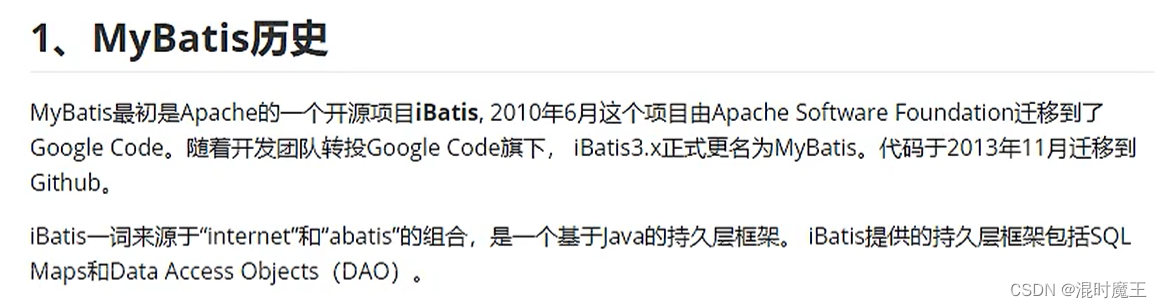
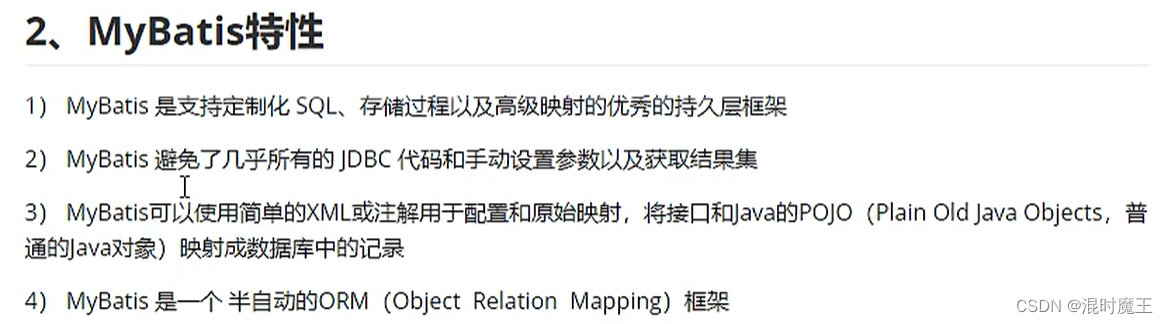
MyBatis简介
创建mybatis项目
1.创建maven工程
a.打包方式为:jar(因为mybatis封装的是jdbc,不需要创建war包来创建一个web工程)
b.引入依赖
2.创建mybatis核心配置文件
mybatis-config.xml
<?xml version="1.0" encoding="UTF-8" ?>
<!DOCTYPE configuration
        PUBLIC "-//mybatis.org//DTD Config 3.0//EN"
        "http://mybatis.org/dtd/mybatis-3-config.dtd">
<configuration>
    <!--设置连接数据库的环境-->
    <environments default="development">
        <environment id="development">
            <transactionManager type="JDBC"/>
            <dataSource type="POOLED">
                <property name="driver" value="com.mysql.jdbc.Driver"/>
                <property name="url"
                          value="jdbc:mysql://localhost:3306/fruitdb"/>
                <property name="username" value="root"/>
                <property name="password" value="123456"/>
            </dataSource>
        </environment>
    </environments>
    <!--引入映射文件-->
    <mappers>
        <mapper resource="mappers/FruitMapper.xml"/>
    </mappers>
</configuration>
3.创建mapper接口
a.创建实体类Fruit
b.创建接口FruitMapper
4.创建MyBatis映射文件
a.映射文件名与mapper接口名一致
b.mappe接口中写增删查改的方法(不用具体实现),在映射文件(FruitMapper.xml)中的mapper标签中,通过命名空间(和mapper接口全类名保持一致)指定要操作的接口,再写入具体的增删查改语句,语句中的id要和mapper接口中的方法名保持一致。
<?xml version="1.0" encoding="UTF-8" ?>
<!DOCTYPE mapper
        PUBLIC "-//mybatis.org//DTD Mapper 3.0//EN"
        "http://mybatis.org/dtd/mybatis-3-mapper.dtd">
<mapper namespace="com.zc.mybatis.mapper.FruitMapper">
    <!--int insertUser();-->
    <insert id="insertFruit">
        insert into t_fruit values(null,'西瓜','123',23,'好吃')
    </insert>
</mapper>
c.映射关系:mapper接口的全类名匹配到映射文件,再根据方法名匹配到对应的sql语句。
5.测试CRUD
//读取MyBatis的核心配置文件
InputStream is = Resources.getResourceAsStream("mybatis-config.xml");
//创建SqlSessionFactoryBuilder对象
SqlSessionFactoryBuilder sqlSessionFactoryBuilder = new
SqlSessionFactoryBuilder();
//通过核心配置文件所对应的字节输入流创建工厂类SqlSessionFactory,生产SqlSession对象
SqlSessionFactory sqlSessionFactory = sqlSessionFactoryBuilder.build(is);
//创建SqlSession对象,此时通过SqlSession对象所操作的sql都必须手动提交或回滚事务
//SqlSession sqlSession = sqlSessionFactory.openSession();
//创建SqlSession对象,此时通过SqlSession对象所操作的sql都会自动提交
SqlSession sqlSession = sqlSessionFactory.openSession(true);
//通过代理模式创建UserMapper接口的代理实现类对象
UserMapper userMapper = sqlSession.getMapper(FruitMapper.class);
//调用UserMapper接口中的方法,就可以根据UserMapper的全类名匹配元素文件,通过调用的方法名匹配
映射文件中的SQL标签,并执行标签中的SQL语句
int result = userMapper.insertUser();
//手动提交事务
//sqlSession.commit();
1.查询功能的标签必须设置resultType或resultMap
resultType:设置默认的映射关系
resultMap:设置自定义的映射关系(字段名和属性名不一致时使用此)
<select id="getFruitById" resultType="com.zc.mybatis.pojo.Fruit">
        select * from t_fruit where fid=3
    </select>
Mybatis中的核心配置文件
1、environments:配置多个连接数据库的环境
2、environment:配置某个具体的环境
3、transactionManage:设置事务管理方式
属性:
type="JDBC||MANAGERD"
JDBC:表示当前环境中,执行sql时,使用的是JDBC中原生的事务管理方式,事务提交或回滚需要手动处理。
MANAGED:被管理
4、dataSource:配置数据源
属性:
type:设置数据源类型 type="POOLED||UNPOOLED||JNDI"
POOLED:表示使用数据库连接池缓存数据库连接
UNPOOLED:表示不使用数据库连接池缓存数据库连接
JNDI:表示使用上下文的数据源
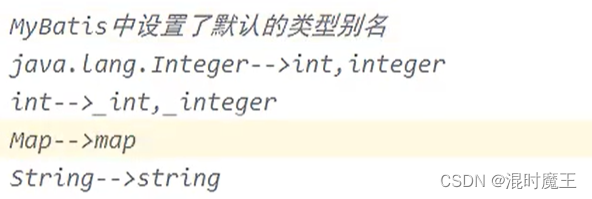
5.typeAliases:设置类型别名---减少查询功能中结果类型(resultType)映射重复出现的重复工作量
typeAliase:设置类型别名
属性:
type:需要设置类型别名的“类”
alias:设置的别名---不区分大小写(不设置时默认为类名)
<typeAliases>
        <typeAlias type="com.zc.mybatis.pojo.Fruit" alias="fruit"></typeAlias>
</typeAliases>
package:以包为单位,将包下所有的类设置为默认的类型别名,类名不区分大小写(常用)
<typeAliases>
        <package name="com.zc.mybatis.pojo"/>
</typeAliases>
6.mapper:引入映射文件
package:以包为单位引入映射文件
属性:
name:包名(mapper接口所在包要和映射文件所在包一致;mapper接口和映射文件的名字一致)

错误记录:建立jdbc.properties文件存放数据库的配置,文件路径放在resources目录下(不然not found)
Mybatis获取参数值的两种方式

1.mapper接口方法的参数为单个的字面量类型
可以通过${}和#{}以任意字符串获取参数值(即参数名可以自定义命名),但是需要注意${}的单引号问题(字符串拼接形式和日期类型需要单引号)
//通过名称获取水果
Fruit getFruitByFname(String fname);
<select id="getFruitByFname" resultType="fruit">
<!--select * from t_fruit where fname=#{fname}-->
select * from t_fruit where fname='${fanem}'
</select>2.mapper接口方法的参数为多个的字面量类型
//通过名称和价格挑选水果
Fruit getFruitByFanemAndFcount(String fname,Integer count);
<select id="getFruitByFanemAndFcount" resultType="fruit">
<!--select * from t_fruit where fname='${arg0}' and fcount='${arg1}'-->
select * from t_fruit where fname='${param1}' and fcount='${param2}'
</select>此时MyBatis会将这些参数放在一个map集合中,以两种方式进行存储
a> 以arg0, arg1...为键,以参数为值
b>以param1, param2...为键,以参数为值
因此只需要通过#{}和${}以键的方式访问值即可,但是需要注意${}的单引号问题用mybatis设置的键进行访问
3.若mapper接口方法的参数有多个时,可以手动将这些参数放在一 个map中存储
Fruit getFruitByMap(Map<String,Object> map);<select id="getFruitByMap" resultType="fruit">
select * from t_fruit where fname=#{fname} and fcount=#{fcount}
</select>自已定义的map集合就可以自己定义参数名(以自己设置键进行访问)。
4.mapper接口方法的参数是实体类类型的参数
void addFruit(Fruit fruit);<insert id="addFruit">
insert into t_fruit values(null,#{fname},#{price},#{fcount},#{remark})
</insert>只需要通过#{}和${}以属性的方式访问属性值即可,但是需要注意${}的单引号问题
5.使用@Param注解命名参数
Fruit getFruitByParam(@Param("fname") String fname,@Param("fcount") Integer fcount);<select id="getFruitByParam" resultType="fruit">
select * from t_fruit where fname=#{fname} and fcount=#{fcount}
</select>此时MyBatis会将这些参数放在一个map集合中, 以两种方式进行存储
a>以@Param注解的值为键,以参数为值
b>以param1, param2...为键,以参数为值因此只需要通过#{}和${}以键的方式访问值即可,但是需要注意${}的单引号问题
关于mybatis查询功能
1.查询数据的条数


2.模糊查询
List<Fruit> getFruitByLike(@Param("fcount") Integer fcount);<select id="getFruitByLike" resultType="fruit">
<!--select * from t_fruit where fcount like'%${fcount}%'-->
<!--select * from t_fruit where fcount like "%"#{fcount}"%"-->
select * from t_fruit where fcount like concat('%',#{fcount},'%')
</select>第一种方式:'%${查询的字段}%'
第二种方式:"%"#{查询的字段}"%"------常用
第三种方式:concat('%',#{查询的字段},'%')------工作中常用
3.批量删除
void deleteMore(@Param("ids") String ids); <delete id="deleteMore">
delete from t_fruit where fid in (${ids})
</delete>这里不能用(#{ids})的原因是#{}底层原理是占位符,它会自动加上单引号导致sql语句错误
4.动态设置表名
背景:当一张表的数据过多时,会影响mysql的性能,为了提高性能可以将一张表进行水平切分,将其拆分成多张表共同储存一张表的数据,这时同一个数据可以对应的表明就不一样了,这时就需要动态设置表名
List<Fruit> getFruitByTableName(String tableName);<select id="getFruitByTableName" resultType="fruit">
select * from ${tableName}
</select>此处表名变量即${tableName}不能用#{},原因:#{}底层原理是占位符,它会自动加上单引号导致sql语句错误
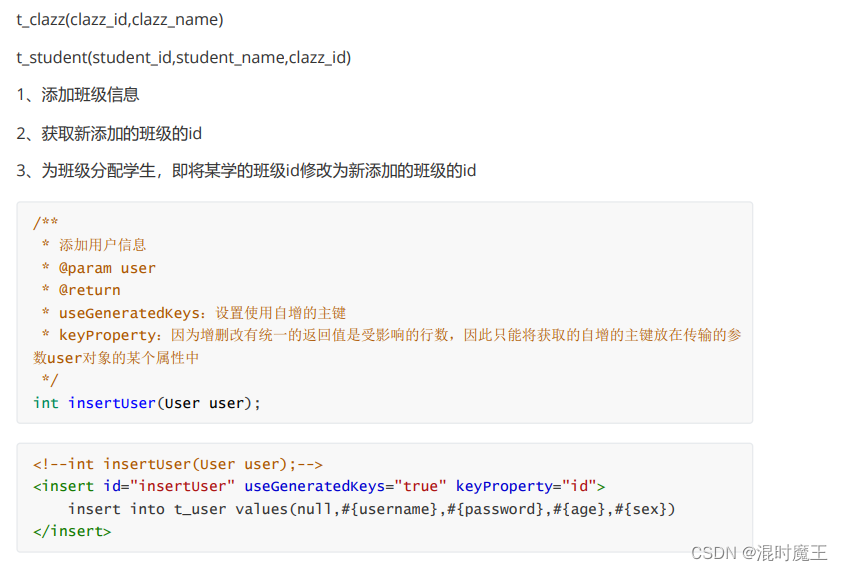
5.添加功能获取自增的主键
业务场景:一对多,多对一的情况下需要用到某张表的id...
自定义映射resultMap
1.实体类中属性值与数据库中字段值不一致问题
private String userName;解决1:取别名
<select id="getAllUser" resultType="user">
        select uid,user_name userName,age,sex,email from f_user
</select>
解决2:在核心配置文件中引入标签<settings>(设置mybatis全局配置),再配置属性将下划线自动映射为驼峰
<!--设置mybatis全局配置-->
    <settings>
        <!--下划线自动映射为驼峰-->
        <setting name="mapUnderscoreToCamelCase" value="true"/>
    </settings>
解决3:用resultMap自定义映射设置字段映射关系
(1)、用resultMap标签自定义映射关系
(2)、写Sql语句
<resultMap id="userResultMap" type="user"><!--type设置映射关系中的实体类型-->
        <!--设置主键的映射-->
        <id property="uid" column="uid"></id>
        <!--其他字段映射-->
        <result property="userName" column="user_name"></result>
        <result property="age" column="age"></result>
        <result property="sex" column="sex"></result>
        <result property="email" column="email"></result>
</resultMap>
<select id="getAllUser" resultMap="userResultMap">
        select * from f_user
</select>
2.多对一映射处理
在多的那个实体类中将一的实体类的类名设置为其字段
例:用户(User)---部门(Dept)
在User实体类中添加字段private Dept dept.
1、级联方式处理映射关系
//根据Id查询用户的基本信息和另一张表里的等级信息
User getUserAndDept(Integer id);
<resultMap id="userAndDeptResultMapOne" type="user">
<id property="uid" column="uid"></id>
<result property="age" column="age"></result>
<result property="sex" column="sex"></result>
<result property="email" column="email"></result>
<!--dept是多的实体类中设置的少的一方的属性值-->
<result property="dept.did" column="did"></result>
<result property="dept.deptName" column="dept_name"></result>
</resultMap>
<select id="getUserAndDept" resultMap="userAndDeptResultMapOne">
select * from f_user left join f_dept on f_user.did=f_dept.did where f_user.uid=#{uid}
</select>2、使用association标签
<resultMap id="userAndDeptResultMapTwo" type="user">
        <id property="uid" column="uid"></id>
        <result property="userName" column="user_name"></result>
        <result property="age" column="age"></result>
        <result property="sex" column="sex"></result>
        <result property="email" column="email"></result>
        <association property="dept" javaType="Dept">
            <id property="did" column="did"></id>
            <result property="deptName" column="dept_name"></result>
        </association>
</resultMap>
<select id="getUserAndDept" resultMap="userAndDeptResultMapTwo">
        select * from f_user left join f_dept on f_user.did=f_dept.did where f_user.uid=#{uid}
</select>
association:
属性:property:多对一关系中多的类中的属性名(需要处理多对一映射关系的属性名)
private Dept dept.
javaType:关联的表的实体类类名(该属性的类型)
3、分步查询
1.第一步-查询用户信息
User getUserAndDeptByStep(@Param("uid") Integer uid);<resultMap id="userAndDeptResultMapThree" type="user">
<id property="uid" column="uid"></id>
<result property="userName" column="user_name"></result>
<result property="age" column="age"></result>
<result property="sex" column="sex"></result>
<result property="email" column="email"></result>
<association property="dept"
select="com.zc.mybatis.mapper.DeptMapper.getDeptByStep"
column="did"><!--两张表建立联系的字段名-->
</association>
</resultMap>
<select id="getUserAndDeptByStep" resultMap="userAndDeptResultMapThree">
select * from f_user where uid=#{uid}
</select>2.第二步-查询用户对应的等级信息
Dept getDeptByStep(@Param("did") Integer did);<select id="getDeptByStep" resultType="dept">
select * from f_dept where did=#{did}
</select>二者建立联系的方式:
通过assoication的
property属性:在多的一方设置的少的一方的属性名=》private Dept dept.
select属性:设置分步查询的sql唯一标识(namespace.SQLId或mapper接口.全类名=》与另一条sql建立联系)
column属性:设置分步查询的条件(两行表都有的字段,通过该字段两表建立联系)
PS:分步查询可以实现延迟加载 (只执行当前访问的信息相关的sql语句)
3.一对多映射处理
在一的那个实体类中将多的实体类的类名设置为其字段,返回类型用list形式接收。
例:部门(Dept)---用户(User)
在Dept实体类中添加字段private List<User> users.
1.collection标签
User getUserAndDeptByStep(@Param("uid") Integer uid);<resultMap id="deptAndUserResultMap" type="dept">
<id property="did" column="did"></id>
<result property="deptName" column="dept_name"></result>
<collection property="users" ofType="User">
<id property="uid" column="uid"></id>
<result property="userName" column="user_name"></result>
<result property="age" column="age"></result>
<result property="sex" column="sex"></result>
<result property="email" column="email"></result>
</collection>
</resultMap>
<select id="getDeptAndUser" resultMap="deptAndUserResultMap">
select * from f_dept left join f_user on f_dept.did=f_user.did where f_dept.did=#{did}
</select>collection:处理一-对多的映射关系
property:需要处理一对多映射关系的属性名----private List<User> users
ofType:表示该属性所对应的集合中存储数据额类型
2.分步查询
同上多对一的分布查询
1.
Dept getDeptAndUserByStep(@Param("did") Integer did);<resultMap id="deptAndUserByStepResultMap" type="dept">
<id property="did" column="did"></id>
<result property="deptName" column="dept_name"></result>
<association property="users" select="com.zc.mybatis.mapper.UserMapper.getDeptAndUserByStep" column="did"></association>
</resultMap>
<select id="getDeptAndUserByStep" resultMap="deptAndUserByStepResultMap">
select * from f_dept where did=#{did}
</select>2.
User getDeptAndUserByStep(@Param("uid") Integer uid);<select id="getDeptAndUserByStep" resultType="user">
select * from f_user where uid=#{uid}
</select>动态Sql

用mybatis提供的sql标签拼接关键字和条件
1、if标签
 //根据条件查询
    List<User> getUserByCondition(User user);
<select id="getUserByCondition" resultType="user">
<!--1=1一个恒成立条件,不影响结果,但可以防止后续某个if里的条件不成立拼接and后sql语句错误-->
select * from f_user where 1=1
<!--test里放满足的条件,条件满足才拼接该字符串-->
<if test="userName!=null and userName!=''">
and user_name=#{userName}
</if>
<if test="age!=null and age!=''">
and age=#{age}
</if>
<if test="sex!=null and sex!=''">
and sex=#{sex}
</if>
<if test="email!=null and email!=''">
and email=#{email}
</if>
</select>2、where标签
<select id="getUserByCondition" resultType="user">
        select * from f_user
        <where>
            <if test="userName!=null and userName!=''">
                 user_name=#{userName}
            </if>
            <if test="age!=null and age!=''">
                and age=#{age}
            </if>
            <if test="sex!=null and sex!=''">
                and sex=#{sex}
            </if>
            <if test="email!=null and email!=''">
                and email=#{email}
            </if>
        </where>
</select>
当where标签中有内容时,会自动生成where关键字,并且将内容前多余的and或or去掉
当where标签中没有内容时,此时where 标签没有任何效果
注意: where标签不能将其中内容后面多余的and或or去掉
2、trim标签
<select id="getUserByCondition" resultType="user">
        select * from f_user
        <trim prefix="where" suffixOverrides="and | or">
            <if test="userName!=null and userName!=''">
                user_name=#{userName} and
            </if>
            <if test="age!=null and age!=''">
                age=#{age} and
            </if>
            <if test="sex!=null and sex!=''">
                sex=#{sex} or
            </if>
            <if test="email!=null and email!=''">
                email=#{email}
            </if>
        </trim>
</select>
属性:
prefix/suffix:将trim标签中内容前面或后面添加指定内容
suffixoverrides/prefixoverrides:将trim标签中内容后面或前面去掉指定内容PS:若标签中没有内容时,trim标签也没有任何效果
4、choose,when,otherwis标签
相当于java中的if...else if...else
<select id="getUserByCondition" resultType="user">
        select * from f_user
        <where>
            <choose>
                <when test="userName!=null and userName!=''">
                    user_name=#{userName}
                </when>
                <when test="age!=null and age!=''">
                    age=#{age}
                </when>
                <when test="sex!=null and sex!=''">
                    sex=#{sex}
                </when>
                <when test="email!=null and email!=''">
                    email=#{email}
                </when>
                <otherwise>
                    did=1
                </otherwise>
            </choose>
        </where>
</select>
当上面所有的when里的条件都不满足时,才会执行otherwise里的内容
when标签至少要有一个,otherwise标签至多有一个
5、foreach标签
批量删除
第一种删除风格:delete from ... where id in (#{ids})
//批量删除
    void deleteUserByids(@Param("uids") Integer[] uids);
<delete id="deleteUserByids">
delete from f_user where uid in
(
<foreach collection="uids" item="uid" separator=",">
#{uid}
</foreach>
)
</delete>collection:需要循环的数组的名
item:数组中的每一个元素
separator:数组中每一个元素的分割的符号
open|close:该循环开始和结束的符号
<delete id="deleteUserByids">
        delete from f_user where uid in
        <foreach collection="uids" item="uid" separator="," open="(" close=")">
                 #{uid}
        </foreach>
</delete>
第二种删除风格:delete from ... where id =? or id=?...
<delete id="deleteUserByids">
        delete from f_user where
        <foreach collection="uids" item="uid" separator="or">
             uid=#{uid}
        </foreach>
</delete>
批量增加
//批量增加
void addUsersByList(@Param("users") List<User> users);
<insert id="addUsersByList">
insert into f_user values
<foreach collection="users" item="user" separator=",">
(null,#{user.userName},#{user.age},#{user.sex},#{user.email},null)
</foreach>
</insert>sql标签
sql片段
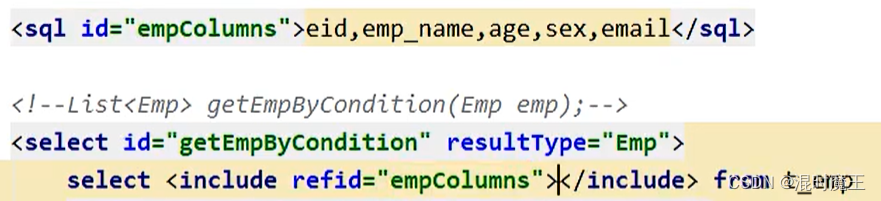
sql标签中放的内容是可以重复利用的,引用的时候只需要通过include标签中的refid属性写上sql标签设置的属性即可。
Mybatis缓存
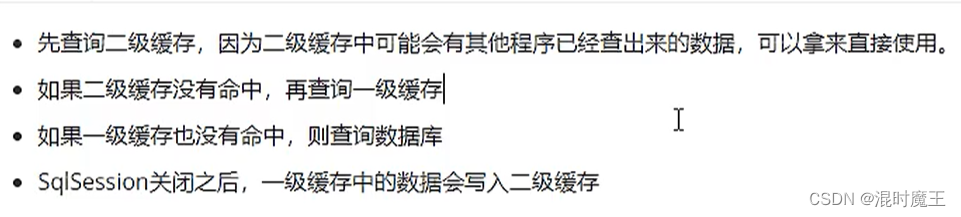
mybatis缓存会将我们查询出来的数据进行记录,当下一次查询相同数据的时候就会从缓存中取数据,不会在数据库中重新访问。缓存只针对查询功能有效。
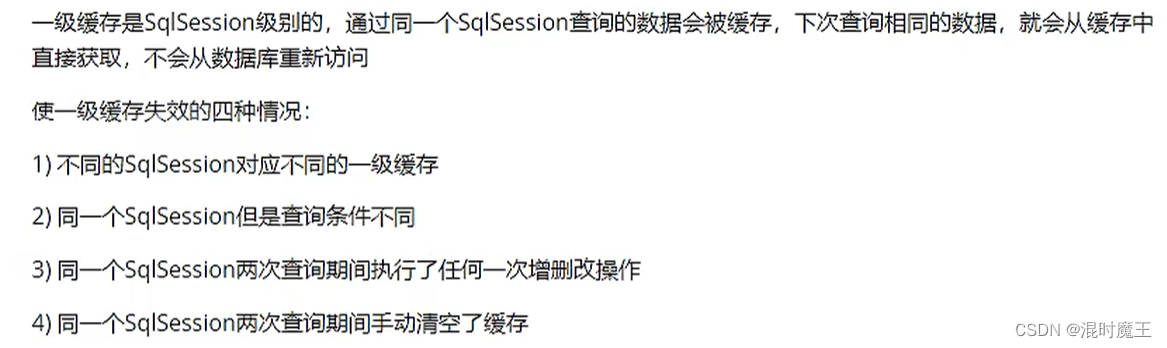
一级缓存
默认开启
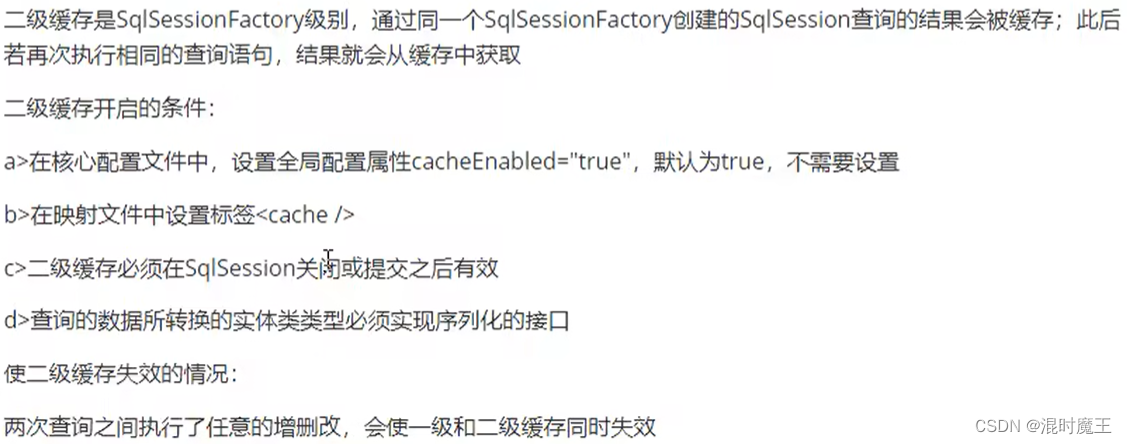
二级缓存
手动开启
mybatis缓存查询顺序
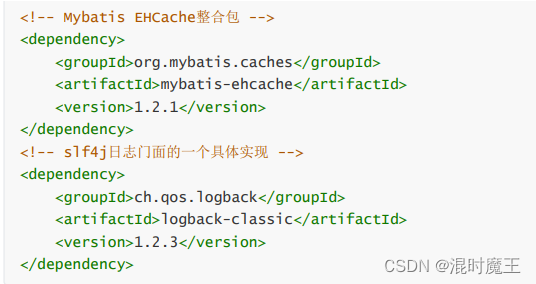
 第三方缓存EHCache
可以用第三方缓存代替二级缓存(一级缓存不可代替)
1.添加依赖
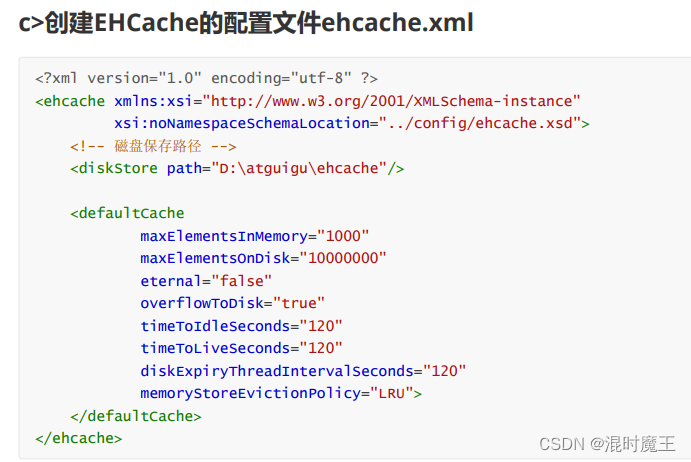
2.创建配置文件
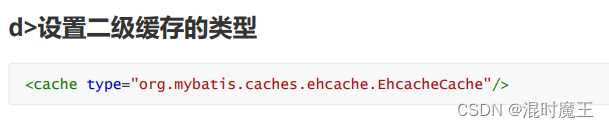
3.设置二级缓存类型
Mybatis逆向工程
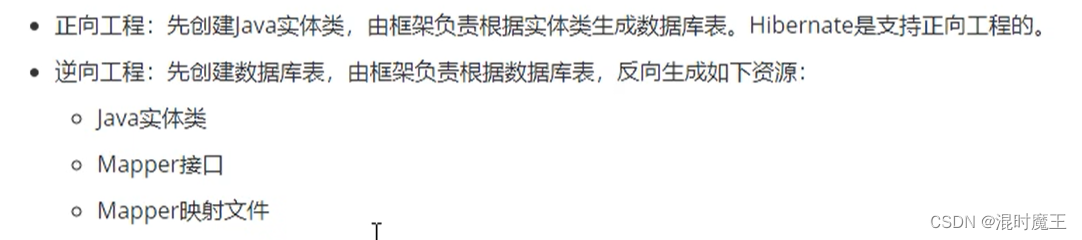
创建步骤
1.添加依赖和插件
<!-- 依赖MyBatis核心包 -->
<dependencies>
<dependency>
<groupId>org.mybatis</groupId>
<artifactId>mybatis</artifactId>
<version>3.5.7</version>
</dependency>
</dependencies>
<!-- 控制Maven在构建过程中相关配置 -->
<build>
<!-- 构建过程中用到的插件 -->
<plugins>
<!-- 具体插件,逆向工程的操作是以构建过程中插件形式出现的 -->
<plugin>
<groupId>org.mybatis.generator</groupId>
<artifactId>mybatis-generator-maven-plugin</artifactId>
<version>1.3.0</version>
<!-- 插件的依赖 -->
<dependencies>
<!-- 逆向工程的核心依赖 -->
<dependency>
<groupId>org.mybatis.generator</groupId>
<artifactId>mybatis-generator-core</artifactId>
<version>1.3.2</version>
</dependency>
<!-- 数据库连接池 -->
<dependency>
<groupId>com.mchange</groupId>
<artifactId>c3p0</artifactId>
<version>0.9.2</version>
</dependency>
<!-- MySQL驱动 -->
<dependency>
<groupId>mysql</groupId>
<artifactId>mysql-connector-java</artifactId>
<version>5.1.8</version>
</dependency>
</dependencies>
</plugin>
</plugins>
</build>
2.创建逆向工程的配置文件
文件名必须是generatorConfig.xml
版本:MyBatis3Simple---清新简洁版
版本:MyBatis3---功能齐全版(生成带条件的CRUD)
<?xml version="1.0" encoding="UTF-8"?>
<!DOCTYPE generatorConfiguration
        PUBLIC "-//mybatis.org//DTD MyBatis Generator Configuration 1.0//EN"
        "http://mybatis.org/dtd/mybatis-generator-config_1_0.dtd">
<generatorConfiguration>
    <!--
    targetRuntime: 执行生成的逆向工程的版本
    MyBatis3Simple: 生成基本的CRUD(清新简洁版)
    MyBatis3: 生成带条件的CRUD(奢华尊享版)
    -->
    <context id="DB2Tables" targetRuntime="MyBatis3Simple">
        <!-- 数据库的连接信息 -->
        <jdbcConnection driverClass="com.mysql.jdbc.Driver"
                        connectionURL="jdbc:mysql://localhost:3306/mybatis"
                        userId="root"
                        password="123456">
        </jdbcConnection>
        <!-- javaBean的生成策略-->
        <javaModelGenerator targetPackage="com.atguigu.mybatis.bean"
                            targetProject=".\src\main\java">
            <property name="enableSubPackages" value="true" />
            <property name="trimStrings" value="true" />
        </javaModelGenerator>
        <!-- SQL映射文件的生成策略 -->
        <sqlMapGenerator targetPackage="com.atguigu.mybatis.mapper"
                         targetProject=".\src\main\resources">
            <property name="enableSubPackages" value="true" />
        </sqlMapGenerator>
        <!-- Mapper接口的生成策略 -->
        <javaClientGenerator type="XMLMAPPER"
                             targetPackage="com.atguigu.mybatis.mapper" targetProject=".\src\main\java">
            <property name="enableSubPackages" value="true" />
        </javaClientGenerator>
        <!-- 逆向分析的表 -->
        <!-- tableName设置为*号,可以对应所有表,此时不写domainObjectName -->
        <!-- domainObjectName属性指定生成出来的实体类的类名 -->
        <table tableName="t_emp" domainObjectName="Emp"/>
        <table tableName="t_dept" domainObjectName="Dept"/>
    </context>
</generatorConfiguration>
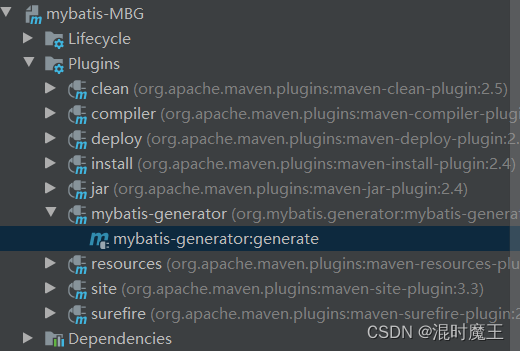
执行插件,生成相应文件
QBC查询
@Test
public void testMBG() throws IOException {
InputStream is = Resources.getResourceAsStream("mybatis-config.xml");
SqlSession sqlSession = new
SqlSessionFactoryBuilder().build(is).openSession(true);
EmpMapper mapper = sqlSession.getMapper(EmpMapper.class);
EmpExample empExample = new EmpExample();
//创建条件对象,通过andXXX方法为SQL添加查询添加,每个条件之间是and关系
empExample.createCriteria().andEnameLike("a").andAgeGreaterThan(20).andDidIsNot
Null();
//将之前添加的条件通过or拼接其他条件
empExample.or().andSexEqualTo("男");
List<Emp> list = mapper.selectByExample(empExample);
for (Emp emp : list) {
System.out.println(emp);
}
}
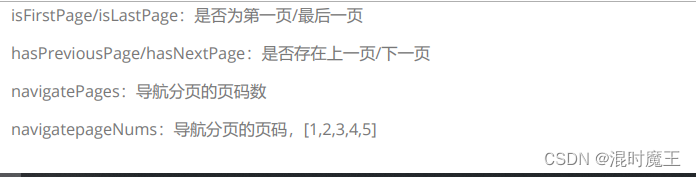
分页插件
1.添加依赖
<dependency>
    <groupId>com.github.pagehelper</groupId>
    <artifactId>pagehelper</artifactId>
    <version>5.2.0</version>
</dependency>
2.配置分页插件
在mybatis核心配置文件中配置
<plugins>
    <!--设置分页插件-->
    <plugin interceptor="com.github.pagehelper.PageInterceptor"></plugin>
</plugins>
使用:


 644
644


 被折叠的 条评论
为什么被折叠?
被折叠的 条评论
为什么被折叠?
 到【灌水乐园】发言


