


Postman
Postman介绍
开发API后,用于API测试的工具。在我们平时开发中,特别是需要与接口打交道时,无论是写接口还是用接口,拿到接口后肯定都得提前测试一下。在开发APP接口的过程中,一般接口写完之后,后端开发都会模拟调用一下请求。在用Postman之前,对于一般的get请求我基本都会用浏览器来简单模拟。而对于post请求,我一般习惯写代码来调用。可以用Java来模拟,当然用Python会更简洁。但是还有有很多弊端,不便于管理、维护困难等。Postman具有每个API开发人员的功能:请求构建,测试和预请求脚本,变量,环境和请求描述,旨在无缝地一起工作。
这样的话就非常需要有一个比较给力的Http请求模拟工具,现在流行的这种工具也挺多的,像火狐浏览器插件-RESTClient,Chrome浏览器插件-Postman等等。这里主要介绍一下,一款模拟请求的利器Postman。
Postman是一种网页调试与发送网页http请求的chrome插件。我们可以用来很方便的模拟get或者post或者其他方式的请求来调试接口。在Postman中,请求可以保存,也就类似于文件。而Collection类似文件夹,可以把同一个项目的请求放在一个Collection里方便管理和分享,Collection里面也可以再建文件夹。
Postman安装
官网地址:Download Postman | Get Started for Free
安装非常简单,下载直接安装即可!
Postman功能简介
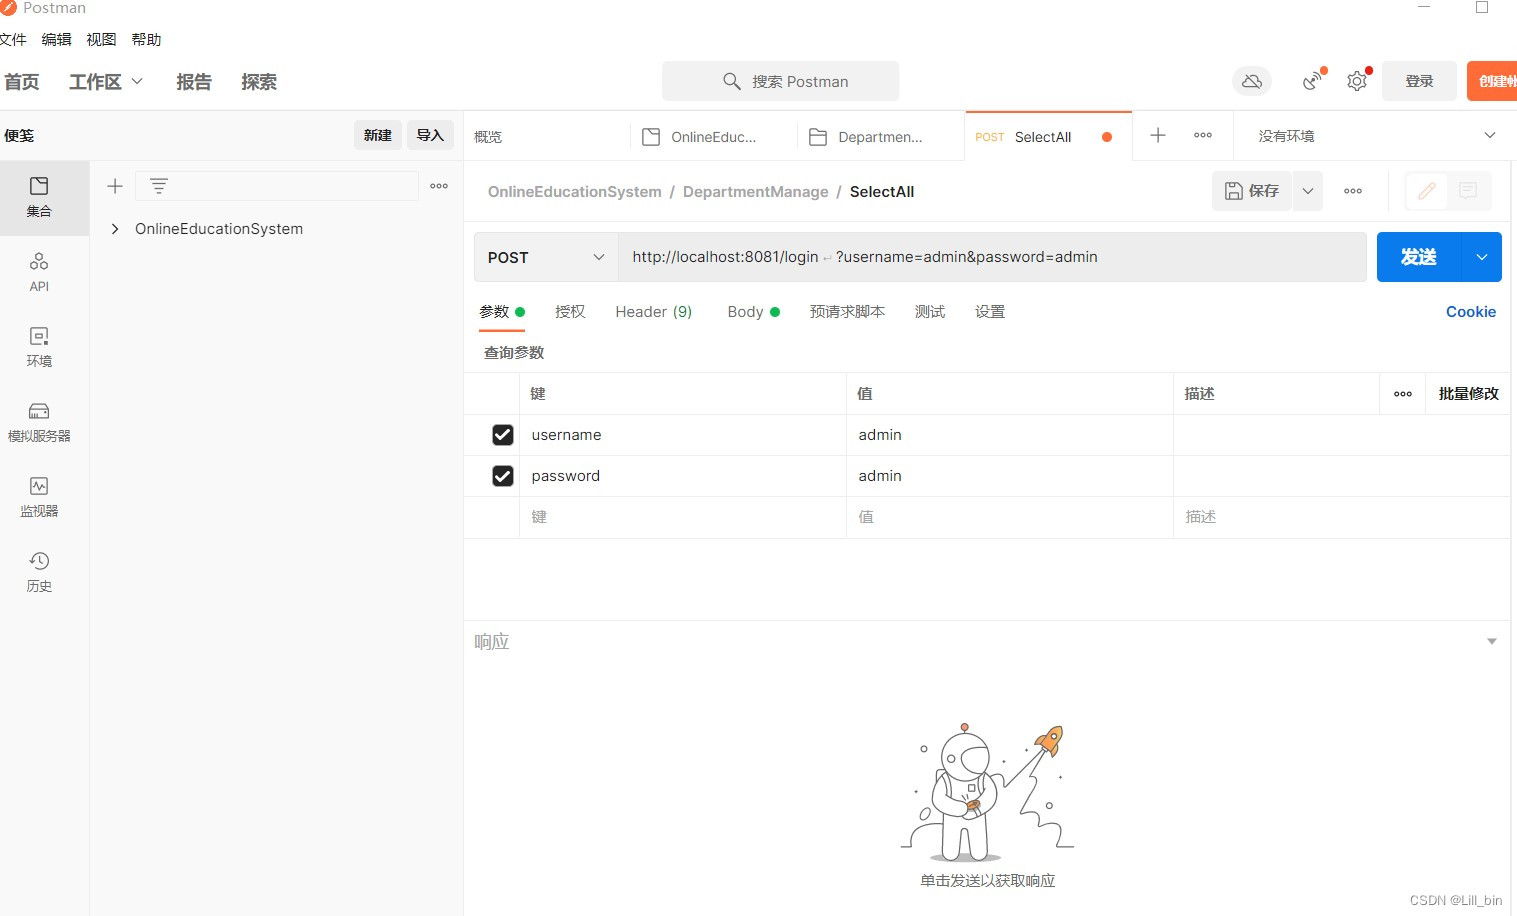
新建一个集合即可进行测试。
用户可选择请求方式,并输入对应的url,如有参数也可在postman的参数列中进行输入,点击发送按钮,即可进行测试。
测试的结果最终也会在响应框内进行显示(此处因为笔者未开启后台服务器,故显示请求无法发送)

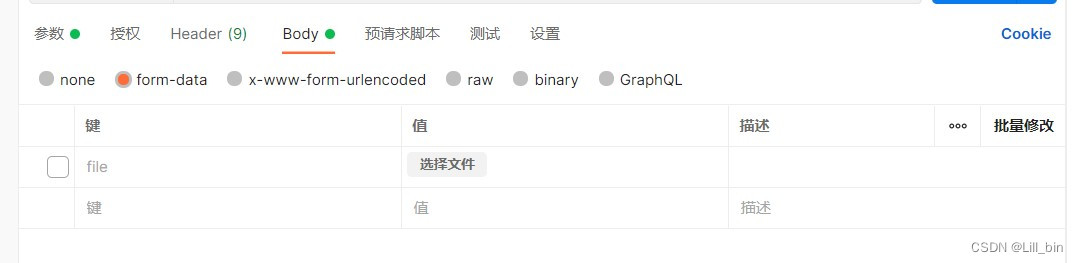
同时,postman也可以对发送请求体进行测试,在url输入框下方进行相关的参数选择即可(此处以上传文件为例)
postman是一款十分好用的测试工具,在后端开发过程中,经常使用到。主要用于接口的测试,以及数据能否正常发送等等。
Swagger接口文档
Swagger介绍
Swagger是一款RESTFUL接口的文档在线自动生成+功能测试功能软件。Swagger是一个规范和完整的框架,用于生成、描述、调用和可视化RESTfu风格的web服务。目标是使客户端和文件系统作为服务器一同样的速度来更新文件的方法,参数和模型紧密集成到服务器。这个解释简单点来讲就是说,swagger是一款可以根据restful风格生成的接口开发文档,并且支持做测试的一款中间软件。
Swagger依赖
<!--swagger接口文档依赖-->
<dependency>
  <groupId>io.springfox</groupId>
  <artifactId>springfox-boot-starter</artifactId>
  <!--swagger依赖版本:注意SpringBoot2.6.X要用3.0的Swagger,SpringBoot2.5.x用2.0的Swagger-->
  <version>3.0.0</version>
</dependency>
Swagger配置
引入swagger依赖后要在yml中进行配置
spring:
  # ===== 自定义swagger配置 ===== #
  mvc:
    pathmatch:
      # 使用swagger3.0的时候配置
      matching-strategy: ant_path_matcher
项目配置类:
package cn.ronghuanet.config;

import io.swagger.annotations.Api;
import org.springframework.context.annotation.Bean;
import org.springframework.context.annotation.Configuration;
import org.springframework.http.HttpMethod;
import springfox.documentation.builders.*;
import springfox.documentation.schema.ScalarType;
import springfox.documentation.service.*;
import springfox.documentation.spi.DocumentationType;
import springfox.documentation.spring.web.plugins.Docket;
import springfox.documentation.swagger2.annotations.EnableSwagger2;

import java.util.ArrayList;
import java.util.List;


/**
 * @Description: Swagger接口文档配置
 * @Author: Heron
 * @Date: 2024/01/20 22:39
 **/
@Configuration
@EnableSwagger2
public class SwaggerConfiguration {

    /*
        swagger的API扫描提供了四种方式,分别如下:
        1、RequestHandlerSelectors.any() 匹配任何controller的接口
        2、RequestHandlerSelectors.withClassAnnotation() 扫描含有类注解的
        3、RequestHandlerSelectors.withMethodAnnotation() 扫描含有方法注解的
        3、RequestHandlerSelectors.basePackage() 扫描指定包路径
     */

    /**
     * @Description: swagger核心配置
     * @Author: Neuronet
     * @Date: 2023/10/1 20:18
     * @Return:
     **/
    @Bean
    public Docket getDocket(){
        ApiInfoBuilder apiInfoBuilder = new ApiInfoBuilder();
        apiInfoBuilder.title("文档标题")
                .description("文档描述内容")
                .version("v1.0.0")
                .contact(new Contact("Neuronet","在线地址","邮箱"));
        ApiInfo apiInfo = apiInfoBuilder.build();
        Docket docket = new Docket(DocumentationType.SWAGGER_2)
                .apiInfo(apiInfo)
                .select()
                .apis(RequestHandlerSelectors.withClassAnnotation(Api.class))
                .paths(PathSelectors.any())
                .build()
                .globalRequestParameters(getGlobalRequestParameters())
                .globalResponses(HttpMethod.GET, getGlobalResponseMessage())
                .globalResponses(HttpMethod.POST, getGlobalResponseMessage());
        return docket;
    }

    /**
     * @Description: 生成全局通用请求参数
     * @Author: Neuronet
     * @Date: 2023/10/1 20:22
     * @Return:
     **/
    private List<RequestParameter> getGlobalRequestParameters() {
        List<RequestParameter> parameters = new ArrayList<>();
        parameters.add(new RequestParameterBuilder()
                .name("Authorization")
                .description("登录令牌")
                .in(ParameterType.HEADER)
                .query(q -> q.model(m -> m.scalarModel(ScalarType.STRING)))
                .required(false)
                .build());
        return parameters;
    }


    /**
     * @Description: 生成通用的接口文档响应信息
     * @Author: Neuronet
     * @Date: 2023/10/1 20:25
     * @Return:
     **/
    private List<Response> getGlobalResponseMessage() {
        List<Response> responseList = new ArrayList<>();
        responseList.add(new ResponseBuilder().code("4xx").description("请求错误,根据code和msg检查").build());
        return responseList;
    }
}
Swagger测试
浏览器访问:http://localhost:8080/swagger-ui/index.html
使用swagger测试controller接口
Swagger注解
-
@Api:用在controller类,描述API接口
-
@ApiOperation:描述接口方法
-
@ApiModel:描述对象
-
@ApiModelProperty:描述对象属性
-
@ApiImplicitParams:描述接口参数
-
@ApiResponses:描述接口响应
-
@ApiIgnore:忽略接口方法
写在最后:本篇文章介绍了postman测试工具与在线接口文档工具swagger,这两个工具在实际开发过程中,均有着较大的应用,希望能够给大家带来帮助。


 28万+
28万+

 被折叠的 条评论
为什么被折叠?
被折叠的 条评论
为什么被折叠?
 到【灌水乐园】发言


