多线程详解(狂神说)
视频地址:https://www.bilibili.com/video/BV1V4411p7EF/
1、简介
1.1、多任务
生活中的例子:边吃饭边玩手机等等

现实中太多这样同时做多件事情的例子了,看起来是多个任务都在做,其实本质上我们的大脑在同一时间依旧只做了一件事情。
1.2、多线程
原来是一条路,慢慢因为车太多了,道路堵塞,效率极低。
为了提高使用的频率,能够充分利用道路,于是加了多个车道。

原来的方法调用:
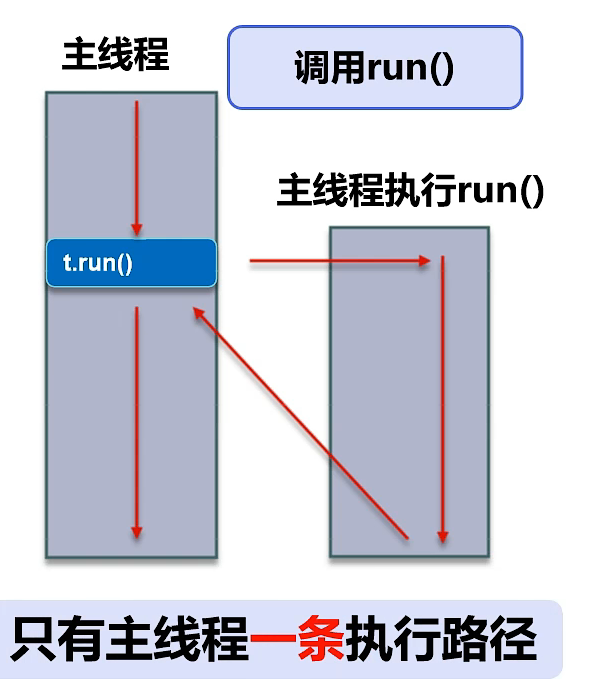
多线程方法调用:
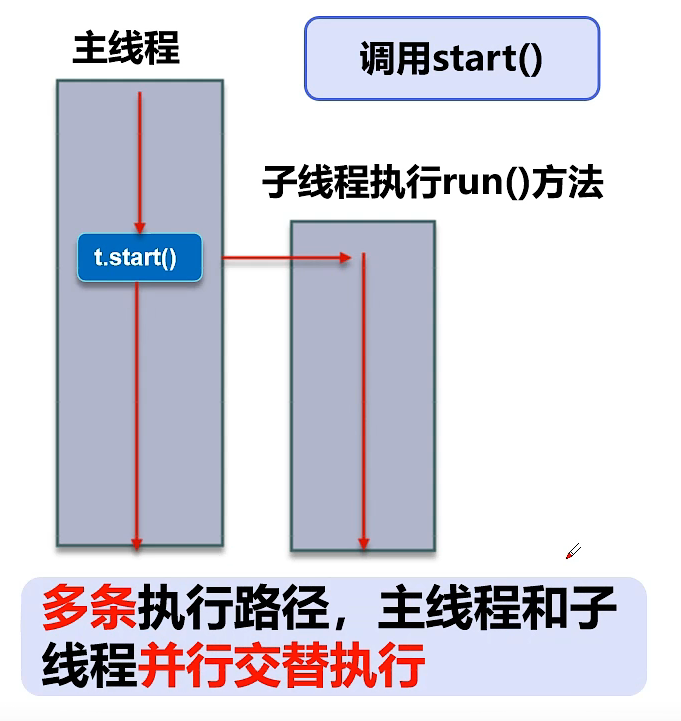
1.3、一些基本概念
进程
在操作系统中运行的程序就是进程,比如QQ、播放器、游戏、IDE

程序、进程、线程
一个进程可以有多个线程,如视频中同时听声音,看图像,看弹幕,等等
- 说起进程,就不得不说下程序。程序是指令和数据的有序集合,其本身没有任何运行的含义,是一个静态的概念。
- 进程是执行程序的一次执行过程,它是动态的概念。进程是系统资源分配的单位。
- 通常在一个进程中可以包含若干个线程,一个进程至少有一个线程,不然没有存在的意义。线程是CPU调度和执行的单位。
注意:很多多线程是模拟出来的,真正的多线程是指有多个CPU,即多核,如服务器。如果是模拟出来的多线程,即在一个CPU的情况下,在同一时间点,cpu 只能执行一个代码,因为切换的很快,所以有同时执行的错觉。
总结
-
线程就是独立的执行路径;
-
在程序运行时,即使没有自己创建线程,后台也会有多个线程,如主线程,gc线程;
-
main()称之为主线程,为系统的入口,用于执行整个程序;
-
在一个进程中,如果开辟了多个线程,线程的运行由调度器(CPU)安排调度,调度器是与操作系统紧密相关的,先后顺序是不能人为的干预的。
-
对同一份资源操作时,会存在资源抢夺的问题,需要加入并发控制。
-
线程会带来额外的开销,如cpu调度时间,并发控制开销。
-
每个线程在自己的工作内存交互,内存控制不当会造成数据不一致;
如果学习了操作系统,对这些会有更加深刻的认知。
2、多线程的实现
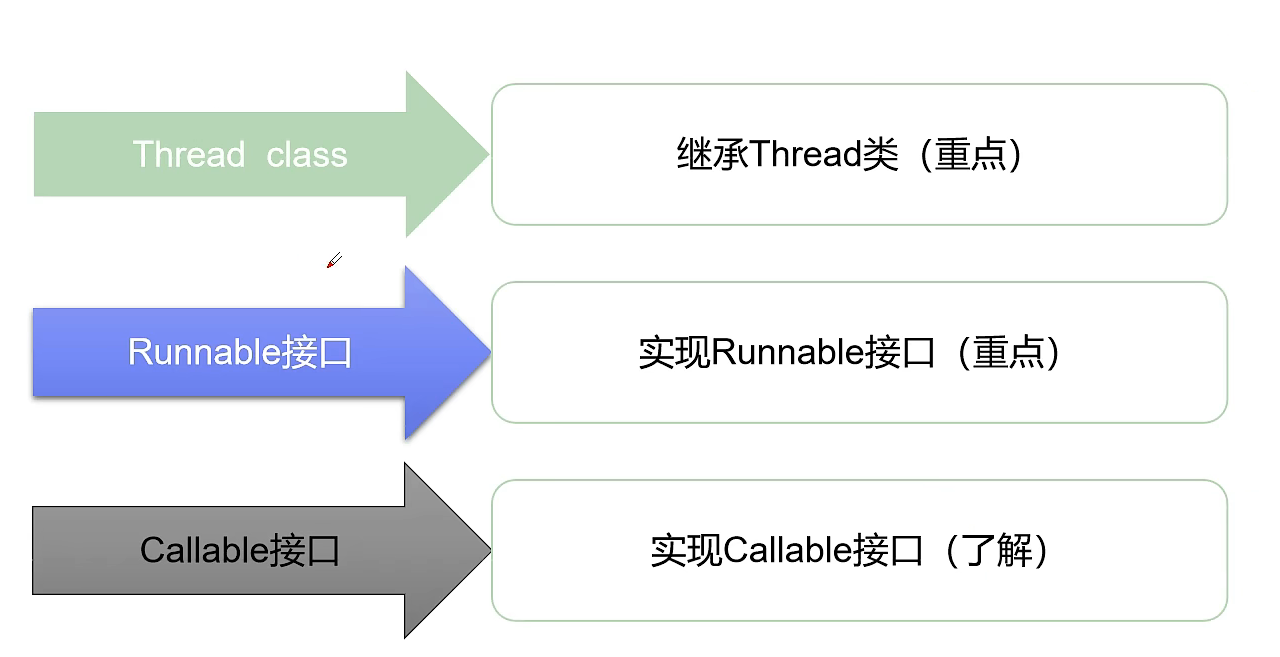
2.1、继承Thread类
通过查看源码发现Thread类其实是实现Runnable接口的!
使用方法
1.自定义线程类继承Thread类
2.重写run() 方法,编写线程执行体
3.创建线程对象,调用start() 方法启动线程
测试
public class TestThread1 extends Thread{

    @Override
    public void run() {
        //run方法线程体
        for (int i = 0; i < 20; i++) {
            System.out.println("我在看代码-----"+i);
        }
    }

    public static void main(String[] args) {

        //创建一个线程对象,调用start方法开启线程
        TestThread1 thread1 = new TestThread1();
        thread1.start();

        //Main线程,主线程
        for (int i = 0; i < 10; i++) {
            System.out.println("我在学习多线程-----"+i);
        }
    }

}
//执行结果
我在学习多线程-----0
我在看代码-----0
我在看代码-----1
我在看代码-----2
我在看代码-----3
我在看代码-----4
我在看代码-----5
我在看代码-----6
我在看代码-----7
我在看代码-----8
我在看代码-----9
我在学习多线程-----1
我在看代码-----10
我在学习多线程-----2
我在看代码-----11
我在看代码-----12
我在看代码-----13
我在看代码-----14
我在学习多线程-----3
我在看代码-----15
我在学习多线程-----4
我在看代码-----16
我在看代码-----17
我在看代码-----18
我在学习多线程-----5
我在看代码-----19
我在学习多线程-----6
我在学习多线程-----7
我在学习多线程-----8
我在学习多线程-----9
我在学习多线程-----10
可以看到主线程和自定义线程交替执行,而且由于cpu调度的随机性,每次的执行结果都有可能不同
注意:线程开启不一定立即执行,由CPU调度安排。
2.2、案例:网图下载
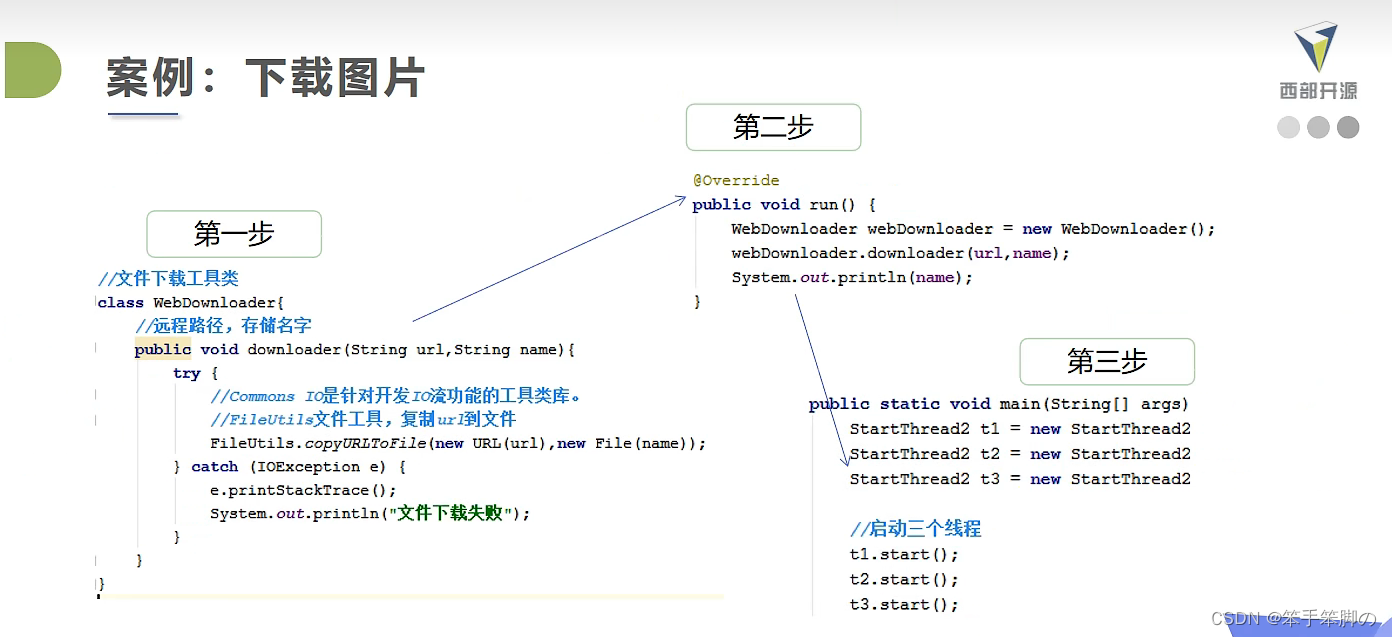
测试
//实现多线程下载图片
public class TestThread2 extends Thread{

    private String url;         //网图地址
    private String name;        //保存的文件名

    public TestThread2(String url,String name){
        this.url = url;
        this.name = name;
    }

    @Override
    public void run() {
        WebDownloader webDownloader = new WebDownloader();
        webDownloader.download(url,name);
        System.out.println("下载了文件名为"+ name + "的文件");
    }

    public static void main(String[] args) {

        TestThread2 t1 = new TestThread2("https://img-blog.csdnimg.cn/07b77dd653fa453ebb75c26438226559.png","1.png");
        TestThread2 t2 = new TestThread2("https://img-blog.csdnimg.cn/07b77dd653fa453ebb75c26438226559.png","2.png");
        TestThread2 t3 = new TestThread2("https://img-blog.csdnimg.cn/07b77dd653fa453ebb75c26438226559.png","3.png");

        t1.start();
        t2.start();
        t3.start();
    }
}

//下载器
class WebDownloader{
    //下载方法
    public void download(String url,String name){
        try {
            FileUtils.copyURLToFile(new URL(url),new File(name));
        } catch (IOException e) {
            e.printStackTrace();
            System.out.println("IO异常,下载失败");
        }
    }
}
可以多执行几次看看结果,下载顺序是不固定的!
//执行结果
下载了文件名为3.png的文件
下载了文件名为2.png的文件
下载了文件名为1.png的文件
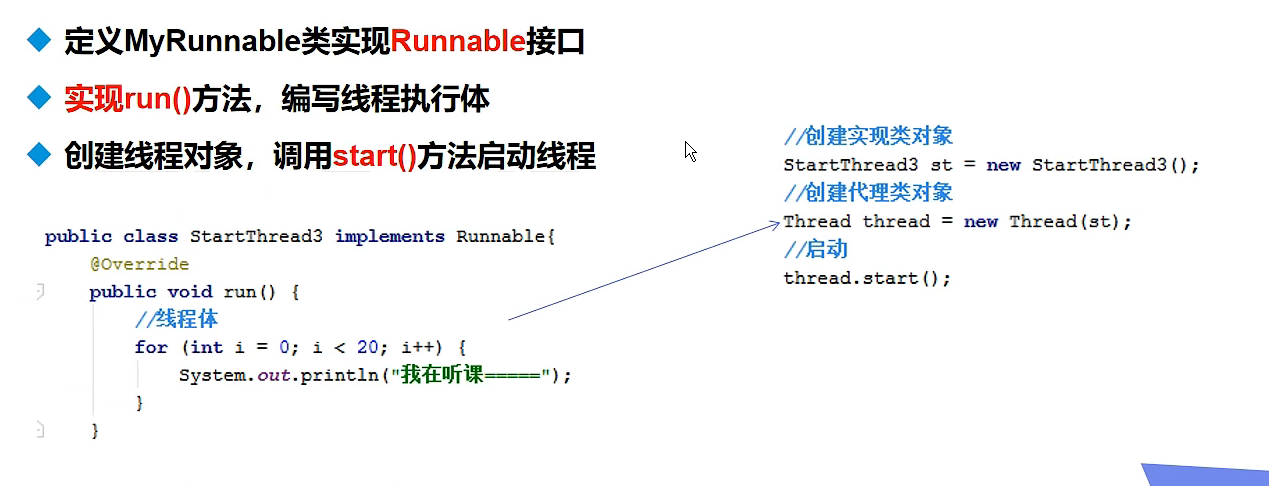
2.3、实现Runnable接口
使用方法
1.定义类实现Runnable接口
2.实现run方法,编写线程执行体
3.创建线程对象,调用start()方法启动线程
测试
public class TestThread3 implements Runnable{

    @Override
    public void run() {
        //run方法线程体
        for (int i = 0; i < 20; i++) {
            System.out.println("我在看代码-----"+i);
        }
    }

    public static void main(String[] args) {
        //创建Runnable接口实现类的对象
        TestThread3 testThread3 = new TestThread3();
        //创建线程对象,通过线程对象来开启线程代理
        Thread thread = new Thread(testThread3);
        thread.start();

        //Main线程,主线程
        for (int i = 0; i < 20; i++) {
            System.out.println("我在学习多线程-----"+i);
        }
    }

}
可以多执行几次看效果
//执行结果
我在学习多线程-----0
我在学习多线程-----1
我在看代码-----0
我在看代码-----1
我在看代码-----2
我在学习多线程-----2
我在看代码-----3
我在看代码-----4
我在看代码-----5
我在看代码-----6
我在看代码-----7
我在看代码-----8
我在学习多线程-----3
我在学习多线程-----4
我在学习多线程-----5
我在学习多线程-----6
我在学习多线程-----7
我在学习多线程-----8
我在学习多线程-----9
我在学习多线程-----10
由于java单继承的特性,推荐使用实现Runnable接口
用Runnable接口改写网图下载
public class TestThread4 implements Runnable{

    private String url;         //网图地址
    private String name;        //保存的文件名

    public TestThread4(String url,String name){
        this.url = url;
        this.name = name;
    }

    @Override
    public void run() {
        WebDownloader webDownloader = new WebDownloader();
        webDownloader.download(url,name);
        System.out.println("下载了文件名为"+ name + "的文件");
    }

    public static void main(String[] args) {

        TestThread4 t1 = new TestThread4("https://img-blog.csdnimg.cn/07b77dd653fa453ebb75c26438226559.png","1.png");
        TestThread4 t2 = new TestThread4("https://img-blog.csdnimg.cn/07b77dd653fa453ebb75c26438226559.png","2.png");
        TestThread4 t3 = new TestThread4("https://img-blog.csdnimg.cn/07b77dd653fa453ebb75c26438226559.png","3.png");

        new Thread(t1).start();
        new Thread(t2).start();
        new Thread(t3).start();

    }
}
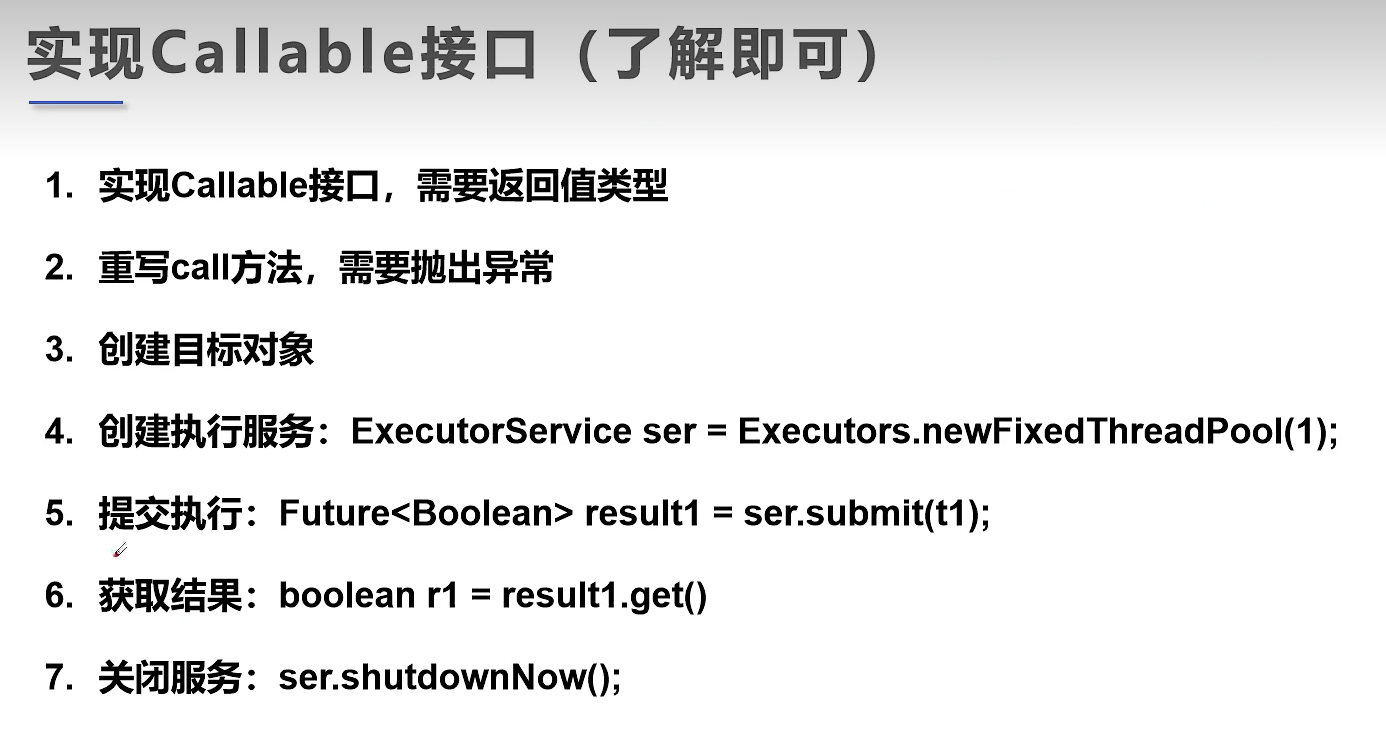
2.4、实现Callable接口
使用方法
- 实现接口
- 重写call方法
- 创建目标对象
- 执行服务
- 提交执行
- 获取结果
- 关闭服务
用Callable接口实现网图下载
public class TestCallable implements Callable {

    private String url;         //网图地址
    private String name;        //保存的文件名

    public TestCallable(String url,String name){
        this.url = url;
        this.name = name;
    }

    @Override
    public Boolean call() throws Exception {
        WebDownloader webDownloader = new WebDownloader();
        webDownloader.download(url,name);
        System.out.println("下载了文件名为"+ name + "的文件");
        return true;
    }

    public static void main(String[] args) throws ExecutionException, InterruptedException {
        TestCallable t1 = new TestCallable("https://img-blog.csdnimg.cn/07b77dd653fa453ebb75c26438226559.png","1.png");
        TestCallable t2 = new TestCallable("https://img-blog.csdnimg.cn/07b77dd653fa453ebb75c26438226559.png","2.png");
        TestCallable t3 = new TestCallable("https://img-blog.csdnimg.cn/07b77dd653fa453ebb75c26438226559.png","3.png");

        //创建执行服务
        ExecutorService service = Executors.newFixedThreadPool(3);

        //提交执行
        Future<Boolean> result1  = service.submit(t1);
        Future<Boolean> result2  = service.submit(t2);
        Future<Boolean> result3  = service.submit(t3);

        //获取结果
        boolean r1 = result1.get();
        boolean r2 = result2.get();
        boolean r3 = result3.get();
        System.out.println(r1);
        System.out.println(r2);
        System.out.println(r3);

        //关闭服务
        service.shutdownNow();
    }

}

//下载器
class WebDownloader{
    //下载方法
    public void download(String url,String name){
        try {
            FileUtils.copyURLToFile(new URL(url),new File(name));
        } catch (IOException e) {
            e.printStackTrace();
            System.out.println("IO异常,下载失败");
        }
    }
}
2.5、小结
- 继承Thread类
- 子类继承Thread类具备多线程能力
- 通过子类对象.start()来启动
- 不建议使用,避免OOP单继承的局限性
- 实现Runnable接口
- 实现接口Runnable具有多线程能力
- 传入目标对象+Thread对象.start()启动线程
- 推荐使用,避免了单继承的局限性,灵活方便,方便同一个对象被多个进程实现
- 实现Callable接口
- 实现接口Callable具有多线程能力
- 需要创建执行器来执行,但是能获取其返回值
3、初识并发问题
3.1、抢票问题
以抢票为例,当多个线程操作同一个资源的情况下会出现不同的线程抢到同一张票,线程不安全,数据紊乱
测试
public class TestThread5 implements Runnable{

    //票数
    private int ticketNums = 10;

    @Override
    public void run() {
        while (true){
            if (ticketNums <= 0){
                break;
            }
            try {
                Thread.sleep(100);
            } catch (InterruptedException e) {
                e.printStackTrace();
            }
            System.out.println(Thread.currentThread().getName()+"拿到了第----->"+ticketNums--+"张票");
        }
    }

    public static void main(String[] args) {
        TestThread5 ticket = new TestThread5();

        new Thread(ticket,"小明").start();
        new Thread(ticket,"老师").start();
        new Thread(ticket,"黄牛").start();
    }

}
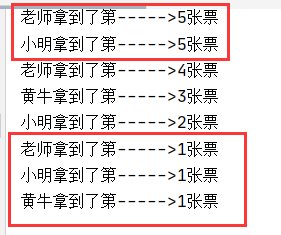
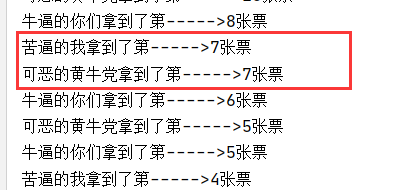
我们可以发现问题,多个线程对象拿到了同一张票,这就是线程不安全的情况
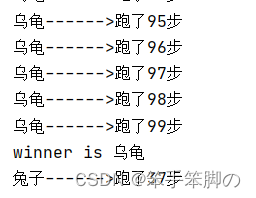
3.2、案例:龟兔赛跑
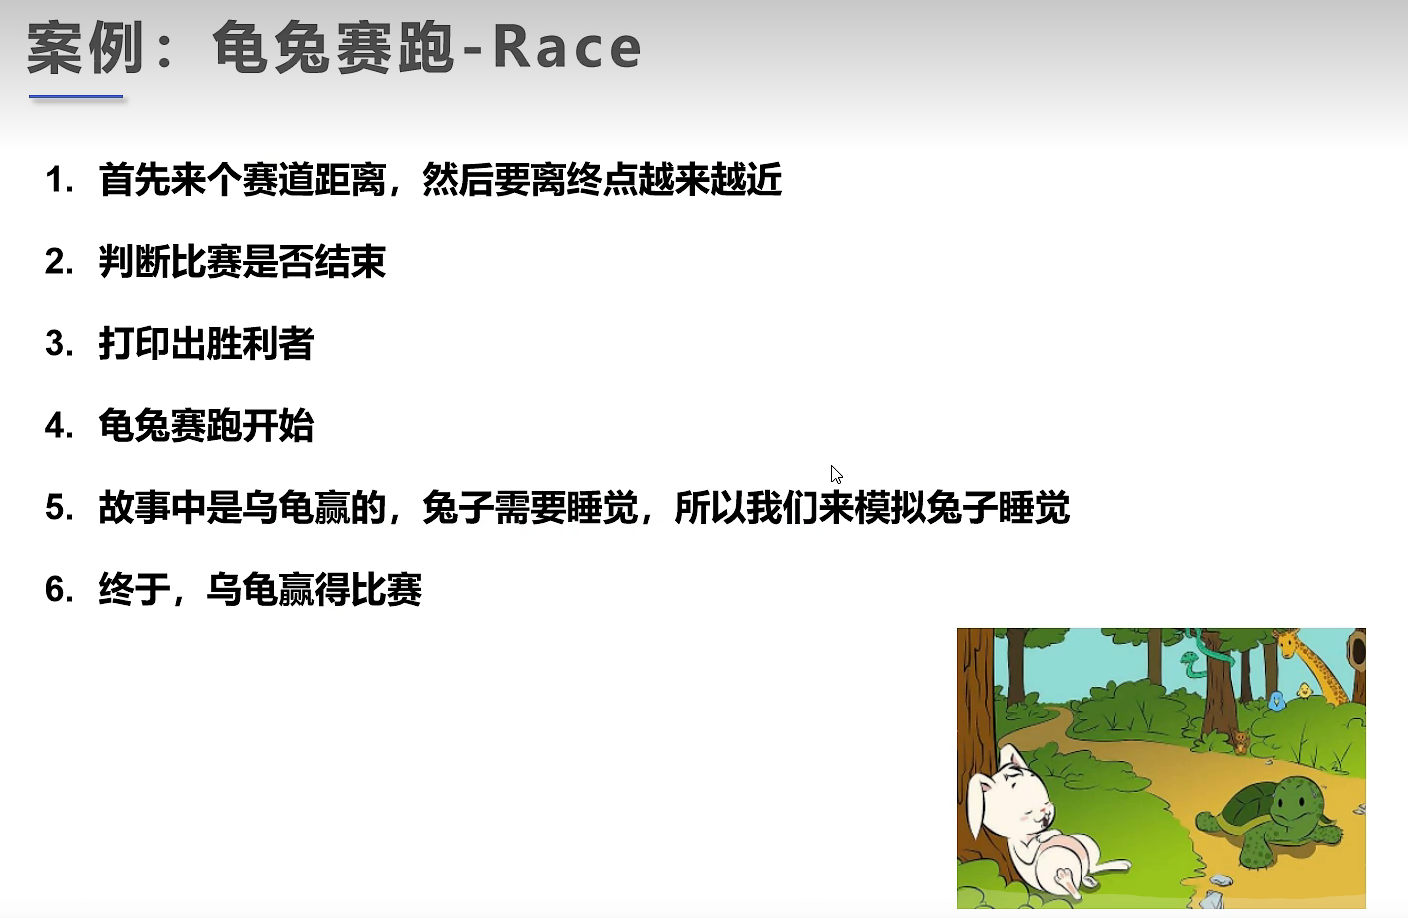
问题说明
实现
public class Race implements Runnable{

    //胜利者
    private static  String winner;

    @Override
    public void run() {
        for (int i = 0; i <= 100; i++) {
            //模拟兔子休息
            if (Thread.currentThread().getName().equals("兔子")  && i%20 == 0){
                try {
                    Thread.sleep(1);
                } catch (InterruptedException e) {
                    e.printStackTrace();
                }
            }
            //判断比赛是否结束
            boolean flag = gameOver(i);
            //如果比赛结束了,就停止程序
            if (flag){
                break;
            }
            System.out.println(Thread.currentThread().getName()+"------>跑了"+i+"步");
        }
    }

    //判断是否完成比赛
    private boolean gameOver(int step){
        //判断是否有胜利者
        if (winner != null){    //已经出现胜利者了
            return true;
        } else {
            if (step >= 100){
                winner = Thread.currentThread().getName();
                System.out.println("winner is "+ winner);
                return true;
            }
        }
        return false;
    }

    public static void main(String[] args) {
        Race race = new Race();
        new Thread(race,"兔子").start();
        new Thread(race,"乌龟").start();
    }

}
4、静态代理模式

这里如果学过Spring的AOP会有清晰的理解,可以认为有一个a接口,里面有A方法和其实现,现在有一个b接口,b接口和a接口的里的方法名一样,但是没有具体实现,这时候我们写一个b接口的实现类,在实现类里定义一个a接口这样的对象,在实现b接口里的A方法时执行a.A()方法即可。
public class StacticProxy {

    public static void main(String[] args) {

        /*
        	这里的小明就可以理解为一个真实对象
        	Thread里有一个代理对象,小明把代理对象给替代了
        	如同婚庆公司里有一个代理的人,你去把这个代理对象给顶替了
        	这个例子可以,但是不太好理解,真实对象和代理对象不一定要实现相同的接口
        */

        new Thread("小明").start();

        new WeddingCompany(new You()).HappyMarry();

    }
}

interface Marry {
    void HappyMarry();
}

//真实角色
class You implements Marry {
    @Override
    public void HappyMarry() {
        System.out.println("谢谢你送我最后清醒");
    }
}

//代理角色
class WeddingCompany implements Marry {

    private Marry target;

    public WeddingCompany(Marry target) {
        this.target = target;
    }

    @Override
    public void HappyMarry() {
        before();
        this.target.HappyMarry();
        after();
    }

    private void after() {
        System.out.println("结婚之后");
    }

    private void before() {
        System.out.println("结婚之前");
    }
}
5、Lambda表达式
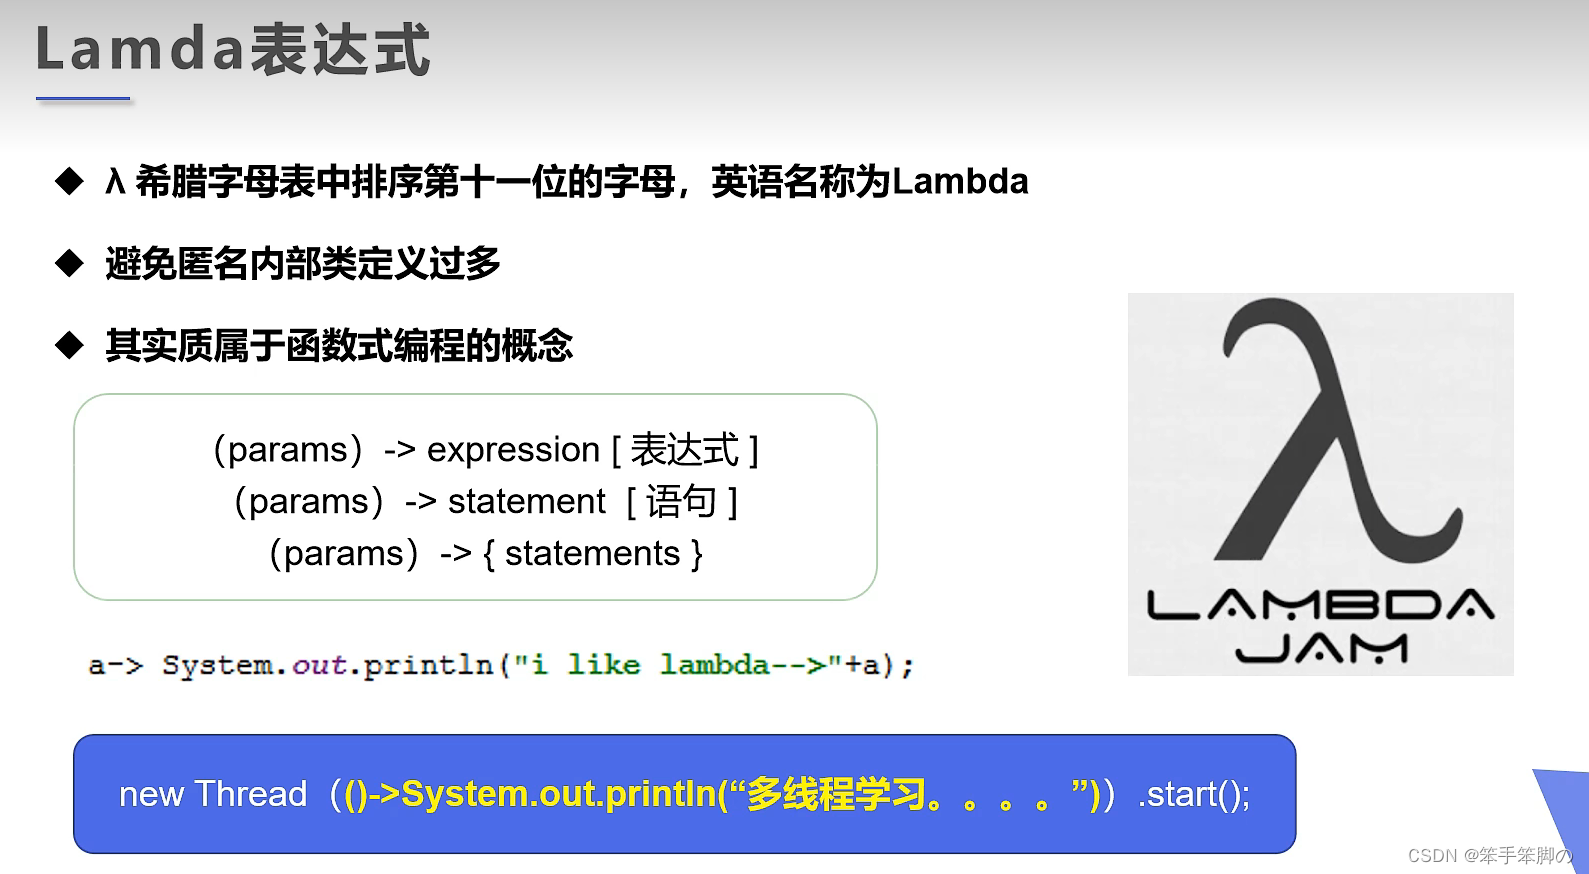
为什么要使用Lambda表达式
- 避免匿名内部类定义过多
- 可以让代码看起来更简洁
- 去掉了无意义的代码,只留下核心的逻辑
函数式接口
- 任何接口,如果只包含唯一一个抽象方法,那么它就是一个函数式接口
//jdk8之后,接口里的方法默认都是abstract的
public interface Runnable(){
    public abstract void run();
}
- 对于函数式接口,我们可以通过Lamda表达式来创建该接口的对象
测试
//lambda表达式
public class Testlambda {

    //3.静态内部类
    static class Like2 implements Ilike {
        @Override
        public void lambda() {
            System.out.println("I like lambda2");
        }
    }

    public static void main(String[] args) {
        Ilike like = new Like();
        like.lambda();

        like = new Like2();
        like.lambda();

        //4.局部内部类
        class Like3 implements Ilike {
            @Override
            public void lambda() {
                System.out.println("I like lambda3");
            }
        }
        like = new Like3();
        like.lambda();

        //5.匿名内部类,没有名称,必须借助接口或者父类
        like = new Ilike() {
            @Override
            public void lambda() {
                System.out.println("I like lambda4");
            }
        };
        like.lambda();

        //6.用lambda简化
        like = () -> {
            System.out.println("I like lambda5");
        };
        like.lambda();

    }

}

//1.定义一个函数式接口
interface Ilike {
    void lambda();
}

//2.实现类
class Like implements Ilike {
    @Override
    public void lambda() {
        System.out.println("I like lambda");
    }
}
实现类—>静态内部类—>局部内部类—>匿名内部类—>lambda表达式
测试2
public class TestLambda2 {

    static class Love2 implements ILove{
        @Override
        public void love(int a) {
            System.out.println("I Love you" + a);
        }
    }

    public static void main(String[] args) {
        ILove love = new Love();
        love.love(2);

        love = new Love2();
        love.love(3);

        class Love3 implements ILove{
            @Override
            public void love(int a) {
                System.out.println("I Love you" + a);
            }
        }
        love = new Love3();
        love.love(4);

        love = new ILove() {
            @Override
            public void love(int a) {
                System.out.println("I Love you" + a);
            }
        };
        love.love(5);

        love = (int a) -> {
            System.out.println("I Love you" + a);
        };
        love.love(6);

    }

}

interface ILove{
    void love(int a);
}

class Love implements ILove{
    @Override
    public void love(int a) {
        System.out.println("I Love you" + a);
    }
}
Lambda虽然已经比较简单了,但依然可以继续简化
简化参数类型
//a的类型int直接省略了,多个参数也可以,但是要一一匹配
public class TestLambda2 {

    public static void main(String[] args) {

        ILove love;
        love = (a) -> {
            System.out.println("I Love you" + a);
        };
        love.love(520);
    }

}

interface ILove{
    void love(int a);
}
简化括号
//只在单参数下有效
public class TestLambda2 {

    public static void main(String[] args) {

        ILove love;
        love = a -> {
            System.out.println("I Love you" + a);
        };
        love.love(520);
    }

}

interface ILove{
    void love(int a);
}
简化花括号
//去掉花括号,花括号内只能有一行代码
public class TestLambda2 {

    public static void main(String[] args) {

        ILove love;
        love = a -> System.out.println("I Love you" + a);

        love.love(520);
    }

}

interface ILove{
    void love(int a);
}
6、线程状态
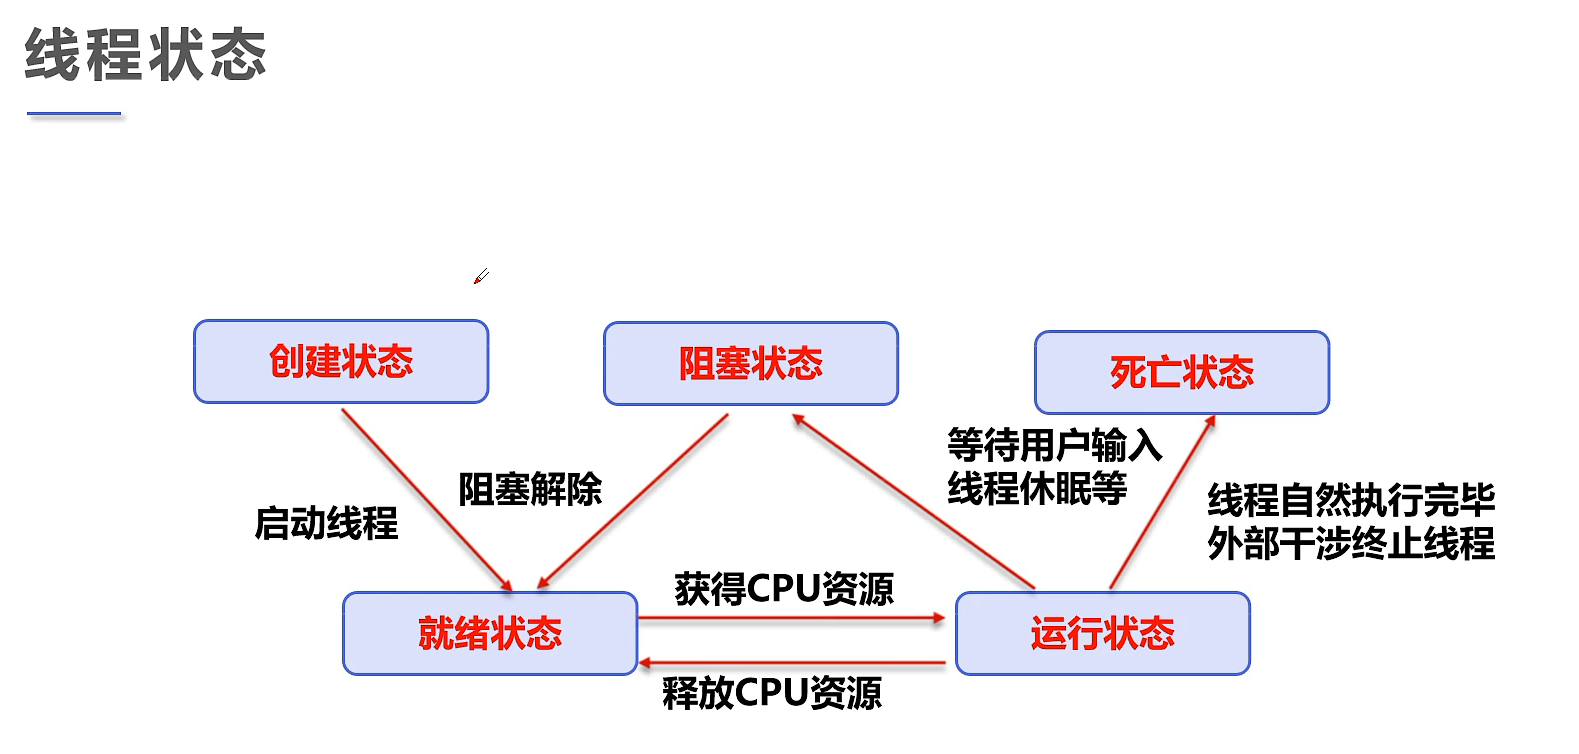
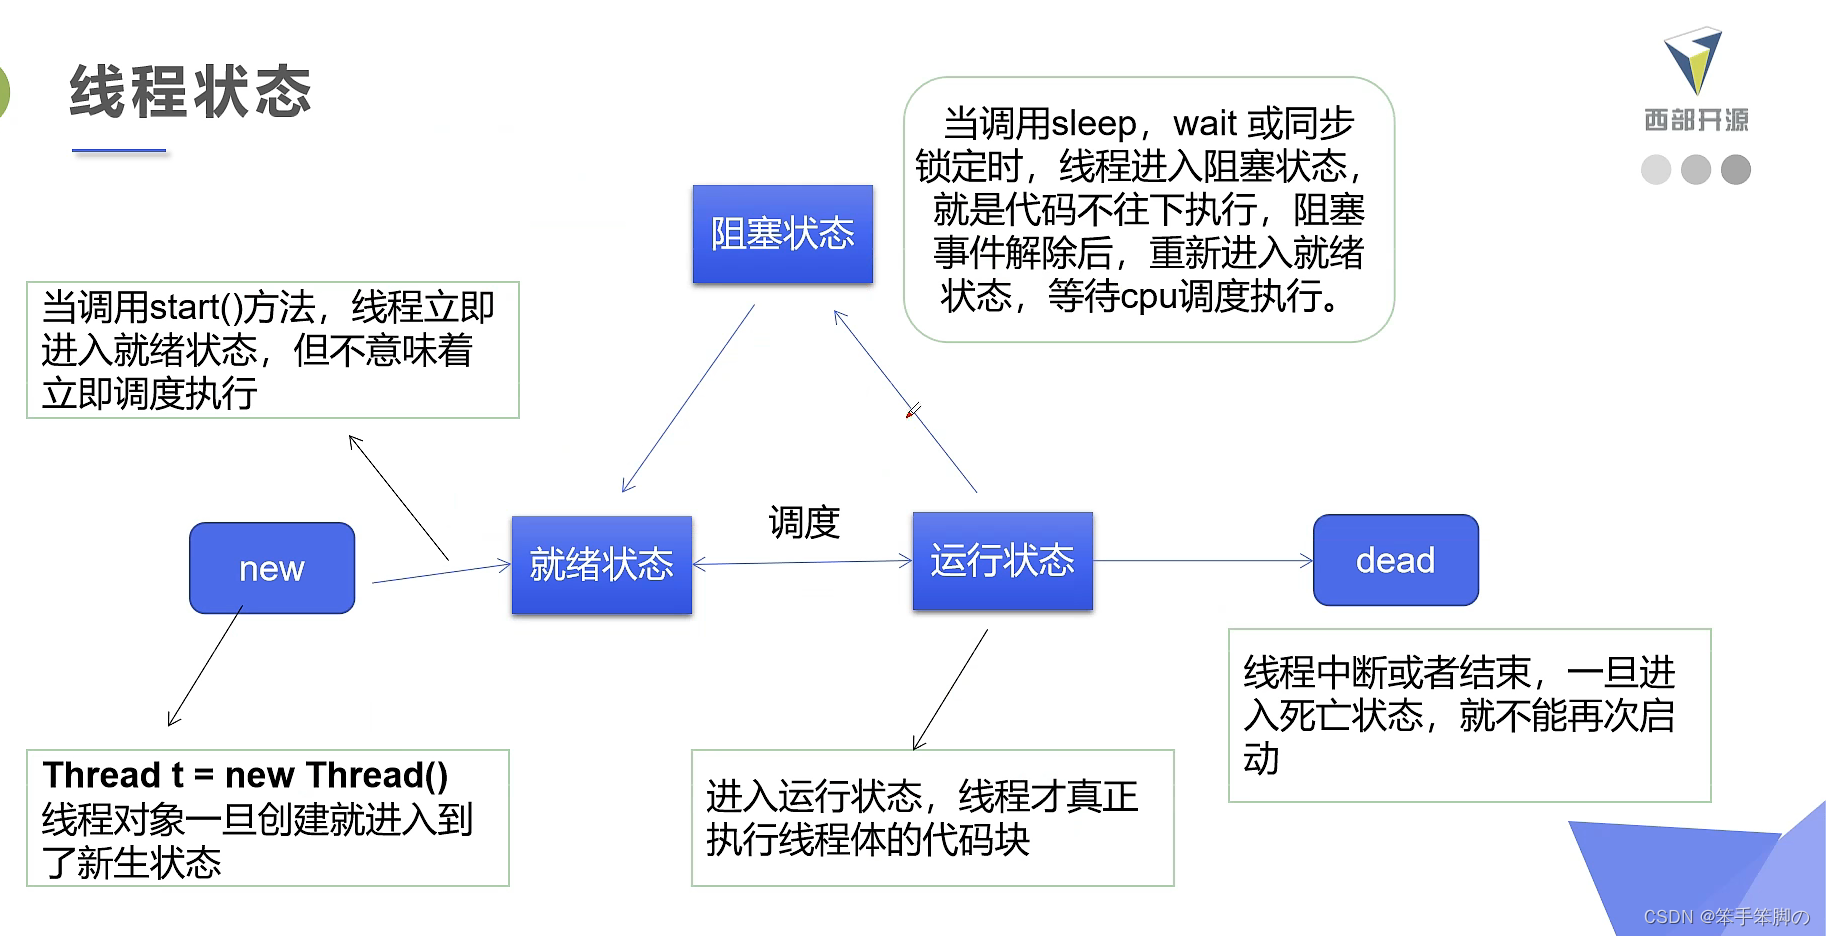
五态模型:
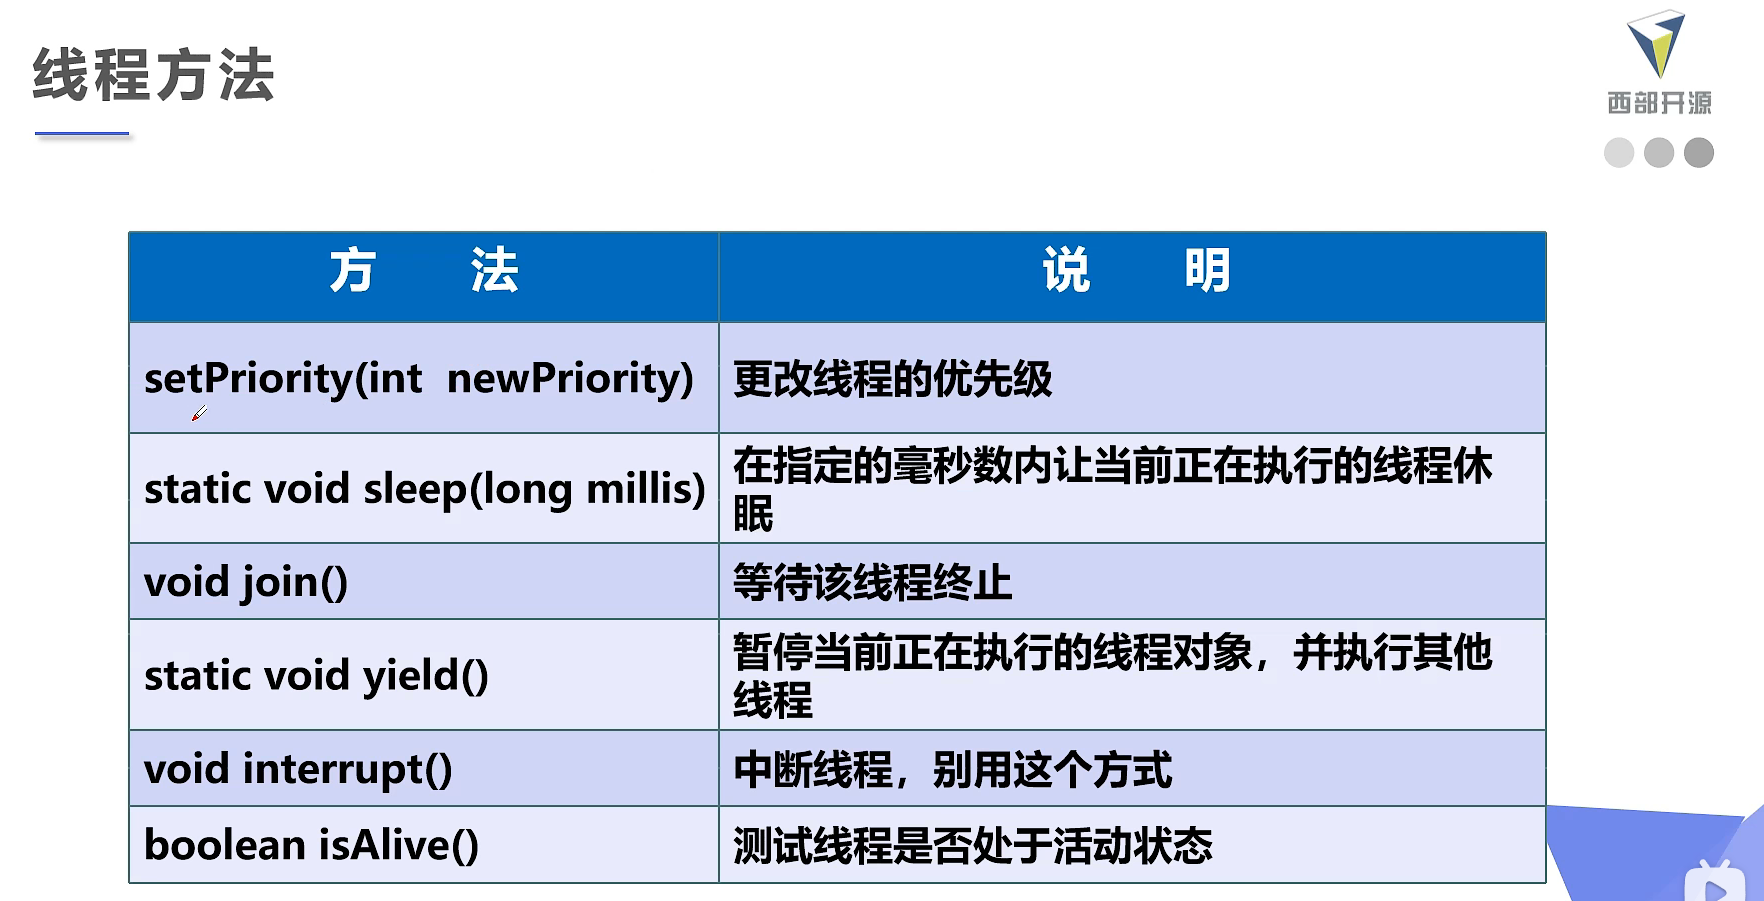
线程方法
6.1、停止线程
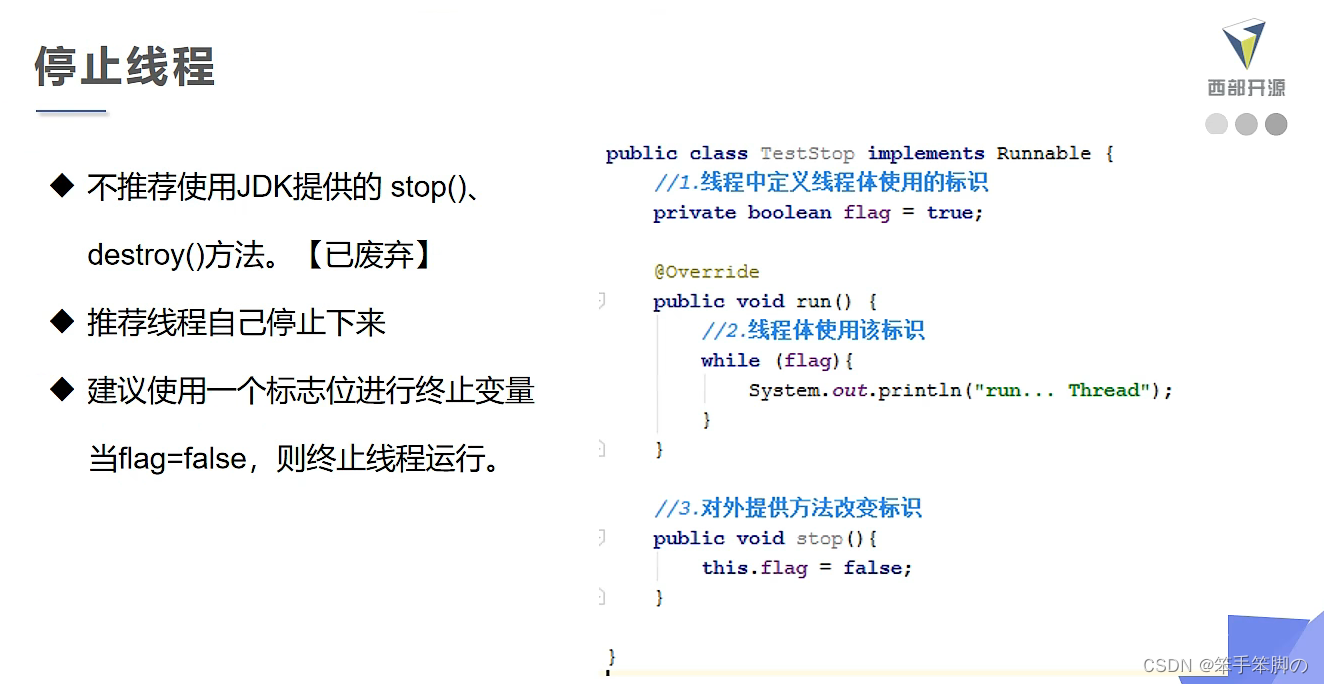
- 不推荐使用JDK提供的stop(),destroy()方法。
- 推荐线程自己停下来
- 建议使用标志位
测试
public class TestStop implements Runnable{

    private boolean flag = true;

    private void stop(){
        this.flag = false;
    }

    @Override
    public void run() {
        int i = 0;
        while (flag){
            System.out.println("thread---------------" + i++);
        }
    }

    public static void main(String[] args) {
        TestStop testStop = new TestStop();
        new Thread(testStop).start();

        for (int i = 0; i < 1000; i++) {
            System.out.println("main-----------------" + i);
            if (i == 900) {
                //调用stop方法切换标志位,让线程停止
                testStop.stop();
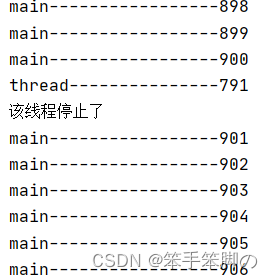
                System.out.println("该线程停止了");
            }
        }
    }
}
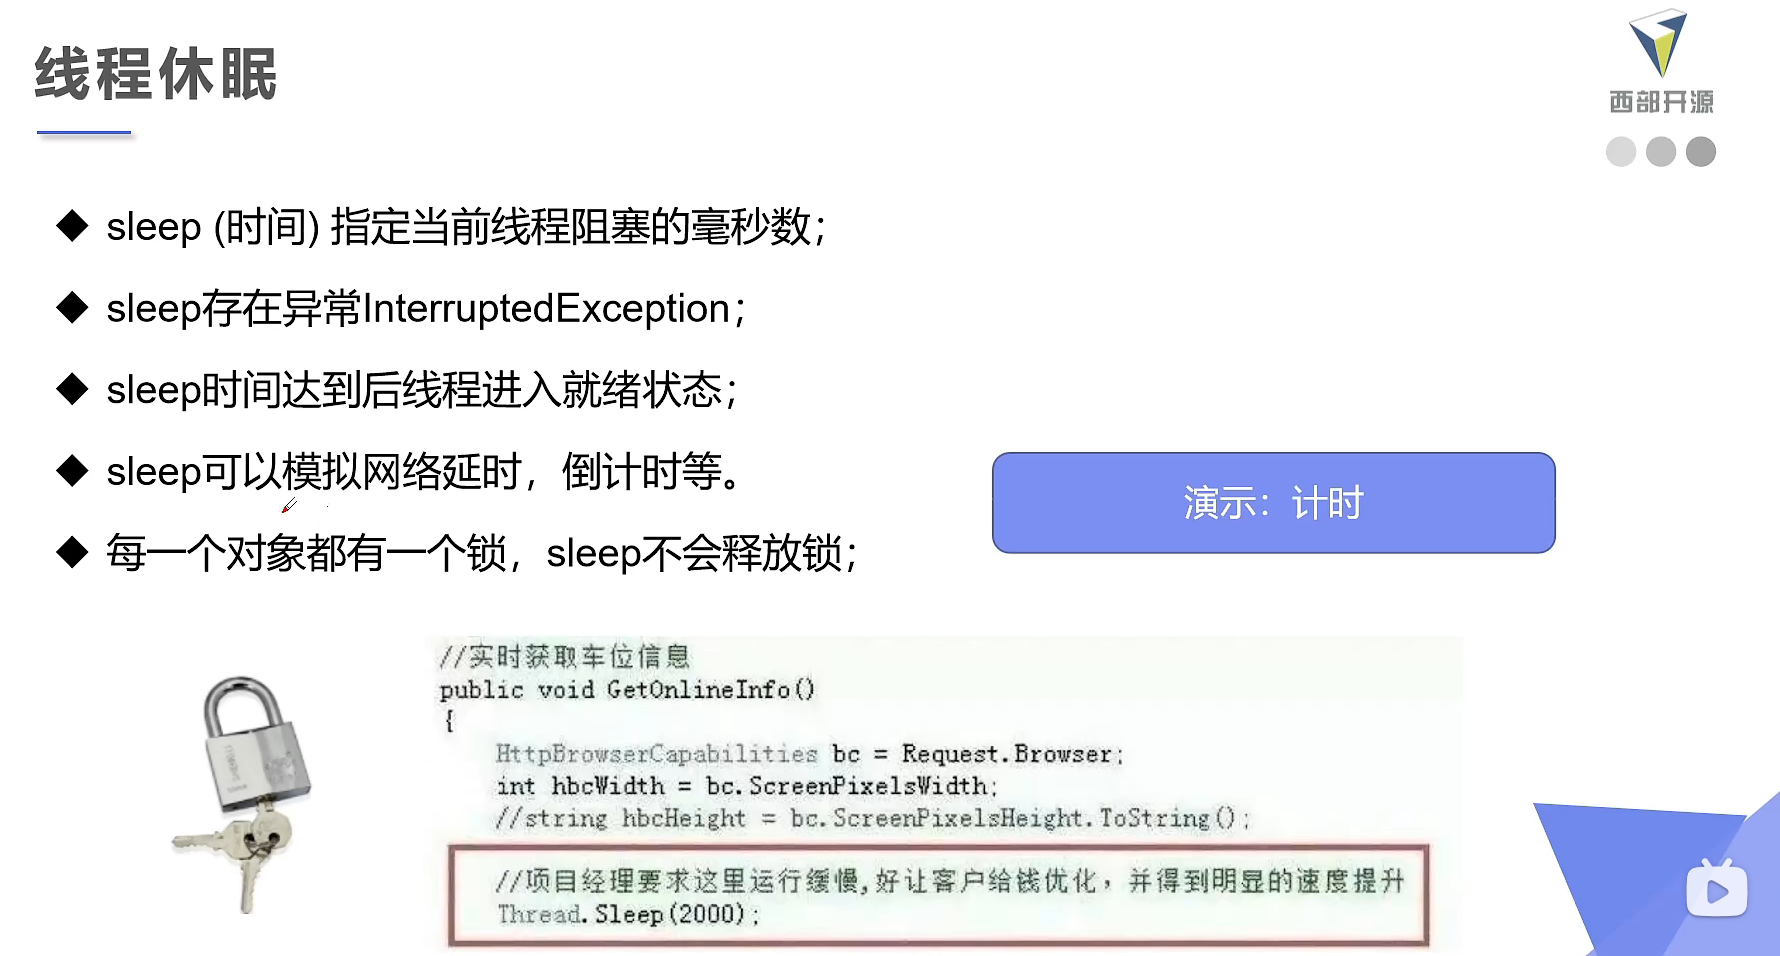
6.2、线程休眠
测试
1.模拟延迟
public class TestSleep implements Runnable {

    //票数
    private int ticketNums = 10;

    @Override
    public void run() {
        while (ticketNums > 0) {
            //捕获异常
            try {
                Thread.sleep(200);
            } catch (InterruptedException e) {
                e.printStackTrace();
            }
            System.out.println(Thread.currentThread().getName() + "--->拿到了第" + ticketNums-- + "张票");
        }
    }

    public static void main(String[] args) {
        TestSleep ticket = new TestSleep();
        new Thread(ticket, "小红").start();
        new Thread(ticket, "老师").start();
        new Thread(ticket, "黄牛").start();
    }
}
2.模拟倒计时
public class TestSleep2 {

    public static void main(String[] args) {
        try {
            tenDown();
        } catch (InterruptedException e) {
            e.printStackTrace();
        }
    }

    //模拟倒计时
    public static void tenDown() throws InterruptedException {
        int num = 10;       //10秒
        while (num > 0) {
            Thread.sleep(1000);
            System.out.println(num--);
        }
    }
}
3.每一秒获取当前时间
public class TestSleep3 {

    public static void main(String[] args) {
        //获取系统当前时间
        Date startTime = new Date(System.currentTimeMillis());
        while (true) {
            try {
                Thread.sleep(1000);
                //更新系统时间
                System.out.println(new SimpleDateFormat("HH:mm:ss").format(startTime));
                startTime = new Date(System.currentTimeMillis());
            } catch (InterruptedException e) {
                e.printStackTrace();
            }
        }
    }
}
6.3、线程礼让

测试
public class TestYield {

    public static void main(String[] args) {

        MyYeild myYeild = new MyYeild();
        new Thread(myYeild, "a").start();
        new Thread(myYeild, "b").start();

    }

}

class MyYeild implements Runnable {
    @Override
    public void run() {
        System.out.println(Thread.currentThread().getName() + "线程开始执行");
        Thread.yield();     //礼让
        System.out.println(Thread.currentThread().getName() + "线程停止执行");
    }
}
package threadState;

//线程礼让
public class TestYield {

    public static void main(String[] args) {

        MyYeild myYeild = new MyYeild();
        new Thread(myYeild, "a").start();
        new Thread(myYeild, "b").start();

    }

}

class MyYeild implements Runnable {
    @Override
    public void run() {
        System.out.println(Thread.currentThread().getName() + "线程开始执行");
        Thread.yield();     //礼让
        System.out.println(Thread.currentThread().getName() + "线程停止执行");
    }
}
礼让失败

礼让成功

6.4、线程强制执行
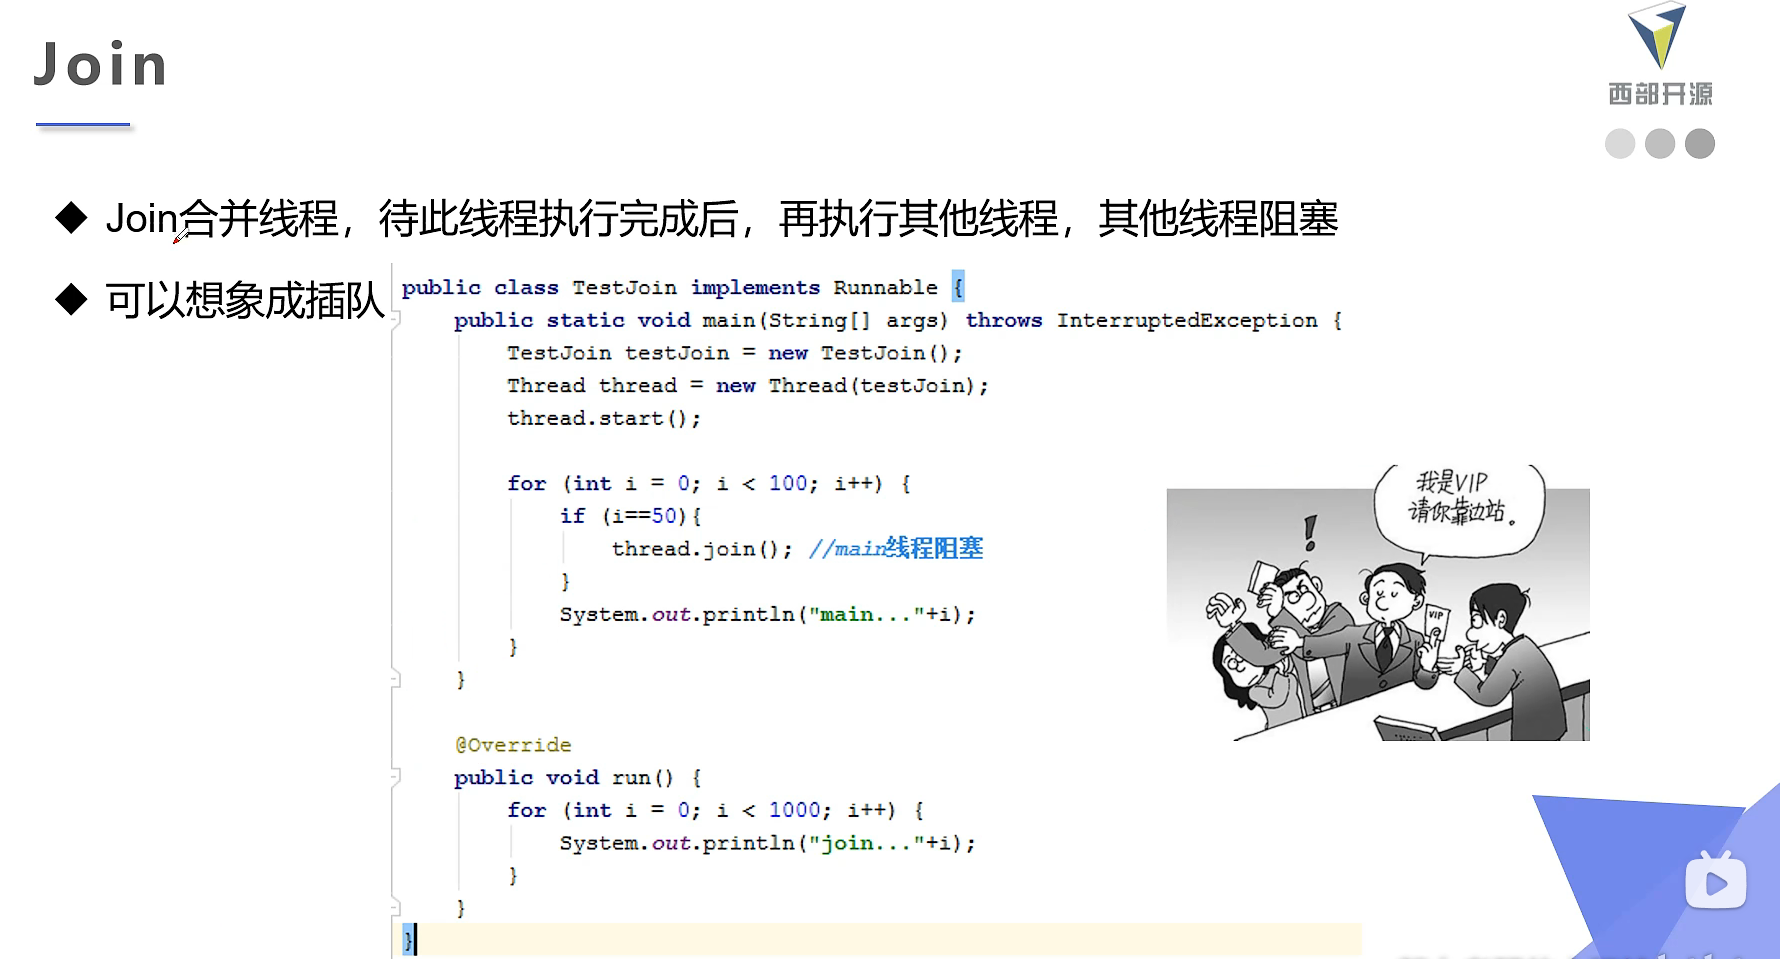
测试
package threadState;

//线程插队
public class TestJoin implements Runnable {

    @Override
    public void run() {
        for (int i = 0; i < 500; i++) {
            System.out.println("线程vip" + i);
        }
    }

    public static void main(String[] args) throws InterruptedException {

        TestJoin testJoin = new TestJoin();
        Thread thread = new Thread(testJoin);
        thread.start();

        for (int i = 0; i < 500; i++) {
            if (i == 200){
                thread.join();
            }
            System.out.println("Main" + i);
        }

    }

}
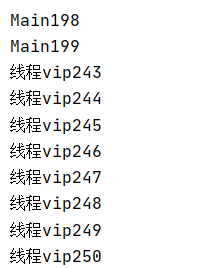
当Main线程跑到200时,thread开启强制执行,直到结束主线程才开始继续执行
6.5、线程状态检测
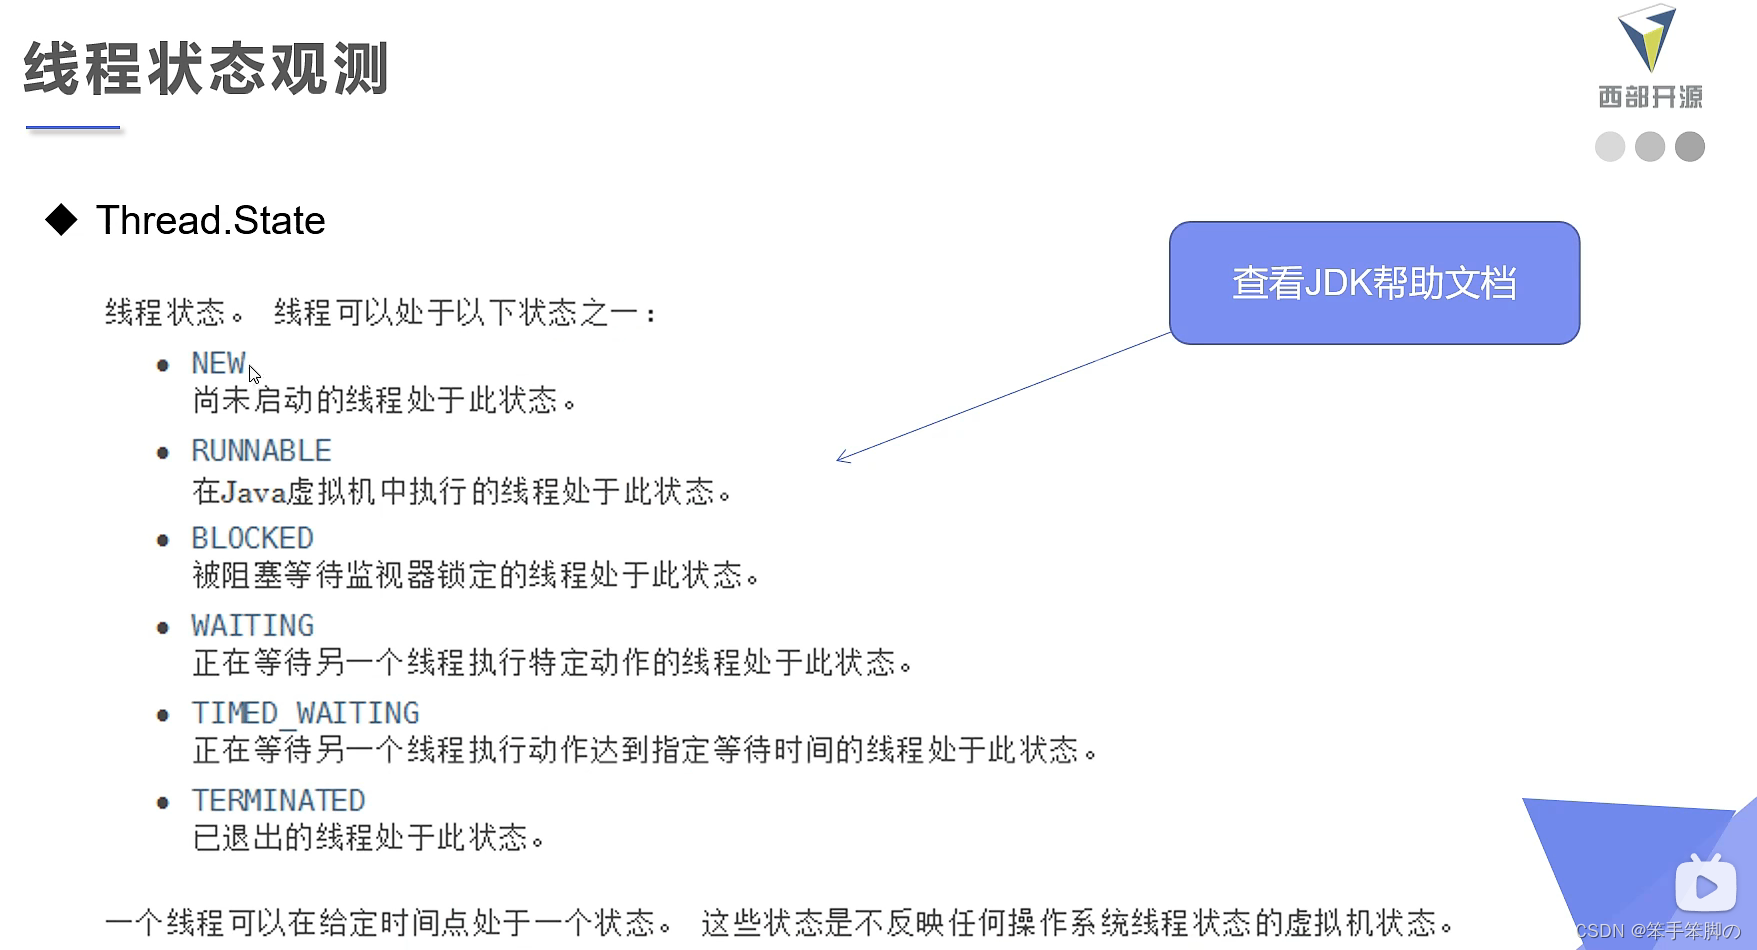
测试
public class TestState {

    public static void main(String[] args) throws InterruptedException{

        Thread thread = new Thread(() -> {
            for (int i = 0; i < 5; i++) {
                try {
                    Thread.sleep(500);
                } catch (InterruptedException e) {
                    e.printStackTrace();
                }
                System.out.println("//");
            }
        });
        Thread.State state = thread.getState();
        System.out.println(state);              //NEW

        thread.start();
        state = thread.getState();
        System.out.println(state);				//Runnable

        while (state != Thread.State.TERMINATED){
            Thread.sleep(100);
            state = thread.getState();
            System.out.println(state);
        }

        //线程停止后不可以再运行
        //thread.start();

    }

}
6.6、线程优先级
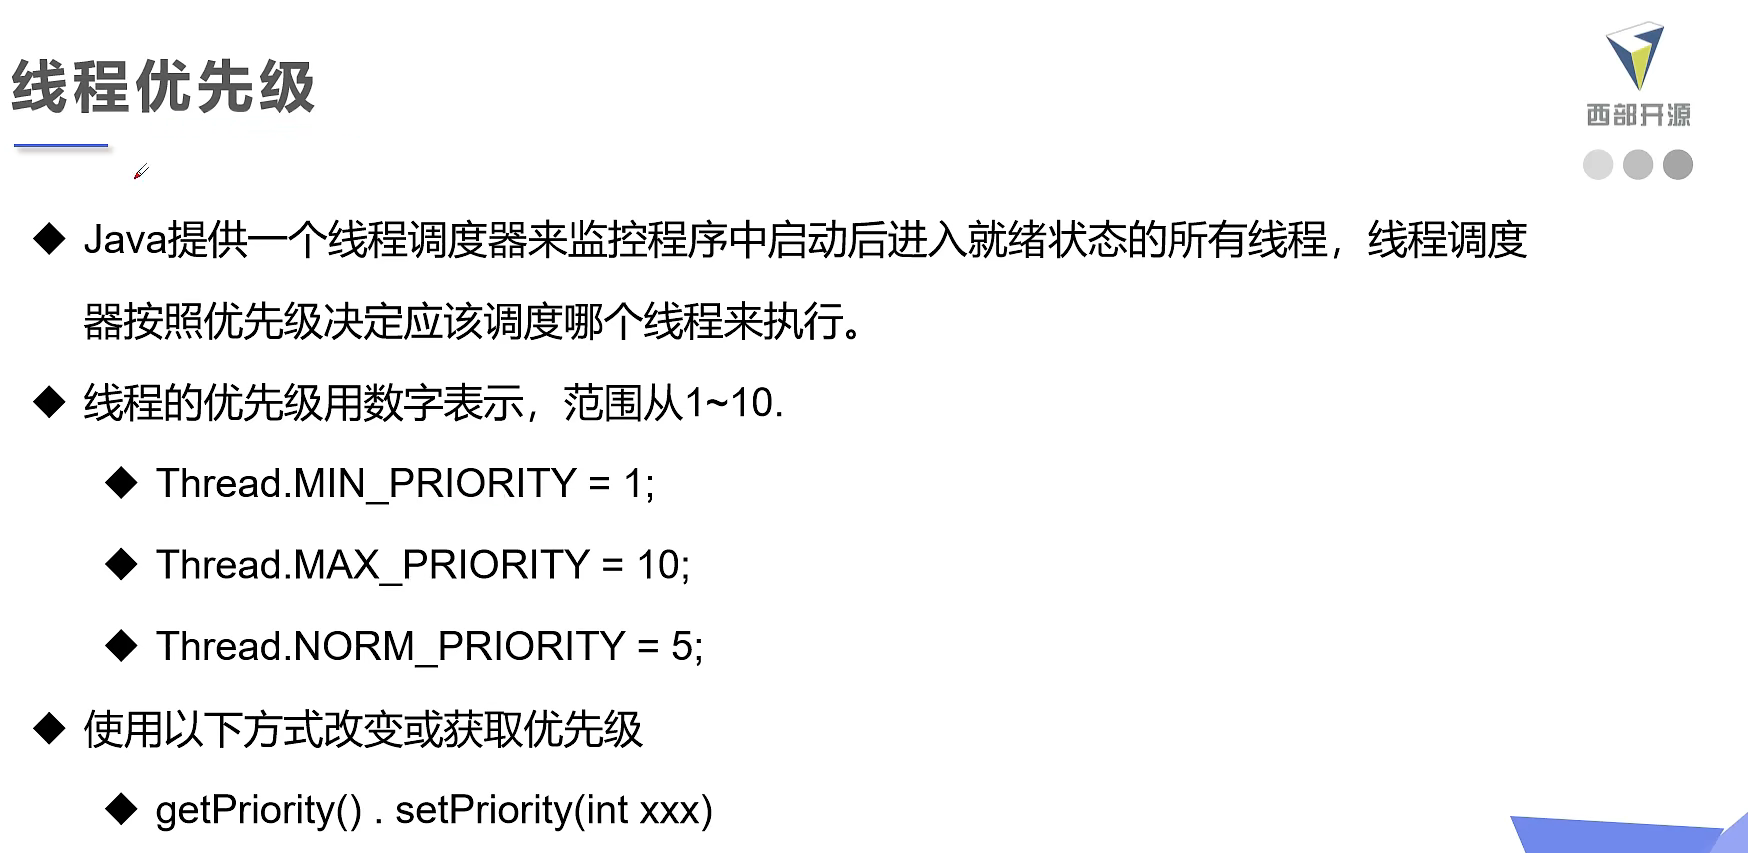
测试
public class TestPriority {

    public static void main(String[] args) {
        System.out.println(Thread.currentThread().getName() + "----->" + Thread.currentThread().getPriority());

        MyPriority myPriority = new MyPriority();
        Thread t1 = new Thread(myPriority);
        Thread t2 = new Thread(myPriority);
        Thread t3 = new Thread(myPriority);
        Thread t4 = new Thread(myPriority);
        Thread t5 = new Thread(myPriority);
        Thread t6 = new Thread(myPriority);

        t1.start();

        t2.setPriority(1);
        t2.start();

        t3.setPriority(4);
        t3.start();

        t4.setPriority(10);
        t4.start();

        //优先级为1~10,不在范围内会报错
//        t5.setPriority(-1);
//        t5.start();
//
//        t6.setPriority(11);
//        t6.start();
    }

}

class MyPriority implements Runnable{

    @Override
    public void run() {
        System.out.println(Thread.currentThread().getName() + "----->" + Thread.currentThread().getPriority());
    }

}
优先级的设定一定要在start()调度前
优先级低只是意味着获得调度的概率低,并不是优先级低就不会被调用了,这都是看cpu的调度
6.7、守护线程

测试
public class TestDaemon {

    public static void main(String[] args) {
        God god = new God();
        You you = new You();

        Thread thread = new Thread(god);
        thread.setDaemon(true);             //默认是false认为是用户线程
        thread.start();                     //守护线程启动

        new Thread(you).start();            //用户线程启动
    }

}

class You implements Runnable{
    @Override
    public void run() {
        for (int i = 0; i < 36500; i++) {
            System.out.println("你一生都开心的活着");
        }
        System.out.println("Goodbye! World");
    }
}

class God implements Runnable{
    @Override
    public void run() {
        while (true){
            System.out.println("God help you");
        }
    }
}
**虚拟机不用等待守护线程执行完毕!**在You进程结束后,Main线程很快也停止了
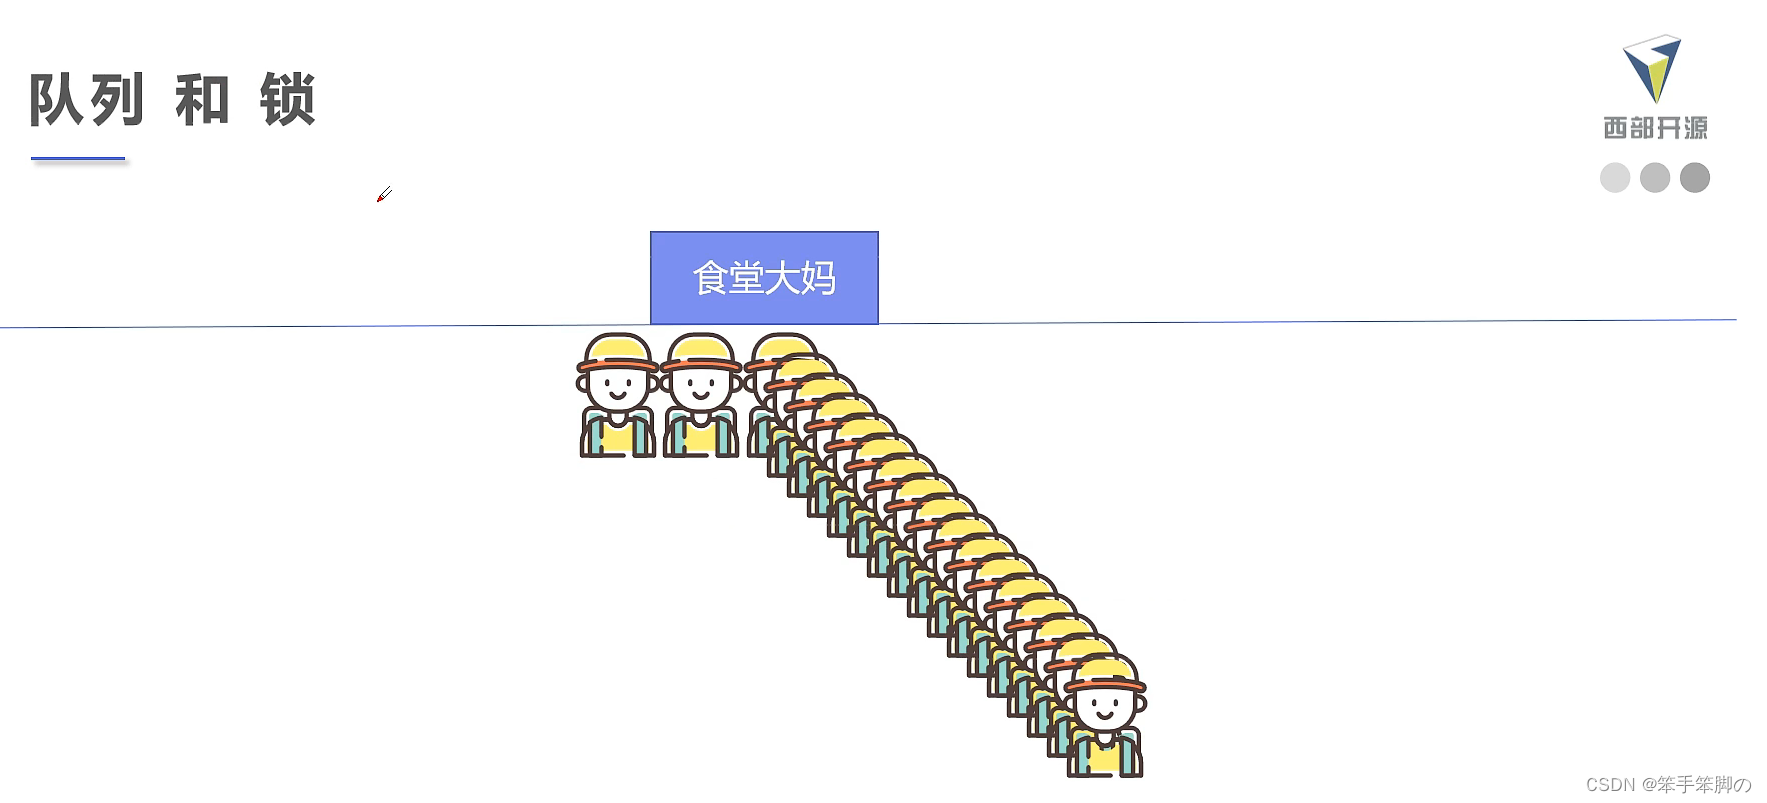
7、线程同步
7.1、线程同步机制
比如多人抢票问题,手机端和柜台同时取钱…



7.2、三大不安全案例
买票
//不安全买票
//多个进程遇到了同一张票,一起购买
public class UnsafeBuyTicket {
    public static void main(String[] args) {
        BuyTicket station = new BuyTicket();

        new Thread(station,"苦逼的我").start();
        new Thread(station,"牛逼的你们").start();
        new Thread(station,"可恶的黄牛党").start();
    }
}

class BuyTicket implements Runnable{

    private int ticketNums = 10;
    private boolean flag = true;

    @Override
    public void run() {
        while (flag){
            buy();
        }
    }

    private void buy(){
        if (ticketNums <= 0){
            flag = false;
            return;
        }
        System.out.println(Thread.currentThread().getName() + "拿到了第----->" + ticketNums-- + "张票");
    }

}
取钱
//不安全取钱
//双方同时进入,发现金额都是100,足够取出
public class UnsafeBank {
    public static void main(String[] args) {
        Account account = new Account(100, "结婚基金");

        Drawing you = new Drawing(account, 50, "you");
        Drawing wife = new Drawing(account, 100, "your wife");

        you.start();
        wife.start();
    }
}

//账户
class Account {
    int money;              //余额
    String cardName;        //卡名

    public Account(int money, String cardName) {
        this.money = money;
        this.cardName = cardName;
    }
}

//银行:模拟取款
class Drawing extends Thread {
    Account account;        //账户
    int drawingMoney;       //取金额
    int nowMoney;           //你手里的钱

    public Drawing(Account account, int drawingMoney, String name) {
        super(name);
        this.account = account;
        this.drawingMoney = drawingMoney;
    }

    //取钱
    @Override
    public void run() {
        if (account.money < drawingMoney){
            System.out.println(Thread.currentThread().getName() + "钱不够,取不了");
            return;
        }
        try {
            sleep(1);
        } catch (InterruptedException e) {
            e.printStackTrace();
        }
        account.money = account.money - drawingMoney;
        nowMoney = nowMoney + drawingMoney;
        System.out.println(account.cardName+"余额为:"+account.money);
        System.out.println(this.getName()+"手里余额为:"+nowMoney);
    }
}

线程不安全的集合
//不安全list
//同一时间多个进程把名字添加到了同一个位置,故最后输出<100000
public class UnsafeList {

    public static void main(String[] args) {
        List<String> list = new ArrayList<String>();
        for (int i = 0; i < 100000; i++) {
            new Thread(() -> {
                list.add(Thread.currentThread().getName());
                try {
                    Thread.sleep(1);
                } catch (InterruptedException e) {
                    e.printStackTrace();
                }
            }).start();
        }
        System.out.println(list.size());
    }
}

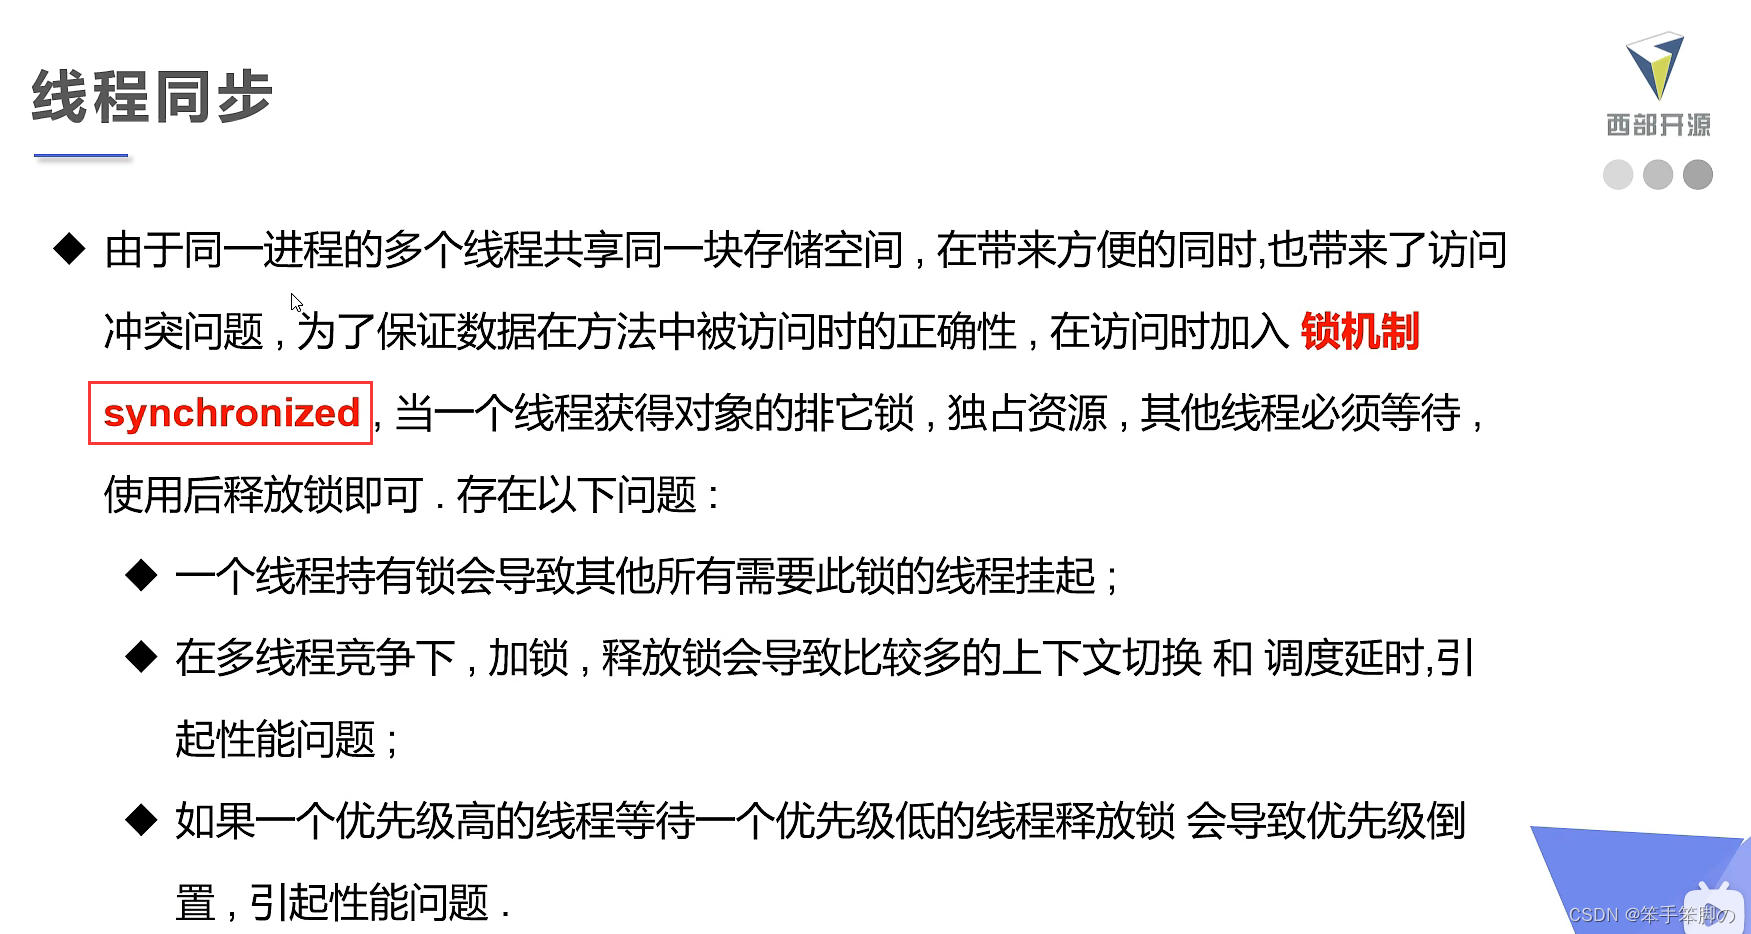
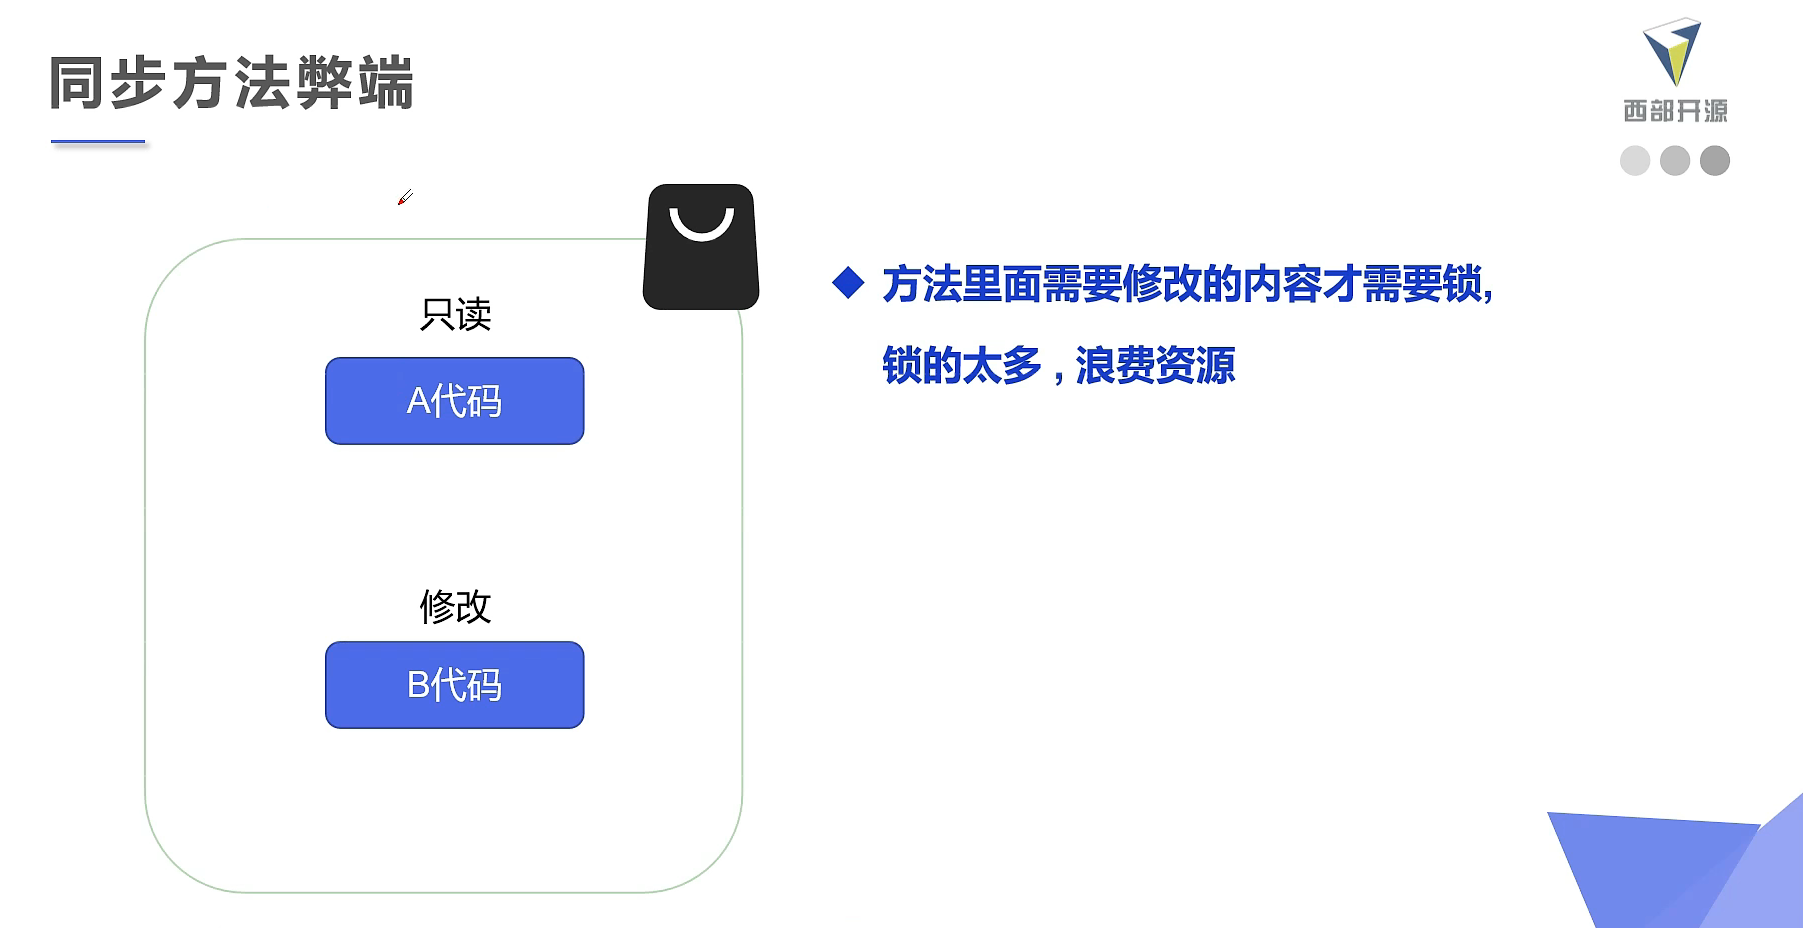
7.3、同步方法及同步块
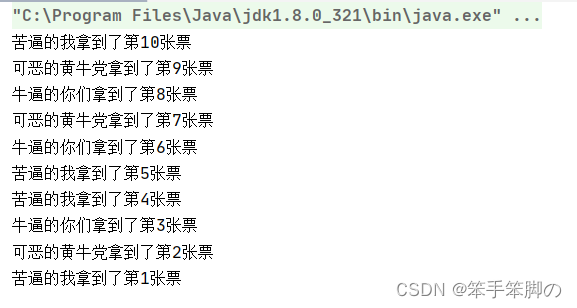
安全买票
public class SafeBuyTicket {
    public static void main(String[] args) {
        BuyTicket1 station = new BuyTicket1();
        new Thread(station,"苦逼的我").start();
        new Thread(station,"牛逼的你们").start();
        new Thread(station,"可恶的黄牛党").start();
    }
}

class BuyTicket1 implements Runnable {
    //票
    private int ticketNums = 10;
    boolean flag = true;

    @Override
    public void run() {
        //买票
        while (flag) {
            try {
                buy();
                Thread.sleep(1);
            } catch (Exception e) {
                e.printStackTrace();
            }
        }
    }

    //synchronized 同步方法
    private synchronized void buy() {
        //判断是否有票
        if (ticketNums <= 0) {
            flag = false;
            return;
        }
        //买票
        System.out.println(Thread.currentThread().getName() + "拿到了第" + ticketNums-- +"张票");
    }
}
安全取钱
public class SafeBank {
    public static void main(String[] args) {
        Account1 account = new Account1(100, "结婚基金");
        Drawing1 you = new Drawing1(account, 50, "you");
        Drawing1 girlfriend = new Drawing1(account, 100, "girlfriend");
        you.start();
        girlfriend.start();
    }
}

//账户
class Account1 {
    int money;//余额
    String cardName;//卡名

    public Account1(int money, String cardName) {
        this.money = money;
        this.cardName = cardName;
    }
}

//银行:模拟取款
class Drawing1 extends Thread {
    Account1 account;//账户
    int drawingMoney;//取金额
    int nowMoney;//你手里的钱

    public Drawing1(Account1 account, int drawingMoney, String name) {
        super(name);
        this.account = account;
        this.drawingMoney = drawingMoney;
    }

    //取钱
    @Override
    public void run() {
        //锁的对象就是变量的量,需要增删改查的对象
        synchronized (account) {
            //判断是否有钱
            if (account.money - drawingMoney < 0) {
                System.out.println(Thread.currentThread().getName() + "余额不足,不能进行取钱");
                return;
            }
            try {
                Thread.sleep(1000);			//放大问题的发生性
            } catch (InterruptedException e) {
                e.printStackTrace();
            }
            //卡内金额 = 余额-你的钱
            account.money = account.money - drawingMoney;
            //你手里的钱
            nowMoney = nowMoney + drawingMoney;
            System.out.println(account.cardName + "余额为:" + account.money);
            //this.getName()==Thread.currentThread().getName()
            System.out.println(this.getName() + "手里的钱:" + nowMoney);
        }
    }
}

集合
public class SafeList {
    public static void main(String[] args) throws InterruptedException {
        List<String> list = new ArrayList<String>();
        for (int i = 0; i < 100000; i++) {
            new Thread(() -> {
                synchronized (list){
                    list.add(Thread.currentThread().getName());
                }
            }).start();
        }
        //如果不加sleep,有可能输出完了线程还没有添加完成造成结果不准确
        Thread.sleep(3000);
        System.out.println(list.size());
    }
}
7.4、CopyOnWriteArrayList
其实JAVA中有线程安全的集合
public class ThreadJuc {
    public static void main(String[] args) throws InterruptedException {
        CopyOnWriteArrayList<String> list = new CopyOnWriteArrayList<String>();
        for (int i = 0; i < 100000; i++) {
            new Thread(() -> {
                list.add(Thread.currentThread().getName());
            }).start();
        }
        Thread.sleep(10000);
        System.out.println(list.size());
    }
}


7.5、死锁

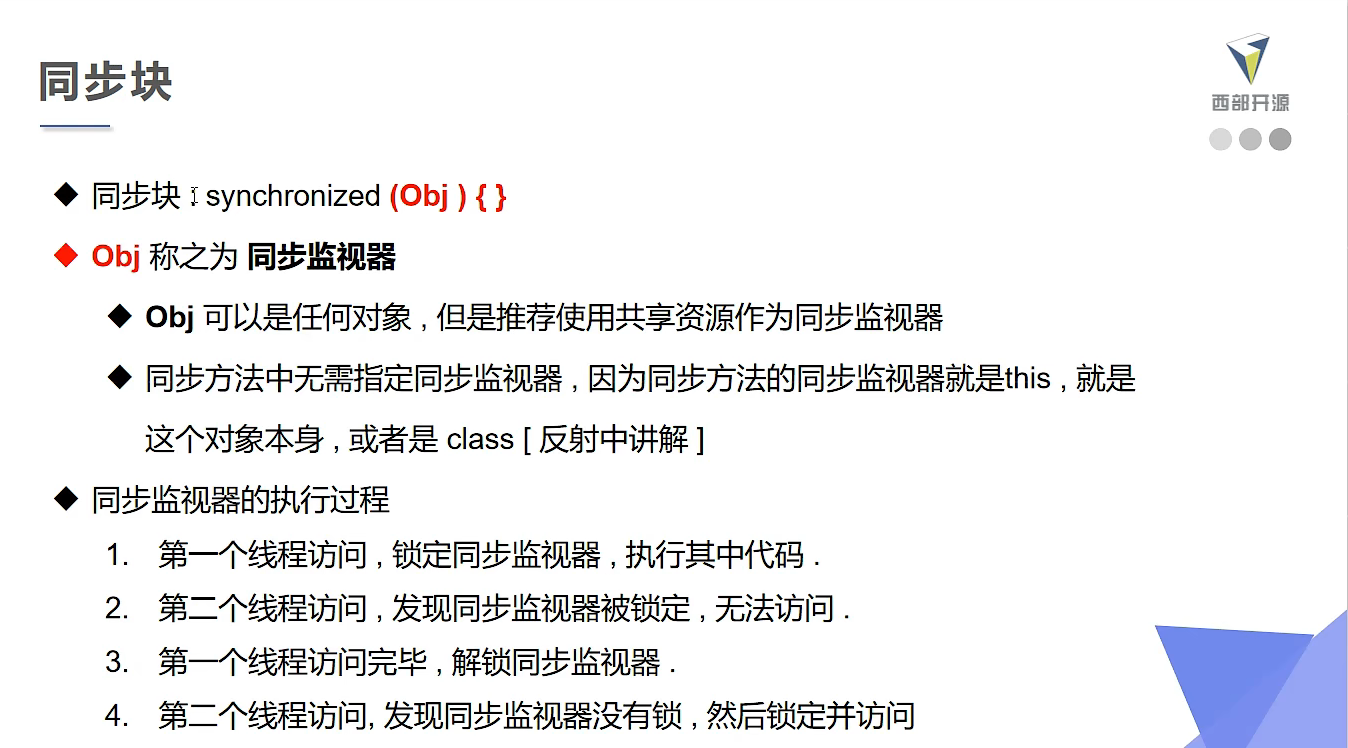
死锁案例
一个人获得了镜子,想去拿口红,另一个人拿到了口红,想去拿镜子,这样两个人就处于死锁状态。
//死锁:多个线程互相抱着对方需要的资源,然后形成僵持
public class DeadLock {
    public static void main(String[] args) {
        Makeup girl1 = new Makeup(0, "灰姑娘");
        Makeup girl2 = new Makeup(1, "白雪公主");
        girl1.start();
        girl2.start();
    }
}

//口红
class Lipstick {
}

//镜子
class Mirror {
}

class Makeup extends Thread {
    //需要的资源只有一份,用static保证只有一份
    static Lipstick lipstick = new Lipstick();
    static Mirror mirror = new Mirror();

    int choice;//选择
    String girlName;//使用化妆品的人

    public Makeup(int choice, String girlName) {
        this.choice = choice;
        this.girlName = girlName;
    }

    @Override
    public void run() {
        //化妆
        try {
            makeup();
        } catch (InterruptedException e) {
            e.printStackTrace();
        }
    }

    private void makeup() throws InterruptedException {
        if (choice == 0) {
            synchronized (lipstick) {//获得口红的锁
                System.out.println(this.girlName + "获得口红的锁");
                Thread.sleep(1000);
                synchronized (mirror) {//一秒钟后想获得镜子
                    System.out.println(this.girlName + "获得镜子的锁");
                }
            }
        } else {
            synchronized (mirror) {//获得镜子的锁
                System.out.println(this.girlName + "获得镜子的锁");
                Thread.sleep(2000);
                synchronized (lipstick) {//二秒钟后想获得的锁
                    System.out.println(this.girlName + "获得口红的锁");
                }
            }
        }
    }
}
解决
private void makeup() throws InterruptedException {
    if (choice == 0) {
        synchronized (lipstick) {//获得口红的锁
            System.out.println(this.girlName + "获得口红的锁");
            Thread.sleep(1000);
        }
        synchronized (mirror) {//一秒钟后想获得镜子
            System.out.println(this.girlName + "获得镜子的锁");
        }
    } else {
        synchronized (mirror) {//获得镜子的锁
            System.out.println(this.girlName + "获得镜子的锁");
            Thread.sleep(2000);
        }
        //解决方法
        synchronized (lipstick) {//二秒钟后想获得的锁
            System.out.println(this.girlName + "获得口红的锁");
        }
    }
}

这个在操作系统课程中有更详细的解释说明
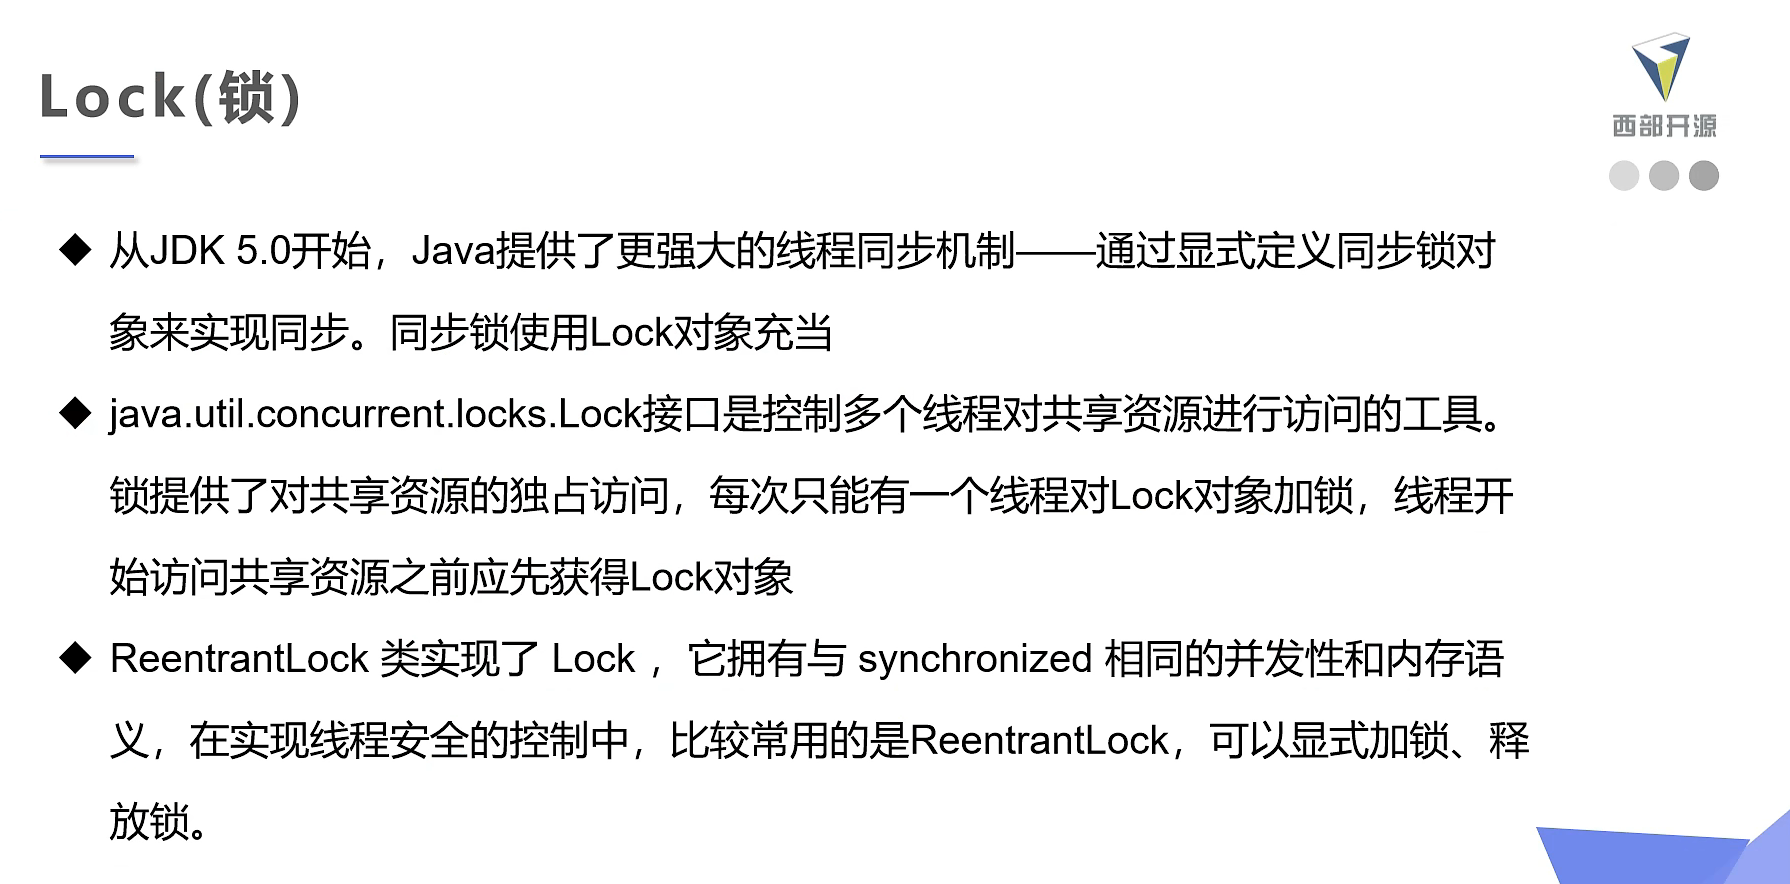
7.6、Lock锁
买票
public class TestLock {

    public static void main(String[] args) {
        TestLock2 lock2 = new TestLock2();
        new Thread(lock2, "t1").start();
        new Thread(lock2, "t2").start();
        new Thread(lock2, "t3").start();
    }
}

class TestLock2 implements Runnable {

    int ticketNums = 10;
    private final ReentrantLock lock = new ReentrantLock();     //可重入锁

    @Override
    public void run() {
        while (true) {
            try {
                lock.lock();    	//加锁
                if (ticketNums > 0) {
                    System.out.println(Thread.currentThread().getName()+ "买到了第" + ticketNums-- + "张票");
                    try {
                        Thread.sleep(500);
                    } catch (InterruptedException e) {
                        e.printStackTrace();
                    }
                } else {
                    break;
                }
            } finally {
                lock.unlock();  	//解锁
            }
        }
    }
}
这样会有一些小的问题,线程t1在拿到锁买完票睡眠期间并未解锁,因此t2,t3进程依然无法在此期间买票,最后这10张票都被t1进程抢光了,可以将lock.unlock()放在Thread.sleep()之前
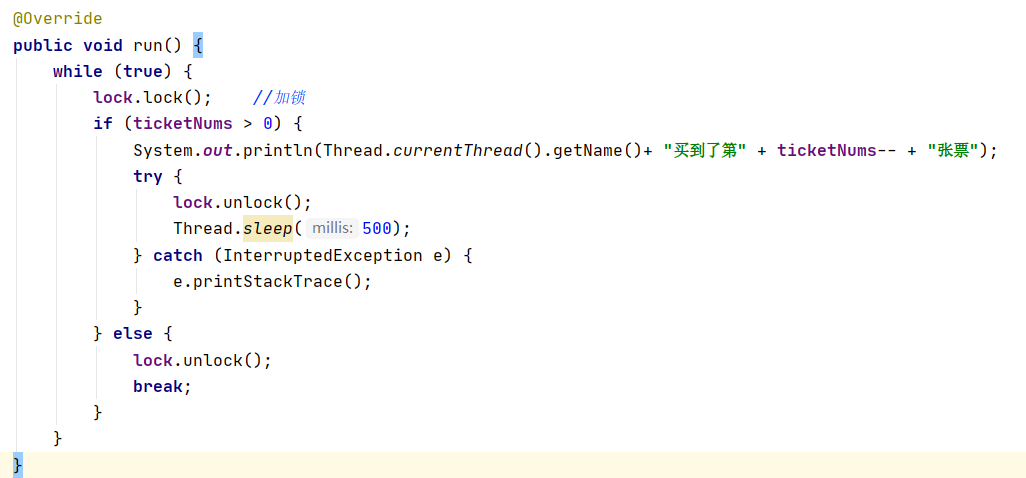
synchronized与Lock的对比
- Lock是显式锁,需要手动开启和关闭;synchronized是隐式锁,出了作用域自动释放
- Lock只有代码块锁,synchronized有代码块锁和方法锁
- 使用Lock锁,JVM将花费较少时间来调度线程,性能更好,并且具有更好的拓展性
- 使用顺序:Lock > 同步代码块 > 同步方法
8、线程通信问题
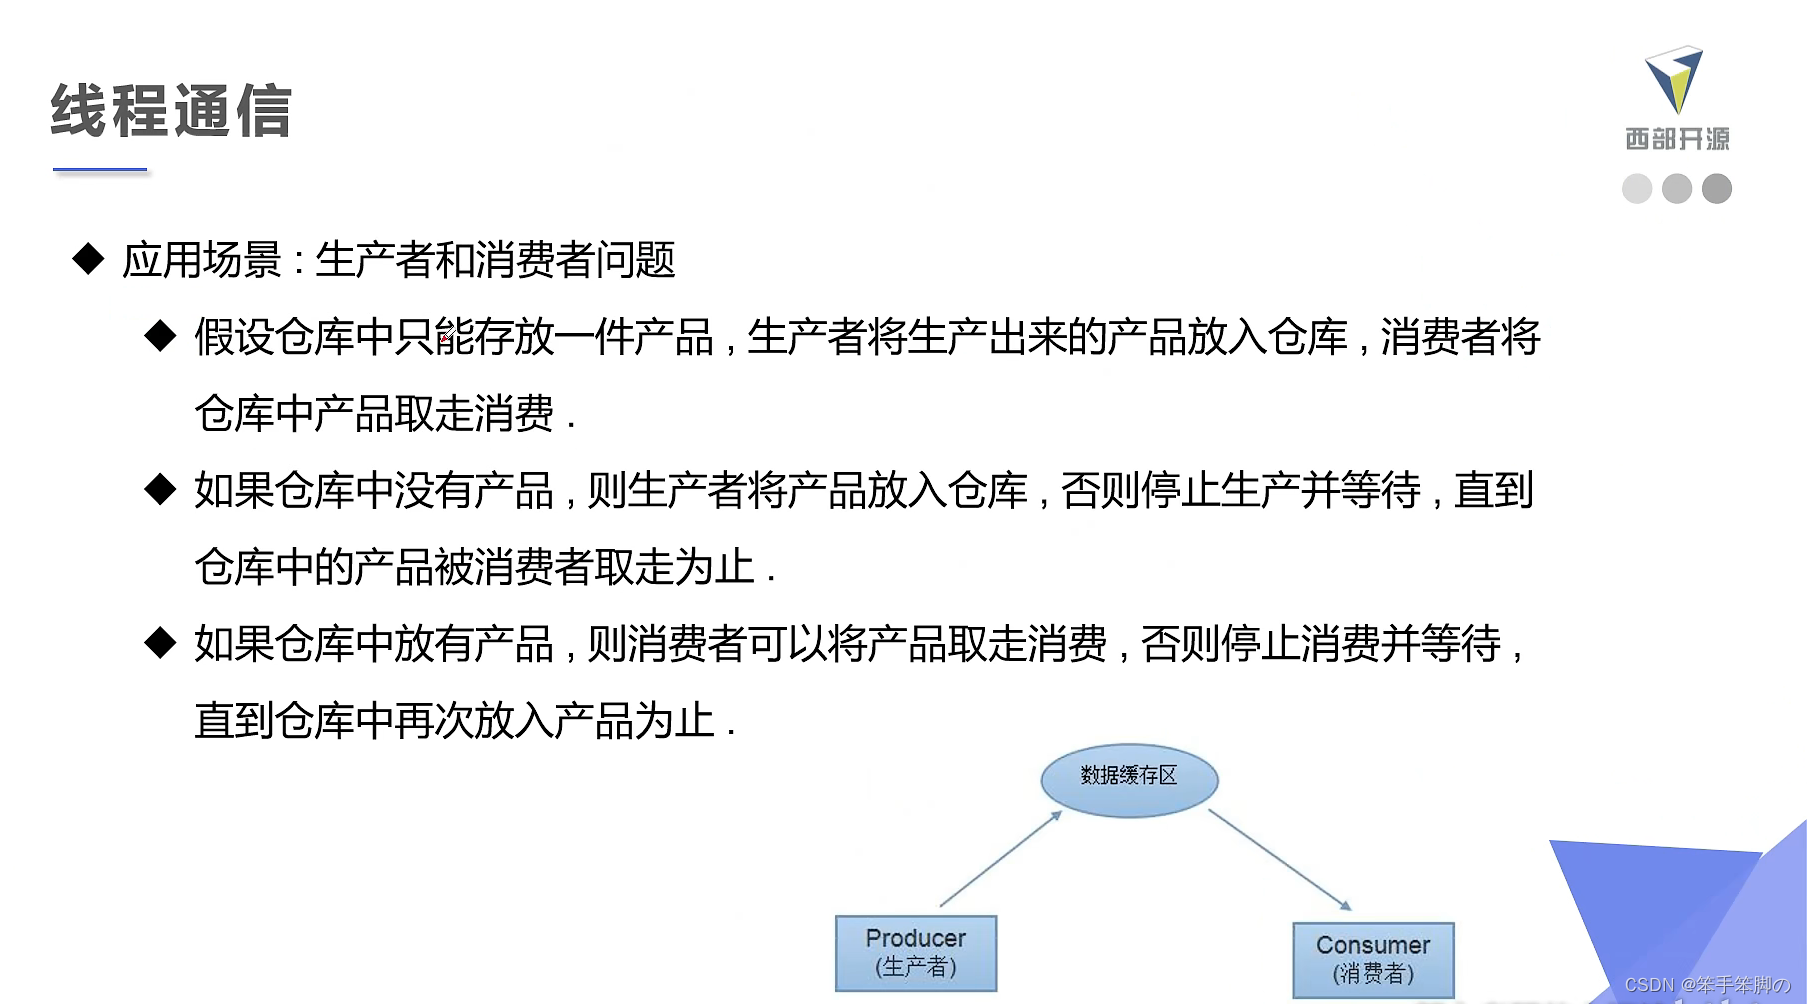
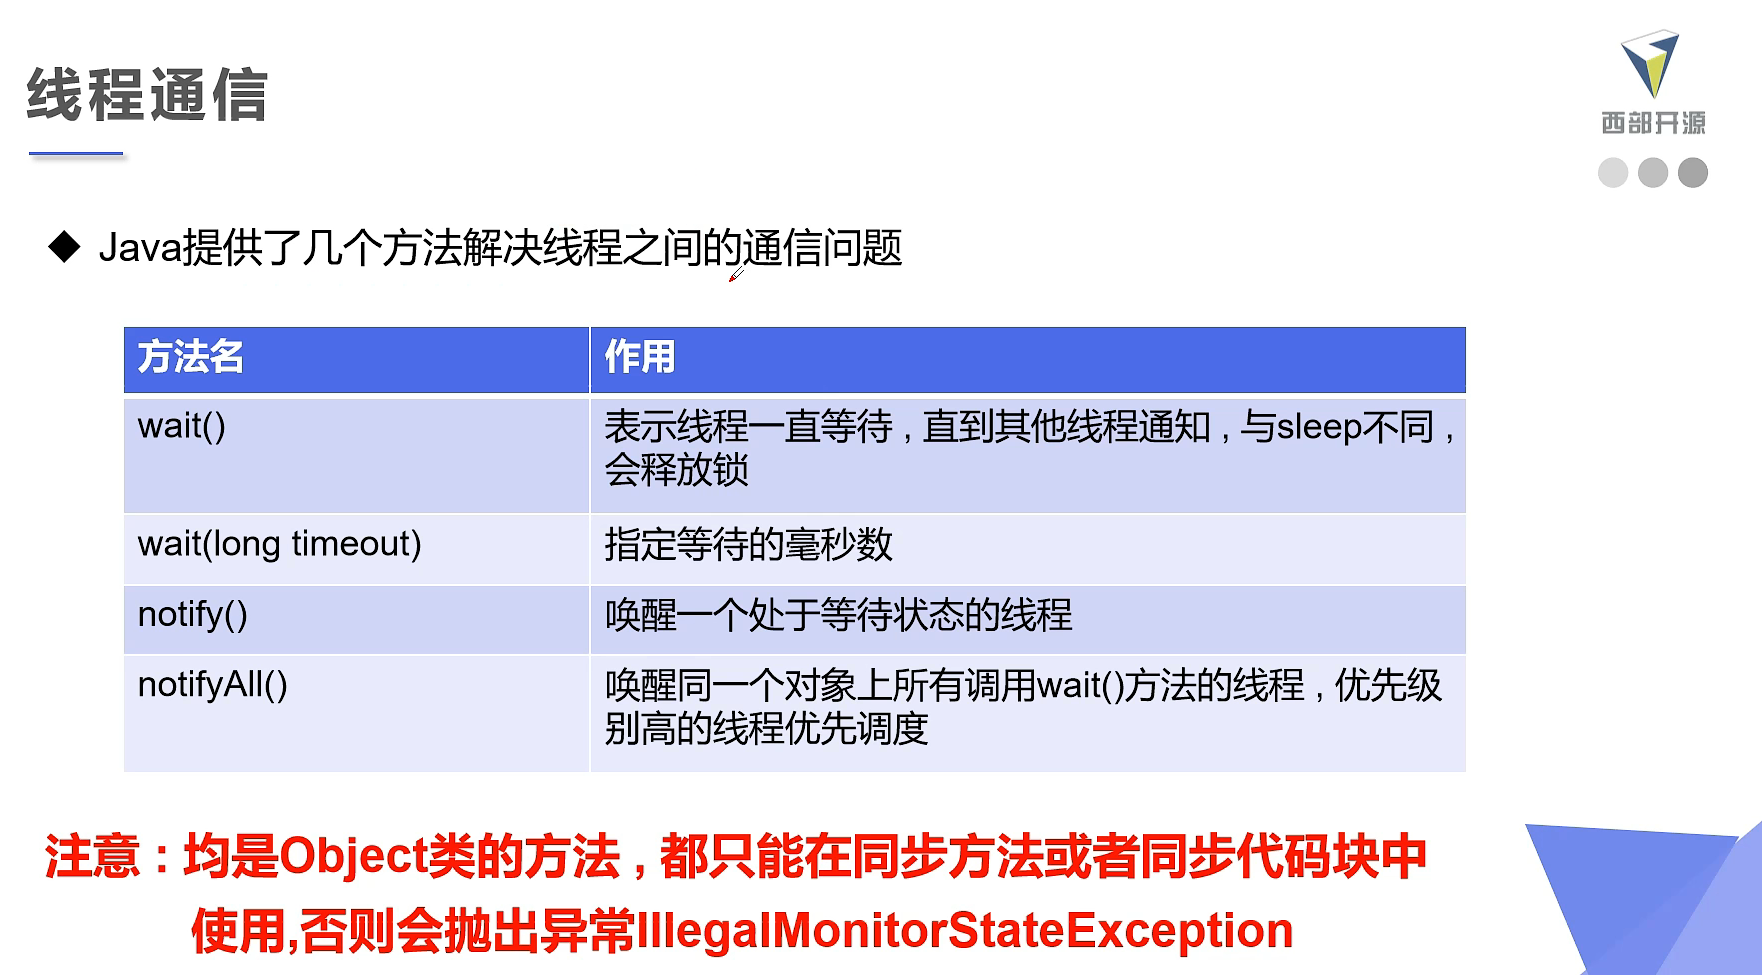
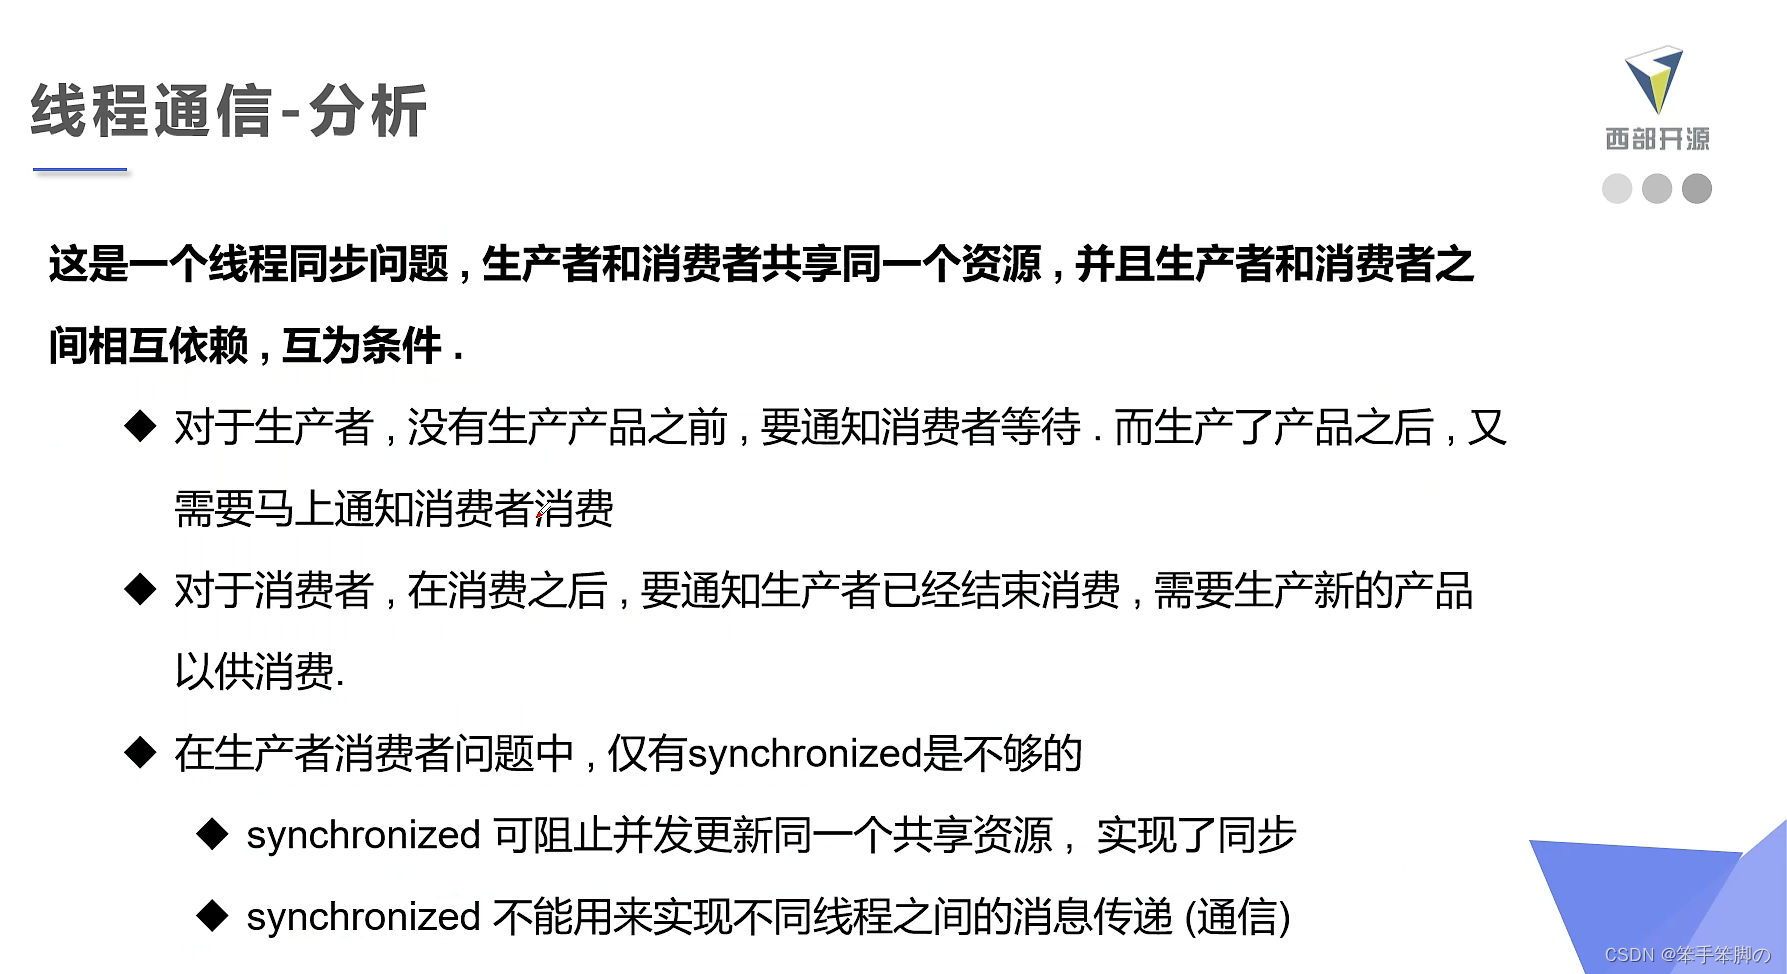
8.1、生产者消费者问题
8.2、管程法
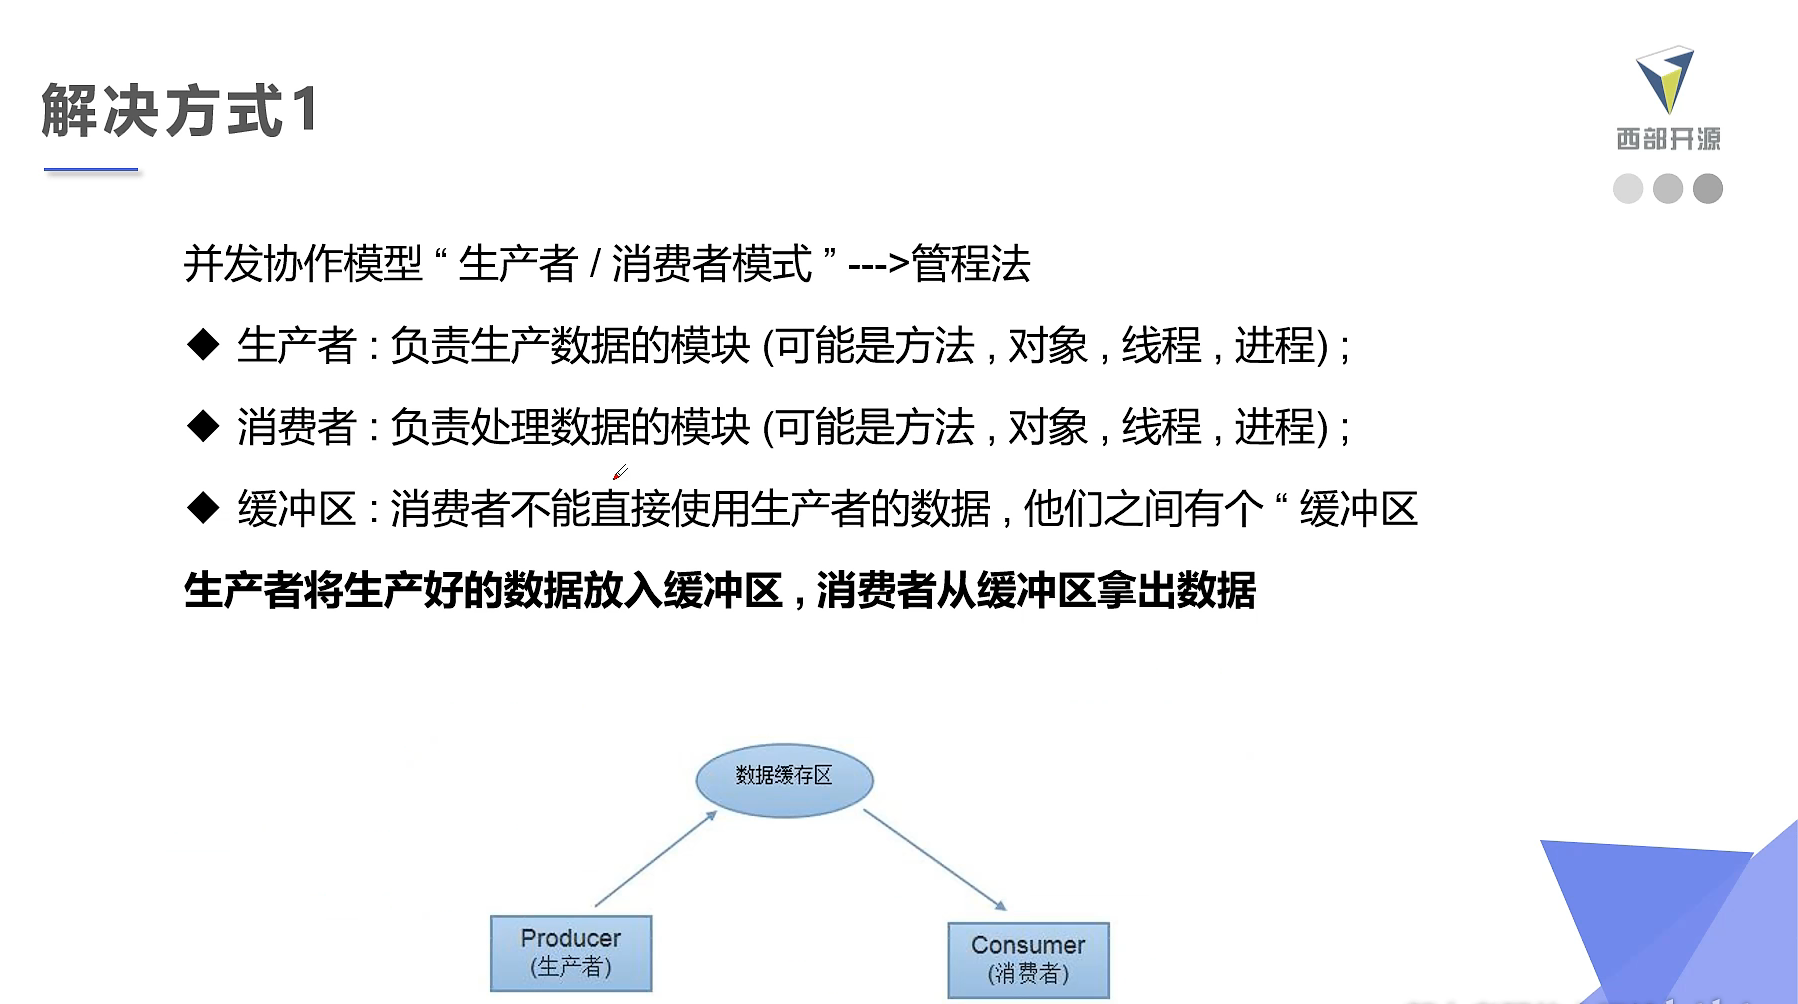
根据操作系统对于管程的定义:
- 管程要自己实现进程的互斥访问
- 管程要有自己写好的生产和消费方法,外界调用方法即可
public class TestPC {

    public static void main(String[] args) {
        SynContainer container = new SynContainer();
        new Producer(container).start();
        new Consumer(container).start();
    }

}

//生产者
class Producer extends Thread{
    SynContainer container;
    public Producer(SynContainer container){
        this.container = container;
    }

    @Override
    public void run() {
        for (int i = 1; i <= 100; i++) {
            container.push(new Chicken(i));
            System.out.println("生产了第"+ i +"只鸡");
        }
    }
}

//消费者
class Consumer extends Thread{
    SynContainer container;
    public Consumer(SynContainer container){
        this.container = container;
    }
    @Override
    public void run() {
        for (int i = 1; i <= 100; i++) {
            System.out.println("消费了第----->"+ container.pop().id +"只鸡");
        }
    }
}

//产品
class Chicken{
    int id;     //产品编号
    public Chicken(int id){
        this.id = id;
    }
}

//缓冲区
class SynContainer{

    //缓冲区大小
    Chicken[] chickens = new Chicken[10];
    //目前产品数量
    int count = 0;

    //生产者方法
    public synchronized void push(Chicken chicken){
        //如果缓冲区已满,等待消费者消费
        while (count == chickens.length){
            try {
                this.wait();
            } catch (InterruptedException e) {
                e.printStackTrace();
            }
        }
        try {
            Thread.sleep(1);
        } catch (InterruptedException e) {
            e.printStackTrace();
        }
        //放入缓冲区
        chickens[count] = chicken;
        count++;
        //通知消费者消费
        this.notifyAll();
    }

    //消费者方法
    public synchronized Chicken pop(){
        //如果缓冲区为空,等待生产者生产
        while (count == 0){
            try {
                this.wait();
            } catch (InterruptedException e) {
                e.printStackTrace();
            }
        }
        try {
            Thread.sleep(2);
        } catch (InterruptedException e) {
            e.printStackTrace();
        }
        //必须先--
        count--;
        Chicken chicken = chickens[count];

        //通知生产者生产
        this.notifyAll();
        return chicken;
    }

}
8.3、信号灯法

设置一个标志位flag,通过flag的值来判断要做的事情
public class TestPC2 {
    public static void main(String[] args) {
        TV tv = new TV();
        new Player(tv).start();
        new Watcher(tv).start();
    }
}

//生产者--->演员
class Player extends Thread{
    TV tv;
    public Player(TV tv){
        this.tv = tv;
    }
    @Override
    public void run(){
        for (int i = 0; i < 20; i++) {
            if (i % 2 == 0){
                this.tv.play("快乐大本营");
            } else {
                this.tv.play("遇见狂神说");
            }
        }
    }
}

//消费者--->观众
class Watcher extends Thread{
    TV tv;
    public Watcher(TV tv){
        this.tv = tv;
    }
    @Override
    public void run(){
        for (int i = 0; i < 20; i++) {
            this.tv.watch();
        }
    }
}

//产品---->节目
class TV{
    /*
        观众观看的时候演员等待
        演员演出的时候观众等待
     */
    String voice;
    boolean flag = true;

    //表演
    public synchronized void play(String voice){
        while (!this.flag){
            try {
                this.wait();
            } catch (InterruptedException e) {
                e.printStackTrace();
            }
        }
        System.out.println("演员表演了---->" + voice);
        this.voice = voice;
        this.flag = !this.flag;
        this.notifyAll();
    }

    //观看
    public synchronized void watch(){
        while (flag){
            try {
                this.wait();
            } catch (InterruptedException e) {
                e.printStackTrace();
            }
        }
        System.out.println("观众观看了----->" + voice);
        this.notifyAll();
        this.flag = !this.flag;
    }

}
9、线程池
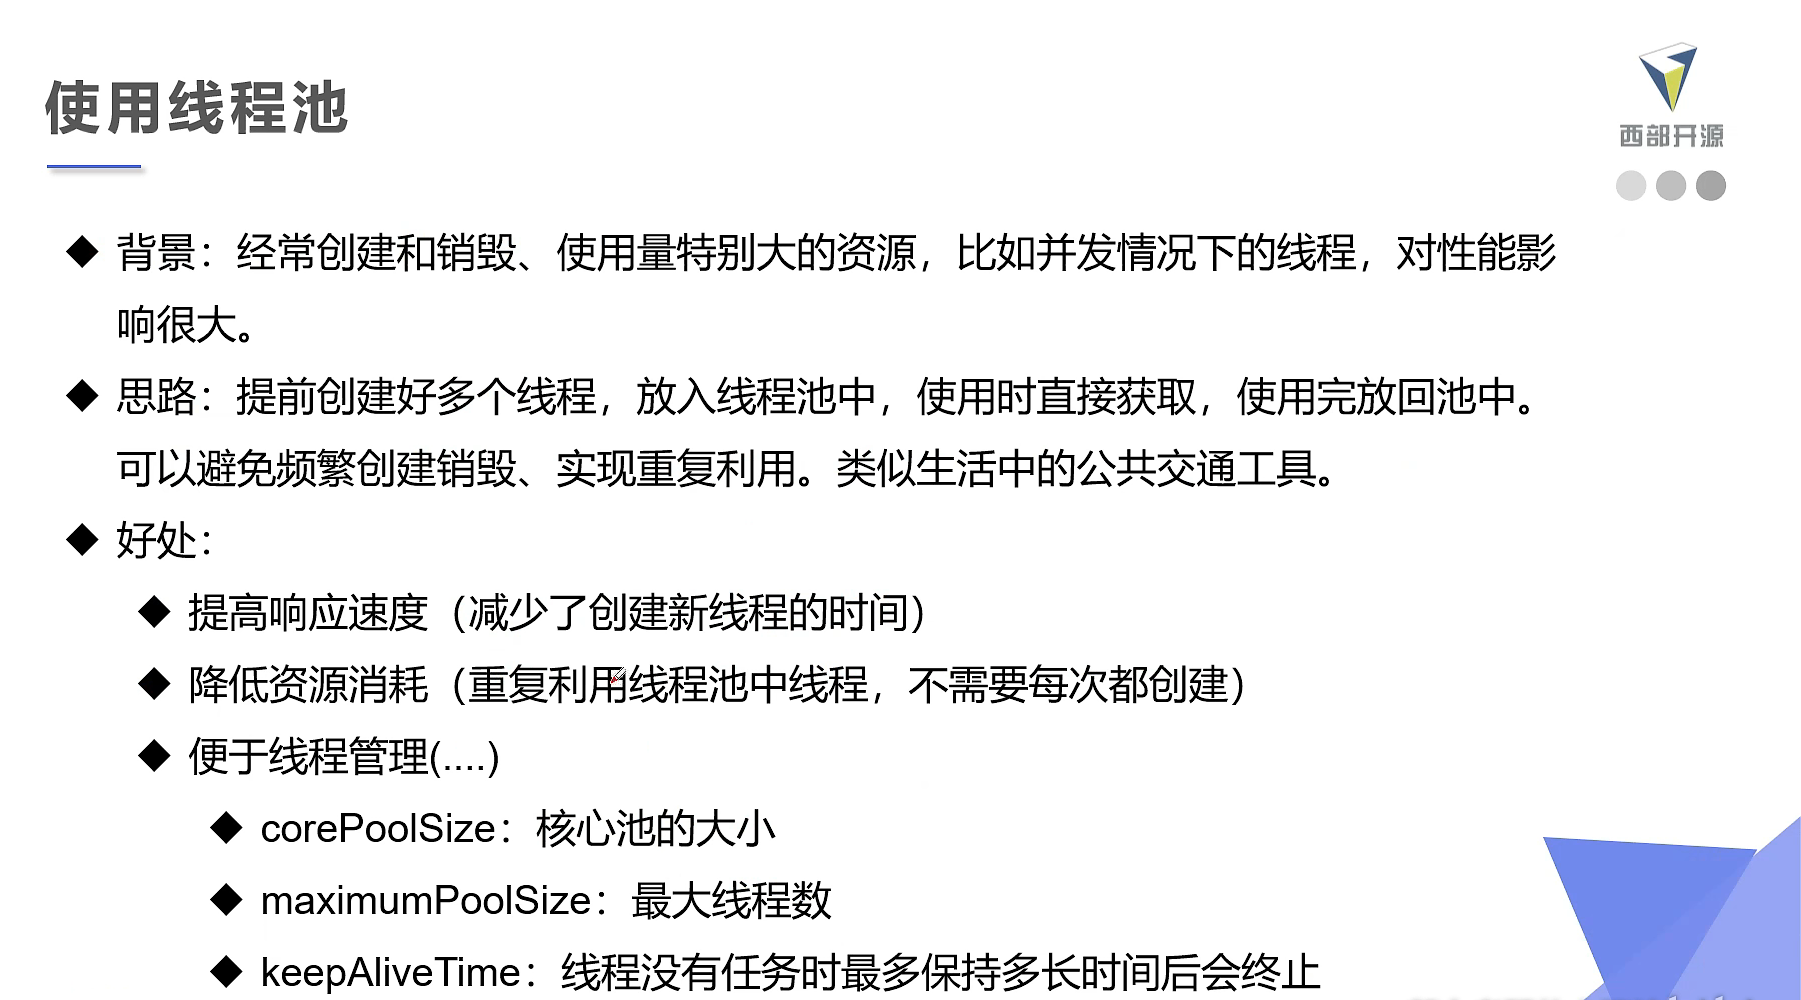
测试
public class TestPool {

    public static void main(String[] args) {
        //1.创建服务,创建线程池
        ExecutorService service = Executors.newFixedThreadPool(10);

        //2.执行
        service.execute(new MyThread());
        service.execute(new MyThread());
        service.execute(new MyThread());
        service.execute(new MyThread());
        service.execute(new MyThread());

        //3.关闭连接
        service.shutdown();
    }

}

class MyThread implements Runnable{

    @Override
    public void run() {
        System.out.println(Thread.currentThread().getName());
    }

}
10、总结
多线程中启动线程的三种方式
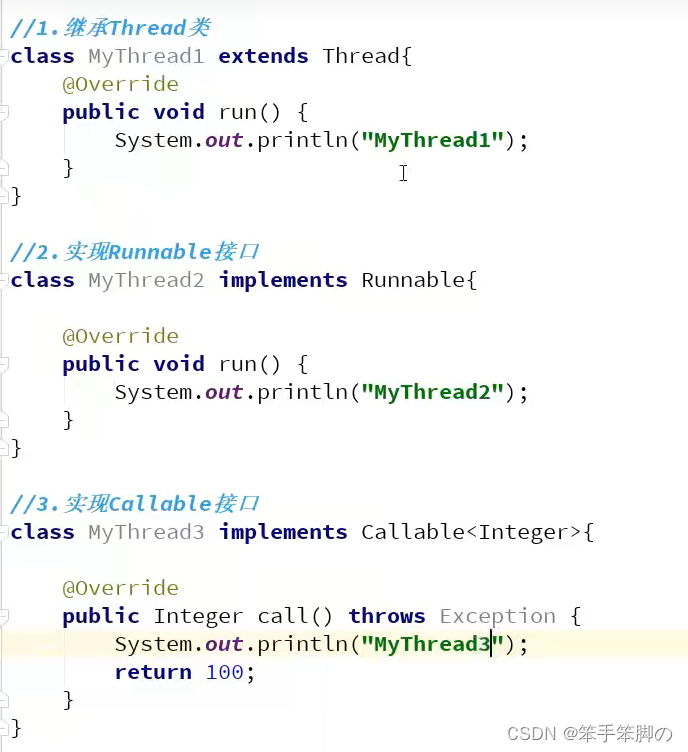
这个视频中关于线程池的介绍很少,实际上线程池是一个重点!


 4181
4181


 被折叠的 条评论
为什么被折叠?


