


设计目标:
使用fragment,activity完成包含4个tab页面的类微信的门户页面框架设计
功能说明:
通过点击底部按钮可以实现界面切换
代码解析:
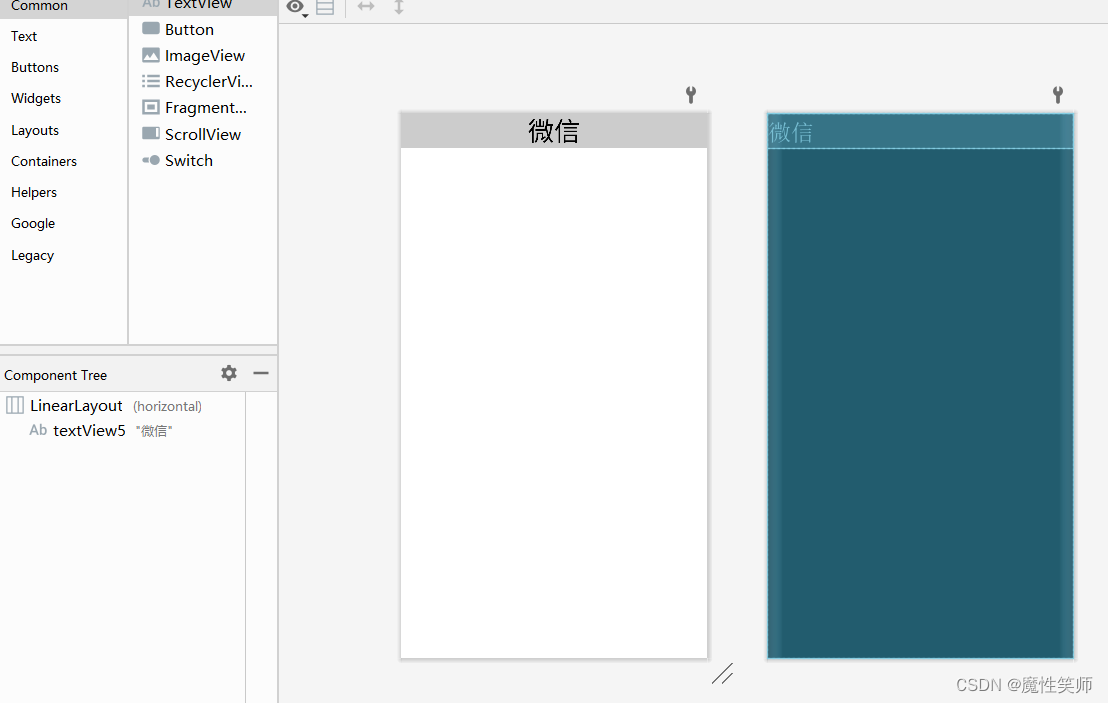
top.xml
新建Layout XML File文件,加入textview控件并设置相关属性
    <TextView
        android:id="@+id/textView5"
        android:layout_width="wrap_content"
        android:layout_height="wrap_content"
        android:layout_weight="1"
        android:gravity="center"
        android:background="#cccccc"
        android:textColor="@color/black"
        android:textSize="35sp"
        android:text="微信" />
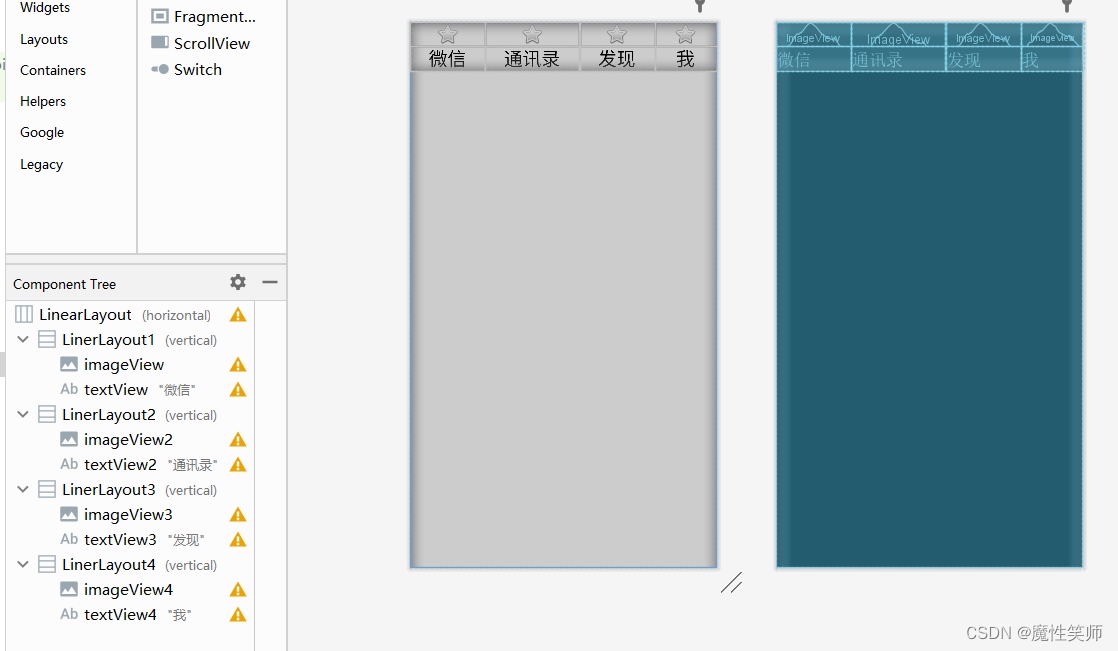
bottom.xml
- LinerLayout可以通过android:orientation属性控制组件横向或者纵向排列。在LinerLayout(horizonal)内添加四个LinerLayout(vertical)使其水平排列,并在LinerLayout(vertical)添加ImageView和TextView使其垂直排列
- 通过设置android:layout_weight="1"使四个布局宽度之比为1:1:1:1
<?xml version="1.0" encoding="utf-8"?>
<LinearLayout xmlns:android="http://schemas.android.com/apk/res/android"
    xmlns:app="http://schemas.android.com/apk/res-auto"
    android:layout_width="match_parent"
    android:background="#cccccc"
    android:layout_height="match_parent">

    <LinearLayout
        android:id="@+id/LinerLayout1"
        android:layout_width="wrap_content"
        android:layout_height="wrap_content"
        android:layout_weight="1"
        android:orientation="vertical">

        <ImageView
            android:id="@+id/imageView"
            android:layout_width="match_parent"
            android:layout_height="wrap_content"
            android:clickable="false"
            app:srcCompat="@android:drawable/btn_star" />

        <TextView
            android:id="@+id/textView"
            android:layout_width="match_parent"
            android:layout_height="wrap_content"
            android:gravity="center"
            android:clickable="false"
            android:text="微信"
            android:textColor="@color/black"
            android:textSize="25sp" />
    </LinearLayout>

    <LinearLayout
        android:id="@+id/LinerLayout2"
        android:layout_width="wrap_content"
        android:layout_height="wrap_content"
        android:layout_weight="1"
        android:orientation="vertical">

        <ImageView
            android:id="@+id/imageView2"
            android:layout_width="match_parent"
            android:layout_height="wrap_content"
            android:clickable="false"
            app:srcCompat="@android:drawable/btn_star" />

        <TextView
            android:id="@+id/textView2"
            android:layout_width="match_parent"
            android:layout_height="wrap_content"
            android:gravity="center"
            android:clickable="false"
            android:text="通讯录"
            android:textColor="@color/black"
            android:textSize="25sp" />
    </LinearLayout>

    <LinearLayout
        android:id="@+id/LinerLayout3"
        android:layout_width="wrap_content"
        android:layout_height="wrap_content"
        android:layout_weight="1"
        android:orientation="vertical">

        <ImageView
            android:id="@+id/imageView3"
            android:layout_width="match_parent"
            android:layout_height="wrap_content"
            android:clickable="false"
            app:srcCompat="@android:drawable/btn_star" />

        <TextView
            android:id="@+id/textView3"
            android:layout_width="match_parent"
            android:layout_height="wrap_content"
            android:gravity="center"
            android:clickable="false"
            android:text="发现"
            android:textColor="@color/black"
            android:textSize="25sp" />
    </LinearLayout>

    <LinearLayout
        android:id="@+id/LinerLayout4"
        android:layout_width="wrap_content"
        android:layout_height="wrap_content"
        android:layout_weight="1"
        android:orientation="vertical">

        <ImageView
            android:id="@+id/imageView4"
            android:layout_width="match_parent"
            android:layout_height="wrap_content"
            android:clickable="false"
            app:srcCompat="@android:drawable/btn_star" />

        <TextView
            android:id="@+id/textView4"
            android:layout_width="match_parent"
            android:layout_height="wrap_content"
            android:gravity="center"
            android:clickable="false"
            android:text="我"
            android:textColor="@color/black"
            android:textSize="25sp" />
    </LinearLayout>
</LinearLayout>
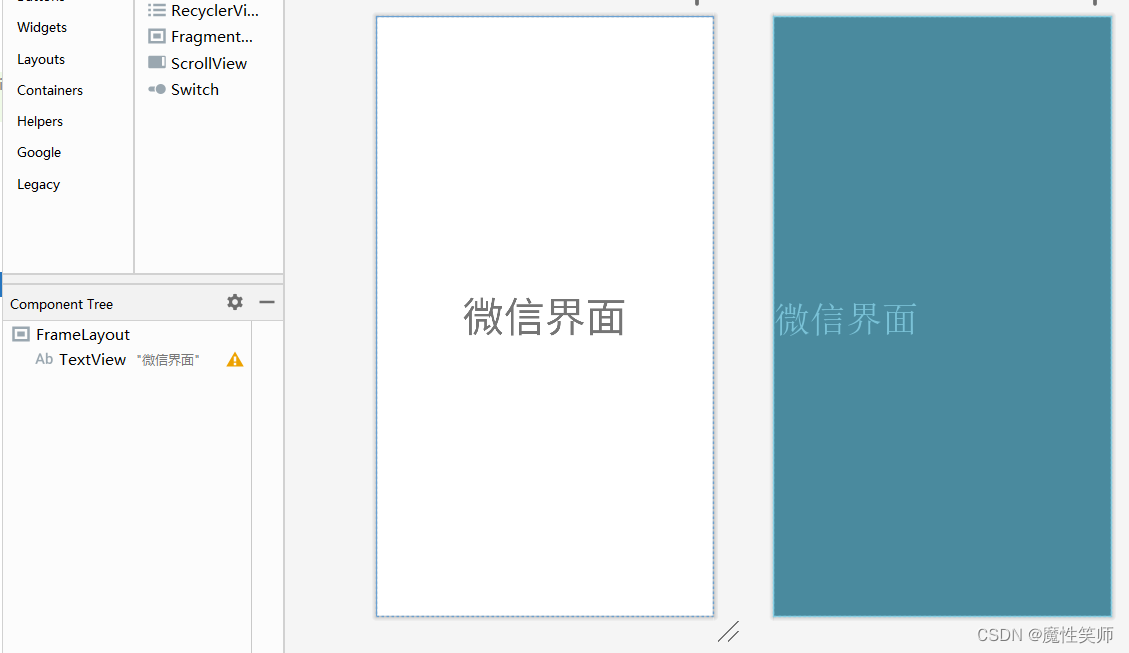
fragment_tab0.xml
新建Fragment(Blank)文件,会同时自动在layout文件夹中生成一个绑定的xml文件
<?xml version="1.0" encoding="utf-8"?>
<FrameLayout xmlns:android="http://schemas.android.com/apk/res/android"
    xmlns:tools="http://schemas.android.com/tools"
    android:layout_width="match_parent"
    android:layout_height="match_parent"
    tools:context=".tab0">

    <!-- TODO: Update blank fragment layout -->
    <TextView
        android:layout_width="match_parent"
        android:layout_height="match_parent"
        android:gravity="center"
        android:text="微信界面"
        android:textSize="50dp" />

</FrameLayout>
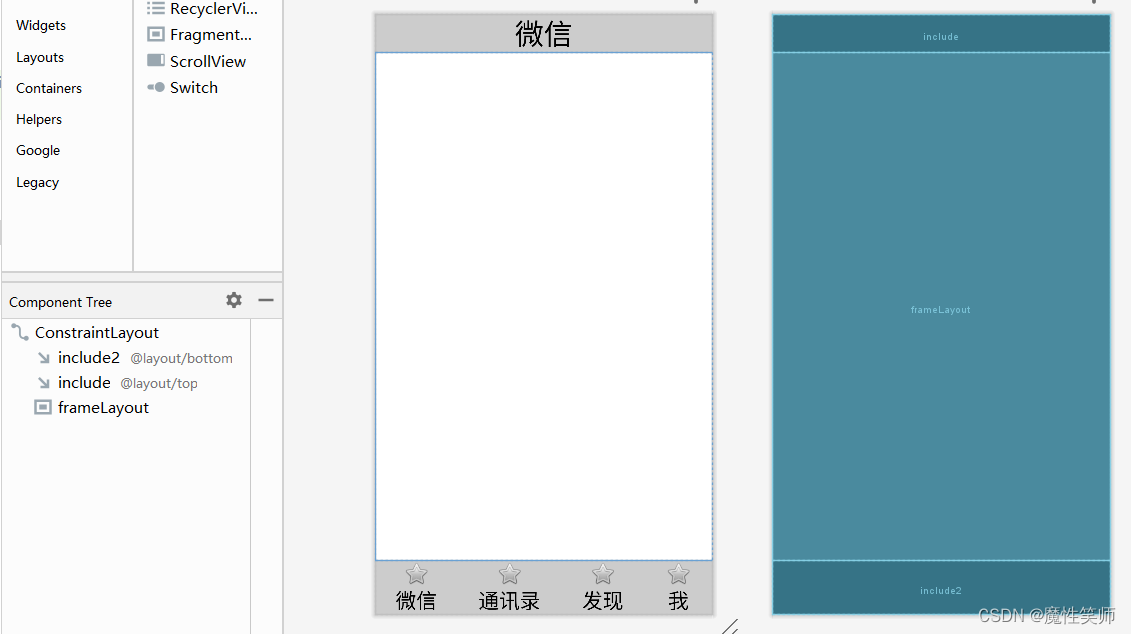
activity_main.xml
- 此处包含两个include,分别引入top和bottom
- ConstraintLayout采用方向约束的方式对控件进行定位,此处framelayout与top和bottom之间存在上下关系的约束
MainActivity.java
将每个控件初始化
private com.example.mywork.tab0 tab0;
    private com.example.mywork.tab1 tab1;
    private com.example.mywork.tab2 tab2;
    private com.example.mywork.tab3 tab3;

    private LinearLayout linearLayout1;
    private LinearLayout linearLayout2;
    private LinearLayout linearLayout3;
    private LinearLayout linearLayout4;

    private FragmentManager manager;
@Override
    protected void onCreate(Bundle savedInstanceState) {
        super.onCreate(savedInstanceState);
        setContentView(R.layout.activity_main);

        linearLayout1=findViewById(R.id.LinerLayout1);
        linearLayout2=findViewById(R.id.LinerLayout2);
        linearLayout3=findViewById(R.id.LinerLayout3);
        linearLayout4=findViewById(R.id.LinerLayout4);

        tab0=new tab0();
        tab1=new tab1();
        tab2=new tab2();
        tab3=new tab3();

        manager=getSupportFragmentManager();//获取所在fragment的父容器

		/*
            将4个fragment和控件链接起来
        */
        FragmentTransaction transaction=manager.beginTransaction()
                .add(R.id.frameLayout,tab0)
                .add(R.id.frameLayout,tab1)
                .add(R.id.frameLayout,tab2)
                .add(R.id.frameLayout,tab3);
        transaction.commit();

        selecttab(0);

		/*设置监听函数*/
        linearLayout1.setOnClickListener(this);
        linearLayout2.setOnClickListener(this);
        linearLayout3.setOnClickListener(this);
        linearLayout4.setOnClickListener(this);

    }
设置linerlayout的点击函数
    @Override
    public void onClick(View v) {
        switch (v.getId())
        {
            case R.id.LinerLayout1:
                selecttab(0);
                break;
            case R.id.LinerLayout2:
                selecttab(1);
                break;
            case R.id.LinerLayout3:
                selecttab(2);
                break;
            case R.id.LinerLayout4:
                selecttab(3);
                break;
            default:
                break;
        }
    }
选择显示哪一个界面。最简单的方法是将所有界面隐藏,然后显示需要显示的界面
public void selecttab(int i)
    {
        FragmentTransaction transaction=manager.beginTransaction();
        transaction.hide(tab0);
        transaction.hide(tab1);
        transaction.hide(tab2);
        transaction.hide(tab3);
        switch (i)
        {
            case 0:
                transaction.show(tab0);
                break;
            case 1:
                transaction.show(tab1);
                break;
            case 2:
                transaction.show(tab2);
                break;
            case 3:
                transaction.show(tab3);
                break;
        }
        transaction.commit();
    }


 640
640


 被折叠的 条评论
为什么被折叠?
被折叠的 条评论
为什么被折叠?
 到【灌水乐园】发言


