


SpringMVC中使用ResponseEntity实现下载文件功能:
package com.atguigu.mvc.controller;

import org.springframework.http.HttpHeaders;
import org.springframework.http.HttpStatus;
import org.springframework.http.ResponseEntity;
import org.springframework.stereotype.Controller;
import org.springframework.util.MultiValueMap;
import org.springframework.web.bind.annotation.RequestMapping;

import javax.servlet.ServletContext;
import javax.servlet.http.HttpSession;
import java.io.FileInputStream;
import java.io.IOException;
import java.io.InputStream;

/**
 * 使用ResponseEntity实现下载文件功能
 *
 * @author ***
 * @create 2022-05-23 16:42
 */
@Controller
public class FileUpAndDownController {
    @RequestMapping("/testDown")
    public ResponseEntity<byte[]> testResponseEntity(HttpSession session) throws IOException {
        //获取ServletContext对象
        ServletContext servletContext = session.getServletContext();
        //获取服务器中文件的真实路径
        String realPath = servletContext.getRealPath("/static/img/图片1.png");
        //创建输入流
        InputStream is = new FileInputStream(realPath);
        //创建字节数组
        byte[] buffer = new byte[is.available()];
        //将流读到字节数组中
        is.read(buffer);
        //创建HttpHeaders对象设置响应头信息
        MultiValueMap<String,String> headers = new HttpHeaders();
        //设置要下载方式以及下载文件名字
        headers.add("Content-Disposition","attachment;filename=图片1.png");
        //设置响应状态码
        HttpStatus statusCode = HttpStatus.OK;
        //创建ResponseEntity对象
        ResponseEntity<byte[]> responseEntity = new ResponseEntity<>(buffer,headers,statusCode);
        //关闭输入流
        is.close();
        return responseEntity;
    }
}
html:
<!DOCTYPE html>
<html lang="en" xmlns:th="http://www.thymeleaf.org">
<head>
<meta charset="UTF-8">
<title>测试文件上传下载</title>
</head>
<body>
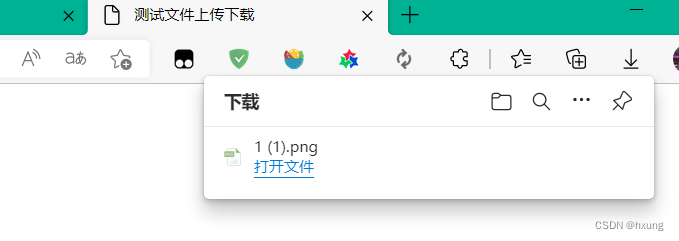
<a th:href="@{/testDown}">下载图片1</a>
</body>
</html>实现效果:
SpringMVC中使用ResponseEntity实现向服务器上传文件功能:
首先需要添加依赖:
<!--文件上传-->
    <dependency>
      <groupId>commons-fileupload</groupId>
      <artifactId>commons-fileupload</artifactId>
      <version>1.3.1</version>
    </dependency>
然后需要在SpringMVC配置文件中配置文件上传解析器,将上传的文件封装为MultipartFile对象
    <!--配置文件上传解析器,将上传的文件封装为MultipartFile-->
    <bean id="multipartResolver" class="org.springframework.web.multipart.commons.CommonsMultipartResolver"></bean>
html:
<!DOCTYPE html>
<html lang="en" xmlns:th="http://www.thymeleaf.org">
<head>
<meta charset="UTF-8">
<title>测试文件上传下载</title>
</head>
<body>
<a th:href="@{/testDown}">下载图片1</a>
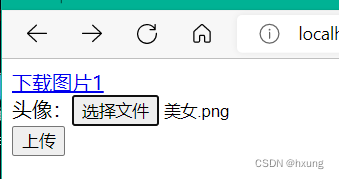
<form th:action="@{/testUp}" method="post" enctype="multipart/form-data">
头像:<input type="file" name="photo"><br>
<input type="submit" value="上传">
</form>
</body>
</html>控制器代码实现:
package com.atguigu.mvc.controller;

import org.springframework.http.HttpHeaders;
import org.springframework.http.HttpStatus;
import org.springframework.http.ResponseEntity;
import org.springframework.stereotype.Controller;
import org.springframework.util.MultiValueMap;
import org.springframework.web.bind.annotation.RequestMapping;
import org.springframework.web.multipart.MultipartFile;

import javax.servlet.ServletContext;
import javax.servlet.http.HttpSession;
import java.io.File;
import java.io.FileInputStream;
import java.io.IOException;
import java.io.InputStream;

/**
 *
 * @author ***
 * @create 2022-05-23 16:42
 */
@Controller
public class FileUpAndDownController {
    //使用ResponseEntity实现上传文件功能
    @RequestMapping("/testUp")
    public String testUp(MultipartFile photo,HttpSession session) throws IOException {
        String filename = photo.getOriginalFilename();
        ServletContext servletContext = session.getServletContext();
        String photoPath = servletContext.getRealPath("photo");
        File file = new File(photoPath);
        //判断photoPath所对应路径是否存在
        if (!file.exists()){
            //若不存在,则创建目录
            file.mkdir();
        }
        String finalPath = photoPath + File.separator + filename;
        photo.transferTo(new File(finalPath));
        return "success";
    }

}
实现效果

改进(将UUID和后缀名拼接后的结果作为最终文件名):
package com.atguigu.mvc.controller;

import org.springframework.http.HttpHeaders;
import org.springframework.http.HttpStatus;
import org.springframework.http.ResponseEntity;
import org.springframework.stereotype.Controller;
import org.springframework.util.MultiValueMap;
import org.springframework.web.bind.annotation.RequestMapping;
import org.springframework.web.multipart.MultipartFile;

import javax.servlet.ServletContext;
import javax.servlet.http.HttpSession;
import java.io.File;
import java.io.FileInputStream;
import java.io.IOException;
import java.io.InputStream;
import java.util.UUID;

/**
 *
 * @author ***
 * @create 2022-05-23 16:42
 */
@Controller
public class FileUpAndDownController {
    //使用ResponseEntity实现下载文件功能
    @RequestMapping("/testDown")
    public ResponseEntity<byte[]> testResponseEntity(HttpSession session) throws IOException {
        //获取ServletContext对象
        ServletContext servletContext = session.getServletContext();
        //获取服务器中文件的真实路径
        String realPath = servletContext.getRealPath("/static/img/图片1.png");
        //创建输入流
        InputStream is = new FileInputStream(realPath);
        //创建字节数组
        byte[] buffer = new byte[is.available()];
        //将流读到字节数组中
        is.read(buffer);
        //创建HttpHeaders对象设置响应头信息
        MultiValueMap<String,String> headers = new HttpHeaders();
        //设置要下载方式以及下载文件名字
        headers.add("Content-Disposition","attachment;filename=图片1.png");
        //设置响应状态码
        HttpStatus statusCode = HttpStatus.OK;
        //创建ResponseEntity对象
        ResponseEntity<byte[]> responseEntity = new ResponseEntity<>(buffer,headers,statusCode);
        //关闭输入流
        is.close();
        return responseEntity;
    }

    //使用ResponseEntity实现上传文件功能
    @RequestMapping("/testUp")
    public String testUp(MultipartFile photo,HttpSession session) throws IOException {
        String filename = photo.getOriginalFilename();
        //获取上传的文件的后缀名
        String suffixName = filename.substring(filename.lastIndexOf("."));
        //将UUID作为文件名
        String uuid = UUID.randomUUID().toString();
        //将UUID和后缀名拼接后的结果作为最终文件名
        filename = uuid + suffixName;
        //通过servletContext获取服务器中的poto目录的路径
        ServletContext servletContext = session.getServletContext();
        String photoPath = servletContext.getRealPath("photo");
        File file = new File(photoPath);
        //判断photoPath所对应路径是否存在
        if (!file.exists()){
            //若不存在,则创建目录
            file.mkdir();
        }
        String finalPath = photoPath + File.separator + filename;
        photo.transferTo(new File(finalPath));
        return "success";
    }

}


 545
545


 被折叠的 条评论
为什么被折叠?
被折叠的 条评论
为什么被折叠?
 到【灌水乐园】发言


