


自留笔记
cv2
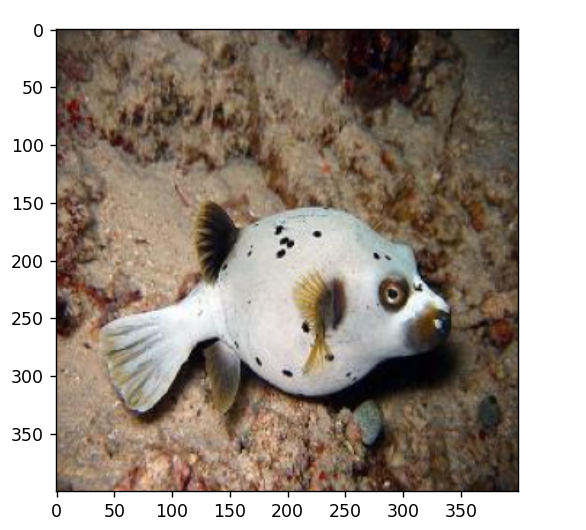
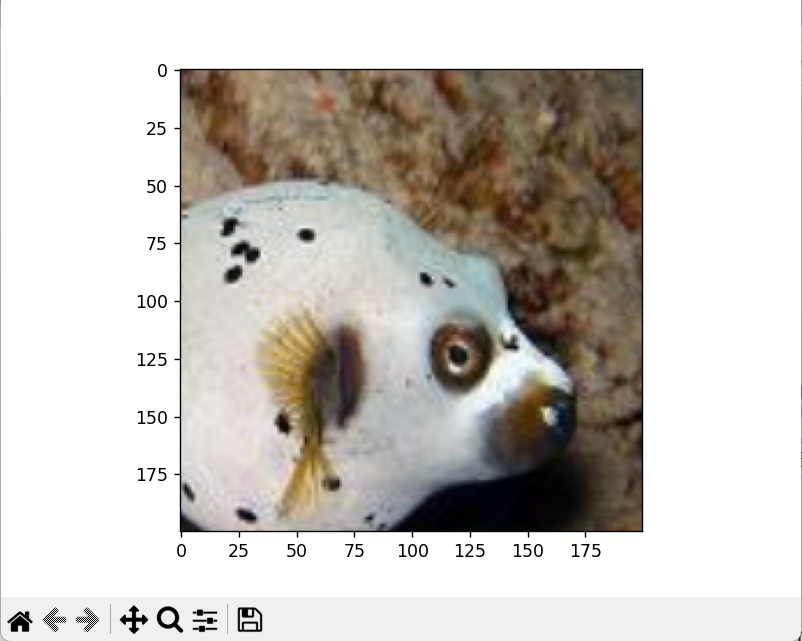
1-读取图片
filename="D:\\project2\\pythonProject\\A-practice-often\\264318_n02655020_17544.JPEG"
image=cv2.imread(filename)#一般imread读取的都是BGR格式,所以需要转换
# plt.imshow(image)
image=cv2.cvtColor(image,cv2.COLOR_BGR2RGB)
# plt.imshow(image)
# plt.show()
print(image.shape)#(256, 256, 3)
2-图片的缩放
class Resize:
    def __init__(self,size):
        self.size=size
    def __call__(self,img):#调用函数
        return cv2.resize(img,self.size)
resize=Resize((400,400))
img_resize=resize(image)
plt.imshow(img_resize)
print(img_resize.shape)
plt.show()|
|
|
| (100, 100, 3) | (400, 400, 3) |

3-图片二值化,阈值处理
#迭代阈值分割
filename="D:\\project2\\pythonProject\\A-practice-often\\264318_n02655020_17544.JPEG"
image=cv2.imread(filename,0)#一般imread读取的都是BGR格式,所以需要转换
# plt.imshow(image)
print("请输入阈值0-255")
thresh=int(input())
retval,img_gloal=cv2.threshold(image, thresh, 255,cv2.THRESH_BINARY)
#cv2.THRESH_BINARY: 指定使用二进制阈值化
print(retval)
#最优阈值
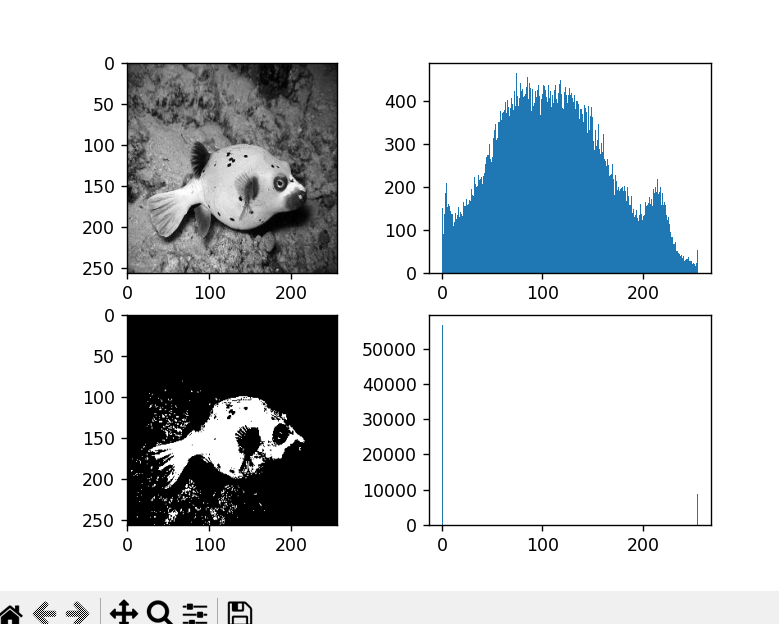
ret2,th2=cv2.threshold(image,0,255,cv2.THRESH_OTSU)
# 显示图片
plt.subplot(2,2,1)
plt.imshow(image,'gray')
plt.subplot(2,2,2)
plt.hist(image.ravel(),256)
# 使用ravel将矩阵转化为一维
plt.subplot(2,2,3)
plt.imshow(img_gloal,'gray')
plt.subplot(2,2,4)
plt.hist(img_gloal.ravel(),256)
plt.show()cv2.THRESH_OTSU 使用的是大津算法,它是一种自动确定阈值的方法。该算法会分析图像的直方图,找到能够最佳区分前景和背景的阈值。这使得它特别适用于前景和背景对比度差异较大的图像
cv2.threshold函数期望接收CV_8UC1(8位单通道)或CV_16UC1(16位单通道)类型的输入图像
最优阈值
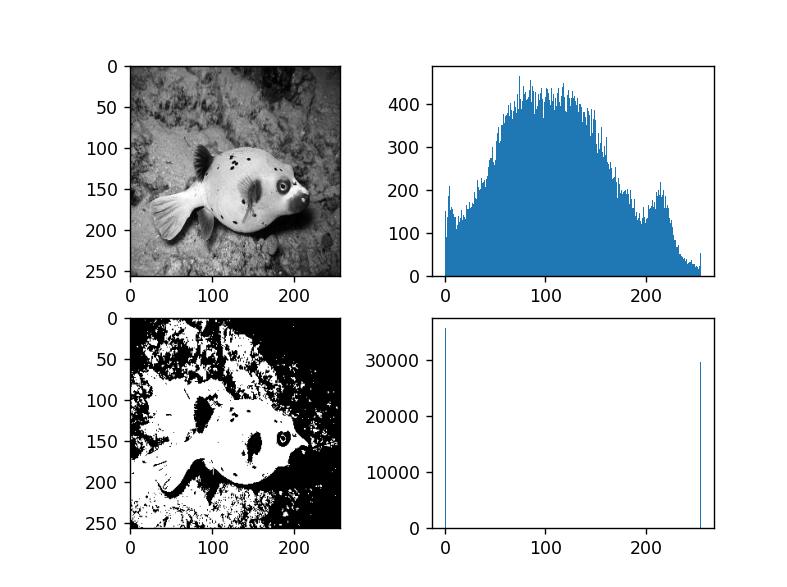
阈值为180的结果
4-图片翻转
class Flip:
    def __init__(self,mode):
        self.mode=mode
    def __call__(self, img):
        return cv2.flip(img,self.mode)
## mode=0垂直翻转、1水平翻转、-1水平加垂直翻转
flip=Flip(mode=-1)
img_flip=flip(image1)
plt.imshow(img_flip)
plt.show()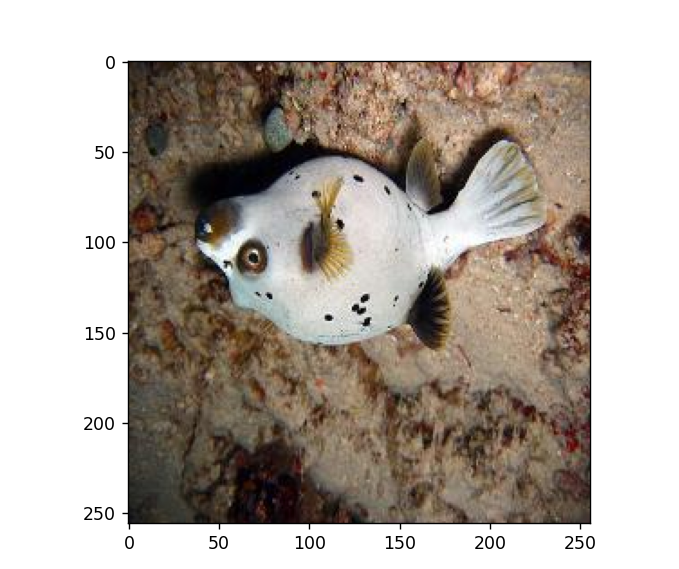
5-随机翻转
#随机翻转
class RandomFlip():
def __init__(self,mode=1):
assert mode in [-1,0,1]
self.mode=mode
def __call__(self,img):
if random.randint(0,1)==1:
# 随机生成0或1(即是否翻转)
return cv2.flip(img,self.mode)
else:
return img
randomflip=RandomFlip()
img_randomflip=randomflip(image1)
plt.imshow(img_randomflip)
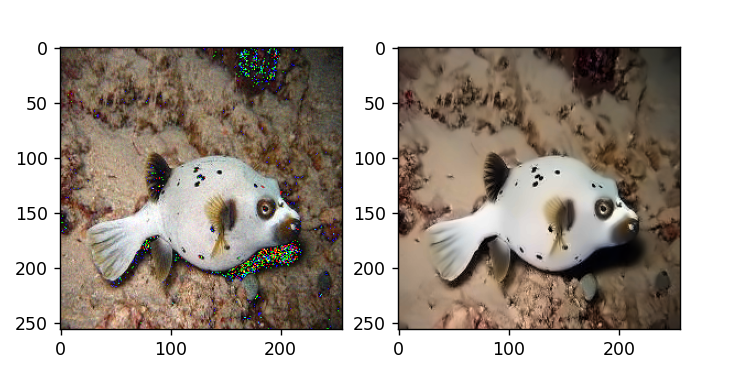
plt.show()6-图像去噪、
def guass_noise(img,mean=0,std=0.001):
    img=np.array(img/255,dtype=float)
    noise=np.random.normal(mean,std**0.5,img.shape)
    out=img+noise
    if out.min()<0:
        low_clip=-1
    else:
        low_clip=0
    out=np.clip(out,low_clip,1.0)
    #于将数组的值限制在指定的范围内
    out=np.uint8(out*255)
    #乘以255可以将数组中的元素值缩放到0-255的范围内,使其适合表示像素值或灰度值
    return out
img_noise=guass_noise(image1)
dst=cv2.fastNlMeansDenoisingColored(image1,None,10,10,7,21)#去噪函数
plt.subplot(1,2,1)
plt.imshow(img_noise)
plt.subplot(1,2,2)
plt.imshow(dst)
plt.show()- 10: 过滤器强度参数,值越大,去噪效果越强,但图像细节也会被平滑。
- 10: 距离参数,确定在空间中查找相邻像素的大小。
- 7: 相似性参数,决定了像素值在颜色空间中被认为是相似的大小。
- 21: 推荐的值为7×7的滤波器窗口大小,用于计算领域像素加权均值
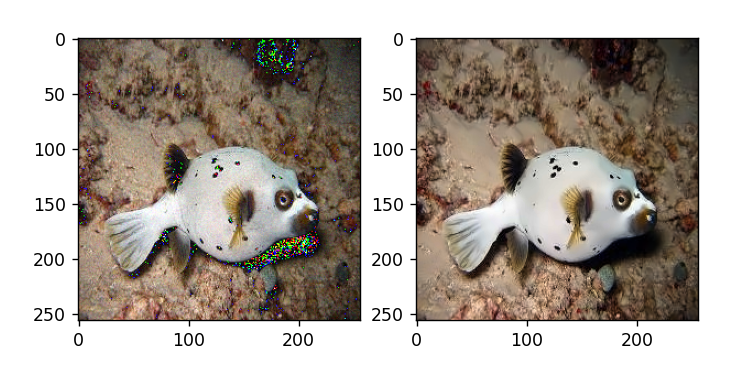
结果
dst=cv2.fastNlMeansDenoisingColored(image1,None,10,10,7,21)#去噪函数
dst=cv2.fastNlMeansDenoisingColored(image1,None,5,5,7,9)#去噪函数
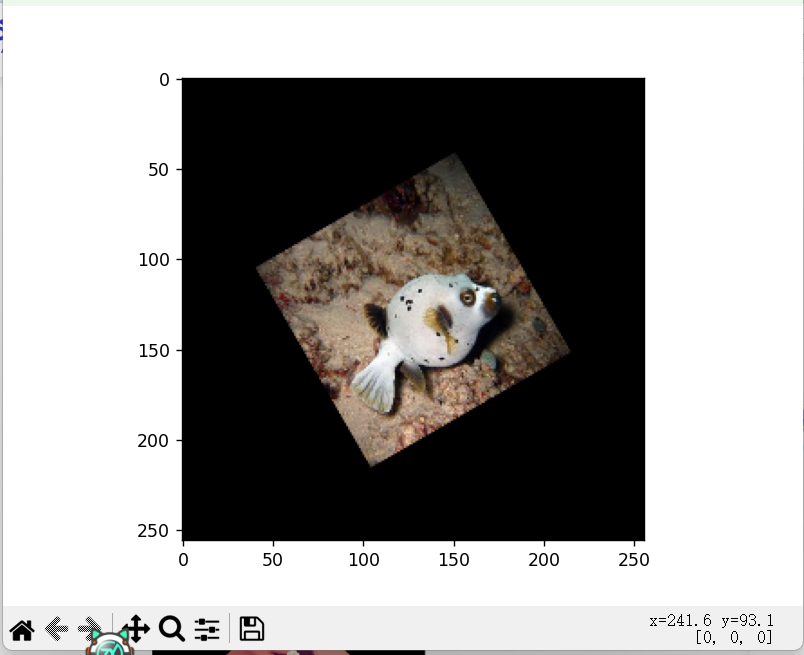
7-图片旋转
import cv2
from matplotlib import pyplot as plt

filename="D:\\project2\\pythonProject\\A-practice-often\\264318_n02655020_17544.JPEG"

image=cv2.imread(filename)
image=cv2.cvtColor(image,cv2.COLOR_BGR2RGB)
# plt.imshow(image)
# plt.show()
#图片旋转
class Rotate:
    def  __init__(self,degree,size):
        self.degree=degree
        self.size=size
    def __call__(self,img):
        h,w=img.shape[:2]
        center=(w//2,h//2)
        M=cv2.getRotationMatrix2D(center,self.degree,self.size)
        return cv2.warpAffine(img,M,(w,h))
rotate=Rotate(30,0.5)
image_rotate=rotate(image)
plt.imshow(image_rotate)
plt.show()
cv2.warpAffine(img,M,(w,h))
是OpenCV库中的一个函数,用于进行二维图像的仿射变换。简单来说,它可以通过对图像的平移、旋转、缩放等操作,改变图像的形状和位置。这个函数接受输入图像、变换矩阵和输出图像的大小等参数,然后生成经过仿射变换的新图像
- src:输入图像,即待进行仿射变换的图像。
- M:变换矩阵,是一个 2x3 的矩阵,定义了仿射变换的规则。你可以通过设置这个矩阵来实现平移、旋转、缩放等操作。
- dsize:输出图像的大小,可以是一个元组 (width, height),指定输出图像的宽度和高度。
- flags:插值方法的标志,用于指定在变换过程中如何处理图像像素的插值。常见的包括 cv2.INTER_LINEAR(线性插值)和 cv2.INTER_NEAREST(最近邻插值)等。
- borderMode:边界模式,指定在图像变换时超出边界的像素如何处理。可以设置为 cv2.BORDER_CONSTANT、cv2.BORDER_REPLICATE 等。
- borderValue:当边界模式设置为 cv2.BORDER_CONSTANT 时,用于填充超出边界的像素的常数值。
8-亮度调节
class Brightness:
    def __init__(self,foctors):
        self.foctors=foctors
    def __call__(self,img):
        img_HSV=cv2.cvtColor(img,cv2.COLOR_RGB2HSV)
        darker_hsv=img_HSV.copy()
        darker_hsv[:,:,2]=self.foctors*darker_hsv[:,:,2]
        return cv2.cvtColor(darker_hsv,cv2.COLOR_HSV2RGB)
brightness=Brightness(0.4)
image_brightness=brightness(image)
plt.imshow(image_brightness)
plt.show()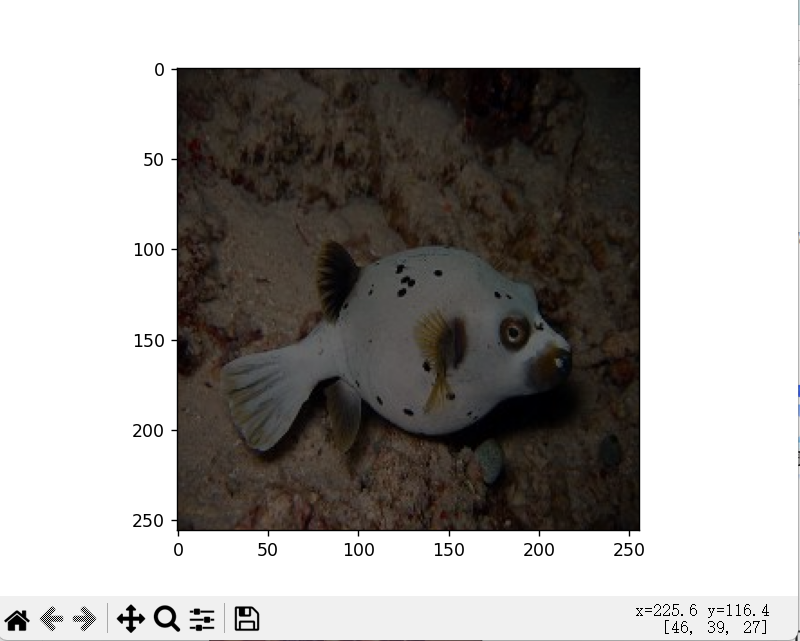
9-随机剪裁
lass RandCropImage(object):
    def __init__(self,size,scale=None,ration=None,interpolation=-1):
        self.interpolation=interpolation if interpolation>=0 else None
        if type(size) is int:
            self.size=(size,size)
        else:
            self.size=size
        self.scale=[0.08,1.0] if scale is None else scale
        self.ration=[3./4,4./3] if ration is None else ration

    def __call__(self,img):
        size=self.size
        scale=self.scale
        ration=self.ration
        aspect_ration=math.sqrt(random.uniform(*ration))
        w=1.*aspect_ration
        h=1.*aspect_ration

        img_h,img_w=img.shape[:2]
        bound=min(float(img_w)/img_h/(w**2),
                  float(img_w)/img_h/(h**2))
        scale_max=min(scale[1],bound)
        scale_min=min(scale[0],bound)

        target_area=img_w*img_h*random.uniform(scale_max,scale_min)
        target_size=math.sqrt(target_area)
        w=int(target_size*w)
        h=int(target_size*h)
        i = random.randint(0, img_w - w)
        j = random.randint(0, img_h - h)

        img = img[j:j + h, i:i + w, :]
        if self.interpolation is None:
            return cv2.resize(img, size)
        else:
            return cv2.resize(img, size, interpolation=self.interpolation)

crop=RandCropImage(200)
img2=crop(image)
plt.imshow(img2)
plt.show()
self.scale=[0.08,1.0] if scale is None else scale用于设置变量self.scale的值。如果scale参数为None,则将self.scale设置为[0.08, 1.0],否则将self.scale设置为scale的值。
10-x轴的剪切变换,角度30°
class ShearAngle:
    def __init__(self,mode):
        self.mode=mode

    def __call__(self, img):

        # x轴的剪切变换,角度15°
        theta = self.mode * np.pi / 180
        M_shear = np.array([
        [1, np.tan(theta), 0],
        [0, 1, 0]
        ], dtype=np.float32)

        img_sheared = cv2.warpAffine(img, M_shear, (img.shape[0], img.shape[1]))
        return img_sheared

erase =ShearAngle(30)
img2 = erase(image)
plt.imshow(img2)
plt.show()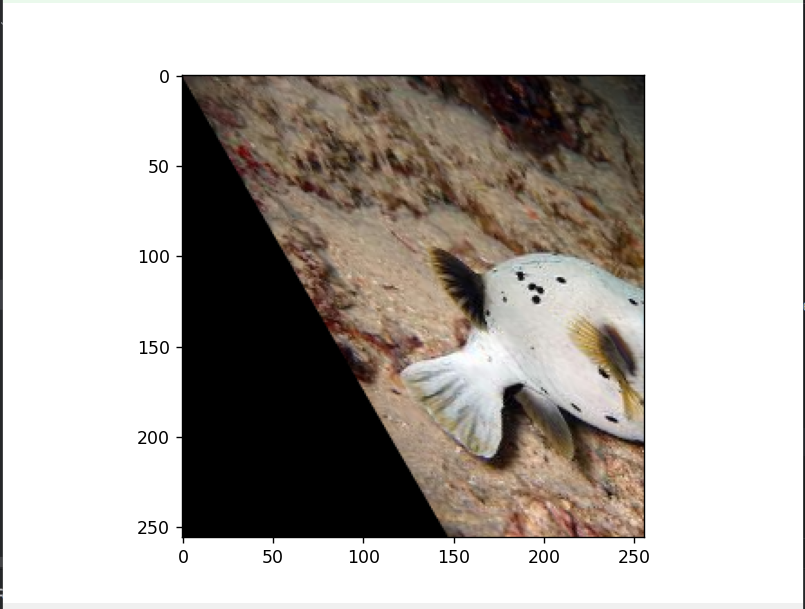
11-随机遮挡物
class RandomErasing(object):
    def __init__(self, EPSILON=0.5, sl=0.02, sh=0.4, r1=0.3,
                 mean=[0., 0., 0.]):
        self.EPSILON = EPSILON
        self.mean = mean
        self.sl = sl
        self.sh = sh
        self.r1 = r1

    def __call__(self, img):
        if random.uniform(0, 1) > self.EPSILON:
            return img

        for attempt in range(100):
            area = img.shape[0] * img.shape[1]

            target_area = random.uniform(self.sl, self.sh) * area
            aspect_ratio = random.uniform(self.r1, 1 / self.r1)

            h = int(round(math.sqrt(target_area * aspect_ratio)))
            w = int(round(math.sqrt(target_area / aspect_ratio)))

            if w < img.shape[0] and h < img.shape[1]:
                x1 = random.randint(0, img.shape[1] - h)
                y1 = random.randint(0, img.shape[0] - w)
                if img.shape[2] == 3:
                    img[x1:x1 + h, y1:y1 + w, 0] = self.mean[0]
                    img[x1:x1 + h, y1:y1 + w, 1] = self.mean[1]
                    img[x1:x1 + h, y1:y1 + w, 2] = self.mean[2]
                else:
                    img[x1:x1 + h, y1:y1 + w, 0] = self.mean[0]
                return img
        return img


erase = RandomErasing()
img2 = erase(image)
plt.imshow(img2)
plt.show()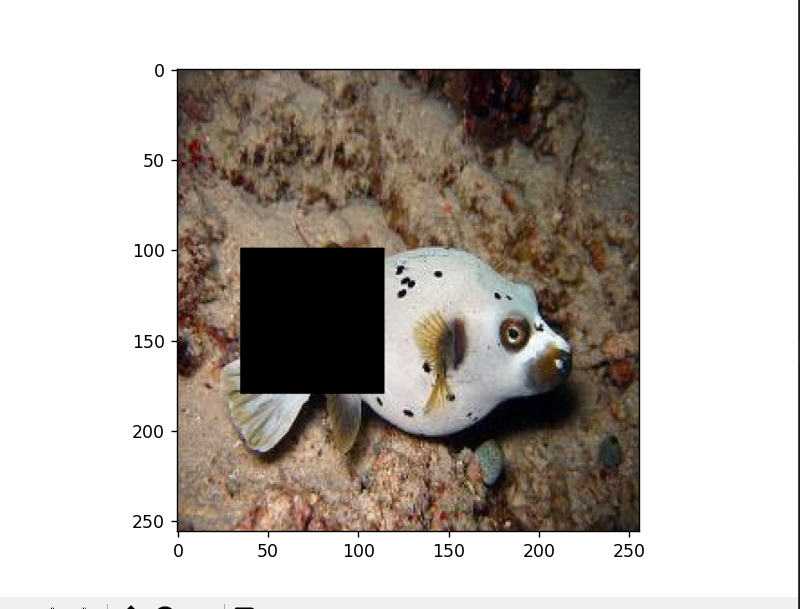


 被折叠的 条评论
为什么被折叠?
被折叠的 条评论
为什么被折叠?
 到【灌水乐园】发言


