


 本文提供了一步一步的指导来帮助读者在Linux环境下安装Nginx Web服务器。包括下载安装包、配置模块、编译安装等步骤,并介绍了如何配置systemd服务实现开机自启。
一、下载安装包
注意:源码包方式
Nginx官网:https://nginx.org/en/download.html
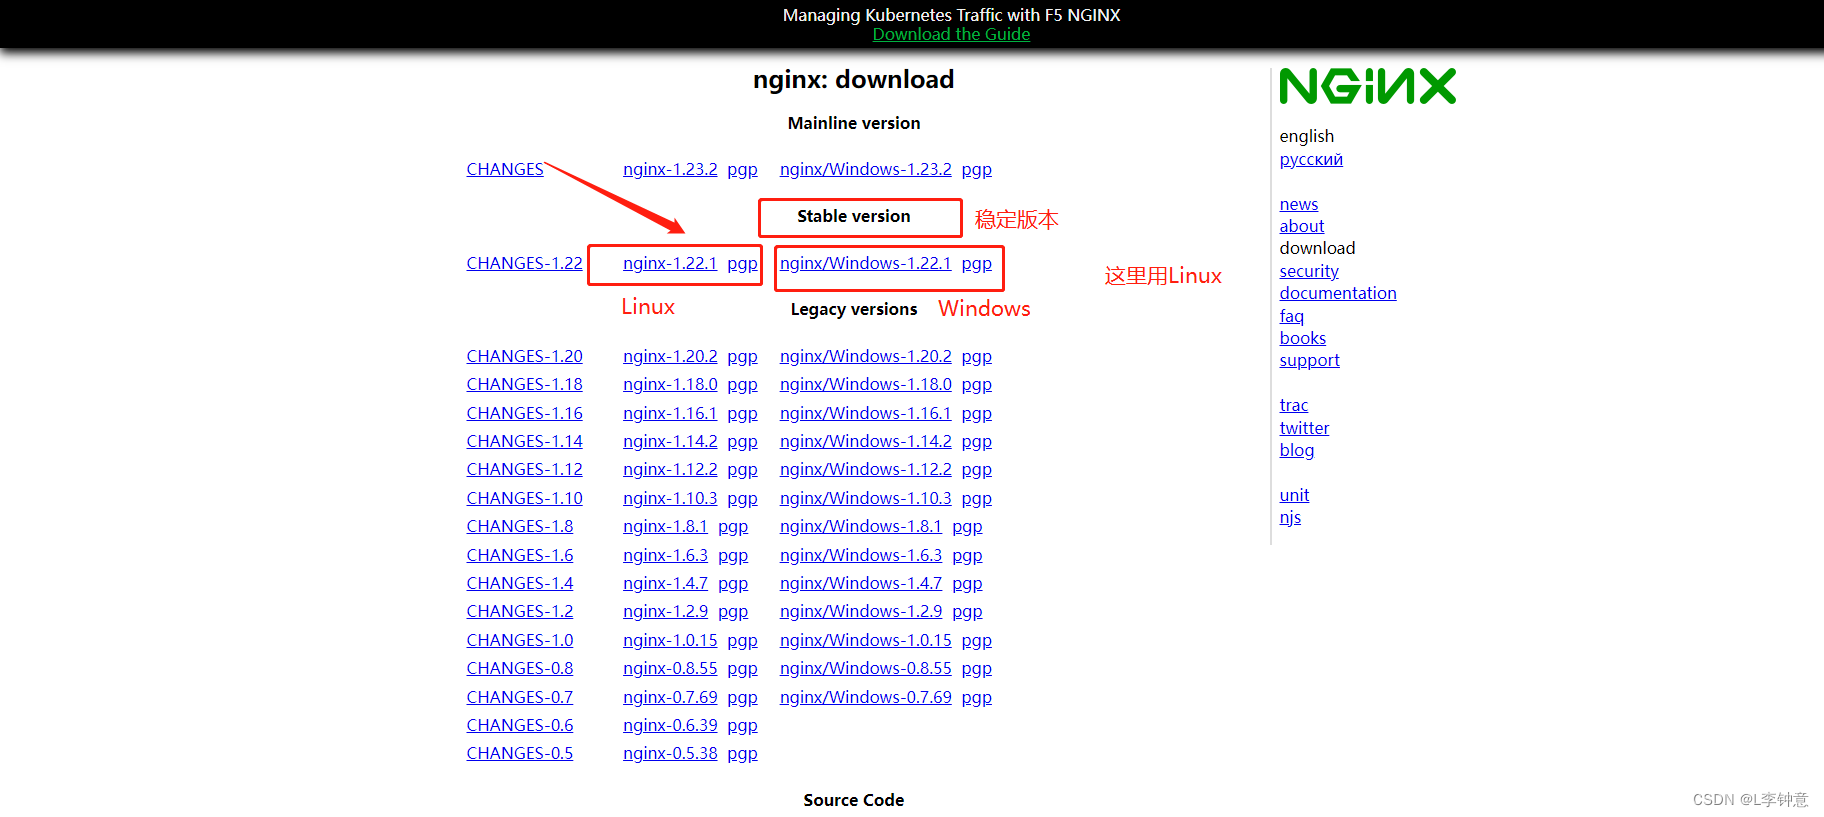
# 复制上述安装包连接,然后wget下载(内网就在电脑上先下载再上传到服务器)
[root@nginx tmp]# wget https://nginx.org/download/nginx-1.22.1.tar.gz
二、Linux 安装Nginx
step 1:解压安装包
[root@nginx tmp]# tar xf nginx-1.22.1.tar.gz -C /usr/local/
注意:一般都会缺少相关依赖,建议提前安装
yum -y install openssl openssl-devel make zlib zlib-devel gcc gcc-c++ libtool pcre pcre-devel pam pam-devel
step 2: 配置模块(以下是最常见的,根据需要用–with添加模块)
--prefix=/usr/local/nginx 定义安装目录 根据需要进行替换
[root@nginx sbin]# cd /usr/local/nginx-1.22.1/
[root@nginx sbin]# ./configure \
--prefix=/usr/local/nginx \
--user=nginx --group=nginx \
--with-http_ssl_module \
--with-http_v2_module \
--with-http_realip_module \
--with-http_stub_status_module \
--with-http_gzip_static_module \
--with-pcre \
--with-stream \
--with-stream_ssl_module \
--with-stream_realip_module \
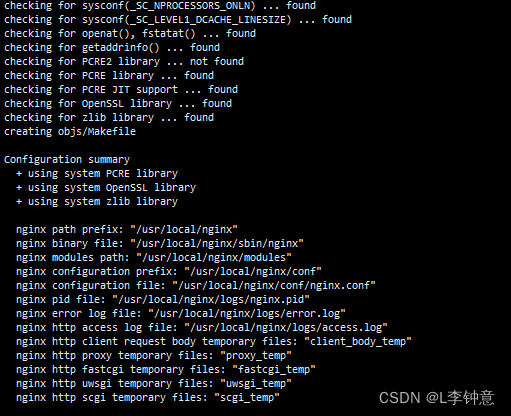
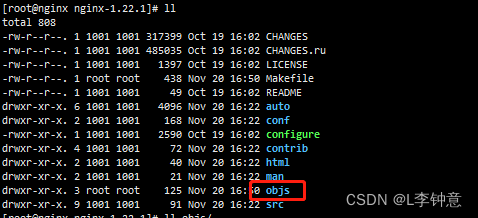
以上情况是正常编译,成功是不会出现err字眼并且目录下生成了objs这个目录
step 3:编译安装
注意:首次安装nginx是需要 make 和 make install 如果已经安装了,添加模块只需要make,make install 会重新覆盖原有的(不建议)
[root@nginx nginx-1.22.1]# make && make install
查看安装路径
[root@nginx nginx-1.22.1]# whereis nginx
nginx: /usr/local/nginx
step 4: 添加环境变量
[root@nginx nginx-1.22.1]# echo 'export PATH=$PATH:/usr/local/nginx/sbin/' >> /etc/profile
[root@nginx nginx-1.22.1]# source /etc/profile
验证
[root@nginx nginx-1.22.1]# nginx -v
nginx version: nginx/1.22.1
[root@nginx nginx-1.22.1]# nginx -V
nginx version: nginx/1.22.1
built by gcc 4.8.5 20150623 (Red Hat 4.8.5-44) (GCC)
built with OpenSSL 1.0.2k-fips  26 Jan 2017
TLS SNI support enabled
configure arguments: --prefix=/usr/local/nginx --user=nginx --group=nginx --with-http_ssl_module --with-http_v2_module --with-http_realip_module --with-http_stub_status_module --with-http_gzip_static_module --with-pcre --with-stream --with-stream_ssl_module --with-stream_realip_module
以上就已经正常安装上nginx了
注意:初次安装系统是没有nginx用户的,所以先添加nginx用户
[root@nginx sbin]# useradd nginx -s /sbin/nologin
Nginx Linux基本操作指令
启动服务:nginx
退出服务:nginx -s quit
强制关闭服务:nginx -s stop
重载服务:nginx -s reload  (重载服务配置文件,类似于重启,但服务不会中止)
验证配置文件:nginx -t
使用配置文件:nginx -c "配置文件路径"
使用帮助:nginx -h
step 5:配置nginx system服务
cat > /lib/systemd/system/nginx.service << EOF
[Unit]
Description="nginx service"
After=network-online.target

[Service]
Type=forking
WorkingDirectory=/usr/local/nginx/sbin
ExecStart=/usr/local/nginx/sbin/nginx
ExecReload=/usr/local/nginx/sbin/nginx -s reload
ExecStop=/usr/local/nginx/sbin/nginx -s stop
Restart=always
RestartSec=3s
LimitNOFILE=204800

[Install]
WantedBy=multi-user.target
EOF
配置文件详解:
Description:										描述服务
After=network.target:								表示服务在网络可用后启动。
[Service]											服务运行参数的设置
Type=forking										是后台运行的形式
ExecStart=/usr/local/nginx/sbin/nginx 				为服务的具体运行命令
ExecReload=/usr/local/nginx/sbin/nginx -s reload 	为重启命令
ExecStop=/usr/local/nginx/sbin/nginx -s stop 		为停止命令
Restart=always										表示在服务挂掉时无论其返回值都重启(如果设置为on-failure则只在服务返回值非0时重启)
RestartSec=3s 										表示服务挂掉后3s后尝试重启。
注意:[Service]的启动、重启、停止命令全部要求使用绝对路径
WantedBy=multi-user.target 指的是:sshd 所在的 Target 是multi-user.target。
这个设置非常重要,因为执行systemctl enable sshd.service命令时,sshd.service的一个符号链接,
就会放在/etc/systemd/system目录下面的multi-user.target.wants子目录之中。Systemd 有默认的启动 Target。
systemctl get-default 所以开机自启完全依赖于它
step 6: 启动nginx
# 启动并开机自启
[root@nginx sbin]# systemctl enable nginx.service --now
[root@nginx sbin]# systemctl status nginx.service
step 7: 页面访问nginx
正常访问如下


 1649
1649

 被折叠的 条评论
为什么被折叠?
被折叠的 条评论
为什么被折叠?
 到【灌水乐园】发言


