


- Spring Boot 介绍
- 构建 Spring Boot 项目
- Spring Boot 入门 HelloWorld
- Spring Boot的全局配置文件
- SpringBoot项目的两种发布方式
1.SpringBoot介绍
1.1.什么是SpringBoot
Spring Boot是由Pivotal团队提供的全新框架,其中“Boot”的意思就是“引导”,Spring Boot 并不是对 Spring 功能上的增强,而是提供了一种快速开发 Spring应用的方式。
1.2.Spring Boot 特点
• 嵌入的 Tomcat,无需部署 WAR 文件
Spring Boot 使用嵌入式的 Servlet 容器(例如 Tomcat、Jetty 或者 Undertow 等),应用无需打成 WAR 包 。
• 简化Maven配置
Spring Boot 提供了一系列的“starter”来简化 Maven 配置。
• 自动配置
Spring Boot 提供了大量的自动配置类,开发人员不需要任何 xml 配置即可实现 Spring 的所有配置

2.构建 Spring Boot 项目
2.1.下载SpringBoot项目
2、选择构建工具Maven Project、Spring Boot版本以及一些工程基本信息,点击“GENERETE”下载项目压缩包
参考下图所示:

2.2.maven构建SpringBoot项目
1、创建maven工程,不要使用骨架
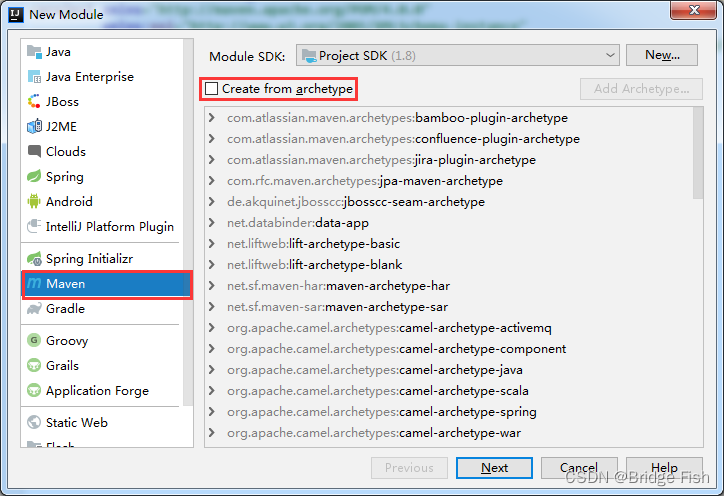
2、填写项目坐标信息

3、设置项目保存位置

2.3.pom.xml
参考下载的springboot项目修改pom.xml
2.3.1.继承springboot父工程
    <parent>
        <groupId>org.springframework.boot</groupId>
        <artifactId>spring-boot-starter-parent</artifactId>
        <version>2.3.2.RELEASE</version>
        <relativePath/> <!-- lookup parent from repository -->
    </parent>
2.3.2.设置编码格式
<!-- 项目源码及编译输出的编码 -->
<project.build.sourceEncoding>UTF-8</project.build.sourceEncoding>
<project.reporting.outputEncoding>UTF-8</project.reporting.outputEncoding>
2.3.3.添加启动器
    <dependencies>
        <!--  springboot的web启动器-->
        <dependency>
            <groupId>org.springframework.boot</groupId>
            <artifactId>spring-boot-starter-web</artifactId>
        </dependency>
    </dependencies>
2.3.4.创建启动类
package com.by;

import org.springframework.boot.SpringApplication;
import org.springframework.boot.autoconfigure.SpringBootApplication;

@SpringBootApplication
public class Application {
    public static void main(String[] args) {
        SpringApplication.run(Application.class, args);
    }
}
2.4.SpringBoot 的 Starter
2.4.1.使用Spring框架的问题?
-
依赖导入问题:每个项目都需要来单独维护自己所依赖的jar包,在项目中使用到什么功能就需要引入什么样的依赖。手动导入依赖容易出错,且无法统一集中管理
-
配置繁琐:在引入依赖之后需要做繁杂的配置,并且这些配置是每个项目来说都是必要的,例如web.xml配置数据库连接池配置、事务配置等等。这些配置重复且繁杂,在不同的项目中需要进行多次重复开发,这在很大程度上降低了我们的开发效率
而在SpringBoot出现之后,它为我们提供了一个强大的功能来解决上述的两个痛点,这就是SpringBoot的starter(启动器)。
2.4.2.Starter是什么?
Spring Boot通过将我们常用的功能场景抽取出来,做成的一系列的启动器,我们只需要在项目中引入这些starter,相关的所有依赖就会全部被导入进来,并且我们可以抛弃繁杂的配置,例如:
Ø spring-boot-starter-web:支持全栈式的 web 开发,包括了 tomcat 和 springMVC 等 jar包
Ø spring-boot-starter-jpa:支持 spring 以 jpa方式操作数据库的 jar 包的集合
Ø spring-boot-starter-redis:支持 redis 键值存储的数据库操作
在导入的starter之后,SpringBoot主要帮我们完成了两件事情:
Ø 相关依赖的自动导入
Ø 相关环境的自动配置
2.4.2.Starter命名
-
官方启动器命名:
- 前缀:spring-boot-starter-
- 规范:spring-boot-starter-模块名
- 举例:spring-boot-starter-web、spring-boot-starter-jdbc
-
第三方启动器命名:
- 后缀:-spring-boot-starter
- 规范:模块名-spring-boot-starter
- 举例:mybatis-spring-boot-starter
3.Spring Boot入门HelloWorld
3.1.controller
import org.springframework.stereotype.Controller;
import org.springframework.web.bind.annotation.RequestMapping;
import org.springframework.web.bind.annotation.ResponseBody;

import java.util.HashMap;
import java.util.Map;

@Controller
public class HelloWorld {
	@RequestMapping("/hello")
	@ResponseBody
	public Map<String, Object> showHelloWorld() {
		Map<String, Object> map = new HashMap<>();
		map.put("msg", "HelloWorld");
		return map;
	}
}
3.2.启动类存放位置
启动类存放的位置:
-
controller 同一个包下
-
controller 的上一级包中
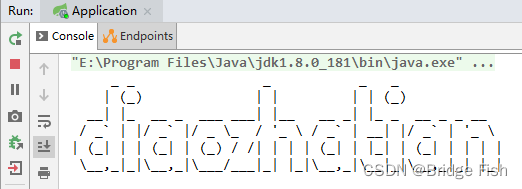
3.3.自定义banner
1、banner生成网站:http://www.bootschool.net/ascii
2、将生成的banner.txt复制到resources目录中
3、测试
4.Spring Boot的全局配置文件
SpringBoot项目使用一个全局的配置文件application.properties或者是application.yml,在resources目录下或者类路径下的/config下,一般我们放到resources下
4.1.properties配置文件
4.1.1.修改tomcat的端口为8088
server.port=8888
4.1.2.修改访问项目时的名字
server.servlet.context-path=/springboot
1.2.yml配置文件
yml是 Spring Boot 中新增的一种配置文件格式。特点:具备天然的树状结构
1.2.1.yml与 properties的区别
-
配置文件的扩展名有变化
-
配置文件中的语法有变化:
1、在 yml 中使用“ :”进行分割
3、在 yml中缩进时不允许使用tab键,缩进的空格数不重要,只要是左对齐的一列数据,都是同一个层级
3、每个K的冒号后面一定要加一个空格
1.2.2.yml方式配置springboot
server:
  port: 8090
  servlet:
    context-path: /springboot
5.Spring Boot项目的两种发布方式
5.1.方式1:通过jar包发布
步骤1:在pom中添加一个SpringBoot的构建的插件
    <build>
        <plugins>
            <plugin>
                <groupId>org.springframework.boot</groupId>
                <!--自动检测项目中的 main 函数-->
                <artifactId>spring-boot-maven-plugin</artifactId>
            </plugin>
        </plugins>
    </build>
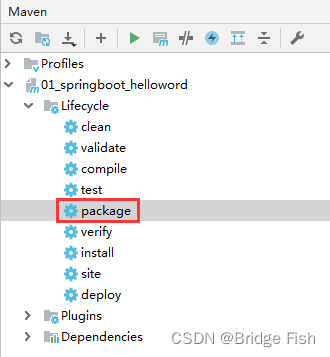
步骤2:在maven视图中,选择“package”,在target中会产生xxx.jar包
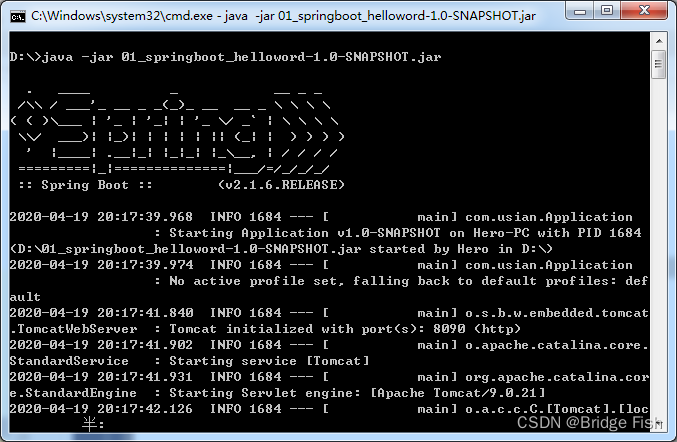
步骤3:然后在cmd终端发布项目
java -jar xxx.jar
5.2.方式2:通过war包发布
步骤1:在pom.xml文件中将jar修改为war
<packaging>war</packaging>
步骤2:设置tomcat启动器依赖范围
maven依赖范围参考:资料/maven依赖作用范围.png
        <dependency>
            <groupId>org.springframework.boot</groupId>
            <artifactId>spring-boot-starter-tomcat</artifactId>
            <!--tomcat启动器依赖范围-->
            <scope>provided</scope>
        </dependency>
步骤3:设置war包的名字
            <plugin>
                <groupId>org.apache.maven.plugins</groupId>
                <artifactId>maven-war-plugin</artifactId>
                <configuration>
                    <warName>hello</warName>
                </configuration>
            </plugin>
步骤4:修改启动类
import org.springframework.boot.SpringApplication;
import org.springframework.boot.autoconfigure.SpringBootApplication;
import org.springframework.boot.builder.SpringApplicationBuilder;
import org.springframework.boot.web.servlet.support.SpringBootServletInitializer;

@SpringBootApplication
public class Application extends SpringBootServletInitializer {
    @Override
    protected SpringApplicationBuilder configure(SpringApplicationBuilder builder) {
        return builder.sources(Application.class);
    }

    public static void main(String[] args) {
        SpringApplication.run(Application.class, args);
    }
}


 3万+
3万+


 被折叠的 条评论
为什么被折叠?
被折叠的 条评论
为什么被折叠?
 到【灌水乐园】发言


