


要在Ubuntu上部署Redmine,你可以按照以下步骤进行操作:
1. 安装必要的软件包:
   sudo apt update
   sudo apt install -y apache2 mysql-server libmysqlclient-dev imagemagick libmagickwand-dev libcurl4-gnutls-dev libssl-dev zlib1g-dev libyaml-dev libsqlite3-dev sqlite3 libxml2-dev libxslt-dev autoconf libc6-dev ncurses-dev g++ gcc make git redis-server
2. 创建MySQL数据库和用户:
   sudo mysql -u root -p
   CREATE DATABASE redmine CHARACTER SET utf8mb4 COLLATE utf8mb4_unicode_ci;
   CREATE USER 'redmine'@'localhost' IDENTIFIED BY 'password';
   GRANT ALL PRIVILEGES ON redmine.* TO 'redmine'@'localhost';
   FLUSH PRIVILEGES;
   EXIT;
3. 下载并编译Redmine:
点击下载Stable版本![]() https://www.redmine.org/projects/redmine/wiki/Download
https://www.redmine.org/projects/redmine/wiki/Download
cd /opt
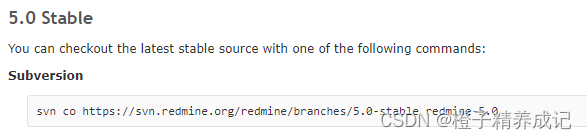
sudo svn co https://svn.redmine.org/redmine/branches/5.0-stable redmine-5.0
sudo mv redmine-5.0 redmine
cd redmine
sudo chown -R www-data:www-data files log tmp public/plugin_assets
sudo chmod -R 755 files log tmp public/plugin_assets
sudo gem install bundler
sudo bundle install --without development test4. 配置数据库连接:
   cp config/database.yml.example config/database.yml
   sudo nano config/database.yml
在 `production` 部分修改以下内容:
   production:
     adapter: mysql2
     database: redmine
     host: localhost
     username: redmine
     password: password
     encoding: utf8mb4
5. 生成秘钥和会话存储:
   sudo bundle exec rake generate_secret_token
   sudo RAILS_ENV=production bundle exec rake db:migrate
6. 配置Apache2服务器:
   sudo cp config/additional_environment.rb.example config/additional_environment.rb
   sudo nano config/additional_environment.rb
在文件末尾添加以下内容:
   # Set the Redmine relative url root
   Rails.application.config.relative_url_root = "/redmine"
然后执行以下命令:
   sudo ln -s /opt/redmine/public /var/www/html/redmine
   sudo nano /etc/apache2/sites-available/redmine.conf
在文件中添加以下内容:
   <VirtualHost *:80>
     ServerName your_domain_or_IP
     DocumentRoot /var/www/html/redmine

     <Directory /var/www/html/redmine>
       Require all granted
     </Directory>

     PassengerRuby /usr/bin/ruby
     PassengerAppEnv production
   </VirtualHost>
替换 `your_domain_or_IP` 为你的域名或IP地址。
7. 启用Redmine网站和相关模块:
   sudo a2ensite redmine.conf
   sudo a2enmod passenger rewrite
   sudo systemctl restart apache2

   sudo apt install -y sendmail

   cd /opt/redmine
   sudo bundle exec rake redmine:plugins:migrate RAILS_ENV=production
   sudo bundle exec rake tmp:cache:clear tmp:sessions:clear RAILS_ENV=p
8. 访问Redmine:
在浏览器中访问 `http://your_domain_or_IP/redmine`,使用管理员账户进行登录,默认用户名和密码为 `admin`。


 3913
3913


 被折叠的 条评论
为什么被折叠?
被折叠的 条评论
为什么被折叠?
 到【灌水乐园】发言


