简介Shiro:
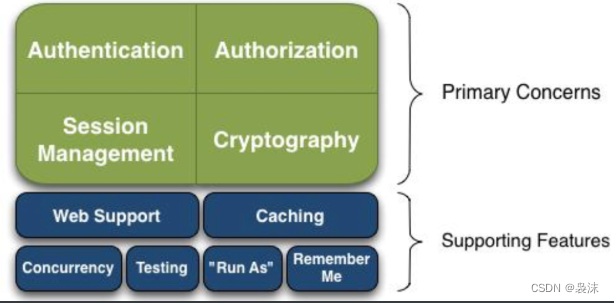
1.基本功能
身份认证、授权、加密、会话管理
Web支持、缓存、多线程、测试、允许一个用户假装为另一个用户的身份进行访问、记住我

2. 执行过程
分为五步:
-
Subject
用户主体:请求的发起者,即访问应用的用户
-
Security Manager
安全管理器:Shiro的核心,用来分发请求,对Shiro中的其他对象进行管理
-
Authenticator
认证器:用来进行认证操作
-
Authentication Strategy
认证策略 :对于多个realm,可以对认证realm的个数进行配置
三种认证策略:AtLeastOneSuccessfulStrategy、FirstSuccessfulStrategy、AllSuccessfulStrategy
-
Realm
安全数据源:用来进行数据匹配的,可以通过多种数据源进行匹配认证,如文件、数据库、QQ、微信、手机号等
3. url过滤
场景:有些url的访问需要登录才能访问,如后台管理界面,未登录时不允许访问,自动跳转到登录页面
解决:使用Shiro过滤器,配置url过滤规则
常用的过滤规则:
-
anon 表示url不需要验证
-
authc 表示url需要登录验证,如果未登录,默认跳转到/login.jsp,参考FormAuthenticationFilter类
-
roles 表示url需要角色验证
-
perms 表示url需要权限验证
-
logout 配置url实现退出登录
注:默认所有url都不需要验证,相当于是anon
应用spring boot实例:
创建一个springboot项目添加依赖:Lombok、Web
<!--jsp-->
<dependency>
    <groupId>org.apache.tomcat.embed</groupId>
    <artifactId>tomcat-embed-jasper</artifactId>
</dependency>
注意:一定要配置jsp的依赖包,否则,在浏览器中访问jsp界面,默认访问文件(下载),不能解析为浏览器dom元素
配置properties.yml
server:
  port: 8080
  servlet:
    context-path: /shiro

spring:
  mvc:
    view:
      prefix: /
      suffix: .jsp
在webapp文件夹中创建index.jsp和login.jsp
要求webapp要与resource为同级
编写自定义数据源Realm:
/**
 * 自定义Realm ,继承AuthorizingRealm
 */
public class ShiroRealm extends AuthorizingRealm {

    /**
     * 认证
     * Authentication 证明真实性,鉴定;身份验证
     */
    @Override
    protected AuthenticationInfo doGetAuthenticationInfo(AuthenticationToken authenticationToken) throws AuthenticationException {
        return null;
    }

    /**
     * 授权
     * Authorization 批准书,授权书;批准
     */
    @Override
    protected AuthorizationInfo doGetAuthorizationInfo(PrincipalCollection principalCollection) {
        return null;
    }
}
编写shiro配置:
@Configuration
public class ShiroConfig {

    /**
     *  获得认证的数据源
     *  realm 领域、范围
     *  @return
     */
    @Bean
    public Realm getRealm() {
        ShiroRealm realm = new ShiroRealm();
        return realm;
    }

    /**
     * 创建安全管理器 类似于: 自定义XXService
     * 自定义的Realm交给SecurityManager管理
     * @param realm
     * @return
     */
    @Bean
    public DefaultWebSecurityManager getDefaultWebSecurityManager(Realm realm) {
        DefaultWebSecurityManager securityManager = new DefaultWebSecurityManager();
        securityManager.setRealm(realm);
        return securityManager;
    }

    /**
     * ShiroFilter ,对资源进行过滤处理
     * 将SecurityManager交给ShiroFilterFactoryBean管理
     * @param securityManager
     * @return
     */
    @Bean
    public ShiroFilterFactoryBean getShiroFilterFactoryBean(DefaultWebSecurityManager securityManager) {
        ShiroFilterFactoryBean filterFactoryBean = new ShiroFilterFactoryBean();
        //设置过滤路径 anon 默认 authc 认证 roles perms 授权 logout 退出
        Map<String,String> map = new LinkedHashMap<>();
        map.put("/index.jsp","authc");
        map.put("/login.jsp","anon");
        //设置安全管理器
        filterFactoryBean.setSecurityManager(securityManager);
        filterFactoryBean.setFilterChainDefinitionMap(map);
        filterFactoryBean.setLoginUrl("/login.jsp");
        return filterFactoryBean;
    }
}
运行程序:
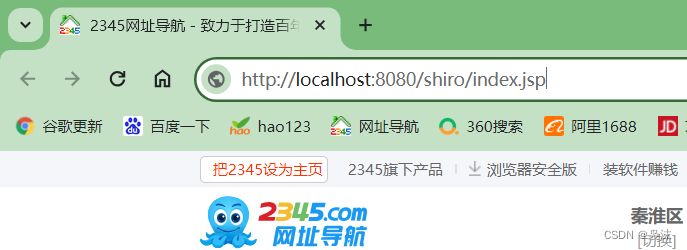
输入网址:http://localhost:8080/shiro/index.jsp

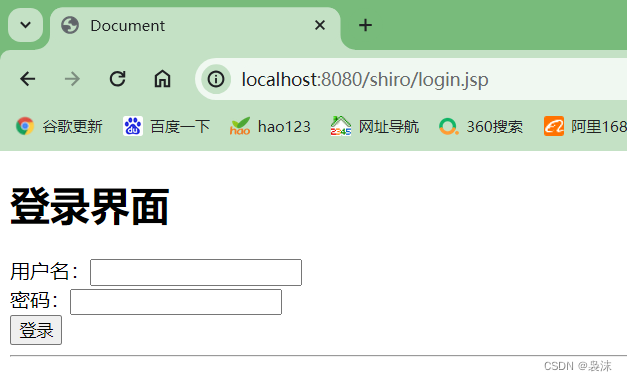
回车之后(成功被拦截到login.jsp):


 本文介绍了Shiro在SpringBoot项目中的应用,涉及身份认证、授权、加密、会话管理,以及如何配置URL过滤规则,包括自定义数据源Realm和ShiroFilter的使用实例。


 906
906


 被折叠的 条评论
为什么被折叠?


