


 本文详细介绍了微信小程序中自定义组件的创建、注册、使用,包括样式隔离、组件间传值、插槽应用等核心概念,并通过实例展示了组件的属性传递和事件交互。此外,还提供了一个完整的item组件案例,演示了组件的复杂功能和应用场景。
1- 前言
在本文中你将收获
- 小程序如何使用自定义组件
- 自定义组件之间的传值
- 自定义组件中插槽的使用
2- 组件文件新建
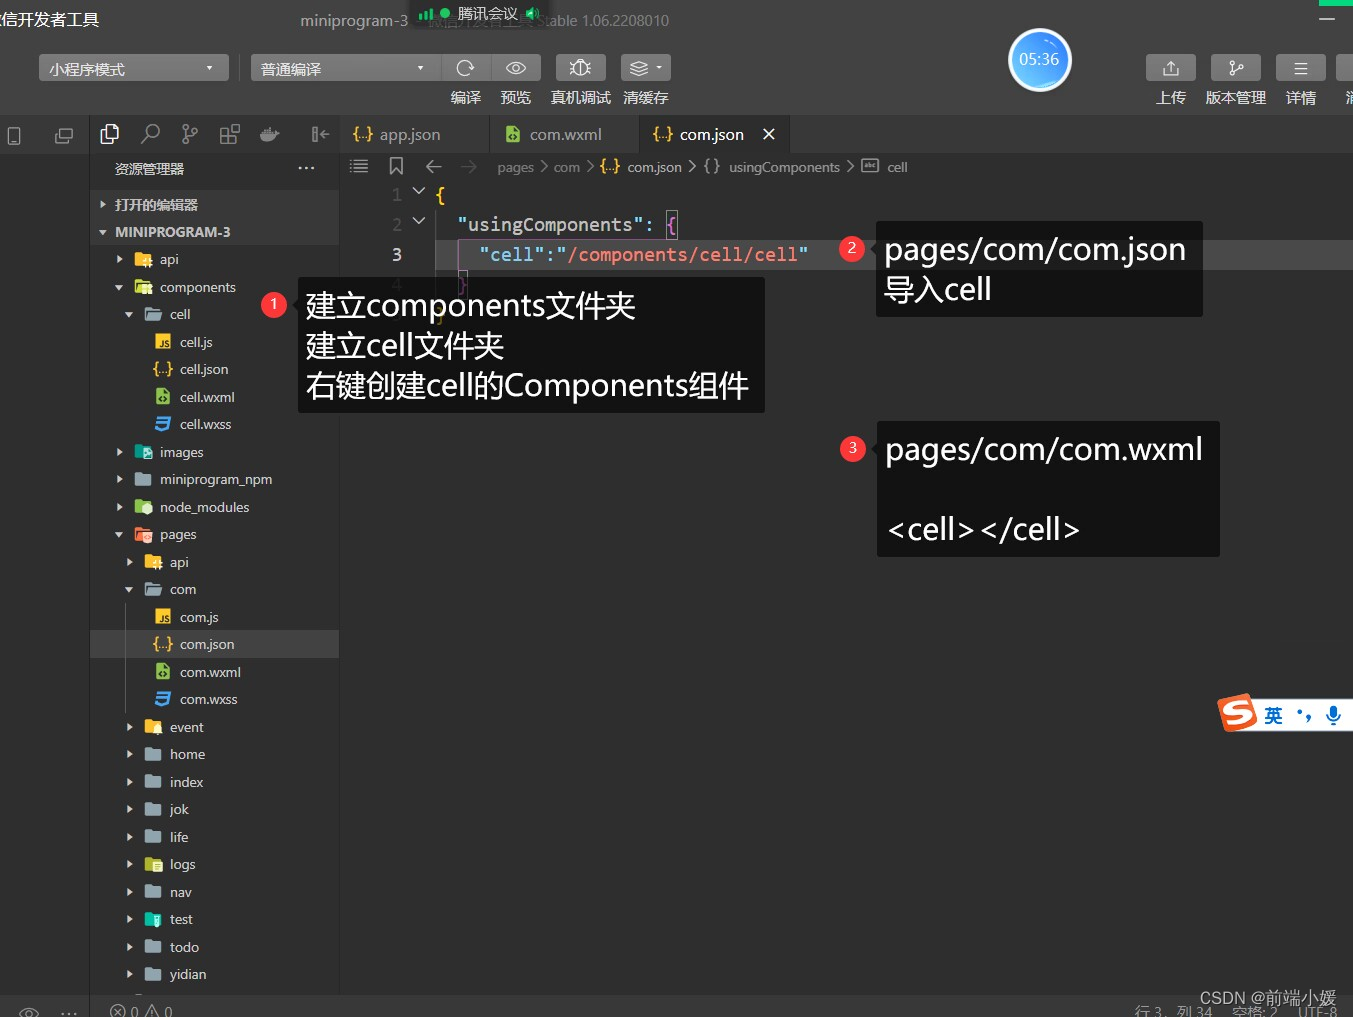
2.1 定义组件
在根目录新建components文件夹,建立cell 文件夹,右击创建cell的Component组件
- cell.js
- cell.wxml
- cell.json
- cell.wxss
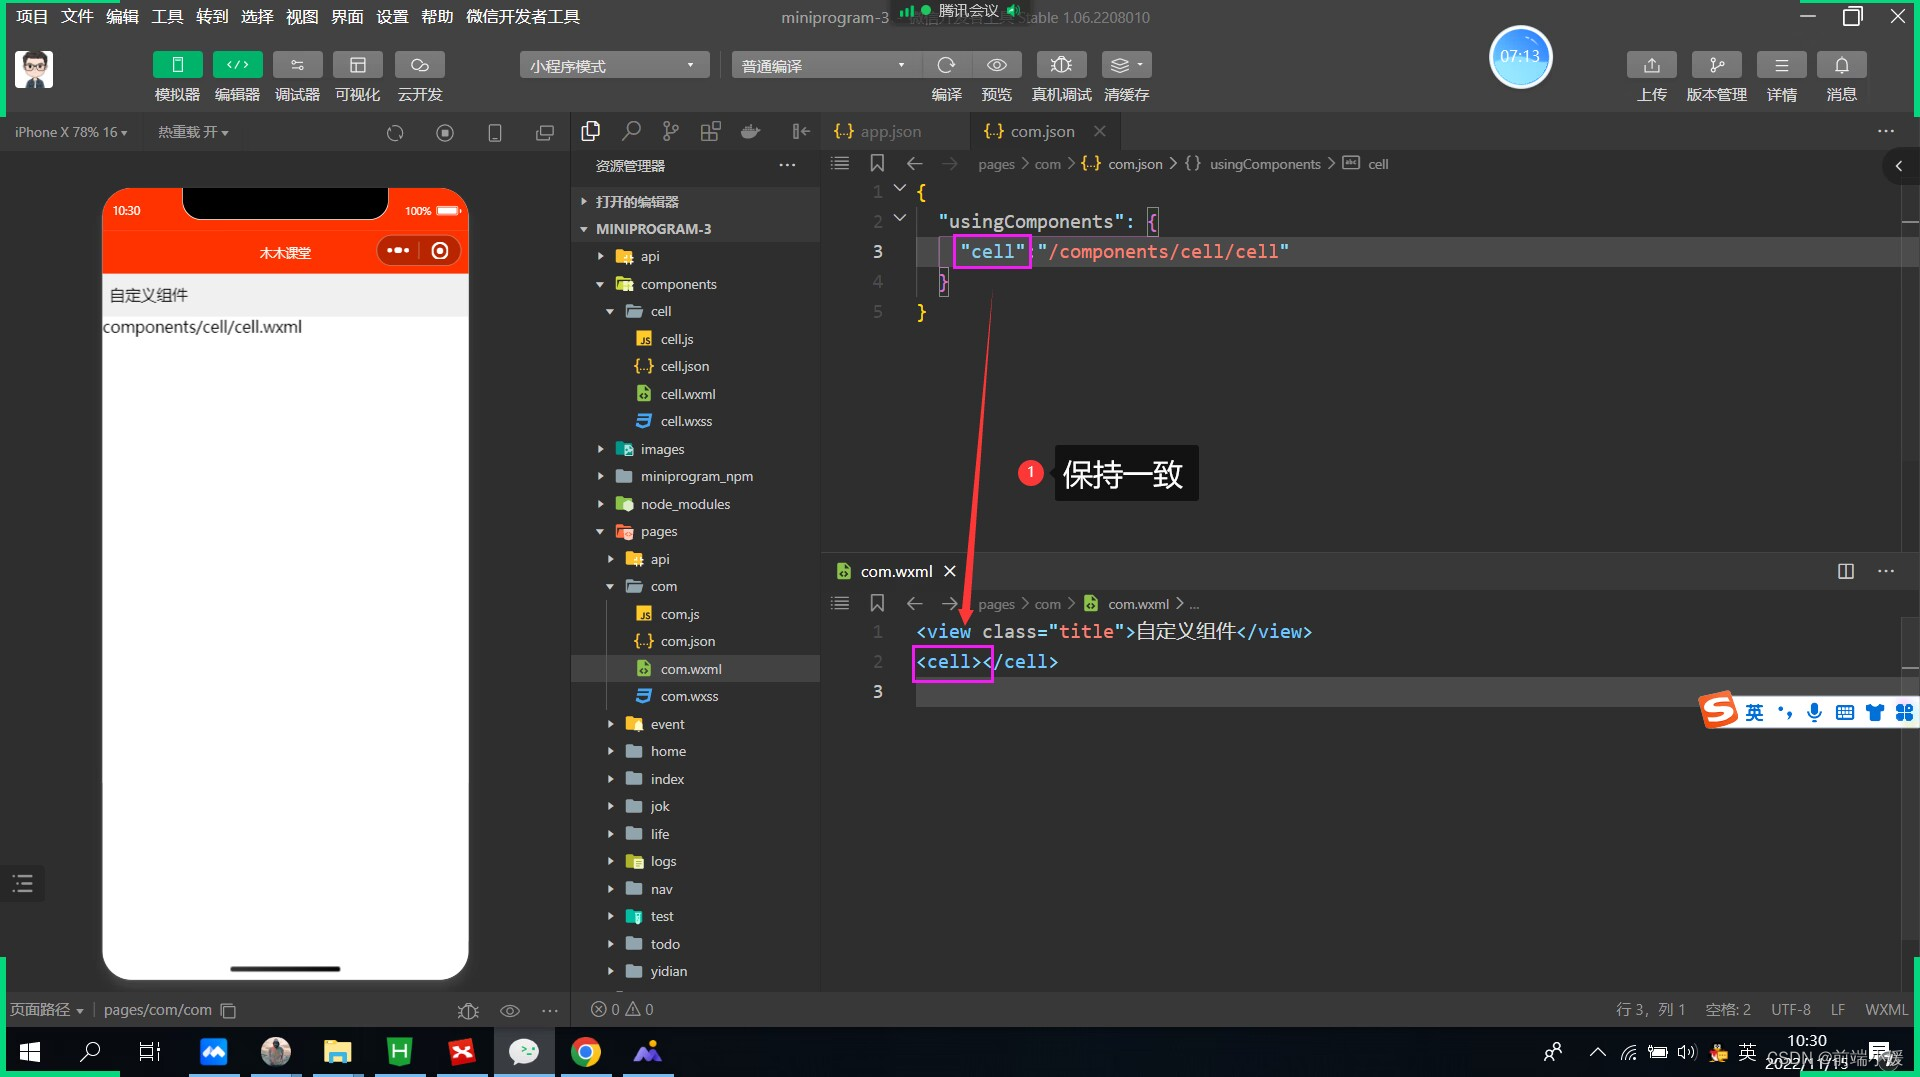
2.2 注册组件
页面的xxx.json ,usingComponent注册
"usingComponents": {

"item":"/components/item/item"
}
2.3 使用组件
<item></item>
2.4 图参考
3- 外部类和样式隔离
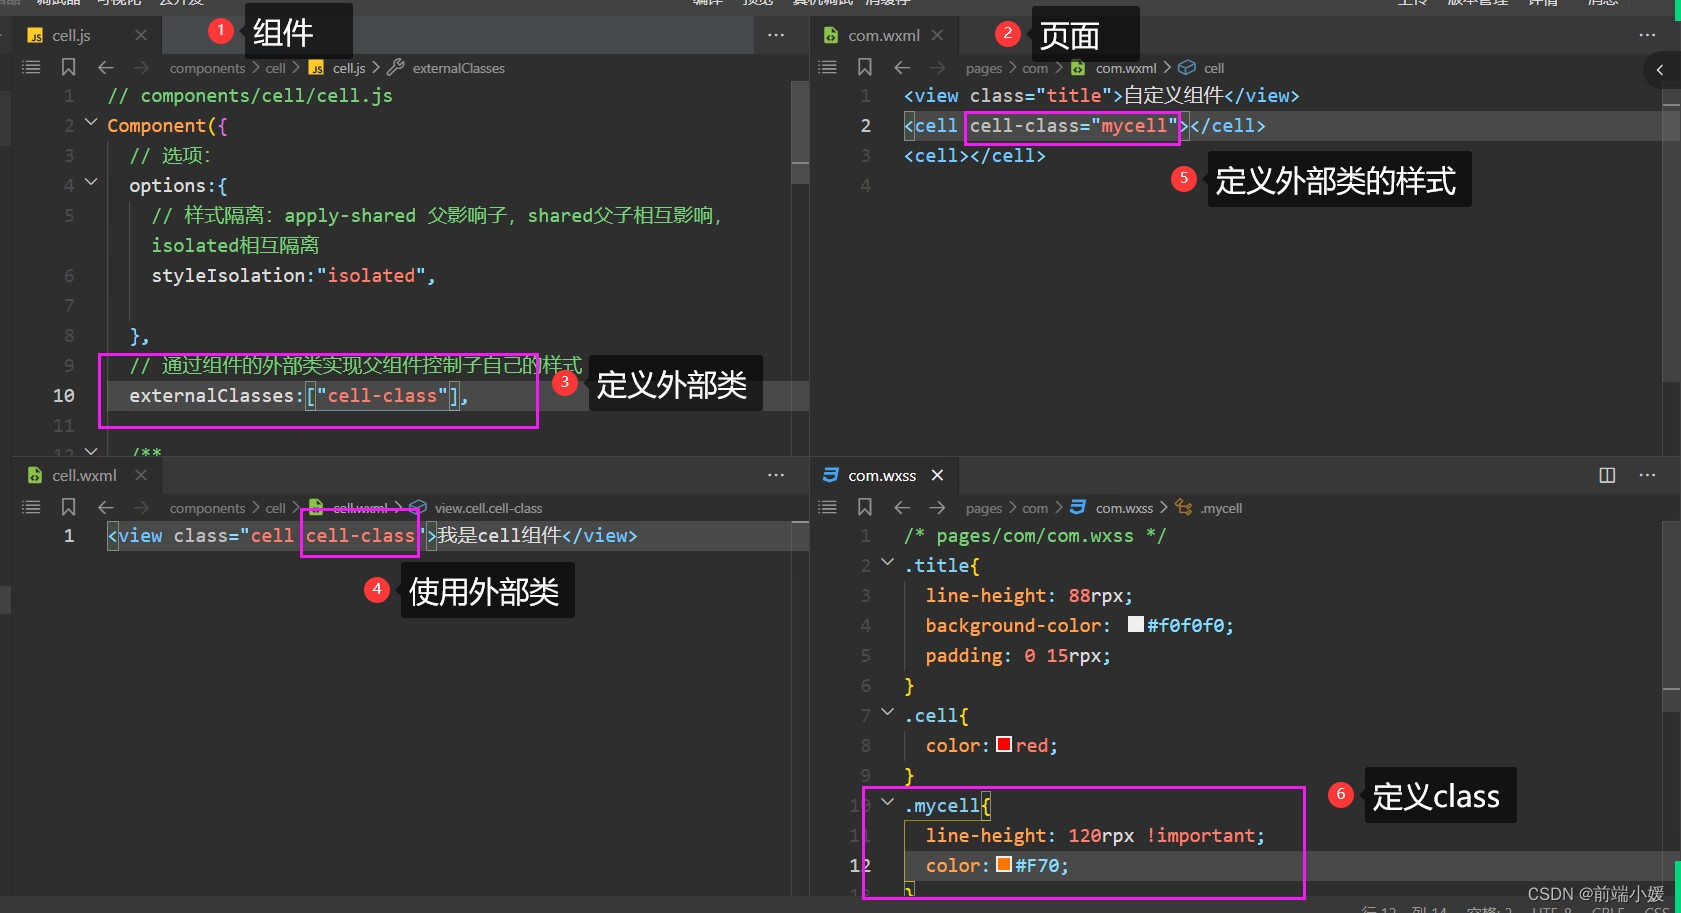
3.1定义组件
- cell.wxml 文件
<view class="cell cell-class">
</view>
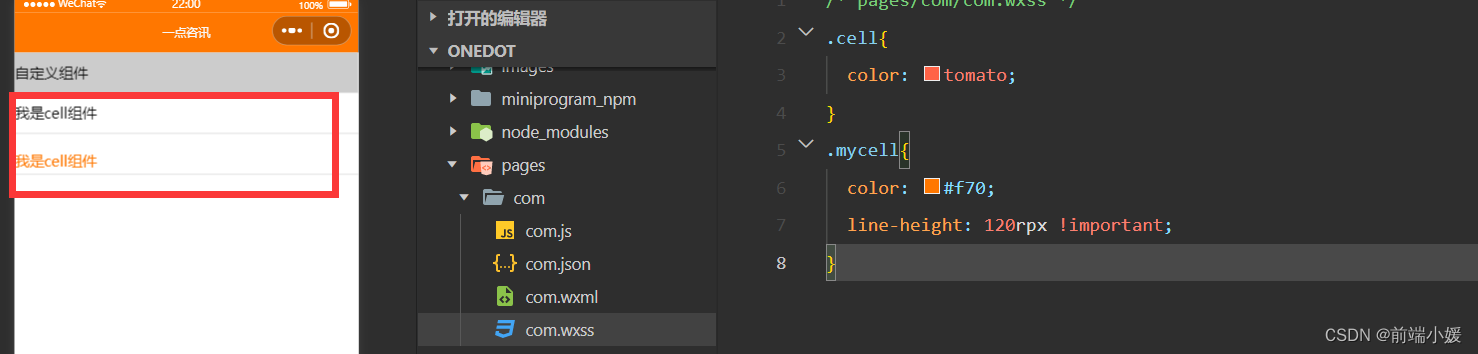
- cell.wxss
/* pages/com/com.wxss */
.cell{

  color: tomato;
}
.mycell{

  color: #f70;
  line-height: 120rpx !important;
}
- cell.js 文件
  /* 选项 */
  options:{

    /* 样式隔离:apply-shared 父影响子
    shared 父子相互影响   isolated 相互隔离
    */
    styleIsolation:'isolated',
  },
  //通过组件的外部类实现父组件控制自己的样式
  externalClasses:["cell-class"],
3.2 使用组件
<cell></cell>
<cell cell-class="mycell"></cell>
3.3 图解释
4- 组件插槽
4.1 默认插槽
- cell.wxml
 <view class="cell">
  我是cell组件
  <slot></slot>
</view>
- cell.js
  /* 选项 */
  options:{

    //允许多个插槽
    multipleSlots:true,
  },
- cell.wxss
.cell{

  height: 88rpx;
  line-height: 88rpx;
  border-bottom: 1rpx solid #cccccc;
}
使用cell组件
<cell>
  <text>放假</text>
  <text>快点到来</text>
</cell>
4.2 命名多插槽
- cell.wxml
 <view class="cell cell-class">
  <slot name="pre"></slot>
  我是cell组件
  <slot></slot>
  <slot name="next"></slot>
</view>
- cell.js
  /* 选项 */
  options:{

    //允许多个插槽
    multipleSlots:true,
  },
- cell.wxss
.cell{

  height: 88rpx;
  line-height: 88rpx;
  border-bottom: 1rpx solid #cccccc;
}
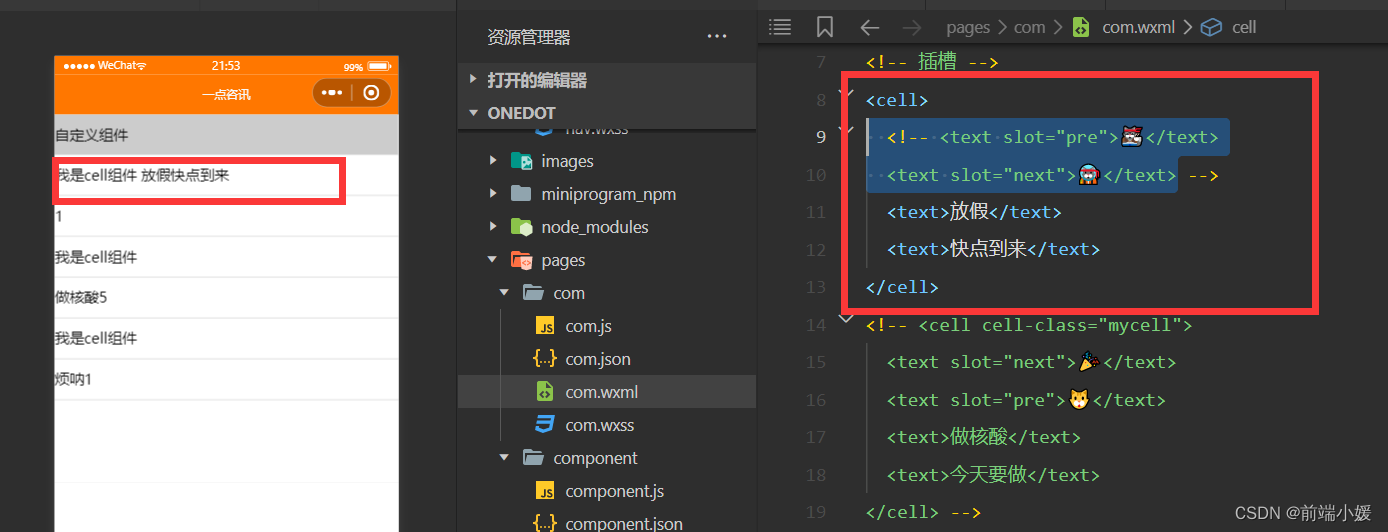
- com.wxml
<!-- 插槽 -->
<cell>
  <text slot=</
最低0.47元/天 解锁文章


 3143
3143

 被折叠的 条评论
为什么被折叠?
被折叠的 条评论
为什么被折叠?
 到【灌水乐园】发言


