


目录
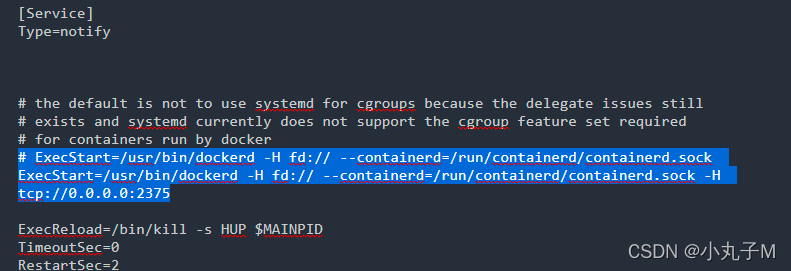
1、修改Docker服务文件,注释掉"ExecStart"这一行,并添加下面信息
7、构建Springboot项目,生成Dockerfile,并完成镜像生成
1、拉取Registry镜像(这里选择搭建2.7版本的registry,不使用最新版,有BUG)
1、创建好私有仓库之后,就可以使用 docker tag 来标记一个镜像,然后推送它到仓库
1、配置maven插件(项目一定是SpringBoot项目或者具备tomcat、Java环境)
一、 Docker结合Idea插件使用
1、修改Docker服务文件,注释掉"ExecStart"这一行,并添加下面信息
docker.service:

[Unit]
Description=Docker Application Container Engine
Documentation=https://docs.docker.com
After=network-online.target firewalld.service containerd.service
Wants=network-online.target
Requires=docker.socket containerd.service

[Service]
Type=notify


# the default is not to use systemd for cgroups because the delegate issues still
# exists and systemd currently does not support the cgroup feature set required
# for containers run by docker
# ExecStart=/usr/bin/dockerd -H fd:// --containerd=/run/containerd/containerd.sock
ExecStart=/usr/bin/dockerd -H fd:// --containerd=/run/containerd/containerd.sock -H tcp://0.0.0.0:2375

ExecReload=/bin/kill -s HUP $MAINPID
TimeoutSec=0
RestartSec=2
Restart=always

# Note that StartLimit* options were moved from "Service" to "Unit" in systemd 229.
# Both the old, and new location are accepted by systemd 229 and up, so using the old location
# to make them work for either version of systemd.
StartLimitBurst=3

# Note that StartLimitInterval was renamed to StartLimitIntervalSec in systemd 230.
# Both the old, and new name are accepted by systemd 230 and up, so using the old name to make
# this option work for either version of systemd.
StartLimitInterval=60s

# Having non-zero Limit*s causes performance problems due to accounting overhead
# in the kernel. We recommend using cgroups to do container-local accounting.
LimitNOFILE=infinity
LimitNPROC=infinity
LimitCORE=infinity

# Comment TasksMax if your systemd version does not support it.
# Only systemd 226 and above support this option.
TasksMax=infinity

# set delegate yes so that systemd does not reset the cgroups of docker containers
Delegate=yes

# kill only the docker process, not all processes in the cgroup
KillMode=process
OOMScoreAdjust=-500

[Install]
WantedBy=multi-user.target
2、重新加载配置文件
systemctl daemon-reload3、重启服务
systemctl restart docker4、防火墙操作
firewall-cmd --zone=public --add-port=2375/tcp --permanent && firewall-cmd --reload && firewall-cmd --list-ports5、查看端口号:
firewall-cmd --list-port
6、IDEA
①、新建项目


②、文件 ->设置 ->插件
查看是否有该插件

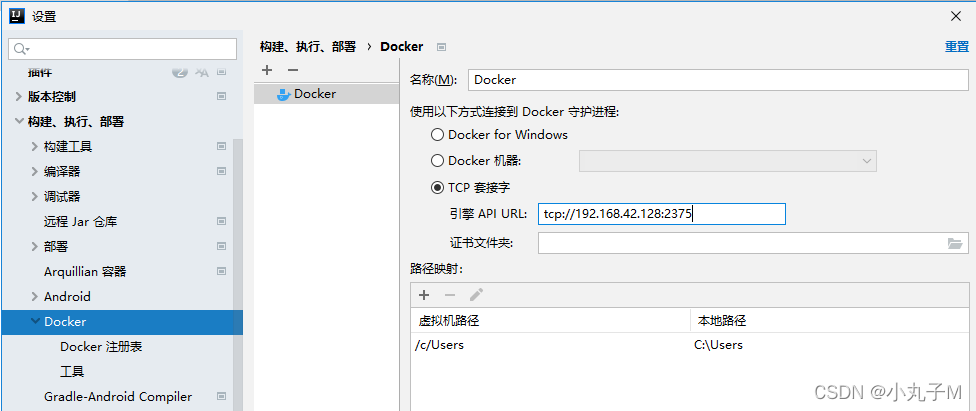
③、配置IDEA
④、查看docker

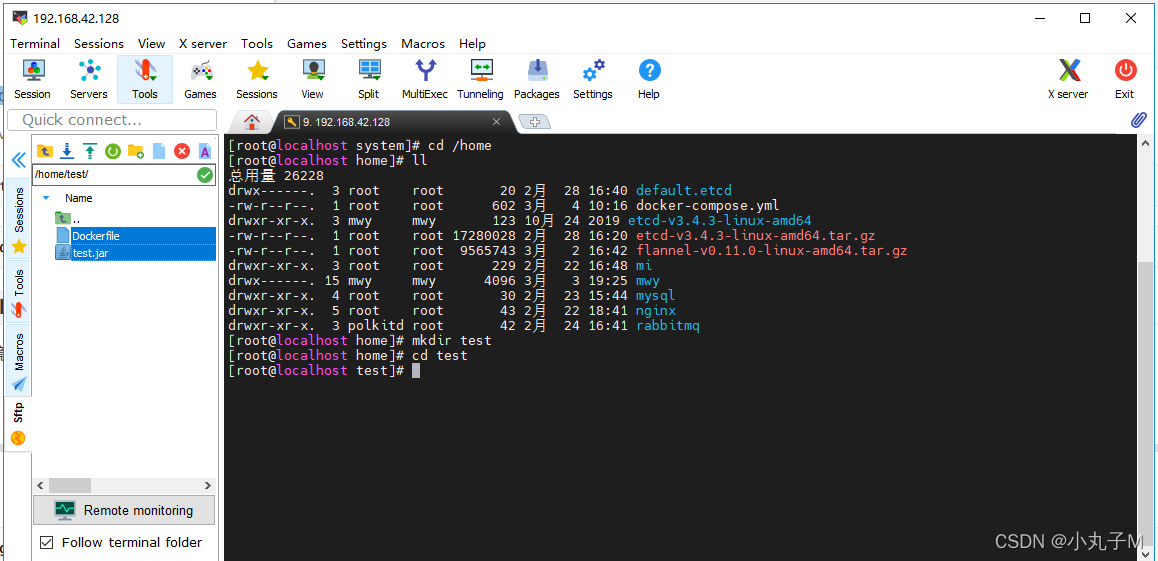
7、构建Springboot项目,生成Dockerfile,并完成镜像生成
①、增加 test.jar , Dockerfile
Dockerfile:
#1.指定基础镜像
FROM openjdk:8-jdk-alpine
#2.维护者信息
MAINTAINER xyz "xyz@qq.com"
#3.创建/tmp目录并持久化到Docker数据文件夹,因为Spring Boot使用的内嵌Tomcat容器默认使用/tmp作为工作目录
VOLUME /tmp
#4.复制test1.jar到容器里(此处与之后的idea中使用docker插件一键发布是不一样的)
ADD test.jar /test.jar
#5.设置时区
ENV TZ=PRC
RUN ln -snf /usr/share/zoneinfo/$TZ /etc/localtime && echo $TZ > /etc/timezone
#6.声明运行时容器提供服务端口,这只是一个声明,在运行时并不会因为这个声明应用就会开启这个端口的服务
EXPOSE 8080
#7.指定容器启动程序及参数(相当于在容器中用cmd命令执行jar包)
ENTRYPOINT ["java","-jar","/test.jar"]
#下面的写法指定springboot项目启动时指定的额外参数
#ENTRYPOINT ["java","-jar","/test1.jar","--spring.config.location=/usr/local/project/docker/xxl-job/config/application.yml"]
②、新增镜像
docker build -t demo:1.0 .
③、启动:
docker run -itd --name test01 -p 8848:8080 demo:1.0④、直接浏览器访问
二、私服搭建
1、拉取Registry镜像(这里选择搭建2.7版本的registry,不使用最新版,有BUG)
docker pull registry:2.72、开启容器
docker run - d \-- name myregistry \- p 5000 : 5000 \- v / usr / local / docker / registry : / var / lib / registry \-- restart = always \registry : 2.7
3、验证是否搭建成功
curl http://127.0.0.1:5000/v2/_catalog

curl http://192.168.42.128:5000/v2/_catalog
4、让docker信任私有镜像仓库地址
vi /etc/docker/daemon.json在 daemon.json 中添加以下内容,其值为注册服务器 (registry) 的 IP 及端口"insecure-registries":["192.168.42.128:5000"]修改后的文件{ "registry-mirrors":["https://xx.mirror.aliyuncs.com"], "insecure-registries":["192.168.27.120:5000"] }重启 dockersystemctl restart docker
三、私有仓库的使用
1、创建好私有仓库之后,就可以使用 docker tag 来标记一个镜像,然后推送它到仓库
· 先在本机查看已有的镜像,选择其中一个进行上传· 镜像标记 (push 前必须先标记镜像 , 自定义 repository 不能有大写字母 )docker tag 自定义镜像名[:版本] 私服IP:端口/仓库名[:版本] docker tag test:1.0 192.168.42.128:5000/test:v1.02、执行查看所有镜像
docker images3、镜像上传
docker push 192.168.42.128:5000/test:v1.04、查看注册服务器的所有镜像
curl 127.0.0.1:5000/v2/_catalog5、从registry下载镜像
docker pull 192.168.42.128:5000/test:v1.0
四、Idea一键部署
1、配置maven插件(项目一定是SpringBoot项目或者具备tomcat、Java环境)
package com.example.demo;

import org.springframework.web.bind.annotation.RequestMapping;
import org.springframework.web.bind.annotation.RestController;

@RestController
public class TestController {

    @RequestMapping("/test")
    public String test(){
        return "hello world";
    }
}
②、将项目打包

③、pom文件导入插件
            <plugin>
                <groupId>com.spotify</groupId>
                <artifactId>dockerfile-maven-plugin</artifactId>
                <version>1.4.10</version>
                <executions>
                    <execution>
                        <id>default</id>
                        <goals>
                            <!--如果package时不想用docker打包,就注释掉这个goal-->
                            <goal>build</goal>
                            <goal>push</goal>
                        </goals>
                    </execution>
                </executions>
                <configuration>
                    <repository>192.168.218.132/test</repository>
                    <tag>${project.version}</tag>
                    <buildArgs>
                        <JAR_FILE>target/${project.build.finalName}.jar</JAR_FILE>
                    </buildArgs>
                </configuration>
            </plugin>
修改了系统变量需要重启开发工具才能生效,一开始提示上传镜像失败,看了错误是上传的ip还是默认的127.0.0.1,重启IDEA就可以了
④、 该插件构建和发布镜像依赖于镜像仓库,需要用户提供镜像仓库的登录信息,支持POM设置和Settings设置,镜像创建可以使用阿里云镜像,或者是私有镜像仓库
⑤、 需在maven/conf/下的setting.xml配置
这个文件在maven目录下,可以 cd $M2_HOME/conf 进入。在pluginGroups中增加一个com.spotify
<pluginGroups>
  <pluginGroup>com.spotify</pluginGroup>
</pluginGroups> 
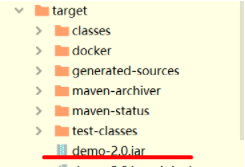
2、新建项目的Dockerfile文件
注意放的位置:

文件内容:
FROM openjdk:8-jdk-alpine
MAINTAINER xyz "xyz@qq.com"
VOLUME /tmp
ADD /target/demo-2.0.jar /test.jar
ENV TZ=PRC
RUN ln -snf /usr/share/zoneinfo/$TZ /etc/localtime && echo $TZ > /etc/timezone
EXPOSE 8080
ENTRYPOINT ["java","-jar","/test.jar"]
3、添加maven命令
clean package dockerfile:build -Dmaven.test.skip=true
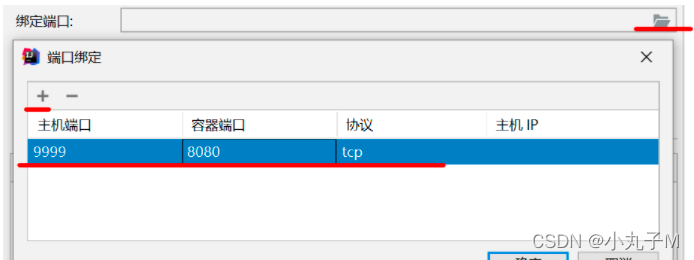
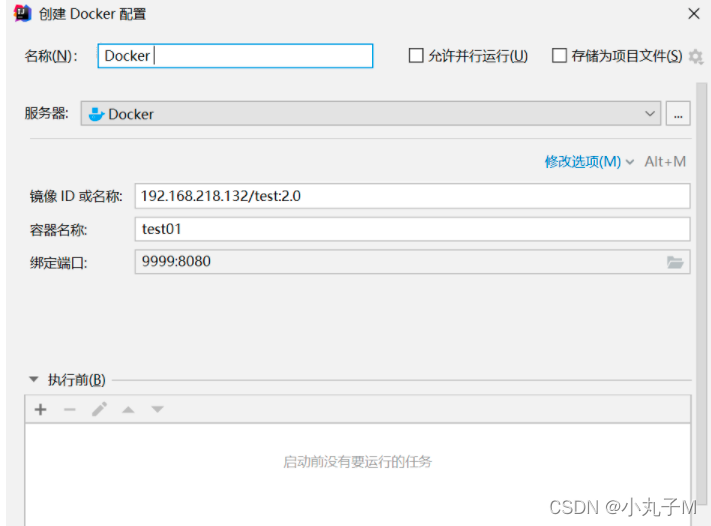
添加配置:

启动:
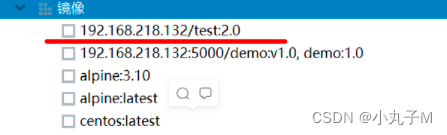
test2.0导入仓库:
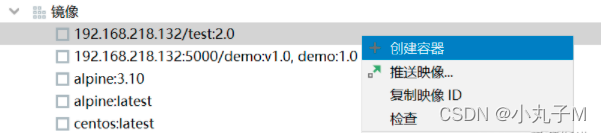
创建容器:

运行:


 951
951


 被折叠的 条评论
为什么被折叠?
被折叠的 条评论
为什么被折叠?
 到【灌水乐园】发言


