


Linux系统中的项目发布配置流程
一、在Linux中安装jdk,并对jdk的环境变量进行配置,配置路径/usr/local/src/,安装完成之后通过Java -version指令查看jdk配置是否成功
部署JDK流程
- 上传JDK安装包 /usr/local/src
- 解压安装包
- 修改Linux环境变量
- JDK环境测试
1.上传JDK
说明: 通过远程工具中的sftp协议,实现文件上传.

2.解压命令
命令: tar -xvf jdk-8u51-linux-x64.tar.gz 之后回车

修改文件名称 mv jdk1.8.0_51 jdk1.8

3.修改Linux环境变量
(1).路径: vim /etc/profile

(2).修改环境变量:(如果想要更改配置点击i进行编辑,完成后按Esc然后执行:wq)

4.jdk环境测试

二、在Linux系统中安装数据库mriaDB
1.数据库的安装和启动
安装命令 yum install mariadb-server(如果安装错误执行yum clean all之后重新下载)

以下命令根据自己需求操作,这里只做演示

![]()
1. 启动命令 [root@localhost src]# systemctl start mariadb
2. 重启命令 [root@localhost src]# systemctl restart mariadb
3. 关闭命令 [root@localhost src]# systemctl stop mariadb
4. 设定开机自起 [root@localhost src]# systemctl enable mariadb
5. 关闭开机自起 [root@localhost src]# systemctl disable mariadb
2.数据库初始化
命令: mysql_secure_installation


3.测试数据库用户名和密码是否有效

4..切换数据库

5.修改数据库表


6.刷新数据库权限
命令:flush privileges;

三.配置防火墙
1.检查防火墙状态
命令: firewall-cmd --state

2.防火墙配置,开机不需要启动防火墙
说明:防火墙中有一个配置文件,表示当Linux系统启动时防火墙应该如何操作!!!
需求: 告诉linux系统以后开机不需要启动防火墙
命令: systemctl disable firewalld.service
(开机重启命令systemctl enable firewalld.service)

3.手动开启和关闭防火墙指令(这时我们可以去测试数据库的连接,要关掉防火墙奥)
说明:通过命令手动将防火墙关闭
命令:
1. systemctl stop firewalld.service
2. systemctl start firewalld.service

4.Mysql数据库远程访问配置(连接成功之后导入自己需要的数据库)


5.手动开放防火墙端口
检查防火墙开放的端口和端口是否开放
命令:firewall-cmd --list-ports

查看和设置完端口之后记得关闭防火墙

重启防火请命令:firewall-cmd --reload
以下操作根据自己的需求来执行
添加端口:firewall-cmd --zone=public --add-port=80/tcp --permanent
移除端口:firewall-cmd --zone=public --remove-port=9090/tcp --permanen
关于其中关键字的解释:
–zone #作用域
–add-port=80/tcp #添加端口,格式为:端口/通讯协议
–remove-port=80/tcp #移除端口,格式为:端口/通讯协议
–permanent #永久生效,没有此参数重启后失效
四、为项目发布做配置
1.创建文件目录images

2.ideal中更改本地磁盘路径

3.后端程序进行打包(如果项目不能打包,请对MAVEN环境进行配置)


将打包的文件粘贴到自己的磁盘目录中,改一个知名知义的名字

4.新建tomcats目录,将打好的jar包上传(直接拖拽复制即可)


5.启动并进行测试
记得转换到指定存放jar包的目录
命令:java -jar 8091.jar &
全部执行启动命令: java -jar 8091.jar & java -jar 8092.jar & java -jar 8093.jar &

根据路径:192.168.126.129:8091/user/findAll![]() http://192.168.126.129:8091/user/findAll 先测试一下
http://192.168.126.129:8091/user/findAll 先测试一下
 通过 jps 查看进程

如果想要关闭进程(服务)
方法:杀死进程(常规杀死)
kill PID号(杀PID号后缀为jar的,如果杀死多个,可在其后拼接PID号即可)

kill -15 PID号 (较为严格的关闭,可以善后)
kill -9 PID号 (强制关闭,后果自负)
注意事项:
1. 前台项目发布一般用于代码的调试.如果报错 效果非常明显.
2. 如果链接Linux的终端关闭,则内部的所有的tomcat服务器都将关闭.
以上流程为前端项目发布,为了对代码进行调试(只是Linux系统内部的)
后台项目的发布
1.在前台发布调试成功之后,需要将tomcat服务器进行后台发布.后台发布时,tomcat会一直运行在Linux系统的内部,不会随终端的开关受到影响.
检查启动项: 检查日志是否正常,检查tomcat服务器是否正常
命令:nohup java -jar 8091.jar => 8091.log &


如果有多个服务,采用脚本方式启动
创建脚本文件:vim satrt.sh
![]()
点击i进行输入,输入完之后点击Esc,然后输入:wq保存

运行脚本

日志查看命令:
cat 输出文件所有的内容
more 输出文档所有的内容,分页输出,空格浏览下一屏,q退出
less 用法和more相同,只是通过PgUp、PgDo键来控制
tail 用于显示文件后几号,使用频繁
tail -10 nginx.conf 查看nginx.conf的最后10行
tail –f nginx.conf 动态查看日志,方便查看日志新增的信息
ctrl+c 结束查看
将来如果程序报错第一时间去查看日志
补充知识:
关闭任意服务
命令: ps -ef |grep 服务名称
下载配置Nginx
1.下载Nginx必须是linux系统的,将包拖到指定位置并解压更改名称

解压nginx包

删除压缩包

改名

2.需要提前安装nginx的依赖项
命令:yum -y install gcc pcre-devel zlib-devel openssl openssl-devel

安装指令
一定要找对安装的位置进行下面的操作命令
命令:./configure

命令:make

命令:make install

查看安装位置
命令:whereis nginx

3.将前端打包好的项目文件复制过来


4. 配置nginx==》conf==》nginx.conf进行操作
#user nobody;
worker_processes 1;
#error_log logs/error.log;
#error_log logs/error.log notice;
#error_log logs/error.log info;
#pid logs/nginx.pid;
events {
worker_connections 1024;
}
http {
include mime.types;
default_type application/octet-stream;
#log_format main '$remote_addr - $remote_user [$time_local] "$request" '
# '$status $body_bytes_sent "$http_referer" '
# '"$http_user_agent" "$http_x_forwarded_for"';
#access_log logs/access.log main;
sendfile on;
#tcp_nopush on;
#keepalive_timeout 0;
keepalive_timeout 65;
#gzip on;
server {
listen 80;
server_name localhost;
#charset koi8-r;
#access_log logs/host.access.log main;
location / {
root html;
index index.html index.htm;
}
#error_page 404 /404.html;
# redirect server error pages to the static page /50x.html
#
error_page 500 502 503 504 /50x.html;
location = /50x.html {
root html;
}
# proxy the PHP scripts to Apache listening on 127.0.0.1:80
#
#location ~ \.php$ {
# proxy_pass http://127.0.0.1;
#}
# pass the PHP scripts to FastCGI server listening on 127.0.0.1:9000
#
#location ~ \.php$ {
# root html;
# fastcgi_pass 127.0.0.1:9000;
# fastcgi_index index.php;
# fastcgi_param SCRIPT_FILENAME /scripts$fastcgi_script_name;
# include fastcgi_params;
#}
# deny access to .htaccess files, if Apache's document root
# concurs with nginx's one
#
#location ~ /\.ht {
# deny all;
#}
}
# another virtual host using mix of IP-, name-, and port-based configuration
#
#server {
# listen 8000;
# listen somename:8080;
# server_name somename alias another.alias;
# location / {
# root html;
# index index.html index.htm;
# }
#}
# HTTPS server
#
#server {
# listen 443 ssl;
# server_name localhost;
# ssl_certificate cert.pem;
# ssl_certificate_key cert.key;
# ssl_session_cache shared:SSL:1m;
# ssl_session_timeout 5m;
# ssl_ciphers HIGH:!aNULL:!MD5;
# ssl_prefer_server_ciphers on;
# location / {
# root html;
# index index.html index.htm;
# }
#}
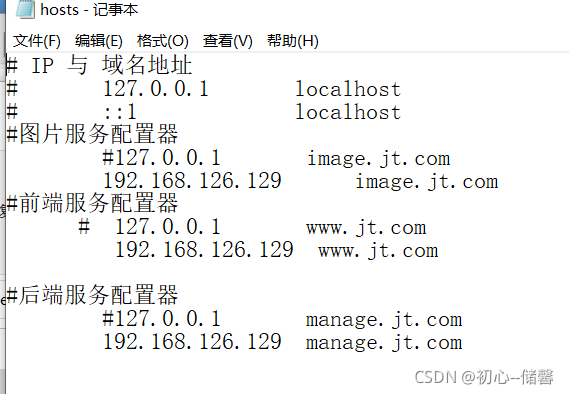
#编辑图片服务器
server {
listen 80;
server_name image.jt.com;
location / {
root /usr/local/src/images;
}
}
#编辑前端服务器
server {
listen 80;
server_name www.jt.com;
location / {
root dist;
index index.html;
}
}
#定义tomcat集群
#负载均衡策略:1:轮询策略
upstream tomcats {
#ip_hash;
server 127.0.0.1:8091;
server 127.0.0.1:8092;
}
#配置后台服务器
server {
listen 80;
server_name manage.jt.com;
location / {
#代理的是一个请求路径
proxy_pass http://tomcats;
}
}
}

启动命令: ./nginx
重启命令: ./nginx -s reload
关闭命令: ./nginx -s stop
每次更改文件后都要进行重启命令操作
5.配置hosts文件—实现本机IP与域名的映射
6.根据域名访问测试(测试时记得防火墙要关闭奥)
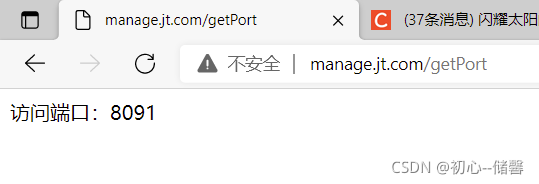
7.进行最后的测试
![]()
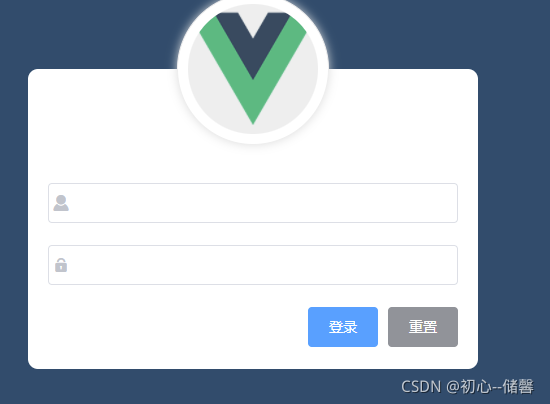

能够登录,数据都能显示,用户新增正常,图片上传并且能够展示,表示运行成功


 2047
2047


 被折叠的 条评论
为什么被折叠?
被折叠的 条评论
为什么被折叠?
 到【灌水乐园】发言


