


信号槽的概念
信号函数与槽函数是 Qt 在 C++ 的基础上新增的特性,类似于其它语言中的回调机制
信号槽的使用更加简单,可以很容易地实现 不同组件对象之间的通信
可以理解为信号槽机制就是:“如果 A对象…,则 B对象… ”
使用信号槽的两个前提条件:
- 通信对象必须是从
QObject派生出来的 - 类的开始要有
Q_OBJECT宏
函数原型
信号槽的连接主要通过 QObject 类中的一个静态成员函数实现:
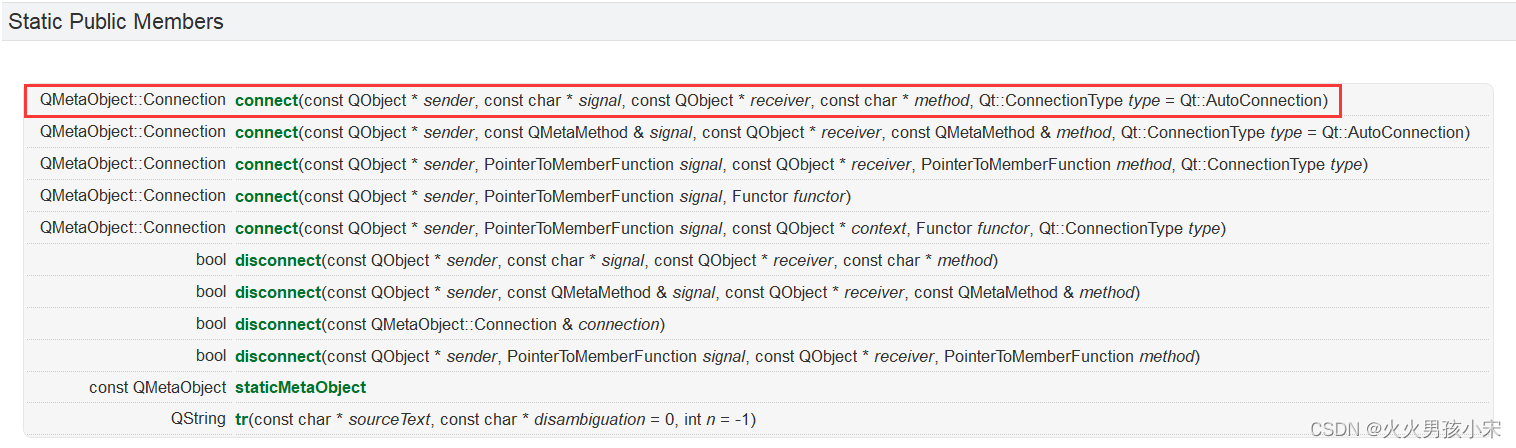
绝大多数自带默认值的参数都可以不看
此处第五个参数不考虑 ,指的是一种连接方式——自动连接
QObject::connect(const QObject * sender,
				 const char * signal,
				 const QObject * receiver,
				 const char * method) [static]
参数1:发射者对象——表示造成原因的对象
参数2:信号函数,当触发了原因时,发射者发射一个信号函数,需要 SIGNAL() 包裹
参数3:接收者对象——表示引起结果的对象
参数4:槽函数,接收者执行的具体功能函数,即结果触发函数调用,需要 SLOT() 包裹
实际上槽函数就是一种特殊的成员函数
信号槽连接的三种方式
为了方便逐步讲解,把信号槽连接由简至繁分为三种方式
自带信号 → 自带槽
自带信号 → 自定义槽
自定义信号 → 槽
方式一
自带信号 → 自带槽
这种方式不需要程序员手写任何函数的定义,只需要在 API 文档中找到对应的函数连接即可
【例子】 点击按钮关闭窗口
参数1:发射者,往往是一个名词——按钮对象
参数2:信号函数,往往是一个过去式动词——被点击函数
参数3:接受者,往往是一个名词——窗口对象
参数4:槽函数,往往是一个动词——关闭函数
代码如下:
dialog.h
#ifndef DIALOG_H
#define DIALOG_H

#include <QDialog>
// 按钮头文件
#include <QPushButton>

class Dialog : public QDialog
{
    Q_OBJECT

public:
    Dialog(QWidget *parent = 0);
    ~Dialog();

private:
	// 头文件中声明
    QPushButton *btn;
};

#endif // DIALOG_H
dialog.cpp
#include "dialog.h"

Dialog::Dialog(QWidget *parent)
    : QDialog(parent)
{
	// 构造函数中重设窗口大小
    resize(300, 300);
    // 构造函数中定义按钮
    btn = new QPushButton("关闭", this);
    // 设置按钮位置与宽高(x,y,w,h)
    btn->setGeometry(50, 50, 100, 50);
    // 信号槽连接
    // QObject::connect(btn, SIGNAL(clicked()), this, SLOT(close()));
    // 派生类中调用基类函数,存在继承关系可以将作用域限定符省略
    //重写信号槽连接
    connect(btn, SIGNAL(clicked()), this, SLOT(close()));
}

Dialog::~Dialog()
{
    delete btn;
}
main.cpp
#include "dialog.h"
#include <QApplication>

int main(int argc, char *argv[])
{
    QApplication a(argc, argv);
    Dialog w;
    // show()也是槽函数,所以槽函数是一种特殊的成员函数
    w.show();

    return a.exec();
}
方式二
自带信号 → 自定义槽
使用最多的一种方式
【例子】 点击按钮把窗口向右下角移动10√2个像素,同时输出调试信息
参数1:按钮对象
参数2:被点击函数
参数3:窗口对象
参数4:自定义槽函数 `mySlot`
代码如下:
dialog.h
#ifndef DIALOG_H
#define DIALOG_H

#include <QDialog>
#include <QPushButton>
#include <QDebug>

class Dialog : public QDialog
{
    Q_OBJECT

public:
    Dialog(QWidget *parent = 0);
    ~Dialog();

private:
    QPushButton* btn;

// 1. 声明槽函数(最小权限法则)
private slots:
    // 学名:驼峰命名法
    // 第一个单词都小写,后面每个单词首字母大写
    void mySlot();
};

#endif // DIALOG_H
dialog.cpp
#include "dialog.h"

Dialog::Dialog(QWidget *parent)
    : QDialog(parent)
{
    resize(200, 200);
    btn = new QPushButton("自定义", this);
    btn->move(50, 50);
    // 3. 连接信号槽
    connect(btn, SIGNAL(clicked()), this, SLOT(mySlot()));

}

// 2. 定义槽函数
void Dialog::mySlot()
{
    // 先获得当前窗口的坐标
    int x = this->x();
    int y = this->y();
    // 移动窗口
    move(x+10, y+10);
    // 输出移动之后的位置坐标
    qDebug() << this->x() << "," << this->y();
}

Dialog::~Dialog()
{
	delete btn;
}
main.cpp
#include "dialog.h"
#include <QApplication>

int main(int argc, char *argv[])
{
    QApplication a(argc, argv);
    Dialog w;
    w.show();

    return a.exec();
}
点击三次后的运行结果
Starting E:\QT\Tools\QtCreator\bin\build-qtday1_4-Desktop_Qt_5_2_1_MinGW_32bit-Debug\debug\qtday1_4.exe...
862 , 399
872 , 409
882 , 419
892 , 429
E:\QT\Tools\QtCreator\bin\build-qtday1_4-Desktop_Qt_5_2_1_MinGW_32bit-Debug\debug\qtday1_4.exe exited with code 0
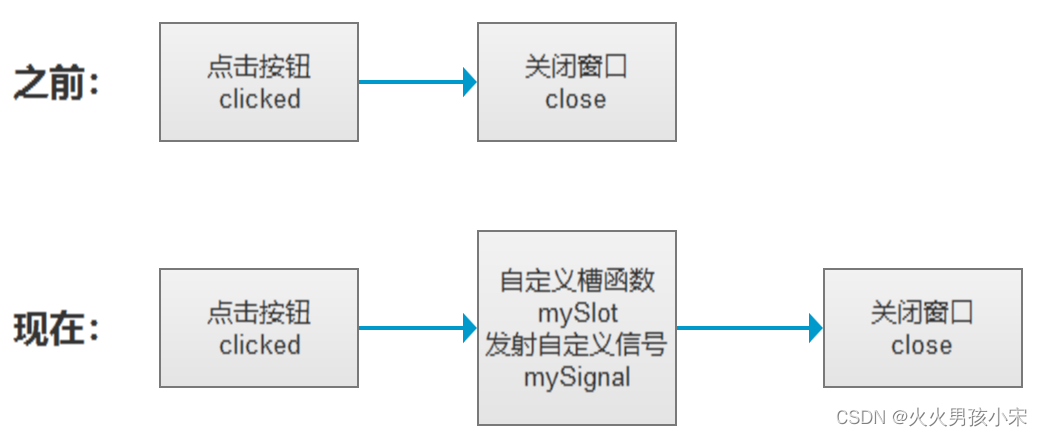
方式三
自定义信号 → 槽
只有在少数情况需要用到自定义信号,下面例子强行使用自定义信号完成
【例子】 点击按钮关闭窗口
参数1:按钮对象
参数2:被点击函数
参数3:窗口对象
参数4:自定义槽函数 `mySlot`
代码如下:
dialog.h
#ifndef DIALOG_H
#define DIALOG_H

#include <QDialog>
#include <QPushButton>
#include <QDebug>

class Dialog : public QDialog
{
    Q_OBJECT

public:
    Dialog(QWidget *parent = 0);
    ~Dialog();

private:
    QPushButton* btn;

// 1. 声明槽函数(最小权限法则)
private slots:
    // 学名:驼峰命名法
    // 第一个单词都小写,后面每个单词首字母大写
    void mySlot();

// 3. 信号函数无权限
signals:
    void mySignal();
};

#endif // DIALOG_H
dialog.cpp
#include "dialog.h"

Dialog::Dialog(QWidget *parent)
    : QDialog(parent)
{
    resize(200, 200);
    btn = new QPushButton("杀鸡用牛刀", this);
    btn->move(50, 50);
    // 3. 连接信号槽
    connect(btn, SIGNAL(clicked()), this, SLOT(mySlot()));

    // 5. 连接自定义信号
    connect(this, SIGNAL(mySignal()), this, SLOT(close()));
}

// 2. 定义槽函数
void Dialog::mySlot()
{
    qDebug() << "发射自定义信号";
    // 4. 发射自定义信号函数,信号函数无调用、无函数体
    emit mySignal();
}

Dialog::~Dialog()
{
    delete btn;
    qDebug() << "窗口已关闭";
}
main.cpp
#include "dialog.h"
#include <QApplication>

int main(int argc, char *argv[])
{
    QApplication a(argc, argv);
    Dialog w;
    w.show();

    return a.exec();
}
运行结果
Starting E:\QT\Tools\QtCreator\bin\build-qtday1_4-Desktop_Qt_5_2_1_MinGW_32bit-Debug\debug\qtday1_4.exe...
发射自定义信号
窗口已关闭
E:\QT\Tools\QtCreator\bin\build-qtday1_4-Desktop_Qt_5_2_1_MinGW_32bit-Debug\debug\qtday1_4.exe exited with code 0
参数传递
编程预备知识
QPushButton的text :
QString属性表示显示的文字,对应的 getter 和 setter 为:
getter: QString	text() const
setter: void	setText(const QString & text)
setter 函数不是槽函数,因此需要自定义槽函数,在自定义槽函数中调用 text 属性的 setter函数 改变其数值
全局参数
在一个类中进行参数传递,可以通过成员变量或静态局部变量等方式
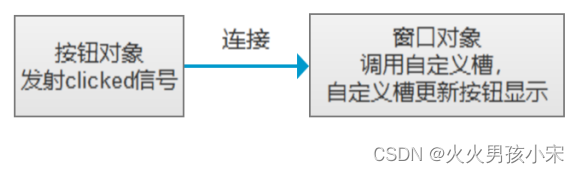
【例子】 点击按钮,按钮上显示当前按钮的点击次数
思路:
成员变量代码示例:推荐
dialog.h
#ifndef DIALOG_H
#define DIALOG_H

#include <QDialog>
#include <QPushButton>

class Dialog : public QDialog
{
    Q_OBJECT

public:
    Dialog(QWidget *parent = 0);
    ~Dialog();

private:
    QPushButton* btn;
    // 计数的成员变量
    int count;// (1)可以在此处赋初值int count = 0;

// 1. 声明槽函数(最小权限法则)
private slots:
    void mySlot();
};

#endif // DIALOG_H
dialog.cpp
#include "dialog.h"

Dialog::Dialog(QWidget *parent)
    : QDialog(parent),count(0)// (2)构造初始化列表
{
    // (3)构造函数中赋值count = 0;
    resize(200, 200);
    btn = new QPushButton("0", this);
    btn->move(50, 50);
    // 3. 连接信号槽
    connect(btn, SIGNAL(clicked()), this, SLOT(mySlot()));
}

// 2. 定义槽函数
void Dialog::mySlot()
{
    // 加
    count++;
    // int整数→QString字符串
    QString text = QString::number(count);
    btn->setText(text);
}

Dialog::~Dialog()
{
    delete btn;
}
静态局部变量代码示例:不推荐
dialog.h
#ifndef DIALOG_H
#define DIALOG_H

#include <QDialog>
#include <QPushButton>

class Dialog : public QDialog
{
    Q_OBJECT

public:
    Dialog(QWidget *parent = 0);
    ~Dialog();

private:
    QPushButton* btn;

// 1. 声明槽函数(最小权限法则)
private slots:
    void mySlot();
};

#endif // DIALOG_H
dialog.cpp
#include "dialog.h"

Dialog::Dialog(QWidget *parent)
    : QDialog(parent)
{
    resize(200, 200);
    btn = new QPushButton("0", this);
    btn->move(50, 50);
    // 3. 连接信号槽
    connect(btn, SIGNAL(clicked()), this, SLOT(mySlot()));
}

// 2. 定义槽函数
void Dialog::mySlot()
{
    static int count = 0;
    // 加
    count++;
    // int整数→QString字符串
    QString text = QString::number(count);
    btn->setText(text);
}

Dialog::~Dialog()
{
    delete btn;
}
静态局部变量没有成员变量好用
如果有多个Dialog对象窗口,多个窗口使用一个静态局部变量,点一个所有的都会随之改变
除非要做出此类效果,否则推荐使用成员变量
另外静态成员变量的生命周期较长,使用成员变量更加轻量化
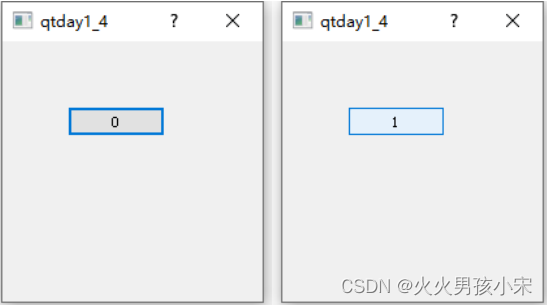
运行结果
信号槽传参
信号槽传参主要在后期用于直接使用变量传递参数不方便的情况,此处仅用于讲解演示,并不是最优解法
【例子】 点击按钮,按钮上显示当前按钮的点击次数
思路:与全局变量所用思路不同,建议回头比对差异

代码如下:
dialog.h
#ifndef DIALOG_H
#define DIALOG_H

#include <QDialog>
#include <QPushButton>

class Dialog : public QDialog
{
    Q_OBJECT

public:
    Dialog(QWidget *parent = 0);
    ~Dialog();

private:
    QPushButton* btn;

private slots:
    // 自定义槽函数1
    void mySlot();

    // 与void valueSignal(int)连接的槽函数2
    void valueSlot(int);

signals:
    // 能携带参数的信号函数
    // 信号函数不需要定义、不需要调用,直接发射
    void valueSignal(int);
};

#endif // DIALOG_H
dialog.cpp
#include "dialog.h"

Dialog::Dialog(QWidget *parent)
    : QDialog(parent)
{
    resize(300, 300);
    btn = new QPushButton("0", this);
    btn->move(100, 100);

    connect(btn, SIGNAL(clicked()), this, SLOT(mySlot()));

    connect(this, SIGNAL(valueSignal(int)), this, SLOT(valueSlot(int)));
}

void Dialog::mySlot()
{
    // 使用静态局部变量进行计数
    static int count = 0;

    //  发送自定义信号
    emit valueSignal(++count);
}

// 此处不能使用哑元,要写上参数名,否则拿不到参数值
void Dialog::valueSlot(int count)
{
    // 拿到传递过来的参数并设置显示
    QString text = QString::number(count);
    btn->setText(text);
}

Dialog::~Dialog()
{
    delete btn;
}
运行结果 同上
相对于全局参数效率较低,能使用参数传递就不要使用信号槽传递参数
信号槽传递参数是为了在参数传递不方便的时候使用的一种方法
信号槽传递参数是为比较复杂的远距离通信设定的
远距离 不是现实的距离,而是编程中两个对象没有直接的关系
如果在一个类中的两个对象,他们之间触手可得,这就称不上 远距离 了
注意:
- 理论上可以传递任意个数的参数,但是实际上 1-2 个居多。
- 信号函数的参数个数必须大于等于槽函数的参数个数。
- 参数类型必须一一匹配
信号槽的对应关系
信号槽之间具有 一对多 和 多对一 的关系
一对多 指的是一个信号可以连接多个槽函数
多对一 指的是多个信号可以连接同一槽函数
一对多的情况可以优化为一对一
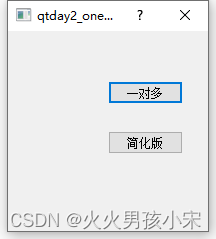
【例子】 一对多并优化成 简化版一对一
代码示例:
dialog.h
#ifndef DIALOG_H
#define DIALOG_H

#include <QDialog>
#include <QPushButton>
#include <QDebug>

class Dialog : public QDialog
{
    Q_OBJECT

public:
    Dialog(QWidget *parent = 0);
    ~Dialog();

private:
    QPushButton* btn1;
    QPushButton* btn2;

private slots:
    // 两个槽函数
    void mySlot1();
    void mySlot2();

    // 与btn2连接的槽函数
    void mySlot();
};

#endif // DIALOG_H
dialog.cpp
#include "dialog.h"

Dialog::Dialog(QWidget *parent)
    : QDialog(parent)
{
    resize(200, 200);
    btn1 = new QPushButton("一对多", this);
    btn2 = new QPushButton("简化版", this);
    btn1->move(100, 50);
    btn2->move(100, 100);

    // 一对多
    connect(btn1, SIGNAL(clicked()), this, SLOT(mySlot1()));
    connect(btn1, SIGNAL(clicked()), this, SLOT(mySlot2()));

    // 所有的一对多都可以简化为一对一的信号槽
    connect(btn2, SIGNAL(clicked()), this, SLOT(mySlot()));
}

void Dialog::mySlot1()
{
    qDebug() << "1";
}

void Dialog::mySlot2()
{
    qDebug() << "2";
}

void Dialog::mySlot()
{
    // 槽函数是一种特殊的成员函数
    // 可以直接调用
    mySlot1();
    mySlot2();
}

Dialog::~Dialog()
{
    delete btn1;
    delete btn2;
}
运行结果
Starting E:\QT\Tools\QtCreator\bin\build-qtday2_onetomuti-Desktop_Qt_5_2_1_MinGW_32bit-Debug\debug\qtday2_onetomuti.exe...
1
2
1
2
E:\QT\Tools\QtCreator\bin\build-qtday2_onetomuti-Desktop_Qt_5_2_1_MinGW_32bit-Debug\debug\qtday2_onetomuti.exe exited with code 0
Button一对多与Button简化版都可以实现信号槽
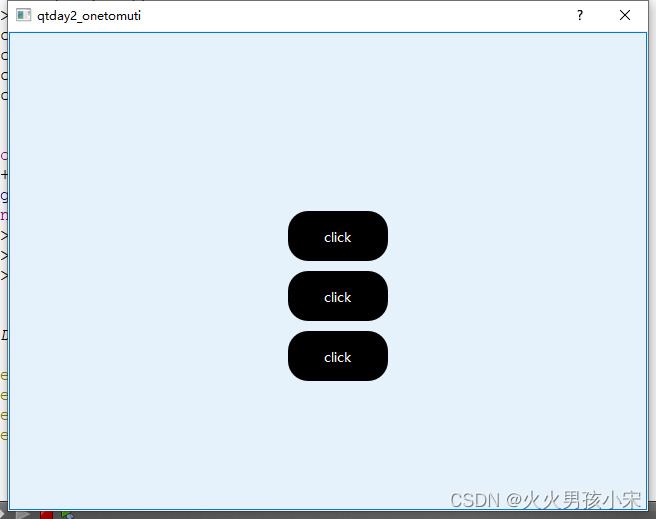
【例子】 多对一
代码示例:
dialog.h
#ifndef DIALOG_H
#define DIALOG_H

#include <QDialog>
#include <QDebug>
#include <QWidget>
#include <QPushButton>

#define QPushButton_STYTLE (QString("\
/*按钮普通态*/\
QPushButton\
{\
    font-family:Microsoft Yahei;\
    /*字体大小为20点*/\
    font-size:10pt;\
    /*字体颜色为白色*/\
    color:white;\
    /*背景颜色*/\
    background-color:rgb(0 , 0 , 0);\
    /*边框圆角半径为8像素*/\
    border-radius:20px;\
}\
/*按钮悬停态*/\
QPushButton:hover\
{\
    /*背景颜色*/\
    background-color:rgb(0 , 0 , 0);\
}\
/*按钮按下态*/\
QPushButton:pressed\
{\
    color:black;\
    /*背景颜色*/\
    background-color:rgb(255 , 255 , 255);\
    /*左内边距为3像素,让按下时字向右移动3像素*/\
    padding-left:3px;\
    /*上内边距为3像素,让按下时字向下移动3像素*/\
    padding-top:3px;\
}"))

class Dialog : public QDialog
{
    Q_OBJECT

public:
    Dialog(QWidget *parent = 0);
    ~Dialog();
private:
    QPushButton *btn;
    QPushButton *btn1;
    QPushButton *btn2;
    QPushButton *btn3;
    int count;
private slots:
    void mySlot();
};

#endif // DIALOG_H
dialog.h
#include "dialog.h"
Dialog::Dialog(QWidget *parent)
: QDialog(parent),count(0)
{
resize(640,480);
btn=new QPushButton(NULL,this);
btn->resize(640,480);
btn1=new QPushButton("click",this);
btn1->setStyleSheet(QPushButton_STYTLE);
btn1->move(280,240);
btn1->resize(100,50);
btn2=new QPushButton("click",this);
btn2->setStyleSheet(QPushButton_STYTLE);
btn2->move(280,180);
btn2->resize(100,50);
btn3=new QPushButton("click",this);
btn3->setStyleSheet(QPushButton_STYTLE);
btn3->move(280,300);
btn3->resize(100,50);
connect(btn,SIGNAL(clicked()),this,SLOT(mySlot()));
connect(btn1,SIGNAL(clicked()),this,SLOT(mySlot()));
connect(btn2,SIGNAL(clicked()),this,SLOT(mySlot()));
connect(btn3,SIGNAL(clicked()),this,SLOT(mySlot()));
}
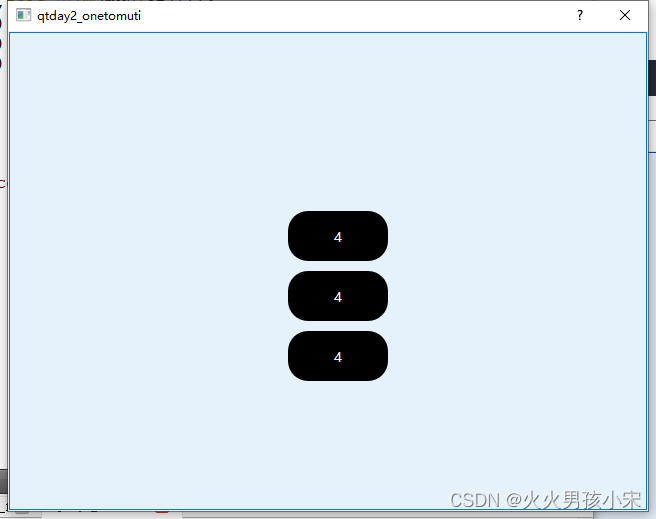
void Dialog::mySlot(){
count++;
qDebug()<<count;
QString test=QString::number(count);
btn1->setText(test);
btn2->setText(test);
btn3->setText(test);
}
Dialog::~Dialog()
{
delete btn;
delete btn1;
delete btn2;
delete btn3;
}
运行结果
Starting E:\QT\Tools\QtCreator\bin\build-qtday2_onetomuti-Desktop_Qt_5_2_1_MinGW_32bit-Debug\debug\qtday2_onetomuti.exe...
1
2
3
4
E:\QT\Tools\QtCreator\bin\build-qtday2_onetomuti-Desktop_Qt_5_2_1_MinGW_32bit-Debug\debug\qtday2_onetomuti.exe exited with code 0
总结
后会有期


 1366
1366


 被折叠的 条评论
为什么被折叠?
被折叠的 条评论
为什么被折叠?
 到【灌水乐园】发言


