


1.SSH是什么?
ssh(SSH客户端)是一个用于登录远程计算机并在远程计算机上执行命令的程序。 它旨在提供两个不受信任的主机之间的安全加密通信通过不安全的网络。
secure shell 安全的shell
2.SSH有什么作用?用在哪里?
SSH是一个应用在应用层的协议。用来远程控制服务器的和其他网络服务提供安全性的协议。
3.如何搭建ssh服务?
软件来实现某个功能--》远程登录
opensshOpenSSH 是使用 SSH 协议进行远程登录的首要连接工具。它加密所有流量以消除窃听,连接劫持,和其他攻击。
此外,OpenSSH还提供了大量安全隧道功能,多种身份验证方法和复杂的配置选项。
centos6/7/8安装好系统,默认安装openssh。Ubuntu 默认不安装。
rpm 是linux里的一个软件管理的命令
在redhat/centos里有使用 oracle linux
redhat package managment 红帽公司出品的软件包管理软件
-q 查询 query
a all
rpm -qa 查询在本机已经安装的所有的软件
[root@ansible_nfs ~]# rpm -qa |grep openssh
openssh-server-7.4p1-22.el7_9.x86_64
openssh-clients-7.4p1-22.el7_9.x86_64
openssh-7.4p1-22.el7_9.x86_64
openssh 提供某些ssh的工具--》客户端
openssh-clients 客户端程序
openssh-server 服务器端
c/s架构的软件
如何知道sshd服务是否启动?
1.看进程
2.看端口
3.直接访问
4.看日志
[root@ansible_nfs ssh]# ps aux|grep  sshd
root        946  0.0  0.2 113000  4332 ?        Ss   09:39   0:00 /usr/sbin/sshd -D
root       1627  0.0  0.3 161820  6108 ?        Ss   10:36   0:00 sshd: root@pts/1
root       2101  0.0  0.0 112824   984 pts/1    S+   12:50   0:00 grep --color=auto sshd

[root@ansible_nfs ssh]# lsof -i:22
COMMAND  PID USER   FD   TYPE DEVICE SIZE/OFF NODE NAME
sshd     946 root    3u  IPv4  21697      0t0  TCP *:ssh (LISTEN)
sshd     946 root    4u  IPv6  21706      0t0  TCP *:ssh (LISTEN)
sshd    1627 root    3u  IPv4  27658      0t0  TCP ansible_nfs:ssh->192.168.2.23:64312 (ESTABLISHED)

[root@ansible_nfs ssh]# netstat -anpult|grep 22
tcp        0      0 0.0.0.0:22              0.0.0.0:*               LISTEN      946/sshd
tcp        0     36 192.168.2.3:22          192.168.2.23:64312      ESTABLISHED 1627/sshd: root@pts
tcp6       0      0 :::22                   :::*                    LISTEN      946/sshd

守护进程: daemon  :一直在内存里运行的程序,除非人为的停止

[root@ansible_nfs log]# tail -f secure
Jul  8 19:54:11 ansible_nfs polkitd[711]: Registered Authentication Agent for unix-process:1572:581934 (system bus name :1.15 [/usr/bin/pkttyagent --notify-fd 5 --fallback], object path /org/freedesktop/PolicyKit1/AuthenticationAgent, locale zh_CN.UTF-8)
Jul  8 19:54:11 ansible_nfs sshd[865]: Received signal 15; terminating.
Jul  8 19:54:11 ansible_nfs sshd[1578]: Server listening on 0.0.0.0 port 2288.
Jul  8 19:54:11 ansible_nfs sshd[1578]: Server listening on :: port 2288.
Jul  8 19:54:11 ansible_nfs polkitd[711]: Unregistered Authentication Agent for unix-process:1572:581934 (system bus name :1.15, object path /org/freedesktop/PolicyKit1/AuthenticationAgent, locale zh_CN.UTF-8) (disconnected from bus)


Jul  8 19:56:05 ansible_nfs sshd[1581]: Accepted password for root from 192.168.2.23 port 57102 ssh2
Jul  8 19:56:05 ansible_nfs sshd[1581]: pam_unix(sshd:session): session opened for user root by (uid=0)

[root@ansible_nfs ~]# pstree -p |grep sshd
           |-sshd(1434)---bash(1436)-+-tail(1548)
           |-sshd(1550)---bash(1552)
           |-sshd(1578)---sshd(1581)---bash(1584)-+-grep(1602)
查看服务自启动列表
[root@ansible_nfs ~]# systemctl list-unit-files|grep sshd
sshd-keygen.service static
sshd.service enabled
sshd@.service static
sshd.socket disabled关于 unit 的启动状态,除了 enable 和 disable 之外还有:
static:这个 unit 不可以自己启动,不过可能会被其它的 enabled 的服务来唤醒。
mask:这个 unit 无论如何都无法被启动!因为已经被强制注销。可通过 systemctl unmask 改回原来的状态。
使用systemctl 查看服务的状态,返回的状态有以下几种
active(running) #正有一个或多个程序正在系统中执行
atcive(exited) #仅执行一次就正常结束的服务, 目前并沒有任何程序在系統中执行
atcive(waiting) #正在执行当中,不过还在等待其他的事件才能继续处理
inactive #服务关闭
enbaled #服务开机启动
disabled #服务开机不自启
failed #系统配置错误
[root@ansible_nfs ~]# cd /etc/ssh
[root@ansible_nfs ssh]# ls
moduli ssh_config sshd_config ssh_host_ecdsa_key ssh_host_ecdsa_key.pub
ssh_host_ed25519_key ssh_host_ed25519_key.pub ssh_host_rsa_key ssh_host_rsa_key.pub
sshd_config --》服务器端的配置文件 server --》进程:sshd
ssh_config --》ssh命令使用的配置文件 client --》进程:ssh
ssh_host_ecdsa_key.pub --》ecdsa加密算法的公钥
ssh_host_ecdsa_key --》ecdsa加密算法的私钥
日志文件:/var/log/secure
[root@ansible_nfs ssh]# tail -f /var/log/secure |grep "Failed password"
Jul 8 20:33:18 ansible_nfs sshd[1703]: Failed password for root from 192.168.2.140 port 40204 ssh2
Jul 8 20:33:26 ansible_nfs sshd[1703]: Failed password for root from 192.168.2.140 port 40204 ssh2
[root@ansible_nfs ~]# cd .ssh
[root@ansible_nfs .ssh]# ls
id_ecdsa id_ecdsa.pub id_rsa id_rsa.pub known_hosts
客户机使用ssh第一次连接服务器时
将服务器上sshd守护进程的公钥复制到本地
存放到本地~/.ssh/known_hosts文件中
每行存放一台服务器的公钥
用来验证服务器的身份
xshell连接不上Linux?
1.查看sshd服务是否启动
[root@ansible_nfs ssh]# ps aux |grep sshd
root 1434 0.0 0.3 161820 6108 ? Ss 18:17 0:00 sshd: root@pts/0
root 1550 0.0 0.3 161820 6108 ? Ss 19:53 0:00 sshd: root@pts/1
root 1581 0.0 0.3 161820 6108 ? Ss 19:56 0:00 sshd: root@pts/2
root 1660 0.0 0.2 113000 4372 ? Ss 20:13 0:00 /usr/sbin/sshd -D
root 1709 0.0 0.3 161820 6184 ? Ss 20:33 0:00 sshd: sc [priv]
sc 1711 0.0 0.1 161820 2360 ? S 20:33 0:00 sshd: sc@pts/3
root 1758 0.0 0.0 112828 988 pts/1 S+ 20:46 0:00 grep --color=auto sshd
2.seLinux需要关闭
selinux 是linux系统里的一套安全机制,用来保护linux系统的安全,会限制进程去做某些对安全有威胁的事情。
永久修改selinux的策略为disabled
[root@localhost ssh]# vim /etc/selinux/config
SELINUX=disabled
[root@localhost ssh]# getenforce    # 查看selinux的状态
Enforcing
[root@localhost ssh]# setenforce 0  # 临时调整selinux的策略为宽容模式
[root@localhost ssh]# getenforce
Permissive
[root@localhost ssh]# service sshd restart
Redirecting to /bin/systemctl restart sshd.service
[root@localhost ssh]# netstat -anplut|grep 2288
tcp        0      0 0.0.0.0:2288            0.0.0.0:*               LISTEN      2383/sshd
3.防火墙需要关闭
systemctl disable firewalld
如何优化加固ssh服务?如何保障linux系统的安全?
1.经常需要给 openssh 进行升级
yum update openssh openssh-clients openssh-server
2.修改端口号(端口号范围:0-65535)
[root@ansible_nfs ssh]# vim sshd_config
Port 2288
修改配置文件后需要重启sshd服务,需要重新加载配置文件,修改的配置才能生效。
[root@ansible_nfs ssh]# systemctl restart sshd


3.禁用root用户(Ubuntu默认禁用root用户登录)
[root@ansible_nfs ssh]# vim sshd_config
PermitRootLogin no
修改配置文件后需要重启sshd服务,需要重新加载,修改的配置才能生效。
[root@ansible_nfs ssh]# systemctl restart sshd
使用普通用户就可以登录(前提是有普通用户并且设置了密码)
4.密码认证(默认开启)
经常更换密码或者设置复杂的密码
5.密钥认证(需要配置)
SSH实现加密
1.数据加密
用来传输数据的时候,对数据进行加密的
2.数据加密类型
对称加密
非对称加密
ssh的命令使用
1.登陆
[root@ansible_nfs ssh]# ssh root@192.168.2.140  # 推荐
[root@ansible_nfs ssh]# ssh 192.168.2.140  		#不指定登陆用户,默认会使用当前的用户名远程连接
[root@ansible_nfs ssh]# ssh -l root 192.168.2.140
root@192.168.2.140's password:
Last login: Sat Jul  8 20:25:34 2023 from 192.168.2.140
[root@ansible_nfs ssh]# exit  # 退出
登出
Connection to 192.168.2.140closed.

2.运行远程机器上的脚本或者命令
[root@ansible_nfs ssh]# ssh 192.168.2.140  mkdir  /luogg{1..10}
[root@ansible_nfs ssh]# ssh 192.168.2.140  sudo mkdir  /danyh{1..10}
[root@ansible_nfs ssh]# ssh 192.168.2.140  sudo bash /lianxi/scan_lan_ip.sh
-p 指定端口号
[root@jenkins .ssh]# ssh 192.168.2.3
ssh: connect to host 192.168.2.3 port 22: Connection refused
端口号为 2288
[root@jenkins .ssh]# ssh 192.168.2.3 -p 2288
The authenticity of host '[192.168.2.3]:2288 ([192.168.2.3]:2288)' can't be established.
ECDSA key fingerprint is SHA256:GJLkvon/6JIxY0thYpMWcSIQBVdWFjwOZah+sPUmZ6E.
ECDSA key fingerprint is MD5:cb:bf:d9:ec:3d:33:6c:a4:5c:3c:e2:ce:b8:60:b8:33.
Are you sure you want to continue connecting (yes/no)? yes
Warning: Permanently added '[192.168.2.3]:2288' (ECDSA) to the list of known hosts.
root@192.168.2.3's password:
Permission denied, please try again.
root@192.168.2.3's password:
Permission denied, please try again.
root@192.168.2.3's password:
因为我禁用了root用户登录,所以只能用普通用户登录
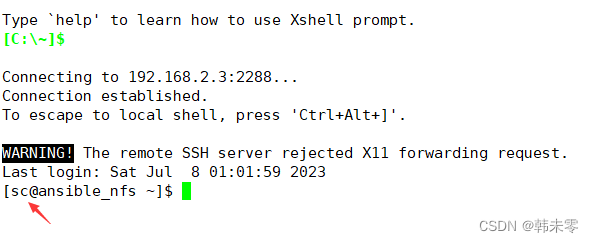
[root@jenkins .ssh]# ssh sc@192.168.2.3 -p 2288
sc@192.168.2.3's password:
Last login: Sat Jul 8 20:15:15 2023 from 192.168.2.23
[sc@ansible_nfs ~]$
sftp:基于ssh协议的ftp功能,底层使用的ssh协议
提供文件的上传和下载
[root@ansible_nfs log]# sftp root@192.168.2.18
root@192.168.2.18's password:
Connected to 192.168.2.18.
sftp>
sftp> ?
Available commands:
bye                                Quit sftp
cd path                            Change remote directory to 'path'
chgrp grp path                     Change group of file 'path' to 'grp'
chmod mode path                    Change permissions of file 'path' to 'mode'
chown own path                     Change owner of file 'path' to 'own'
df [-hi] [path]                    Display statistics for current directory or
                                   filesystem containing 'path'
exit                               Quit sftp
get [-afPpRr] remote [local]       Download file
reget [-fPpRr] remote [local]      Resume download file
reput [-fPpRr] [local] remote      Resume upload file
help                               Display this help text
lcd path                           Change local directory to 'path'
lls [ls-options [path]]            Display local directory listing
lmkdir path                        Create local directory
ln [-s] oldpath newpath            Link remote file (-s for symlink)
lpwd                               Print local working directory
ls [-1afhlnrSt] [path]             Display remote directory listing
lumask umask                       Set local umask to 'umask'
mkdir path                         Create remote directory
progress                           Toggle display of progress meter
put [-afPpRr] local [remote]       Upload file
pwd                                Display remote working directory
quit                               Quit sftp
rename oldpath newpath             Rename remote file
rm path                            Delete remote file
rmdir path                         Remove remote directory
symlink oldpath newpath            Symlink remote file
version                            Show SFTP version
!command                           Execute 'command' in local shell
!                                  Escape to local shell
?                                  Synonym for help
sftp> pwd
Remote working directory: /root
sftp> lpwd
Local working directory: /root
sftp> ls
anaconda-ks.cfg                                     frist-a                                             mysql-router-community-8.0.33-1.el7.x86_64.rpm      mysqlrouter.conf
sftp> lls
anaconda-ks.cfg  gitlab-cleanse-2023-07-01T17:08  han  mysql-router-community-8.0.33-1.el7.x86_64.rpm  sanchuang
sftp> cd /
sftp> lcd /
sftp>
scp 远程拷贝 底层通过ssh协议远程连接到其他的机器上,复制文件
ssh copy
[root@ansible_nfs ~]# scp root@192.168.2.140:/etc/passwd .
passwd                                                                                                                                                                         100% 1317     1.6MB/s   00:00
[root@ansible_nfs ~]# ls
anaconda-ks.cfg   passwd
[root@ansible_nfs ~]# scp passwd  root@192.168.2.140:/root/
passwd                                                                                                                                                                         100% 1317     1.1MB/s   00:00

[root@jenkins ~]# ls
anaconda-ks.cfg    passwd
2台服务器之间配置免密通道;IP地址(192.168.2.3、192.168.2.140)
密钥认证
公钥和私钥是一对文件,文件里面是一段字符串,告诉加密算法加密的时候,使用的参数。
public key 公开
private key 自己
[root@ansible_nfs ~]# ip a
1: lo: <LOOPBACK,UP,LOWER_UP> mtu 65536 qdisc noqueue state UNKNOWN group default qlen 1000
    link/loopback 00:00:00:00:00:00 brd 00:00:00:00:00:00
    inet 127.0.0.1/8 scope host lo
       valid_lft forever preferred_lft forever
    inet6 ::1/128 scope host
       valid_lft forever preferred_lft forever
2: ens33: <BROADCAST,MULTICAST,UP,LOWER_UP> mtu 1500 qdisc pfifo_fast state UP group default qlen 1000
    link/ether 00:0c:29:cc:31:b9 brd ff:ff:ff:ff:ff:ff
    inet 192.168.2.3/24 brd 192.168.2.255 scope global noprefixroute dynamic ens33
       valid_lft 76958sec preferred_lft 76958sec
    inet6 fe80::20c:29ff:fecc:31b9/64 scope link
       valid_lft forever preferred_lft forever
[root@jenkins ~]# ip a
1: lo: <LOOPBACK,UP,LOWER_UP> mtu 65536 qdisc noqueue state UNKNOWN group default qlen 1000
    link/loopback 00:00:00:00:00:00 brd 00:00:00:00:00:00
    inet 127.0.0.1/8 scope host lo
       valid_lft forever preferred_lft forever
    inet6 ::1/128 scope host
       valid_lft forever preferred_lft forever
2: ens33: <BROADCAST,MULTICAST,UP,LOWER_UP> mtu 1500 qdisc pfifo_fast state UP group default qlen 1000
    link/ether 00:0c:29:38:56:24 brd ff:ff:ff:ff:ff:ff
    inet 192.168.2.140/24 brd 192.168.2.255 scope global noprefixroute ens33
       valid_lft forever preferred_lft forever
    inet6 fe80::20c:29ff:fe38:5624/64 scope link
       valid_lft forever preferred_lft forever
1.生成密钥对,在192.168.2.140上使用root用户生成密钥对,密钥对会在用户的家目录下
[root@jenkins .ssh]# ssh-keygen
Generating public/private rsa key pair.
Enter file in which to save the key (/root/.ssh/id_rsa):
Enter passphrase (empty for no passphrase):
Enter same passphrase again:
Your identification has been saved in /root/.ssh/id_rsa.
Your public key has been saved in /root/.ssh/id_rsa.pub.
The key fingerprint is:
SHA256:VmawAOkuSvF/EqQ3bQ6VQRS25wSUF7NuMgVzfFuvzwY root@jenkins
The key's randomart image is:
+---[RSA 2048]----+
|    .o=X=+.      |
|    . .+*=o. .   |
|   .   .=== o .  |
| .  .. o*+ .   . |
|  o.o ooS+    .  |
| ..o.= ++    E   |
|.. .o *       +  |
|.    o o       + |
|      o       .  |
+----[SHA256]-----+
[root@jenkins .ssh]# cd /root/.ssh/  # 进入用户的家目录
[root@jenkins .ssh]# ls
authorized_keys  config  id_rsa  id_rsa.pub  known_hosts
id_rsa 私钥
id_rsa.pub  公钥
known_hosts
[root@jenkins .ssh]# ll      # 不建议修改密钥文件的权限,不然会导致密钥失效
总用量 20
-rw------- 1 root root  571 7月   1 14:06 authorized_keys
-rw-r--r-- 1 root root   60 6月  30 14:56 config
-rw------- 1 root root 1675 7月   8 20:57 id_rsa
-rw-r--r-- 1 root root  394 7月   8 20:57 id_rsa.pub
-rw-r--r-- 1 root root  180 7月   8 20:33 known_hosts
2.上传公钥到对方的服务器,要求对方的服务器运行root用户登录
[root@jenkins .ssh]# ssh-copy-id -i id_rsa.pub root@192.168.2.3 -p 2288
/usr/bin/ssh-copy-id: INFO: Source of key(s) to be installed: "id_rsa.pub"
/usr/bin/ssh-copy-id: INFO: attempting to log in with the new key(s), to filter out any that are already installed
/usr/bin/ssh-copy-id: INFO: 1 key(s) remain to be installed -- if you are prompted now it is to install the new keys
root@192.168.2.3's password:

Number of key(s) added: 1

Now try logging into the machine, with:   "ssh -p '2288' 'root@192.168.2.3'"
and check to make sure that only the key(s) you wanted were added.

[root@jenkins .ssh]#
3.验证登录是否需要密码
[root@jenkins .ssh]# ssh -p '2288' 'root@192.168.2.3'
Last login: Sat Jul  8 20:37:53 2023
[root@jenkins .ssh]# scp  -P 2288 'root@192.168.2.3':/etc/hosts  .
hosts                                                                                                                                                                          100%  158   122.1KB/s   00:00
[root@jenkins .ssh]# ls
authorized_keys  config  hosts  id_rsa  id_rsa.pub  known_hosts
另外一台Linux服务器重复以上操作,这样双方是双向信任关系。
# 生成密钥对,在192.168.1.140上使用root用户生成密钥对,密钥对会在用户的家目录下
[root@ansible_nfs ~]# ssh-keygen
Generating public/private rsa key pair.
Enter file in which to save the key (/root/.ssh/id_rsa):
/root/.ssh/id_rsa already exists.
Overwrite (y/n)? y
Enter passphrase (empty for no passphrase):
Enter same passphrase again:
Your identification has been saved in /root/.ssh/id_rsa.
Your public key has been saved in /root/.ssh/id_rsa.pub.
The key fingerprint is:
SHA256:TV1CrnPBKSbeotcB9+cyBYnJUjGiP8g4AYZZe7f2euY root@ansible_nfs
The key's randomart image is:
+---[RSA 2048]----+
| ++     . +oo .  |
|o. o   . + B =   |
|  . o o + O O    |
|   . = = X + o   |
|    o = S * o o  |
|     o o + + +   |
|      . o . o .  |
|       oo    o   |
|      .+E        |
+----[SHA256]-----+
[root@ansible_nfs ~]#

[root@ansible_nfs ~]# cd .ssh

# 上传公钥到对方的服务器,要求对方的服务器运行root用户登录
[root@ansible_nfs .ssh]# ssh-copy-id -i id_rsa.pub root@192.168.2.140
/usr/bin/ssh-copy-id: INFO: Source of key(s) to be installed: "id_rsa.pub"
/usr/bin/ssh-copy-id: INFO: attempting to log in with the new key(s), to filter out any that are already installed
/usr/bin/ssh-copy-id: INFO: 1 key(s) remain to be installed -- if you are prompted now it is to install the new keys

Number of key(s) added: 1

Now try logging into the machine, with:   "ssh 'root@192.168.2.140'"
and check to make sure that only the key(s) you wanted were added.

# 验证登录是否需要密码
[root@ansible_nfs .ssh]# ssh 'root@192.168.2.140'
Last login: Sat Jul  8 20:28:15 2023 from 192.168.2.3


 1万+
1万+


 被折叠的 条评论
为什么被折叠?
被折叠的 条评论
为什么被折叠?
 到【灌水乐园】发言


